Conker: Live & Reloaded – ‘Conquering Conker’ Live Walkthrough
Navigation:
Conquering Conker: Live & Reloaded
Conquering Conker Part 1: Beach Dead
Conquering Conker Part 2: Fortress Deux
Conquering Conker Part 3: Castle Tedistein
Conquering Conker Part 4: A Bridge Too Narrow
Conquering Conker Part 5: Three Towers
Conquering Conker Part 6: Doon
Conquering Conker Part 7: T.M.S Spamono
Conquering Conker Part 8: The Ditch
THE DITCH
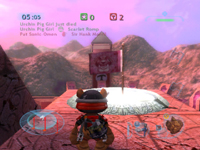
The final battle of this war is a slightly more complex version of capture the flag. The flag spawns in an underground chamber connecting the SHC and Tediz bases. Grab the flag and run it up a series of ramps to one of the towers on the outer ring of the stadium. Run through a darkened doorway at the base of one of the four towers, and plant the flag on the white platform (see screen number 3, below). The team capturing the most towers at the end of the scenario wins. Capturing all of the towers is automatic victory.
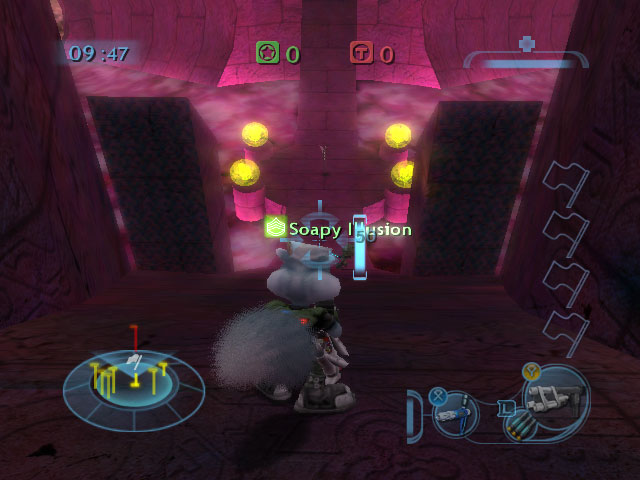
![]() The lower flag chamber contains upgrades and connects both
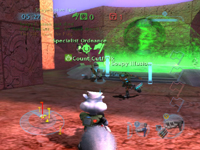
The lower flag chamber contains upgrades and connects both ![]() The vehicle platform is the hub of enemy activity. Control this
The vehicle platform is the hub of enemy activity. Control this![]() bases; control it for a significant advantage.
bases; control it for a significant advantage.![]() area and you can effectively shut down the opposing team.
area and you can effectively shut down the opposing team.
As soon as you plant a flag in a tower, your team controls that tower, and a gigantic green (SHC) or red (Tediz) flag drops down across the outside of the tower. You can’t score on the same tower twice in a row, but you can steal control of a tower from the other team. The icons on the right-hand side of your screen show how many towers each team controls, and how many are uncontrolled. The battle continues until time runs out, or one team controls all four towers.
The underground flag chamber has several yellow upgrade spheres. If you aren’t the first soldier to snatch the flag, grab an upgrade (if any are left) for some extra firepower on your way back up.
One tower lies on either side of the SHC base, and one tower lies on either side of the Tediz base, for a total of four towers. If you’re playing online, use your headset to tell your team which tower you’re running toward. Even if you have the same soldier acting as the flag runner, it’s important that everyone on your team know what path he’s taking and to what tower, so they can provide assistance. Lone flag runners are not long for the world; team mates should protect the flag carrier and be ready to grab the flag and continue if the primary flag carrier bites the dust (and he will).
Controlling the flag chamber has some advantages, the biggest of which is cutting off the shortest route for the enemy to cross the map in order to capture the towers near your base. Place Earthguard sentries and mines around your team’s entrance to the flag chamber to hinder enemy movement into your territory.
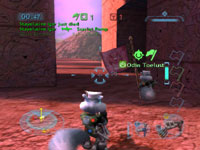
![]() Protect and support your Flag Carrier at all times!
Protect and support your Flag Carrier at all times!![]() Drop flags atop the towers to score! The towers make good
Drop flags atop the towers to score! The towers make good![]() sniper nests as well.
sniper nests as well.
Soldiers with close-range weapons, such as the Sneeker’s Sabre and the Thermophile’s Sinurator, do their best work in confined areas. Their most successful killing grounds are the underground passage and tunnels leading up from each base. If you’re particularly sneaky and want to have a little fun, fly a Mule or Steed outside the arena and (carefully!) into one of the lava tunnels leading into the flag chamber. If you’re using a Steed, perch yourself just inside a lava tunnel and pepper the flag platform with rockets. If you’re using a Mule, hover over the flag platform and rain down bombs. Note that this tactic really isn’t terribly useful because Mules and Steeds are easy targets in the flag chamber… but it’s still fun, and may surprise the other team. (Imagine the looks on their furry little faces.)
Demolishers, Long Rangers, and Thermophiles equipped with Fausters should try to provide long range support for flag carriers. They are also good at preventing vehicles (particularly Steeds and Mules) from dominating the map.
Because the center of the map is wide open, it’s the perfect playground for Sky Jockeys in Steeds and/or Mules. It’s also deadly for any soldier carrying a flag. If you’re running with the flag, take advantage of the narrower areas leading to the flag towers. Unless the underground chamber is guarded heavily, it’s a quick way to cross from one side of the map to the other. If you must run across open ground, tell your team so they can provide support.
There are only a few paths to the outer ring. Land-based vehicles like our good friend the Tankus can camp at those points as well as an Earthguards turret. (Vehicles are also mobile, and gleefully fun to drive over your enemies.) Every path leads past a vehicle spawn point, so patrolling the outer rings in smaller vehicles like the Toad or R-Hog can be a good option for defenders.
There are other vehicle-based strategies that work well in The Ditch. An unchallenged Mule can bomb the enemy back to the Stone Age, and Steeds are good for patrolling the outer ring and mercilessly peppering the enemy base with rocket fire. We particularly like to use our own version of “Shock and Awe” to dominate the skies and ceaselessly rain death and destruction down on the enemy base with bombs and rockets (preferably while listening to Wagner’s “Ride of the Valkyries”). This can effectively shut an enemy down for a significant period of time as they scramble to survive and fend off your aerial assault — and if done well, it can shut down the enemy for the entire match.