Chapter 6-5: dataDyne Attack


Navigation:
Chapter 1: Carrington Institute Training
Chapter 2: The Jungles of South America
Chapter 3: dataDyne Cybernetic Manufacturing
Chapter 4: dataDyne Operations Base/Crash Site
Chapter 5: Captive aboard the Pelagic I
Chapter 6: Carrington Institute HQ
6-1: Carrington Institute Floor I
6-2: Carrington Institute Floor II
6-3: Carrington Institute Floor III
6-4: Carrington Institute Floor IV
6-5: dataDyne Attack
Chapter 7: Perfect Dark GBC Secrets and Extras
DATADYNE ATTACK
![]()
![]()
The elevator from Carrington’s Office emits a dull chime as it arrives at the final floor of the Institute; the doors open and Joanna is prepared for further resistance with her 6-YYY at the ready. Instead, the agent finds the offices abandoned – evacuated when the attack first began – she lowers her weapon in solace, but it isn’t long before her ears perk at an approaching sound…
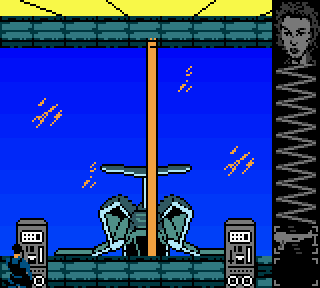
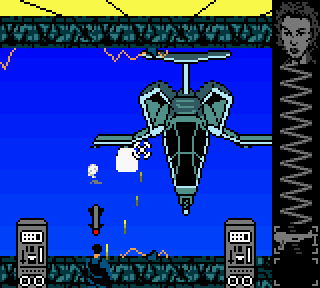
From outside the Institute, a dataDyne Hovercopter rises into view – the pilot focusing his threatening gaze on Joanna’s position. In a flash, the Hovercopter has launched a ballistic missile towards the window, sending shrapnel and shattered glass in its wake. Taking cover behind a mainframe computer, Joanna grits her teeth as she prepares for her last stand against dataDyne…
MISSION OBJECTIVES:
• PREVENT DATADYNE FROM DESTROYING CI HQ
• KILL ALL DATADYNE GUARDS
![]() This showdown functions similarly to the Hind Attack that we encountered in South America; you’ll be able to strafe back and forth using the directional pad, adjusting your reticle by holding B in combination with a direction, and pressing the A button to fire your Machine Gun. The mainframe computers found on either side of the window will provide some cover, but they can be destroyed after four successive missile strikes, so seek their shelter in the most dire moments of the attack only. From the start of the showdown, you’ll want to aim your reticle at the outermost missile launchers and fire as you make sweeping passes.
This showdown functions similarly to the Hind Attack that we encountered in South America; you’ll be able to strafe back and forth using the directional pad, adjusting your reticle by holding B in combination with a direction, and pressing the A button to fire your Machine Gun. The mainframe computers found on either side of the window will provide some cover, but they can be destroyed after four successive missile strikes, so seek their shelter in the most dire moments of the attack only. From the start of the showdown, you’ll want to aim your reticle at the outermost missile launchers and fire as you make sweeping passes.
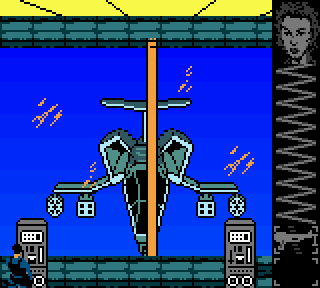
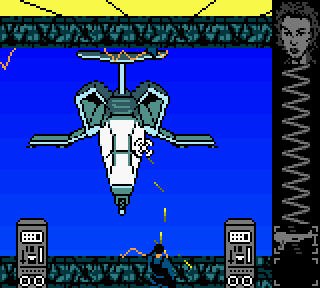
![]() Once you’ve managed to fire enough shots at the first missile launcher on either side, you’ll destroy it entirely. From here, you’ll need to focus your efforts on destroying the second missile launcher on the opposite side, whilst avoiding any stray missiles and gunfire that track onto your position; as long as you keep moving, you should be able to survive. After both outer-missile launchers have been destroyed, you’ll be able to work away at the inner-missile launchers; you’ll receive heavy shelling from them during this stage, so do what you can to avoid their bombastic payload and return fire as efficiently as possible.
Once you’ve managed to fire enough shots at the first missile launcher on either side, you’ll destroy it entirely. From here, you’ll need to focus your efforts on destroying the second missile launcher on the opposite side, whilst avoiding any stray missiles and gunfire that track onto your position; as long as you keep moving, you should be able to survive. After both outer-missile launchers have been destroyed, you’ll be able to work away at the inner-missile launchers; you’ll receive heavy shelling from them during this stage, so do what you can to avoid their bombastic payload and return fire as efficiently as possible.
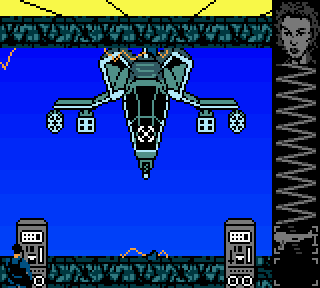
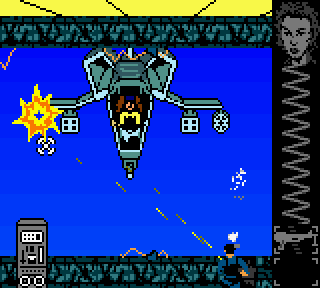
![]() Once all of the ballistics on the Hovercopters wings have been neutralized, you’ll be tasked with firing your Machine Gun at the cockpit directly. During this phase of the attack, you’ll be able to seek refuge behind the mainframe computers, as the Hovercopters front-mounted Machine Gun is unable to do any damage. You can either set your sights on the Machine Gun for a temporary distraction-free period to take out the cockpit, or you can avoid the Machine Gun fire and focus entirely on hammering the cockpit. After the glass is shattered to expose the pilot, the Hovercopter fails under its own power and drifts out of view…
Once all of the ballistics on the Hovercopters wings have been neutralized, you’ll be tasked with firing your Machine Gun at the cockpit directly. During this phase of the attack, you’ll be able to seek refuge behind the mainframe computers, as the Hovercopters front-mounted Machine Gun is unable to do any damage. You can either set your sights on the Machine Gun for a temporary distraction-free period to take out the cockpit, or you can avoid the Machine Gun fire and focus entirely on hammering the cockpit. After the glass is shattered to expose the pilot, the Hovercopter fails under its own power and drifts out of view…
![]() Use this time to move your reticle to the far left, or far right of the screen, as the Hovercopter will soon rise back up towards the window with its weapons recommissioned, and you’ll want to get a jump on taking out the refreshed missile launchers as soon as possible. Repeat the previous pattern of destroying the outer-missile launchers first, and then you’ll be permitted to fire on the inner-missile launchers; once you’ve destroyed both sets and have cleared the wings, the Hovercopter will be unable to destroy any of the computer mainframes left standing. Take cover if it’s an option and prepare to move onto the final phase.
Use this time to move your reticle to the far left, or far right of the screen, as the Hovercopter will soon rise back up towards the window with its weapons recommissioned, and you’ll want to get a jump on taking out the refreshed missile launchers as soon as possible. Repeat the previous pattern of destroying the outer-missile launchers first, and then you’ll be permitted to fire on the inner-missile launchers; once you’ve destroyed both sets and have cleared the wings, the Hovercopter will be unable to destroy any of the computer mainframes left standing. Take cover if it’s an option and prepare to move onto the final phase.
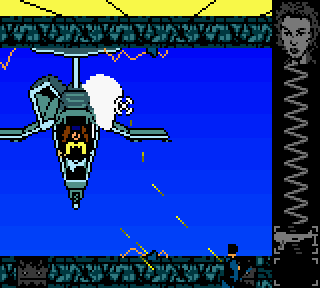
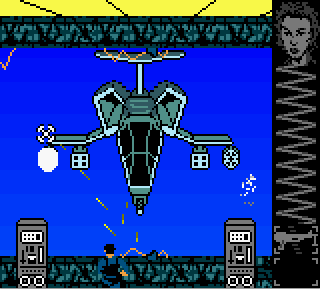
![]() Despite having shattered the glass that had kept the pilot from harm, we’re going to instead focus our reticle on taking out the dual-intake ports on either side of the pilot. If the computer mainframes are still intact, you can choose to take cover behind them to adjust your reticle, otherwise you’ll need to keep strafing and firing at the intake ports whilst avoiding the Machine Gun fire. You do have the option of taking out the Machine Gun temporarily by focusing your reticle over it, but in these final throes it might be more effective to ignore it and concentrate on both intake ports, as their destruction signals the end of the attack.
Despite having shattered the glass that had kept the pilot from harm, we’re going to instead focus our reticle on taking out the dual-intake ports on either side of the pilot. If the computer mainframes are still intact, you can choose to take cover behind them to adjust your reticle, otherwise you’ll need to keep strafing and firing at the intake ports whilst avoiding the Machine Gun fire. You do have the option of taking out the Machine Gun temporarily by focusing your reticle over it, but in these final throes it might be more effective to ignore it and concentrate on both intake ports, as their destruction signals the end of the attack.
After the Hovercopter has had both of it’s intake-ports devastated, the malfunctioned craft is soon seized by fires and explosions that rock its beaten frame. The pilot can do nothing as the Hovercopter is enveloped with smoke, losing altitude as it ends its journey at the base of the Institute where it leaves no survivors.
With her mission complete, Joanna visits Daniel Carrington in his office to debrief…
Daniel Carrington: Well done Joanna. That was a close thing. You really have proven yourself as an agent.
Joanna Dark: I just did my duty.
Daniel Carrinton: From now on we must be cautious. We will have to carry out further investigations of dataDyne to find out what is at the bottom of this.
Joanna Dark: I’d like to volunteer for that job, sir.
Daniel Carrington: For now I think you should have a break, take it easy for a while. We’ll need you back in action very soon…
Joanna Dark: I’ll be ready!