Chapter 6-3: Carrington Institute Floor III


Navigation:
Chapter 1: Carrington Institute Training
Chapter 2: The Jungles of South America
Chapter 3: dataDyne Cybernetic Manufacturing
Chapter 4: dataDyne Operations Base/Crash Site
Chapter 5: Captive aboard the Pelagic I
Chapter 6: Carrington Institute HQ
6-1: Carrington Institute Floor I
6-2: Carrington Institute Floor II
6-3: Carrington Institute Floor III
6-4: Carrington Institute Floor IV
6-5: dataDyne Attack
Chapter 7: Perfect Dark GBC Secrets and Extras
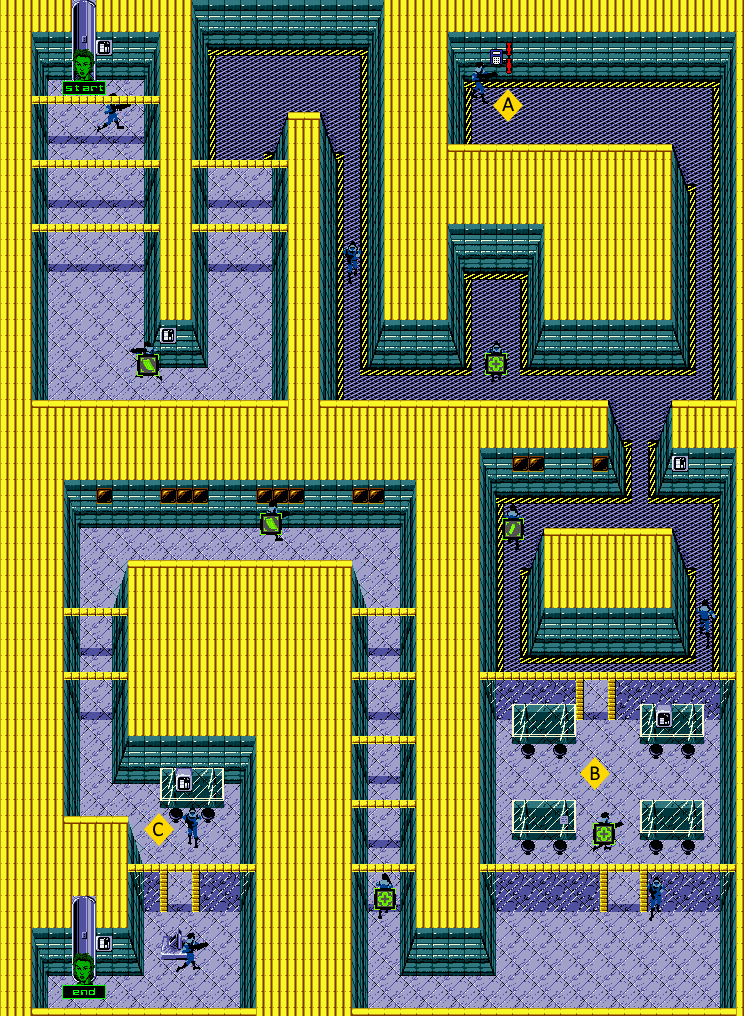
CARRINGTON INSTITUTE FLOOR III: MAP OVERVIEW
MISSION OBJECTIVES:
• PREVENT DATADYNE FROM DESTROYING CI HQ
• KILL ALL DATADYNE GUARDS
As soon as you’ve arrived at the third floor, approach the guard to the immediate south and assassinate him with the Falcon 2. Once this is accomplished, proceed towards the wall on the right and then head south so that you’re tracing along its surface, and then be prepared to encounter the second guard as a computer screen comes into view.
It’s entirely feasible to assassinate the guard as he passes in front of the computer screen without stopping, however, you’ll be provided with a generous window of opportunity to approach the guard from behind as he continues to the west as well. Inspect the second guard for a Machine Gun clip, and then sprint around the corner to the north until you’ve arrived at a segment of metal grating.
Follow this path to the east and then resume walking when you’ve located the thin corridor to the south – walk through this corridor and you’ll discover the third guard patrolling in the same direction; approach him from behind and then assassinate him with the Falcon 2.
From here, you’ll need to reach the end of the corridor by walking to the south as much as possible and trace the lowest wall as you continue to the east. Once you notice that the path has branched off to the north, stop moving entirely – the fourth guard will be pacing vertically in this area, so you’ll want to stay out of view until the guard reaches the shared southern wall. As long as you don’t edge past the corner to the north, you should be able to remain hidden.
Once the guard has reached the wall and turns around to continue his patrol to the north, you can proceed to follow him, going in for an assassination with the Falcon 2. The guard will provide us with a Med-Kit (25% Health Restore), but we’re going to avoid taking it for now, as we have an unavoidable confrontation ahead.
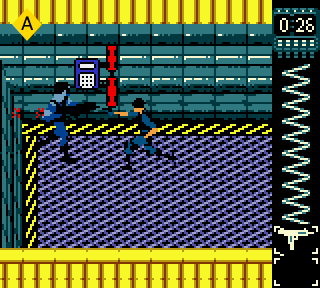
![]() At this point, you should have around 30 seconds remaining on your timer to locate the Explosive Device before it detonates – we’re going to switch over to the 6-YYY and then sprint eastward to locate a thin corridor that will lead us north. Travel up the thin corridor until you’ve reached the northern most point and then start heading west; you’ll find the fifth guard stationed to the left of the Explosive Device. Once the guard comes into view, open fire with the 6-YYY and you should be able to take him out without sustaining too much damage. Once this has been accomplished, interface with the Explosive Device to disarm it.
At this point, you should have around 30 seconds remaining on your timer to locate the Explosive Device before it detonates – we’re going to switch over to the 6-YYY and then sprint eastward to locate a thin corridor that will lead us north. Travel up the thin corridor until you’ve reached the northern most point and then start heading west; you’ll find the fifth guard stationed to the left of the Explosive Device. Once the guard comes into view, open fire with the 6-YYY and you should be able to take him out without sustaining too much damage. Once this has been accomplished, interface with the Explosive Device to disarm it.
From the device, we’re going to retrace our steps through the thin corridor and approach the fourth guard holding the Med-Kit (25% Health Restore). Inspect the guard and you’ll negate any damage that you’ve sustained during your sprint to the Explosive Device.
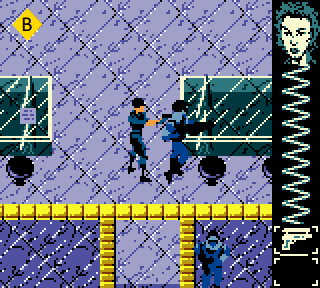
When you’re ready to continue, we’ll head to the east once more, this time opting for the southern path that leads us deeper into the Institute. In this room, you’ll face off against two dataDyne guards that pace vertically on either side of a large square installation in the center. While it’s possible to covertly approach the guard on the left, it’s difficult to do so reliably. Instead, keep the 6-YYY drawn and begin heading to the left once you’ve entered the room – the guard will be alerted of your presence immediately, but you’ll be able to lay down some suppressive fire before things get too out of hand.
Once you’re able to overwhelm the sixth guard, we’ll switch back to the Falcon 2 and then inspect his body for a Falcon 2 clip. We’re going to head counter-clockwise around the square installation, so continue following the path we just confronted the sixth guard on and you’ll discover an open doorway as you begin heading east.
Instead of heading through the doorway, we’re going to cautiously head east until the right path of the square installation is visible. If you’ve done this correctly, you should manage to locate the seventh guard as he arrives at the lowest point of his patrol – as soon as he touches the glass divider, he’ll turn about and continue pacing to the north. Use this opportunity to approach the guard from behind, and then assassinate him with the Falcon 2.
![]() With this area cleared, we’ll return to the base of the square installation and then head through the doorway as we make our way to the south. As you pass between the first set of desks, you’ll encounter the eighth guard pacing horizontally between the lower set – approach the guard before he’s arrived at the stool in front of the desk, and then assassinate him with the Falcon 2. If your health hasn’t been fully recovered to 100% from the previous confrontations, you can inspect the guard for a Med-Kit (25% Health Restore). Otherwise we’ll prepare to covertly approach the ninth guard, found stationed to the right of the doorway below.
With this area cleared, we’ll return to the base of the square installation and then head through the doorway as we make our way to the south. As you pass between the first set of desks, you’ll encounter the eighth guard pacing horizontally between the lower set – approach the guard before he’s arrived at the stool in front of the desk, and then assassinate him with the Falcon 2. If your health hasn’t been fully recovered to 100% from the previous confrontations, you can inspect the guard for a Med-Kit (25% Health Restore). Otherwise we’ll prepare to covertly approach the ninth guard, found stationed to the right of the doorway below.
Provided that you don’t step too far from the threshold, you should be able to inch your way through the doorway and remain undetected. Once you’re on the same alignment as the guard next to the doorway, turn to the right and then go in for an assassination with the Falcon 2.
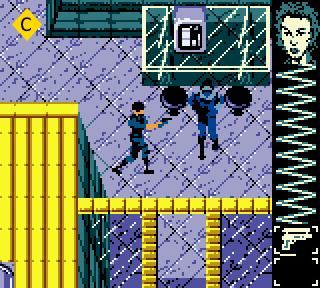
From here, we’ll proceed to the west and locate the next thin corridor. You’ll find the tenth guard making his way to the north, and although he appears quite far away, it won’t take too long to bridge the distance and approach the guard covertly for an assassination.
While the guard will provide us with a Med-Kit (25% Health Restore), we’ll reserve the inspection until we’ve come under fire. Equip the 6-YYY and then proceed to the north, tracing the right wall until you’ve arrived in the corner, and then head to the west. As soon as you’ve identified the eleventh guard pacing to the right, open fire with the 6-YYY and you should be able to neutralize him before sustaining too much damage. Inspect the fallen guard for a Machine Gun clip and then proceed to the west until the path leads south.
![]() In order to remain inconspicuous, we’ll trace the leftmost wall in this southern corridor, passing underneath two beams until we arrive in the corner. Carefully inch your way towards the east, and you’ll be able to locate a computer on a desk, and more importantly, the twelfth guard pacing vertically between the aforementioned desk and a glass divider below. If you stop short of the corner, you’ll be able to witness the guards patrol without compromising your position – wait until the guard begins heading to the south, and then go in for an assassination before he can reach the divider.
In order to remain inconspicuous, we’ll trace the leftmost wall in this southern corridor, passing underneath two beams until we arrive in the corner. Carefully inch your way towards the east, and you’ll be able to locate a computer on a desk, and more importantly, the twelfth guard pacing vertically between the aforementioned desk and a glass divider below. If you stop short of the corner, you’ll be able to witness the guards patrol without compromising your position – wait until the guard begins heading to the south, and then go in for an assassination before he can reach the divider.
Once the guard has been neutralized, approach the doorway to the south, but take care not to step into the shadow of the doorway. From your vantage point, you should be able to locate the final guard pacing horizontally in front of a Carrington Institute statue in the next room.
Wait until the guard has finished his patrol to the west and has begun walking east to enter the room and work your way around the left side of the statue so that you’re able to covertly approach the guard from behind. Once you’ve caught up to the guard, assassinate him with the Falcon 2 and you’ll have taken out all of the dataDyne soldiers on the third floor.
At this point you can choose to retrace your steps to the tenth guard in order to retrieve the Med-Kit (25% Health Restore) if you require it. Otherwise, travel to the south and use the elevator to ascend to the final floor.