Jet Force Gemini Quick Reference Item Guide
The Universe is a big place, and as you chart a course from planet to planet in Jet Force Gemini you’ll discover an arsenal of weapons, hidden keys, and important items that you’ll need to collect and utilize to progress through your adventure. As these items can be crucial, and the three separate journeys of Juno, Vela and Lupus can become complicated, we’ve designed this Quick Reference Item Guide to keep track of anything and everything.
For ease of navigation, this guide features two components – first, you can choose to scroll down and click on an individual item which will take you to a section that describes its purpose and exact location in Jet Force Gemini, even if it changes for each character.
Second, you can scroll down past the individual items to discover a checklist of sorts that details each and every planet in Jet Force Gemini, and which items you’ll be able to find during play, and if those items require any pre-requisites, with each of the characters.
This guide has been designed so that you can easily find what you’re looking for, and return to saving the Galaxy as quickly as possible. Enjoy!


GOLDWOOD ITEMS (JUNO FIRST PASS)
Goldwood is a planet that must be explored initially as Juno.
After defeating Mizar at his Palace, Vela and Lupus may return to this world for their exclusive items.
ANY JET FORCE MEMBER
| Item | Type | Location | Prerequisite | |
|---|---|---|---|---|
|
Shuriken | Weapon | Outset | Yellow Key |
|
Fish Food | Weapon | Outset |  None None |
|
Flamethrower Capacity | Crate | Outset | None |
|
Shuriken Capacity | Crate | Outset | None |
|
Machine Gun Capacity | Crate | Interior | Machine Gun |
|
Pistol Capacity | Crate | Interior | Machine Gun |
|
Machine Gun Capacity | Crate | Interior | Machine Gun |
JUNO EXCLUSIVE ITEMS
| Item | Type | Location | Prerequisite | |
|---|---|---|---|---|
|
Yellow Key | Key | Outset | None |
|
Red Key | Key | Interior | None |
|
Machine Gun | Weapon | Interior | Red Key |
VELA EXCLUSIVE ITEMS
| Item | Type | Location | Prerequisite | |
|---|---|---|---|---|
|
Vela’s Hatch Key | Spaceship Part | Lodge | None |
|
Machine Gun Capacity | Crate | Lodge | None |
|
Shuriken Capacity | Crate | Lodge | None |
|
Cluster Bombs Capacity | Crate | Lodge | None |
|
Tri-Rockets Capacity | Crate | Lodge | None |
|
Tri-Rockets Capacity | Crate | Lodge | None |
|
Tri-Rockets Capacity | Crate | Lodge | None |
|
Grenades Capacity | Crate | Lodge | None |
|
Grenades Capacity | Crate | Lodge | None |
|
Homing Missile Capacity | Crate | Lodge | None |
|
Homing Missile Capacity | Crate | Lodge | None |
|
Homing Missile Capacity | Crate | Lodge | None |
|
Timed Mines Capacity | Crate | Lodge | None |
|
Sniper Rifle Capacity | Crate | Lodge | None |
LUPUS EXCLUSIVE ITEMS
| Item | Type | Location | Prerequisite | |
|---|---|---|---|---|
|
Shocker | Weapon | Rim | Power Suit Upgrade / Machine Gun |
|
Machine Gun Capacity | Crate | Rim | Power Suit Upgrade |
|
Sniper Rifle Capacity | Crate | Rim | Power Suit Upgrade |
|
Machine Gun Capacity | Crate | Rim | Power Suit Upgrade |
S.S. ANUBIS ITEMS (JUNO FIRST PASS)
The S.S. Anubis is discovered by reaching the end of the Interior on Goldwood with Juno, and he alone must explore it initially. After defeating Mizar at his Palace, Vela and Lupus may return to this world for their exclusive items.
ANY JET FORCE MEMBER
| Item | Type | Location | Prerequisite | |
|---|---|---|---|---|
|
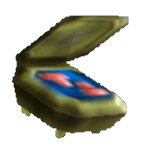
Earplugs | Trade Item | Hold | Earn a Gold Medal/Floyd |
|
Machine Gun Capacity | Crate | Hold | None |
|
Pistol Capacity | Crate | Hold | None |
|
Plasma Shotgun Capacity | Crate | Hold | None |
|
Pistol Capacity | Crate | Hold | None |
|
Machine Gun Capacity | Crate | Hold | None |
|
Cluster Bomb Capacity | Crate | Hold | None |
|
Spaceship Fin | Spaceship Part | Passageway | Power Suit Upgrade |
|
Sniper Rifle Capacity | Crate | Passageway | Power Suit Upgrade |
|
Sniper Rifle Capacity | Crate | Passageway | Power Suit Upgrade |
JUNO EXCLUSIVE ITEMS
| Item | Type | Location | Prerequisite | |
|---|---|---|---|---|
|
Plasma Shotgun | Weapon | Hold | None |
|
Cluster Bomb | Weapon | Hold | None |
TAWFRET ITEMS (JUNO FIRST PASS)
Tawfret is discovered by reaching the end of the Hold on the S.S. Anubis with Juno, and he alone must explore it initially. After defeating Mizar at his Palace, Vela and Lupus may return to this world for their exclusive items.
ANY JET FORCE MEMBER
| Item | Type | Location | Prerequisite | |
|---|---|---|---|---|
|
Tri-Rocket Capacity | Crate | Bog | Tri-Rocket Launcher |
|
Tri-Rocket Capacity | Crate | Bog | Tri-Rocket Launcher |
|
Plasma Shotgun Capacity | Crate | Bog | Tri-Rocket Launcher |
|
Plasma Shotgun Capacity | Crate | Bridge | None |
|
Pistol Capacity | Crate | Bridge | None |
|
Homing Missile Capacity | Crate | Bridge | None |
|
Sniper Rifle Capacity | Crate | Bridge | None |
|
Homing Missile Capacity | Crate | Bridge | None |
|
Sniper Rifle Capacity | Crate | Bridge | Tri-Rocket Launcher |
|
Remote Mines | Weapon | Bridge | None |
|
Machine Gun Capacity | Crate | Castle | None |
|
Homing Missile Capacity | Crate | Castle | None |
|
Tr-Rocket Capacity | Crate | Castle | None |
ANY JET FORCE MEMBER (EXCLUDING VELA)
| Item | Type | Location | Prerequisite | |
|---|---|---|---|---|
|
Flares | Weapon | Bridge | None |
JUNO EXCLUSIVE ITEMS
| Item | Type | Location | Prerequisite | |
|---|---|---|---|---|
|
Tri-Rocket Launcher | Weapon | Bog | None |
|
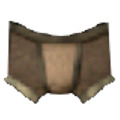
Gimlet’s Pants | Trade Item | Bridge | None |
|
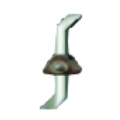
Gimlet’s Crowbar | Progress Item | Bridge | Gimlet’s Pants |
|
Floyd Components | Progress Item | Bridge | Gimlet’s Crowbar |
|
Grenades | Weapon | Bog | Tri-Rocket Launcher |
|
Sniper Rifle | Weapon | Bridge | None |
VELA EXCLUSIVE ITEMS
| Item | Type | Location | Prerequisite | |
|---|---|---|---|---|
|
Cargo Key | Spaceship Part | Bridge | Gimlet’s Pants |
MIZAR’S PALACE ITEMS (JUNO FIRST PASS)
Mizar’s Palace is discovered by defeating Boss Fet-Bubb at the end of the Tawfret with Juno, and he alone must explore it initially. Vela can reach Mizar’s Palace by defeating Boss Lurg at the end of Ichor, and Lupus can reach Mizar’s Palace by defeating the Boss Mechantids at the end of Eschebone.
ANY JET FORCE MEMBER
| Item | Type | Location | Prerequisite | |
|---|---|---|---|---|
|
Stabilizer | Spaceship Part | Pyramid Interior | Power Suit Upgrade/Rescue All Tribals |
ANY JET FORCE MEMBER (EXCEPT LUPUS)
| Item | Type | Location | Prerequisite | |
|---|---|---|---|---|
|
Fuse | Spaceship Part | Mizar’s Racetrack |  Power Suit Upgrade/Achieve First Place Power Suit Upgrade/Achieve First Place |
JUNO EXCLUSIVE ITEMS
| Item | Type | Location | Prerequisite | |
|---|---|---|---|---|
|
Pistol Capacity | Crate | Lobby | None |
|
Plasma Shotgun Capacity | Crate | Lobby | None |
|
Plasma Shotgun Capacity | Crate | Lobby | None |
|
Grenades Capacity | Crate | Lobby | None |
|
Plasma Shotgun Capacity | Crate | Lobby | None |
|
Machine Gun Capacity | Crate | Lobby | None |
|
Grenades Capacity | Crate | Lobby | None |
|
Machine Gun Capacity | Crate | Lobby | None |
|
Grenades Capacity | Crate | Lobby | None |
|
Grenades Capacity | Crate | Lobby | None |
VELA EXCLUSIVE ITEMS
| Item | Type | Location | Prerequisite | |
|---|---|---|---|---|
|
Machine Gun Capacity | Crate | Flume | None |
|
Pistol Capacity | Crate | Flume | None |
|
Plasma Shotgun Capacity | Crate | Flume | None |
|
Plasma Shotgun Capacity | Crate | Flume | None |
|
Pistol Capacity | Crate | Flume | None |
|
Grenades Capacity | Crate | Flume | None |
|
Grenades Capacity | Crate | Flume | None |
LUPUS EXCLUSIVE ITEMS
| Item | Type | Location | Prerequisite | |
|---|---|---|---|---|
|
Night Vision Goggles | Progress Item | Chasm | None |
|
Pistol Capacity | Crate | Chasm | None |
|
Plasma Shotgun Capacity | Crate | Chasm | None |
|
Plasma Shotgun Capacity | Crate | Chasm | None |
|
Machine Gun Capacity | Crate | Chasm | None |
|
Grenades Capacity | Crate | Chasm | None |
|
Machine Gun Capacity | Crate | Chasm | None |
|
Grenades Capacity | Crate | Chasm | None |
|
Grenades Capacity | Crate | Chasm | None |
SEKHMET ITEMS (VELA FIRST PASS)
Sekhmet is discovered by reaching the Pyramid at Mizar’s Palace with Juno, prompting Vela’s quest to begin here. After defeating Mizar at his Palace, Juno and Lupus may return to this world for their exclusive items.
ANY JET FORCE MEMBER
| Item | Type | Location | Prerequisite | |
|---|---|---|---|---|
|
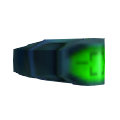
Green Key | Key | Battle Cruiser | Red Key |
|
Machine Gun Capacity | Crate | Battle Cruiser | None |
|
Plasma Shotgun Capacity | Crate | Battle Cruiser | None |
|
Machine Gun Capacity | Crate | Battle Cruiser | Red Key |
|
Grenades Capacity | Crate | Battle Cruiser | Green Key |
|
Sniper Rifle Capacity | Crate | Battle Cruiser | Power Suit Upgrade |
|
Homing Missile Capacity | Crate | Battle Cruiser | None |
|
Homing Missile Capacity | Crate | Battle Cruiser | None |
|
Tri-Rockets Capacity | Crate | Battle Cruiser | None |
|
Tri-Rockets Capacity | Crate | Battle Cruiser | None |
|
Plasma Shotgun Capacity | Crate | Battle Cruiser | None |
|
Plasma Shotgun Capacity | Crate | Battle Cruiser | None |
|
Homing Missile Capacity | Crate | Battle Cruiser | None |
JUNO EXCLUSIVE ITEMS
| Item | Type | Location | Prerequisite | |
|---|---|---|---|---|
|
Blue Key | Key | Battle Cruiser | None |
|
Shuriken Capacity | Crate | Battle Cruiser | None |
|
Shocker Capacity | Crate | Battle Cruiser | None |
VELA EXCLUSIVE ITEMS
| Item | Type | Location | Prerequisite | |
|---|---|---|---|---|
|
Red Key | Key | Battle Cruiser | Machine Gun |
|
Grenades | Weapon | Battle Cruiser | None |
|
Machine Gun | Weapon | Battle Cruiser | None |
|
Plasma Shotgun | Weapon | Battle Cruiser | Machine Gun |
CERULEAN ITEMS (VELA FIRST PASS)
Cerulean is discovered when Vela acquires the Green Key in Sekhment, unlocking the Green Key Door in the landing site to find a passage to Cerulean, which she alone must explore initially. After defeating Mizar at his Palace, Juno and Lupus may return to this world for their exclusive items.
ANY JET FORCE MEMBER
| Item | Type | Location | Prerequisite | |
|---|---|---|---|---|
|
Machine Gun Capacity | Crate | Dune | None |
|
Pistol Capacity | Crate | Dune | None |
|
Pistol Capacity | Crate | Dune | Yellow Key |
|
Tri-Rocket Capacity | Crate | Dune | Yellow Key |
|
Tri-Rocket Capacity | Crate | Dune | Yellow Key |
|
Tri-Rocket Capacity | Crate | Dune | Yellow Key |
VELA EXCLUSIVE ITEMS
| Item | Type | Location | Prerequisite | |
|---|---|---|---|---|
|
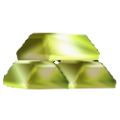
Gold Bar (3) | Trade Item | Dune | None |
|
Tri-Rocket Launcher | Weapon | Dune | Gold Bar (3) |
|
Yellow Key | Key | Dune | Tri-Rocket Launcher |
|
Homing Missiles | Weapon | Dune | None |
ICHOR ITEMS (VELA FIRST PASS)
Ichor is discovered by reaching the end of the Dune in Cerulean with Vela, and she alone must explore this world initially. After defeating Mizar at his Palace, Juno and Lupus may return to this world for their exclusive items.
ANY JET FORCE MEMBER
| Item | Type | Location | Prerequisite | |
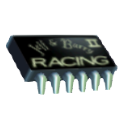
Arcade Chip | Optional Item | Military Base | Earn a Gold Medal/Floyd |
|---|---|---|---|---|
|
Plasma Shotgun Capacity | Crate | Military Base | None |
|
Pistol Capacity | Crate | Military Base | None |
|
Grenades Capacity | Crate | Military Base | None |
|
Machine Gun Capacity | Crate | Military Base | None |
|
Pistol Capacity | Crate | Military Base | None |
|
Homing Missile Capacity | Crate | Military Base | None |
|
Grenades Capacity | Crate | Military Base | None |
|
Homing Missile Capacity | Crate | Military Base | None |
|
Homing Missile Capacity | Crate | Military Base | None |
|
Sniper Rifle Capacity | Crate | Perimeter | Blue Key |
ANY JET FORCE MEMBER (EXCLUDING JUNO)
| Item | Type | Location | Prerequisite | |
|---|---|---|---|---|
|
Flares | Weapon | Military Base | None |
VELA EXCLUSIVE ITEMS
| Item | Type | Location | Prerequisite | |
|---|---|---|---|---|
|
Sniper Rifle | Weapon | Military Base | None |
LUPUS EXCLUSIVE ITEMS
| Item | Type | Location | Prerequisite | |
|---|---|---|---|---|
|
Lupus’ Hatch Key | Spaceship Part | Military Base | None |
SPAWNSHIP ITEMS (LUPUS FIRST PASS)
The Spawnship is discovered by reaching the Pyramid at Mizar’s Palace with Vela, prompting Lupus’ quest to begin here. After defeating Mizar at his Palace, Juno and Vela may return to this world for their exclusive items.
ANY JET FORCE MEMBER
| Item | Type | Location | Prerequisite | |
|---|---|---|---|---|
|
Machine Gun Capacity | Crate | Troop Carrier | None |
|
Pistol Capacity | Crate | Troop Carrier | None |
|
Plasma Shotgun Capacity | Crate | Troop Carrier | None |
|
Pistol Capacity | Crate | Troop Carrier | None |
|
Plasma Shotgun Capacity | Crate | Troop Carrier | None |
|
Machine Gun Capacity | Crate | Troop Carrier | None |
|
Homing Missile Capacity | Crate | Troop Carrier | None |
LUPUS EXCLUSIVE ITEMS
| Item | Type | Location | Prerequisite | |
|---|---|---|---|---|
|
Plasma Shotgun | Weapon | Troop Carrier | None |
|
Machine Gun | Weapon | Troop Carrier | None |
|
Red Key | Key | Troop Carrier | None |
|
Yellow Key | Key | Troop Carrier | Red Key |
|
Sniper Rifle | Weapon | Troop Carrier | Red Key |
JUNO EXCLUSIVE ITEMS
| Item | Type | Location | Prerequisite | |
|---|---|---|---|---|
|
Shocker | Weapon | Troop Carrier | Yellow Key / Red Key |
|
Juno Hatch Key | Spaceship Part | Troop Carrier | Yellow Key / Red Key |
|
Cluster Bomb Capacity | Crate | Troop Carrier | None |
|
Remote Mines Capacity | Crate | Troop Carrier | None |
|
Timed Mines Capacity | Crate | Troop Carrier | None |
|
Tri-Rocket Capacity | Crate | Troop Carrier | None |
|
Tri-Rocket Capacity | Crate | Troop Carrier | None |
|
Tri-Rocket Capacity | Crate | Troop Carrier | None |
|
Tri-Rocket Capacity | Crate | Troop Carrier | None |
|
Homing Missile Capacity | Crate | Troop Carrier | None |
|
Homing Missile Capacity | Crate | Troop Carrier | None |
|
Homing Missile Capacity | Crate | Troop Carrier | None |
|
Homing Missile Capacity | Crate | Troop Carrier | None |
|
Flamethrower Capacity | Crate | Troop Carrier | None |
|
Machine Gun Capacity | Crate | Troop Carrier | None |
VELA EXCLUSIVE ITEMS
| Item | Type | Location | Prerequisite | |
|---|---|---|---|---|
|
Shocker | Weapon | Troop Carrier | None |
RITH ESSA ITEMS (LUPUS FIRST PASS)
Rith Essa is discovered when Lupus acquires the Red Key and the Yellow Key in the Spawnship, unlocking their respective doors to find a passage to Rith Essa, which he alone must explore initially. After defeating Mizar at his Palace, Juno and Vela may return to this world for their exclusive items.
ANY JET FORCE MEMBER
| Item | Type | Location | Prerequisite | |
|---|---|---|---|---|
|
Homing Missile Capacity | Crate | Bluff | None |
|
Homing Missile Capacity | Crate | Bluff | None |
|
Machine Gun Capacity | Crate | Bluff | None |
|
Plasma Shotgun Capacity | Crate | Bluff | None |
|
Plasma Shotgun Capacity | Crate | Bluff | None |
|
Pistol Capacity | Crate | Bluff | None |
|
Sniper Rifle Capacity | Crate | Bluff | Blue Key |
|
Plama Shotgun Capacity | Crate | Bluff | Blue Key |
|
Tri-Rocket Capacity | Crate | Interior | None |
|
Plasma Shotgun Capacity | Crate | Interior | None |
|
Timed Mines Capacity | Crate | Interior | None |
VELA EXCLUSIVE ITEMS
| Item | Type | Location | Prerequisite | |
|---|---|---|---|---|
|
Mine Key | Key | Bluff | Specialist Magazine |
|
Deflector Shield | Spaceship Part | Mine | Mine Key/Tribal Pad |
LUPUS EXCLUSIVE ITEMS
| Item | Type | Location | Prerequisite | |
|---|---|---|---|---|
|
Tri-Rocket Launcher | Weapon | Bluff | None |
|
Cluster Bomb | Weapon | Bluff | None |
|
Homing Missiles | Weapon | Bluff | None |
|
Pistol Capacity | Crate | Bluff | None |
ESCHEBONE ITEMS (LUPUS FIRST PASS)
Eschebone is discovered when Lupus reaches the end of the Bluff in Rith Essa and locates the Interior, which provides him with passage to Eschebone, which he alone must explore initially. After defeating Mizar at his Palace, Juno and Vela may return to this world for their exclusive items.
ANY JET FORCE MEMBER
| Item | Type | Location | Prerequisite | |
|---|---|---|---|---|
|
Tri-Rocket Capacity | Crate | Approach | None |
|
Machine Gun Capacity | Crate | Approach | None |
|
Pistol Capacity | Crate | Approach | None |
|
Homing Missile Capacity | Crate | Approach | None |
|
Grenades Capacity | Crate | Thorax | None |
|
Pistol Capacity | Crate | Thorax | None |
|
Cluster Bombs Capacity | Crate | Thorax | None |
|
Magenta Key | Key | Thorax | None |
LUPUS EXCLUSIVE ITEMS
| Item | Type | Location | Prerequisite | |
|---|---|---|---|---|
|
Grenades | Weapon | Approach | None |
VELA EXCLUSIVE ITEMS
| Item | Type | Location | Prerequisite | |
|---|---|---|---|---|
|
Blue Key | Key | Thorax | None |
|
Specialist Magazine | Trade Item | Thorax | None |
|
Oxygen Tank | Spaceship Part | Cortex | Power Suit Upgrade |
|
Sniper Rifle Capacity | Crate | Cortex | Power Suit Upgrade |
SPACESTATION ITEMS (VELA FIRST PASS)
The Spacestation is discovered by reaching the end of the Lodge in Goldwood with Vela, and she alone must explore this world initially. After defeating Mizar at his Palace, Juno and Lupus may return to this world for their exclusive items.
ANY JET FORCE MEMBER
| Item | Type | Location | Prerequisite | |
|---|---|---|---|---|
|
Flamethrower | Weapon | AbandonedWreck | None |
|
Remote Mines Capacity | Crate | Abandoned Wreck | None |
|
Remote Mines Capacity | Crate | Abandoned Wreck | None |
|
Flamethrower Capacity | Crate | Abandoned Wreck | None |
WALKWAY ITEMS (JUNO FIRST PASS)
The Walkway is discovered when Juno acquires the Yellow Key, and unlocks the Yellow Key Door in the S.S. Anubis landing site to find a passage to the Walkway, which he alone must explore initially. After defeating Mizar at his Palace, Vela and Lupus may return to this world to explore, though they will not find any exclusive items.
JUNO EXCLUSIVE ITEMS
| Item | Type | Location | Prerequisite | |
|---|---|---|---|---|
|
Homing Missiles | Weapon | Peak | None |
GEM QUARRY ITEMS (LUPUS FIRST PASS)
The Gem Quarry is discovered when Lupus reaches the end of the Rim in Goldwood, which he alone must explore initially. After defeating Mizar at his Palace, Juno and Vela may return to this world to explore, though they will not find any exclusive items.
LUPUS EXCLUSIVE ITEMS
| Item | Type | Location | Prerequisite | |
|---|---|---|---|---|
|
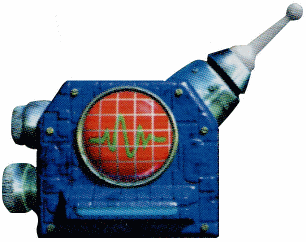
Radar Dish | Spaceship Part | Landing | None |
WATER RUIN ITEMS (VELA FIRST PASS)
The Water Ruin is discovered when Vela uses the Red Key on Sekhmet to discover a jetpack pad. Provided that Vela has acquired the Power Suit Upgrade from King Jeff at Mizar’s Palace, she can jettison to a higher elevation and discover a secret passage to the Water Ruin, which she alone must explore initially. After defeating Mizar at his Palace, Juno and Lupus may return to this world for their exclusive items.
ANY JET FORCE MEMBER
| Item | Type | Location | Prerequisite | |
|---|---|---|---|---|
|
Timed Mine | Weapon | Lost Island | None |
|
Power Cell | Spaceship Part | Lost Island | Earplugs |
VELA EXCLUSIVE ITEMS
| Item | Type | Location | Prerequisite | |
|---|---|---|---|---|
|
Nitrogen Tank | Spaceship Part | Lost Island | None |
|
Flamethrower Capacity | Crate | Lost Island | None |
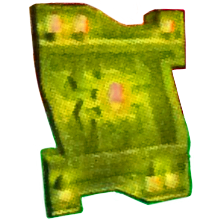 |
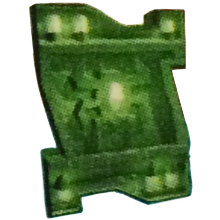
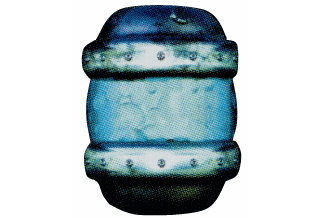
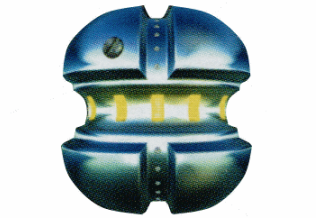
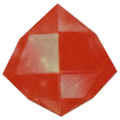
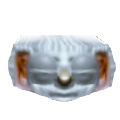
|
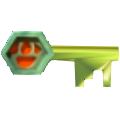
Juno’s Yellow Key:
Juno can discover his Yellow Key inside the Outset Caves on Goldwood during his first visit. Upon reaching the end of the caves, the Yellow Key can be found inside a non-descript crate that can be destroyed.
Vela can discover her Yellow Key inside the Tribal Chamber on Cerulean. To access this chamber, she’ll need to exchange three gold bars found scattered on the Dune to Fishface for the Tri-Rocket Launcher.
Lupus’ Yellow Key:
Lupus will need to secure the Red Key in the Spawnship before he can collect the Yellow Key. Once he’s collected the Red Key, he can gain access to a room beyond the Red Lock in the Troop Carrier and jettison to a pair of wall-bound pipes that hide the Yellow Key, along with the Sniper Rifle.
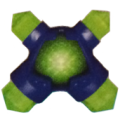
 |
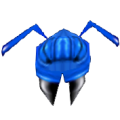
|
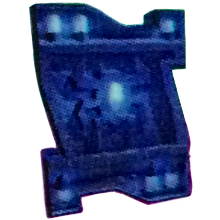
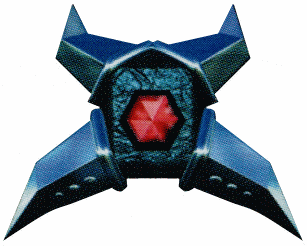
Juno’s Blue Key:
The Battle Cruiser features an area where cross-beams are situated over a floor of molten magma. Juno can use his ability to walk across lava unharmed here, and travel into a conspicuous pipe below. Once he’s reached the end of the pipe, he can find the Blue Key hidden in a chest near the shore.
By traveling along an elevated bridge deep in the bowels of Eschebone, Vela can leave the central area of the Thorax to discover a pool of water. Diving into the pool will lead her to a labyrinth of underwater tunnels, where the path to the immediate left will lead her to a chest containing the Blue Key.
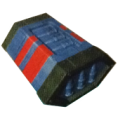
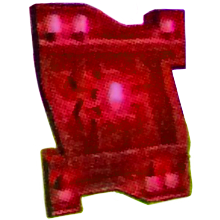 |
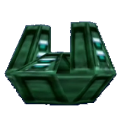
|
Juno’s Red Key:
After exploring much of Goldwood, and completing the Outset, Juno will come across an area that features a rising pathway leading up to a Red Lock. Sticking to the lower path on the left side will lead him to Magnus – speaking with the pint-sized ambassador will have him offering up the Red Key.
If Vela follows the path of the shallow river that flows through the lower path of Sekhmet, she’ll come across a Target Door. Dispatching the Target Door with her Machine Gun will allow her through a narrow passage that leads to a large room – in the center she’ll find a questionable character named Fishface that will provide her with the Red Key when asked.
Lupus’ Red Key:
During his initial exploration of the Spawnship, Lupus will be able to follow the most direct route to a chasm that can be bridged by traversing across the floating platforms moving in a circuit. Once he’s been able to brave the gap, he’ll continue along the elevated pathways until he’s found an imposing Weevil behind a LifeForce Door. Neutralizing the Weevil and exploring the platform just beyond his station will surrender the Red Key.
 |
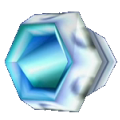
|
Juno’s Green Key:
Provided that Juno has secured the Red Key from Goldwood, he can traverse the cross-beams in Sekhmet’s lava room and pass through the door showcasing the Red Lock. Traveling across three elaborate structures with elevator platforms just beyond, the Star Twin will locate an exit in the final room on the ground floor that will lead him to an ambush with Mizar’s flying opposition. Defeating all of the Drones will allow passage to a vertical Jetpack shaft, with a glass floor at its base. Shooting at the glass floor until it shatters will allow Juno to acquire the Green Key.
Provided that Vela has secured the Red Key from Fishface earlier in Sekhmet, she can traverse the cross-beams in Sekhmet’s lava room and pass through the door showcasing the Red Lock. Traveling across three elaborate structures with elevator platforms just beyond, the Star Twin will locate an exit in the final room on the ground floor that will lead her to an ambush with Mizar’s flying opposition. Defeating all of the Drones will allow passage to a vertical Jetpack shaft, with a glass floor at its base. Shooting at the glass floor until it shatters will allow Vela to acquire the Green Key.
Lupus’ Red Key:
Provided that Lupus has secured the Red Key from the Spawnship, he can traverse the cross-beams in Sekhmet’s lava room and pass through the door showcasing the Red Lock. Traveling across three elaborate structures with elevator platforms just beyond, the Jet Force Canine will locate an exit in the final room on the ground floor that will lead him to an ambush with Mizar’s flying opposition. Defeating all of the Drones will allow passage to a vertical Jetpack shaft, with a glass floor at its base. Shooting at the glass floor until it shatters will allow Lupus to acquire the Green Key.
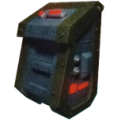
 |
|
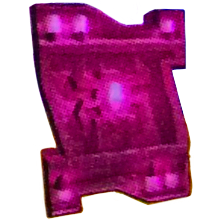
Juno’s Magenta Key:
In the central Thorax chamber of Eschebone, Juno will need to travel along the elevated path to arrive at the pool where Vela’s Blue Key can be found. As Juno is unable to swim, he’ll follow the passage until it opens up to a large room with an exit to the left and right, which leads back to the central Thorax chamber, and to a Floyd Mission respectively. Juno will find the Magenta Key perched on a rock nearest to the Floyd Mission.
In the central Thorax chamber of Eschebone, Vela will need to travel along the elevated path to arrive at the pool where her Blue Key can be found. Provided that Vela has already acquired the Blue Key, she’ll ignore the dive and follow the passage until it opens up to a large room with an exit to the left and right, which leads back to the central Thorax chamber, and to a Floyd Mission respectively. Vela will find the Magenta Key perched on a rock nearest to the Floyd Mission.
Lupus’ Magenta Key:
In the central Thorax chamber of Eschebone, Lupus will need to travel along the elevated path to arrive at the pool where Vela’s Blue Key can be found. As Lupus is unable to swim, he’ll follow the passage until it opens up to a large room with an exit to the left and right, which leads back to the central Thorax chamber, and to a Floyd Mission respectively. Lupus will find the Magenta Key perched on a rock nearest to the Floyd Mission.
 |
|
 |
|
 |
|
 |
|
 |
|
 |
|
 |
|
 |
|
 |
|
 |
|
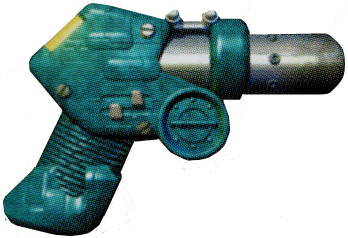
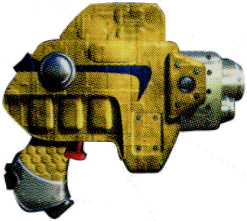
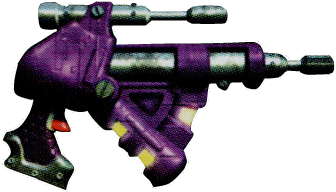
Juno’s Machine Gun:
After exploring much of Goldwood, and completing the Outset, Juno will come across an area that features a rising pathway leading up to a Red Lock. Sticking to the lower path on the left side will lead him to Magnus – speaking with the pint-sized ambassador will have him offering up the Red Key. Bypassing the Red Lock with the Red Key will lead Juno to a small cave, where the Machine Gun awaits.
From the landing site on Sekhmet, Vela can proceed to the first chamber where she’ll encounter Mizar’s Drones. After defeating all of Mizar’s Drones in this area, a pair of LifeForce Doors near the stream will unlock – if Vela travels through the door nearest to the entrance of the room, she’ll come across a chest that contains the Machine Gun.
Lupus’ Machine Gun:
At the landing site of the Spawnship, Lupus can bypass the elevator to find two chests available on the opposite side of the room. The chest on the right will contain the Machine Gun.
 |
|
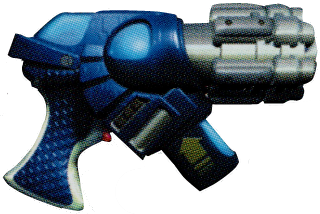
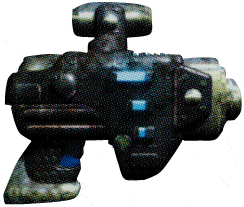
Juno’s Plasma Shotgun:
At the landing site of the S.S. Anubis, Juno will be tasked with scaling a number of stacked crates in the loading bay. Once he’s able to ascend to the second level, he’ll discover a chest that will relinquish the Plasma Shotgun when opened.
If Vela follows the path of the shallow river that flows through the lower path of Sekhmet, she’ll come across a Target Door. Dispatching the Target Door with her Machine Gun will allow her through a narrow passage that leads to a large room with a chest in the far left corner. Opening the chest will relinquish the Plasma Shotgun.
Lupus’ Plasma Shotgun:
At the landing site of the Spawnship, Lupus can bypass the elevator to find two chests available on the opposite side of the room. The chest on the left will contain the Plasma Shotgun.
 |
|
Juno’s Tri-Rocket Launcher:
Juno will have to progress through Tawfret until he can locate King Jeff at the gated Cemetery. Once Juno speaks with King Jeff and learns of his grave mistake, the Tribal magnate will grant him the Tri-Rocket Launcher.
Upon eliminating the Drones at the landing site, and one lingering trooper in the Dune expanse on Cerulean, Vela will be granted passage to Fishface’s base of operations. Provided that she’s managed to locate all three Gold Bars in the expanse, she’ll be able to trade them with Fishface for the Tri-Rocket Launcher.
Lupus’ Tri-Rocket Launcher:
On Rith Essa, Lupus can progress through the zigzagging path that will lead him to the cliff edges of the Bluff. Once he’s finished with the long and winding path, and completes the area, the Canine will find himself on some makeshift wooden steps; a chest containing the Tri-Rocket Launcher can be found to the immediate left.
 |
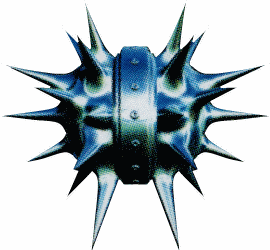
|
Juno’s Shocker:
Once Juno possesses the Red Key and the Yellow Key, he can pass through both doors in the Spawnship to arrive at a lava-filled chamber. On the left side of the room, Juno will spot a round kiln-like object in the magma – utilizing his heat resistance, a quick trek inside the structure leads to a chest containing the Shocker.
After taking the elevator at the Spawnship landing site, Vela can leap from the bridge in the next room until a pool of water found on the ground floor. Using her diving abilities, Vela can swim through the underwater entrance to a previously-unseen section of the ship. After passing through a LifeForce Door, Vela will discover a chest containing the Shocker in the third and final room.
Lupus’ Shocker:
In order to reach the Rim on Goldwood, Lupus will require his armor to be upgraded by King Jeff after facing off against Mizar at his Palace. Once this accomplished, he can return to Goldwood progressing through the Outset and Interior until he arrives at the Target Door. Using his Machine Gun, he’ll progress until he comes to a large gulf with a LifeForce Door. Provided that Lupus can exterminate enough Drones to satisfy the conditions of the LifeForce Door, he can jettison across the gap and enter the Rim. In these caverns, Lupus will need to continue his extermination until he arrives at a water-logged platform section. With some careful thrusting from the apex of the ledge in this area, Lupus can reach another LifeForce Door, where entry brings him to a chest containing the Shocker.
 |
|
Juno’s Flamethrower:
As Juno enters the Spacestation, he’ll be able to drop to the floor below near his ship – venturing through a wall to the left will take him to a crate, which he can use to propel upwards through a hole in the ceiling. Finding another crate on the current floor, Juno can once again ascend towards the final floor, walking through two perforations where a Chest containing the Flamethrower may be found on the opposite side.
As Vela enters the Spacestation, she’ll be able to drop to the floor below near her ship – venturing through a wall to the left will take her to a crate, which she can use to propel upwards through a hole in the ceiling. Finding another crate on the current floor, Vela can once again ascend towards the final floor, walking through two perforations where a Chest containing the Flamethrower may be found on the opposite side.
Lupus’ Flamethrower:
As Lupus enters the Spacestation, he’ll be able to drop to the floor below near his ship – venturing through a wall to the left will take him to a crate, which he can use to propel upwards through a hole in the ceiling. Finding another crate on the current floor, Lupus can once again ascend towards the final floor, walking through two perforations where a Chest containing the Flamethrower may be found on the opposite side.
 |
|
Juno’s Sniper Rifle:
After Juno leaves the Cemetery on Tawfret, the next civilized structures he’ll come across are the walled area that features a Main Hall where Gimlet can be found inside. If Juno investigates the interior of the building to the right of this Main Hall, he’ll discover a small room with chest containing the Sniper Rifle.
Entering the first Military Base on Ichor, Vela can leap onto the walkway in the center – traveling towards the entrance that shares the wall with the LifeForce Door will lead her into a long passageway inside the base. If Vela enters the first door on her left in this passageway, she’ll come across two chests. The chest on the right will contain the Sniper Rifle.
Lupus’ Sniper Rifle:
Lupus will need to secure the Red Key in the Spawnship before he can collect the Sniper Rifle. Once he’s collected the Red Key, he can gain access to a room beyond the Red Lock in the Spawnship and jettison to a pair of wall-bound pipes that hide the chest containing the Sniper Rifle, along with the Yellow Key.
 |
|
Juno’s Homing Missiles:
When Juno arrives on the Walkway, he’ll be tasked with eliminating all of Mizar’s Drones stationed on the Peak – once this is accomplished, he’ll be able to pass the LifeForce Door and enter the interior. Inside, he’ll find a chest at the rear of the room containing the Homing Missiles.
After Vela has traded three Gold Bars for the Tri-Rocket Launcher on Cerulean, she can cross the expanse and enter a Tribal chamber, followed by a large cavern that features a string of Cyclops Drones sweeping overhead. There are three potential exits to the room; one requires a LifeForce requirement; one requires the Yellow Key; and the final exit has no pre-requisite. If Vela utilizes the non-conditional exit, she’ll find a small chest containing the Homing Missiles inside.
Lupus’ Homing Missiles:
On the landing site of Rith Essa, Lupus can ascend the zigzagging slopes meant to take the Canine to the next area. However, if he positions himself on the edge of the first apex nearest the waterfall, he can jetison across the gap and land on the opposite edge. Once this is accomplished, venturing into a secret entrance behind the waterfall will lead Lupus to a chest containing the Homing Missiles.
 |
|
Juno’s Shuriken:
When Juno is in possession of the Yellow Key, he can leave the landing site on Goldwood enter the Outset. On the left side of the Outset, he’ll find a Yellow Key Door with a Stag Drone stationed on the other side. After defeating the Stag Drone, Juno can find a chest on the left side of the area containing the Shuriken.
When Vela is in possession of the Yellow Key, she can leave the landing site on Goldwood enter the Outset. On the left side of the Outset, she’ll find a Yellow Key Door with a Stag Drone stationed on the other side. After defeating the Stag Drone, Vela can find a chest on the left side of the area containing the Shuriken.
Lupus’ Shuriken:
When Lupus is in possession of the Yellow Key, he can leave the landing site on Goldwood enter the Outset. On the left side of the Outset, he’ll find a Yellow Key Door with a Stag Drone stationed on the other side. After defeating the Stag Drone, Lupus can find a chest on the left side of the area containing the Shuriken.
 |
|
Juno’s Grenades:
When Juno reaches the Cemetery on Tawfret, he can speak with King Jeff to acquire the Tri-Rocket Launcher. Once this is accomplished, he can use it to blast away the door of the first Mausoleum on the left. Venturing inside the desecrated tomb will allow Juno to discover a chest that contains the Grenades.
On the landing site at Sekhmet, Vela can discover a chest containing the Grenades around the base of the landing pad.
Lupus’ Grenades:
As Lupus makes his way through the Approach on Eschebone, he’ll come to a mouth of the large, fanged insect in the wall that will send its great tongue lolling out. Just to the right of this maw, Lupus can discover a rocky platform housing a chest amidst the lava. Leaping onto the rock and opening the chest will relinquish the Grenades.
 |
|
Juno’s Cluster Bombs:
As Juno makes his way through the Hold of the S.S. Anubis, he’ll come to an area that features a sloped hill with a conveyer belt running down its center. If Juno can tackle the steep slope and arrive at the top of the room, he can use his ammunition to smash a pane of glass found on the left side, exposing a door. Walking through this door will bring him to an area that features a grid of precarious cross-beams that he’ll need to cross to find an entrance on the opposite side. Once this is done, Juno needs only to reach the end of a cramped passageway that follows to find a chest containing the Cluster Bombs.
As Vela enters the first base in Ichor, she’ll need to eliminate Mizar’s Drones to gain access to the area beyond the LifeForce Door. In this next area, she can use her ammunition to smash through the glass found on the left side of the room to expose a hidden doorway. Traveling through this doorway will take her to a room housing Floyd Pad, and a chest that contains the Cluster Bombs.
Lupus’ Cluster Bombs:
On Rith Essa, Lupus can progress through the zigzagging path that will lead him to the cliff edges of the Bluff. Once he’s finished with the long and winding path, and completes the area, the Canine will find himself at a forked path that splits in three directions. Climbing up the steps next to the waterfall will take him to Fernando Mole’s home (along with his vicious dog, Flopsy) where a chest containing the Cluster Bombs can be found just to the left.
 |
|
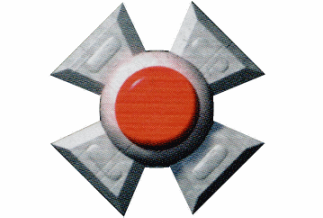
Juno’s Remote Mines:
Once Juno reaches the final section of the Bridge where Floyd and Gimlet are found on Tawfret, he can work his way up to the rooftop the features the large chimney, utilizing the brickwork as makeshift stairs. From here, he can jump down into the chimney and begin exploring the catacombs far below. If Juno follows the stream to the left, he’ll come across a sarcophagus against the wall as he rounds the corner that can be blasted away with the Tri-Rockets. A small grotto will be exposed once the sarcophagus is destroyed, revealing a chest that contains the Remote Mines.
Once Vela reaches the final section of the Bridge where Floyd and Gimlet are found on Tawfret, she can work her way up to the rooftop the features the large chimney, utilizing the brickwork as makeshift stairs. From here, she can jump down into the chimney and begin exploring the catacombs far below. If Vela follows the stream to the left, she’ll come across a sarcophagus against the wall as she rounds the corner that can be blasted away with the Tri-Rockets. A small grotto will be exposed once the sarcophagus is destroyed, revealing a chest that contains the Remote Mines.
Lupus’ Remote Mines:
Once Lupus reaches the final section of the Bridge where Floyd and Gimlet are found on Tawfret, he can work his way up to the rooftop the features the large chimney, utilizing the brickwork as makeshift stairs. From here, he can jump down into the chimney and begin exploring the catacombs far below. If Lupus follows the stream to the left, he’ll come across a sarcophagus against the wall as he rounds the corner that can be blasted away with the Tri-Rockets. A small grotto will be exposed once the sarcophagus is destroyed, revealing a chest that contains the Remote Mines.
 |
|
Juno’s Timed Mines:
From the landing site of the Water Ruin, Juno will need to make his way to the shores of the devastated castle. At the back of the ruins, just beyond the walls, he’ll be able to discover a chest that contains the Timed Mines.
From the landing site of the Water Ruin, Vela will need to make his way to the shores of the devastated castle. At the back of the ruins, just beyond the walls, she’ll be able to discover a chest that contains the Timed Mines.
Lupus’ Timed Mines:
From the landing site of the Water Ruin, Lupus will need to make his way to the shores of the devastated castle. At the back of the ruins, just beyond the walls, he’ll be able to discover a chest that contains the Timed Mines.
 |
|
Juno’s Flares:
Once Juno speaks to King Jeff in the Cemetery of Tawfret to come into possession of the Tri-Rocket Launcher, he can make his way towards the final area of the bridge where Floyd and Gimlet can be found. The rear of the building beneath Floyd’s post hides a door which can be taken out with the Tri-Rocket Launcher, and the interior houses a chest that contains the Flares.
Entering the first Military Base on Ichor, Vela can leap onto the walkway in the center – traveling towards the entrance that shares the wall with the LifeForce Door will lead her into a long passageway inside the base. If Vela enters the first door on her left in this passageway, she’ll come across two chests. The chest on the left will contain the Flares.
Lupus’ Flares:
Once Lupus possesses the Tri-Rocket Launcher, he can make his way towards the final area of the bridge on Tawfret where Floyd and Gimlet can be found. The rear of the building beneath Floyd’s post hides a door which can be taken out with the Tri-Rocket Launcher, and the interior houses a chest that contains the Flares.
 |
|
Juno’s Fish Food:
From the landing site of Goldwood, Juno can continue towards the first area of the Outset. Rather than taking the bridge towards King Jeff’s hut, inspecting the wall to the right will reveal a slight crevice that he can use to access a secret area just beyond. Once this is accomplished, Juno will discover a chest on the right side that contains the Fish Food.
From the landing site of Goldwood, Vela can continue towards the first area of the Outset. Rather than taking the bridge towards King Jeff’s hut, inspecting the wall to the right will reveal a slight crevice that she can use to access a secret area just beyond. Once this is accomplished, Vela will discover a chest on the right side that contains the Fish Food.
Lupus’ Fish Food:
From the landing site of Goldwood, Lupus can continue towards the first area of the Outset. Rather than taking the bridge towards King Jeff’s hut, inspecting the wall to the right will reveal a slight crevice that he can use to access a secret area just beyond. Once this is accomplished, Lupus will discover a chest on the right side that contains the Fish Food.
 |
|
 |
|
 |
|
 |
|
 |
|
 |
|
Floyd Component 1:
Once you’ve discovered Floyd’s post on the rooftop of the Main Hall in second Bridge area, you’ll be able to collect the first of Floyd’s components by traveling towards the adjacent building with the large chimney. Utilizing the brickwork as makeshift stairs, you’ll be able to ascend to the chimney rooftop and then follow a thin wall to recover the first ‘Robot Component’.
Floyd Component 2:
The second Component can be found in the catacombs, deep underneath the current site where Floyd is found. To access this area, you’ll need to leap down the aforementioned chimney and then explore the perimeter below. The second ‘Robot Component’ should be found near a series of pillars as you round the corner.
Floyd Component 3:
Floyd’s final component is hidden beneath a trapdoor that requires the Crowbar to access. To acquire the Crowbar, you’ll need to retrieve Gimlet’s Pants, which are hung up on a large tree in the center of a lake in the previous area. From here, you can speak to Gimlet by entering the building that houses the large chimney to exchange the Pants for his Crowbar. The rear of the building beneath Floyd’s post hides a door which can be taken out with the Tri-Rocket Launcher – once inside, you can prise open a trapdoor to discover the final ‘Robot Component’.
 |
|
Goldwood Floyd Mission:
Upon returning to Goldwood with Floyd intact, any member of the Jet Force Gemini team may clear the Outset until they’ve arrived at the Interior. If they take the leftmost door without a lock in this area, they’ll discover a small cave that features a Floyd Pad to begin their first mission. If Floyd can collect at least 12 cases of Metallic Ore, and disable 10 Power Cells before the timer reaches 900, he’ll be awarded a Gold Medal. As a Gold Medal in this Floyd Mission will unlock the Goldwood Multiplayer Target Map, it is not neccessary to complete the campaign adventure.
Upon returning to the S.S. Anubis with Floyd intact, any member of the Jet Force Gemini team may clear the Hold until they come to an area that features a sloped hill with a conveyer belt running down its center. Tackling the steep slope and arriving at the top of the room will allow them to use their ammunition to smash a pane of glass found on the left side, exposing a door. Walking through this door will bring the team to an area that features a grid of precarious cross-beams that they’ll need to cross to find an entrance on the opposite side. Once this is done, they need only reach the end of a cramped passageway that leads to Floyd’s Mission. If Floyd can collect at least 8 Circuit Boards, destroy 3 Switch Boxes and take out the Reactor Hub before the timer can reach 900, he’ll be awarded a Gold Medal. As a Gold Medal in this Floyd Mission will unlock the Earplugs, it is neccessary to complete the campaign adventure.
Mizar’s Palace Floyd Mission:
Arriving to Mizar’s Palace with Floyd intact as Juno, and completing the Lobby section to arrive at the Courtyard will allow him to utilize a Floyd Pad nearest the entrance to the Chasm to begin the Floyd Mission. If Floyd can collect 3 Power Keys and travel to the Pyramid Generator Room before the timer can reach 000, he’ll be awarded an Expert Medal by default. This Floyd Mission is neccessary to complete the campaign adventure.
Ichor Floyd Mission:
Upon returning to Ichor with Floyd intact, any member of the Jet Force Gemini team may pass the first LifeForce Door in the Military Base to find a room featuring a large pane of glass on the left side. They can then use their ammunition to smash through the glass to expose a hidden doorway where entry will take them to a room housing a Floyd Pad to begin their next mission. If Floyd can collect at least 45 Oil Cans, and reach the finish before the timer can reach 900, he’ll be awarded a Gold Medal. As a Gold Medal in this Floyd Mission will unlock the Arcade Chip which can be used to unlock the Greenwood Village Multiplayer Map after repairing the second cabinet in the Big Bug Fun Club, it is not neccessary to complete the campaign adventure.
Upon returning to Eschebone with Floyd intact, any member of the Jet Force Gemini team may clear the Approach and Thorax until they’ve arrived at a pool of water after crossing an elevated bridge in the main chamber. Ascending the set of stairs next to the pool and gaining access to the LifeForce Door on the right side of the next room will lead them to a room housing a Floyd Pad to begin their next mission. If Floyd can collect at least 21 DNA Strands, and reach the finish before the timer can reach 850, he’ll be awarded a Gold Medal. As a Gold Medal in this Floyd Mission will unlock the Rith Essa Multiplayer Target Map, it is not neccessary to complete the campaign adventure.
 |
|
 |
|
 |
|
 |
|
 |
|
 |
|
 |
|
 |
|
 |
|
 |
|
 |
|
 |
|
 |
|
 |
|
 |
|