Sea of Thieves – Pirate Academy


Navigation:
Chapter 1: Getting Started
Introduction
Picking Your Pirate
Getting Around
First Steps
Crewing Up
Life and Death
Chapter 2: Around the Outposts
Outpost Features
The Gold Hoarders
The Merchant Alliance
The Order of Souls
The Bilge Rats
The Hunter’s Call
The Reaper’s Bones
Chapter 3: Tools of the Trade
Navigational Tools
Practical Tools
Voyages and Quest Items
Supplies
Musical Instruments
Chapter 4: Combat
Sword Combat
Flintlock Pistol
Blunderbuss
Eye of Reach
Ammo and Reloading
Throwables
Chapter 5: Life Aboard Ship
Welcome Aboard
Working the Ship
Ship’s Weapons
Ship Supplies and Chests
Ship Damage and Repair
Voting on Voyages
Using the Brig
Sinking and Scuttling
The following guide was created by Rare for their Pirate Academy on the official Sea of Thieves website – it has been preserved here for posterity.
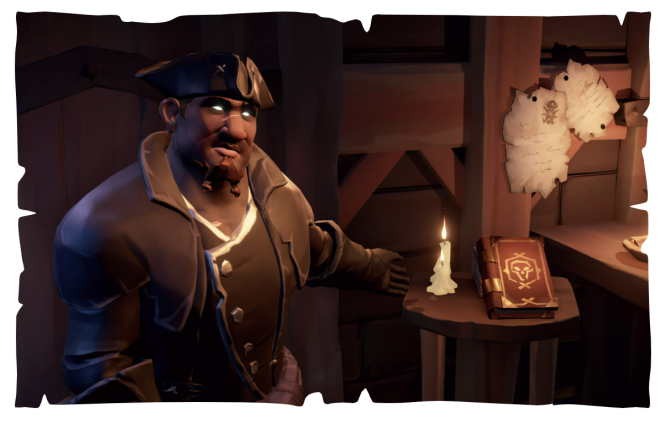
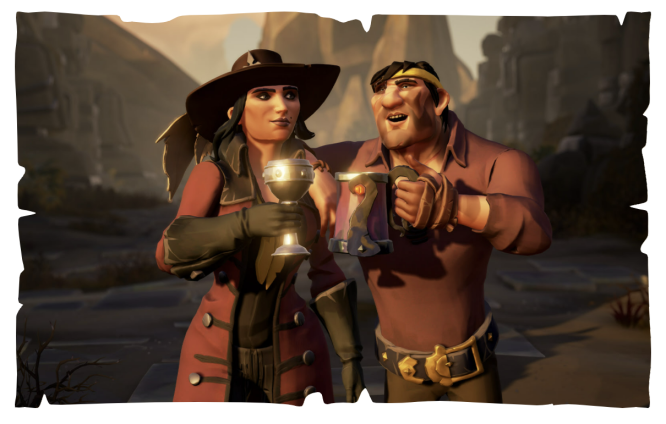
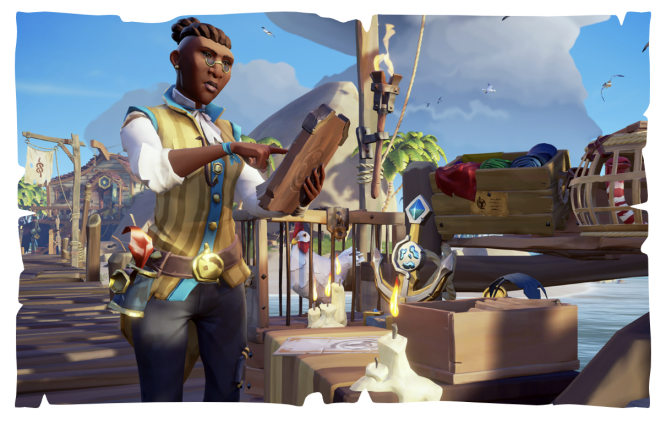
Nine-Cat Nura:
Welcome, would-be pirates!
I’m Nine-Cat Nura, writing to you from the Sea of Thieves. Why? I was promised a good amount of gold if I did, that’s why. Besides, the rest of my crew are ashore, handing in a couple of skulls to Madame Olive over at the—well, I’m getting ahead of myself.
If you’re reading this, you’ve almost certainly been tempted by the pirate life and want to get a taste of it for yourself. That’s great to know, because everyone out here loves a rookie – especially the sharks.
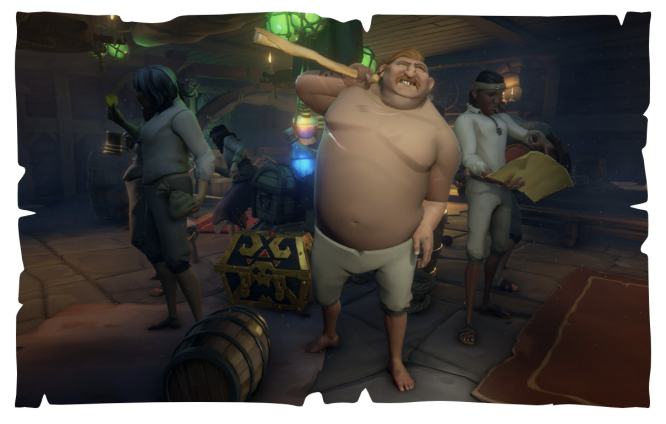
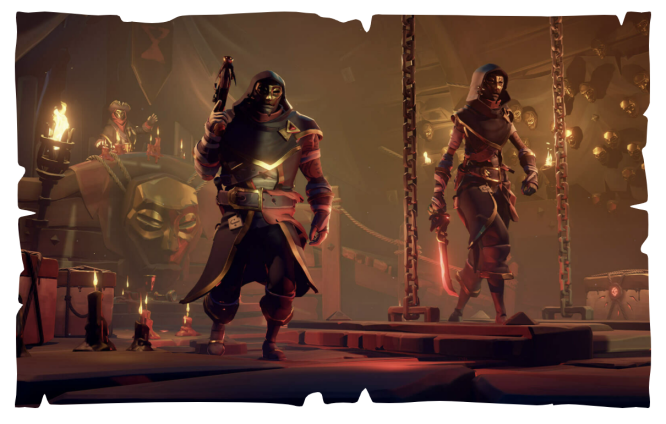
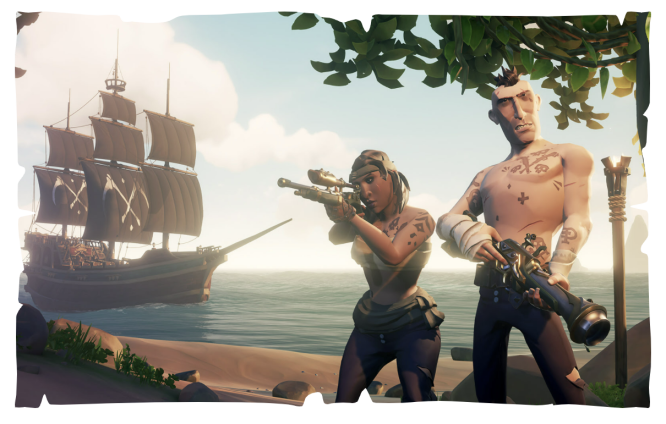
Seamark:
‘Huge’, ‘hulking’ and ‘horrible’ are just some of the words that people have used to describe this former soldier. (Coincidentally, those are quite often their last words.) Seamark has a notorious temper, but there’s no denying it makes him a formidable fighter. So who better to learn from?
Seamark arrived on the Sea of Thieves in the company of Lesedi Singh, co-founder of the Sea Dogs and their infamous Arena contests alongside her brother DeMarco. Despite this allegiance, Seamark still considers himself a mercenary and is happy to do whatever it takes to keep his pockets jangling – even a spot of light Academy instruction, as it turns out.
We’re proud to introduce you to this library of lessons from residents of the Sea of Thieves, helping you learn how to do everything from starting your very first Voyage to making your mark in a world of riches, rival crews and rampaging sea beasts.
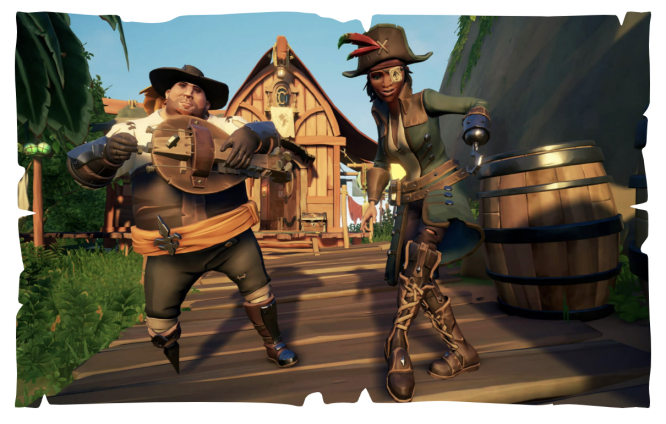
GETTING STARTED: PICKING YOUR PIRATE
What kind of pirate will you be? That’s the first question people ask themselves as they prepare to set sail on the Sea of Thieves, while visions of their possible future selves swim before them in a haze of ambition, excitement and grog.
If, while browsing the pirate possibilities, you don’t see anything that just screams out “Yes! That’s the kind of shifty-looking scoundrel I want to be!” you can always summon up more alternatives from the ether until you spot a shape that really embodies your inner marauder. Should you choose to shake things up further into your adventures, it’s also possible to gulp down a Pirate Appearance Potion and completely renew your physique.
Whether you elect to be an aged, wiry sea dog or a lumbering, barrel-chested brawler, there’s no need to worry about the finer details like the length of your hair or particularly interesting scars. Those traits will come later, when you’ve taken your first steps on your new pirate feet, earned yourself some gold and paid a visit to the nearest Clothing and Vanity Chests. There are plenty of stylish alternatives available by default, or you can opt to spend plunder at Outposts on everything from trousers to tattoos.
If you spot a pirate who’s sporting an accessory or style choice you simply can’t find in the local clothing shop, however, it’s probably a reward from the Voyages they’ve been on. As you make your way through the world and accomplish some daring feats of your own, you’ll start to build up your own collection of hairstyles, peglegs and other features that will help you become the fearsome buccaneer you’ve always dreamed of presenting to the world.

GETTING STARTED: GETTING AROUND
Let’s begin with walking and talking. You might think that’s pretty self-explanatory, but believe me, it’s harder than you might imagine if you’ve been at the grog all morning.
Start by taking a look at these charts. They’re not treasure charts, sadly, but they’ll give you a good idea of all the ways you can leap, dash and generally get to where you want to be. (If you’d prefer to scrunch up these pages and toss them into the fire, you can also customise your own control scheme in the Settings menu.)
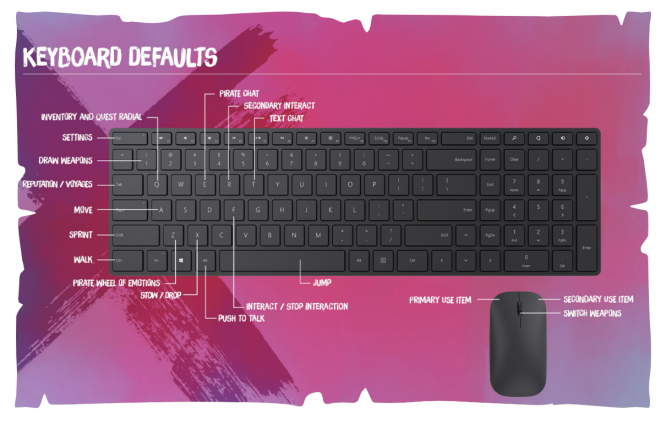
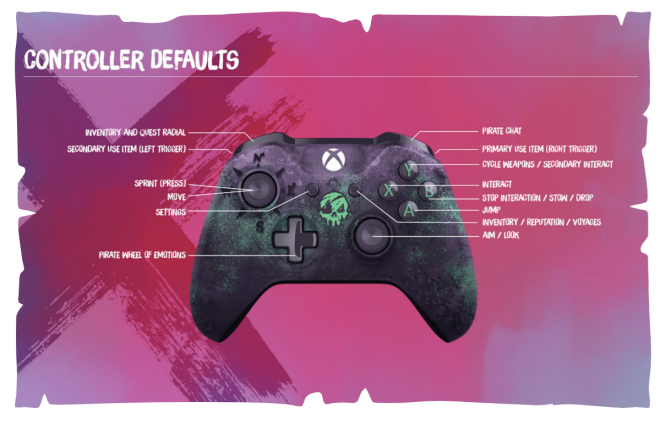
Whatever your preferred method of motion, you’ll notice the charts have a lot of features in common. Beyond looking and walking around, a healthy pirate can also:
Jump: You won’t be leaping tall taverns in a single bound, but jumping will get you over obstacles and might mean the difference between landing safely in the water or splatting on the sand nearby.
Sprint: A burst of speed is always useful, whether you want to outrun an enemy or just be first in line at the bar. Just remember there are some things you can’t manage while sprinting, like using a pistol – and if you’re holding treasure or another type of object that can’t be stowed away on your person, you won’t be able to sprint at all.
Interact: There are lots of things you can chat with, poke at or otherwise make use of, and you’ll find them all across the Sea of Thieves. When you approach an object or a person, you’ll see the different ways you can interact with them. If it’s a cannon, for example, you can choose between Primary Use to operate it, or Secondary Use to load any cannonball you might be holding. Some objects will only ever have a Primary Use, but you’ll always be able to see the options once you’re close enough.
Disengage/Stow/Drop: Feel the need to go hands-free? This is how. If you’re interacting with something like a capstan or cannon, you can release it. If you’re holding a common object that can be stored on your person, like a banana, you can put it away. If you’re holding treasure or another kind of object that can’t be stored, you can drop it. Of course, anyone else can snatch up a placed or dropped object, so think twice before you set down anything valuable.
Use: Holding things is boring. Using things is the fun part! What happens when you use an object depends on what it is – so you can play a musical instrument or fire a pistol. Some objects also have a Secondary Use: a cutlass, for example, can be used to block an attack.
Cycle Weapons: Even the brawniest pirate is limited to carrying two weapons at any time – either a cutlass and a firearm, or two firearms. This is how you switch between them. (Seamark will have plenty more to tell you about weapons elsewhere!)
Item Radial: The Item Radial has several pages that give you easy access to your belongings. When you open the radial you’ll see the first page of your equipment, which contains day-to-day items like your shovel and compass. The second page is for items you might use when socialising, like your tankard and musical instruments. The Item Radial also has pages for throwable items like Blunderbombs, along with maps and other important Quest Items. If you’re holding certain objects, you might also see a page of relevant items that can be used in tandem – bait for your fishing rod, for example.
Quest Radial: By default, items related to Quests (like treasure maps) are accessed from your Item Radial. If you prefer, you can adjust your control scheme to include a Quest Radial which separates out charts and other Quest-related tools for faster access. Once these Quest items are in your hand, you can take a closer look or show them to other pirates.
Swimming: If you should find yourself in deep water, you can still move around. You’ll swim towards wherever you happen to be looking when you move forward, so angle yourself appropriately if you want to dive or head for the surface. Sprinting while swimming will grant you an additional burst of speed.
That’s it for the fundamentals! Now we can get into what being a pirate is all about.
GETTING STARTED: FIRST STEPS
Bel and I grew up here, but pirates who make it to the Sea of Thieves from elsewhere have a habit of finding themselves washed up on Old Sailor Isle, a peaceful haven just outside the borders of our pirate paradise. I’ve heard stories that there’s a friendly face to greet them, talk them through the fundamentals and send them on a Maiden Voyage into the Sea of Thieves itself once they’ve practised the basics of navigation, combat and ship repair. Even an experienced pirate can relive their Maiden Voyage if they choose – who knows, there might be treasure you didn’t find the first time around…
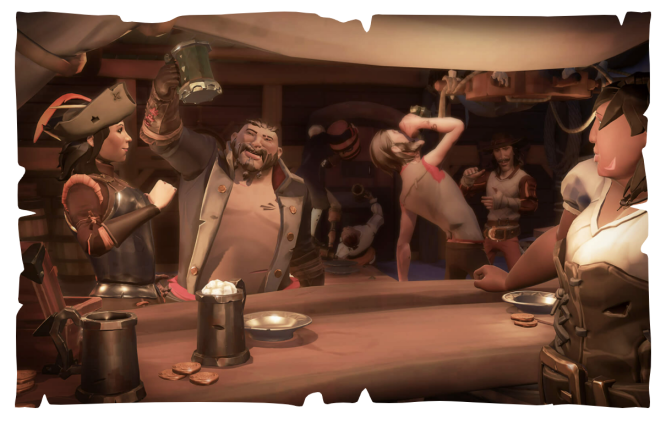
After all that sailing, most pirates like to enjoy a hearty, er, celebration when they first arrive. If you’re one of them, chances are your next conscious experience will be coming to your senses in one of the Sea of Thieves’ many taverns. Taverns are located at Outposts, and there are at least half a dozen that I know of dotted across the map – we’ll look at them in more detail later. For now, you can rest assured that your ship will be anchored nearby, no matter which watering hole you start from.
If you’re lucky, you might draw the attention of a Mysterious Stranger who’s keeping an eye out for new arrivals. He may look almost as fearsome as me, but it’s worth doing as he suggests if you’re just starting out on your career in piracy. Not only will it give you an opportunity to get the lay of the land, so to speak, you’ll also find a little bit of gold can go a long way in the early days.
When your headache’s finally been eased by the comforting presence of coins in your purse, it’s time to think about what you’d like to do next. And, more importantly, who you’d like to join you on the journey…
GETTING STARTED: CREWING UP
While it’s perfectly possible to take part in everything the Sea of Thieves has to offer as a ‘lone wolf’ pirate, you’ll find that life as part of a crew has a number of advantages. For one thing, there’s no danger of having to split the profits – you’ll receive the same amount of gold no matter how large or small your crew may be.
If you’ve accepted an invitation from a friend or a member of a party, you should soon find yourself in the tavern with fellow crew members already in tow. If you’d prefer to start a crew of your own, or simply throw in your lot with other pirates, you have a couple of options.
First, you’ll want to pick the kind of ship you’re planning on sailing, as this will determine the maximum size your crew can be. Sloops can carry a crew of one or two pirates, Brigantines support three and a crew of four requires a Galleon – although there’s nothing to stop you from having a go at sailing the larger ships all by yourself if you like. Nobody will laugh at you. Probably.

Next, you’ll need to choose between hosting an Open or Closed Crew. With an Open Crew, you’ll be teamed up with other pirates from around the world to fill any empty spaces, matching you with up to three strangers-turned-shipmates. If you have a Closed Crew, only people you’ve invited will be able to join.
At this point, you’ll get the opportunity to invite your friends or people from Clubs before choosing to set sail. You’ll still be able to send invites once you’re underway, so feel free to leave slots empty in anticipation of late arrivals. By default, if you have an Open Crew with an empty space, your friends will be able to see the available slot and choose to join it, but that option can be removed if you prefer. You can vote to change your Open/Closed Crew setting once you’re aboard.
The Sea of Thieves is an unpredictable place, and when it comes to effective shipboard communication, some pirates fall back on good old-fashioned shouting. Just be aware that while your crewmates can hear you no matter how far apart you are, other crews can also overhear your conversations if they get close enough. If you’d like to communicate with other crews over a distance, use your Speaking Trumpet.
Alternatively, there are two other ways to express yourself that sidestep voice entirely. One is Pirate Chat, which is a useful way to send written messages to your crew. Even if you can’t think of anything witty or enlightening to say, you can use Pirate Chat to select from some predefined, contextual phrases which will then be translated automatically.
If you’re more of a visual villain, you can also select an emote from the Pirate Wheel of Emotions to dance, wave, and generally make your feelings known to others, whether they’re part of your crew or not. If all else fails, try pulling out your tankard. Grog, they say, is the universal ice-breaker.
GETTING STARTED: LIFE AND DEATH
Okay, pirates, pay close attention: what I’m about to tell you might just save your life. And if it doesn’t, it’ll at least explain what happens next.
Pirates are tough, but we’re not invincible, and the Sea of Thieves is a particularly dangerous place. I’ll let Seamark scare you with stories of what’s out there, but there are a couple of things you should know right away.
If you get shot, slashed, bitten or otherwise injured, you’ll lose health, and it’ll take more than a few seconds of crouching behind a chest-high wall to shake it off. Oh, and if you’re poisoned or set on fire, you’ll continuously lose health for a while (although of course you can deal with the fire problem by jumping into the water).
And speaking of water… Undersea adventures can be fun, but once you start gasping for breath, it’s time to break for the surface before you black out and drown. And – I really shouldn’t need to say this – falling from high places isn’t much good for you either.
To replenish your health the pirate way, you’ll need to cronch down on a banana or some other food source (grog, sadly, won’t help). If you’ve recently eaten a particularly well-cooked meal, you’ll find its positive effects linger on and help heal your wounds next time you’re injured. You’ll soon learn that some foods restore more health than others.
If you take a lethal blow, your soul will start to shuffle off this mortal coil, but while this is happening, it’s possible for any crewmate who can reach you to revive you with a small amount of restored health. This is sometimes a vital tactic during a fight, but if you’re ready to surrender yourself to death’s embrace immediately, that’s an option too.
Luckily, pirates who do meet a sticky end in any of these ways (or other ways of their own devising) will wake up aboard an ethereal vessel known as the Ferry of the Damned. Its Captain, the Ferryman, saves the souls of the recently deceased and will eventually return you to the living world through a portal where the Captain’s cabin should be. Definitely worth staying on his good side!
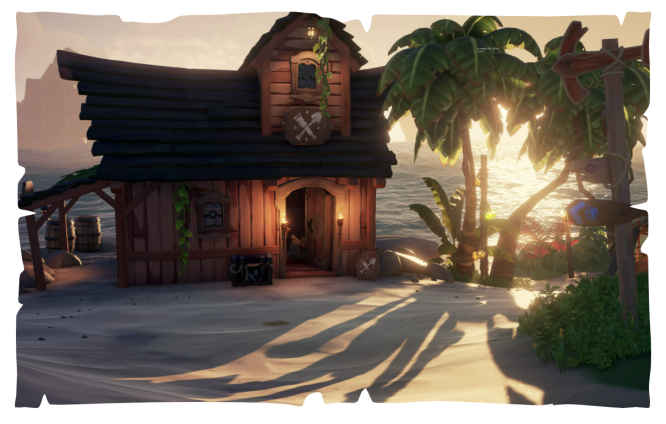
AROUND THE OUTPOSTS: OUTPOST FEATURES
An Outpost is where you’ll start your life on the Sea of Thieves, so you’d do well to learn how to make the best use of them. They’re scattered far and wide, so chances are you’ll have time to get your bearings before encountering other crews.
As you know, taverns stock grog. (If you didn’t know that, you might want to reconsider this whole piracy idea.) Speak to the tavern keeper and you’ll find your tankard filled for free – no-one ever expects a pirate to pay their bills – or you can request a top-up of your ship’s grog barrel. By the door, assuming you’re sober enough to reach it, is a helpful reminder of the Pirate Code.
Outposts may not be bustling city-states, but they’ve got plenty to offer pirates. At the clothing shop, for instance, you can trade gold not just for apparel (though there are plenty of jackets, dresses, boots, gloves and more to browse) but also tattoos and even hairstyles.
Next is the equipment shop, where spending will see you swap your battered old tankards, spyglasses and many other things with bespoke variants to add some serious style to your skulduggery.
The weapon shop, as you can probably guess by now if you’ve been paying attention, is the place to procure different weapons of both the stabby and shooty kind. There’s no difference in power or accuracy between two weapons of the same type, but new designs are a great way to express your personality and accomplishments, even if that’s just saying “I am a person who likes to smash things”.
Unlike the other shops, branches of the Pirate Emporium won’t accept gold earned from your adventures – their currency of choice is Ancient Coins, which can be purchased in packs from the Emporium or occasionally liberated from elusive Ancient Skeletons. They offer a number of exclusive cosmetics for your ship, new emotes, Pirate Appearance Potions and a varied selection of pirate pets (both domestic and exotic) to keep you company as you travel.
Lastly, there’s the Shipwright, whose shop can be naturally be found down at the docks and is the place to go if you fancy renovating your ship – whether that’s a fresh coat of paint for the hull or something grander like a new set of sails.

No matter which shop you visit, there’ll be at least one chest enabling you to root through your belongings and switch between clothing, weapons and anything else you already own. You’ll find chests like these aboard your ship too, so you can pull off a quick-change act while you’re out at sea.
As you explore, you’ll notice a few other strange individuals loitering about the place. These are representatives of the Trading Companies and, as you’re bound to bump into them sooner or later, it’s well worth your time to read up on them and what they have to offer…
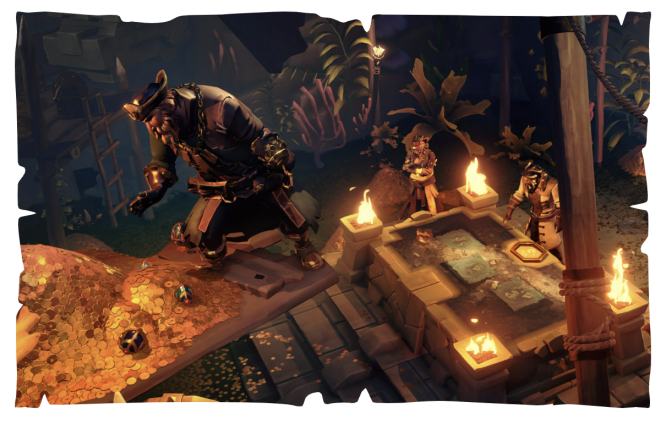
AROUND THE OUTPOSTS: THE GOLD HOARDERS
What’s green on the outside and gold on the inside? The tent you should be searching for if you want to cross paths with the Gold Hoarders! Ha ha, pirate jokes. Self-titled representatives of this Trading Company can be found at any Outpost, and even though they’re not always the friendliest folks, they will stick to their promises if you agree to take on work for them.
Many of the chests buried across the Sea of Thieves are locked up tight, you see, and only the Gold Hoarders have the keys to open them. That’s why they’ll grudgingly give you a share of any sealed treasure chest you bring them, before doing… well, whatever it is they usually do with the rest of the gold. As well as chests, the Gold Hoarders will pay handsomely for the many valuable artefacts you might find such as goblets and curios. Like all Trading Companies, they also accept gems and unlocked chests, even if they’re empty.
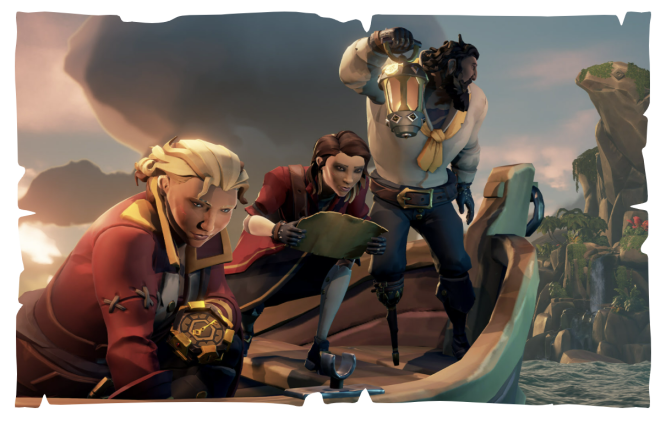
There’s no need to keep your fingers crossed and hope you’ll stumble upon one of these treasures by chance, mind you. The Gold Hoarders offer Voyages, and have a large number of maps for sale that will guide you to the buried chests they so desire. Some of these are your classic ‘X Marks the Spot’ sort of map, where you’ll need to work out which island is being depicted and dig in in the right places to collect the required loot.
Another type of Voyage the Hoarders offer is less of a map and more of a riddle: a sequence of cryptic clues from some forgotten felon or other, and you’ll have to decipher its meaning to find treasure. Don’t think you can skip to the end, either. These riddles have a way of revealing themselves one step at a time, and sometimes you’ll need to perform a certain act or some kind of ritual to see the next piece of the puzzle.
If you do find yourself stumped on a riddle, here’s a piece of Nura know-how: if the clue’s telling you to walk a certain number of steps, bring out your compass and use it to take slow, precise paces. If you’re left scratching your head, try taking another look around – just because the riddle mentions a shark statue, for instance, it doesn’t mean there’s only one of those on the island.
In more recent times, the Gold Hoarders have begun offering another Voyage to those pirates they’ve learned to trust. If that’s you, they may ask you to find and return Vault Keys to prevent their secret Treasure Vaults from being looted! They’ll supply a Golden Wayfinder to help with this, and once you’ve retrieved a Vault Key you can either return it to the Gold Hoarders as agreed, or use it to enter a Vault yourself and face its hazards for even greater risk and reward…
AROUND THE OUTPOSTS: THE MERCHANT’S ALLIANCE
As the closest thing to a legitimate business venture of all the Trading Companies, newcomers are often surprised to find pirates and the Merchant Alliance working together rather than at each other’s throats. Well, Senior Trader Mollie is a wise woman who knows that if anyone’s likely to make it across the Sea of Thieves in one piece, it’s a pirate.
Mollie’s quite a bit stricter than the other Company heads, mind you. You can deliver your chests to any old Gold Hoarder, but the goods the Merchant Alliance pay you to transport must be collected from a particular point on the map and then delivered to a specific recipient who’ll hand over the gold. These Cargo Runs also need to be completed within a certain amount of time to earn the full reward, and the cargo needs to arrive in good condition – you’ll lose part of your payment if you arrive with dried-up plants, soggy cloth or broken bottles in your hold.
Commissions are also available to purchase from the Merchant Alliance, who expect pirates to provide any goods listed out in their Trade Good Ledger, not just deliver them on time. The ledger might require you to procure general supplies, gunpowder barrels or even wild animals that need to be found and brought aboard ship, though the Merchants will provide any special containers or cages that might be needed.
When it comes to animals, chickens are the most polite passengers and will look after themselves once caught. Pigs, on the other hand, need to be fed regularly or they’ll perish without leaving so much as a ham sandwich behind, and snakes will attack anyone who gets close if they’re not properly mesmerised (though this does make them handy for guarding valuables).
Sometimes empty animal cages can be found out there in the world. If you do snag any critters on your travels, Merchant Alliance representatives will accept them as stock along with gems, Gunpowder Barrels and Collector’s Chests, and they’re always happy to buy both fully stocked Supply Crates and Trade Good Crates full of rare tea, spices and so on. Yes, even the ghostly ones. It’s probably market forces, or supply and demand, or something.
In recent times, the Merchant Alliance have started offering Voyages to help them discover the fate of Merchant deliveries that never arrived. These Lost Shipment Voyages will see you follow the route of a missing crew, finding clues to their disappearance and where their journey came to an abrupt end. Once you find the ship, your goal is to retrieve its Cargo Manifest and return it to the Merchant Alliance. If you also found the key to the Captain’s cabin along the way, the goods inside are yours for the taking. Might as well finish the job they started, right?
Ever the pioneering businesswoman, Mollie has also expanded the Merchant Alliance’s business ventures with new Trade Routes. These allow enterprising Emissaries to buy surplus Commodity Crates at one Outpost and sell them at another Outpost where they’re highly sought-after. Be sure to check the Merchant Inventory at an Outpost to find out what’s hot and where the demand lies before you plan your route and start trading. The market is a fickle beast!
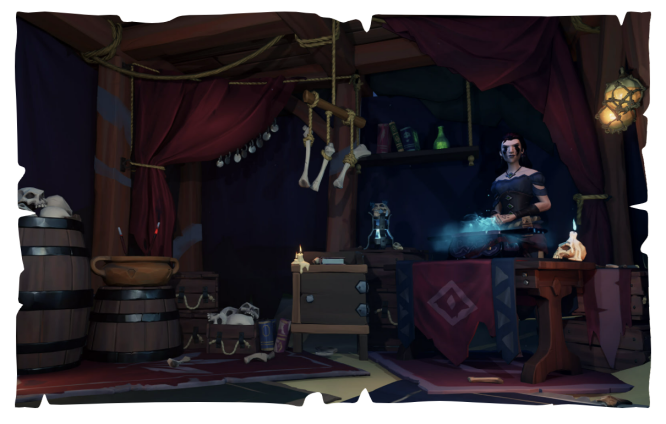
AROUND THE OUTPOSTS: THE ORDER OF SOULS
They may be a group of mystics and magicians, but one thing the Order of Souls could never conjure up is a decent headquarters for their Trading Company. Instead, you’ll find their representatives working out of makeshift accommodations tucked underneath the Pirate Emporium. Just look for the pretty coloured lanterns.
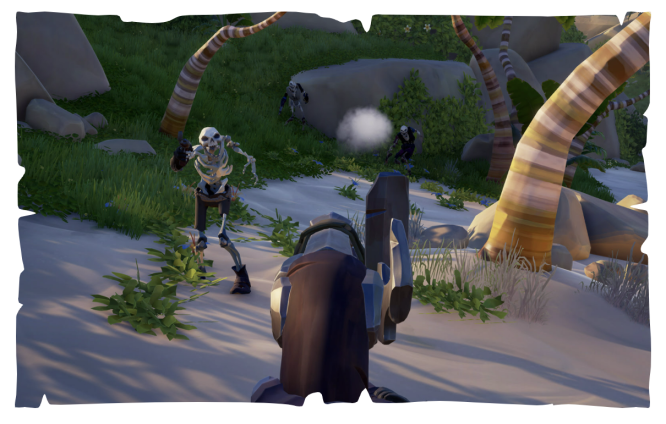
The Order of Souls really have a grudge against skeletons – so much so that those of the Order will reward pirates for hunting down specific targets and bringing back their skulls. These bounties, as they’re known, will see you sent out to find and fight the skellies in question, bringing any requested heads back to the nearest Order representative if you want to be paid. Skulls you’ve found in places like Skeleton Forts (or stolen from other crews) can also be handed over for a reward.
Unlike treasure maps, there’s no precise way of knowing where on an island your bounty will be, although a keen sense of hearing can help. High-ranking enemies like Skeleton Captains may not show themselves at all to begin with, meaning you’ll need to cleave through their crew before your prey finally puts in a personal appearance.
Just like chests, skulls need to be physically carried and you won’t be able to defend yourself while holding one, so make sure the coast is clear before heading back to your ship with your prize. Their eerie glow and whispering sound makes them easy for stowaways to locate, so leaving them alone for too long is just asking for trouble. Oh, and no-one’s going to be impressed by you grabbing your crew’s hard-earned skull and launching into the whole “Alas, poor Yorick” routine, so don’t. Really, just don’t.
More recently, the Order of Souls have expanded their crusade against the undead and will offer pirates with sufficient reputation the chance to sail out and deal with a fleet of Ghost Ships. The spectral skulls recovered from these battles can also be handed into the Order along with gems and Collector’s Chests, although what they do with them next is anyone’s guess…
AROUND THE OUTPOSTS: THE BILGE RATS
Larinna is the latest representative of the Bilge Rats, a group of thrill-seekers on a quest to prove that the real pirate life involves danger, bravado and the ever-present possibility of an exciting death – which they do by dreaming up wild schemes to test the mettle of their fellow buccaneers. (Larinna’s predecessor Duke wanted to write this piece himself, but we tossed for it and I won, by tossing him all the way out of the door and into a pile of crates.)
When they’re not getting swept up in the drama of the day as Duke was liable to do, the Bilge Rats like to keep an ear to the ground for new and exciting developments on the seas. Then they’ll build a Voyage around that, creating challenges that bring pirates together in unusual ways. Take their debut event which tasked crews with locating and occupying the lofty Skeleton Thrones hidden across the Sea of Thieves, or the Reaper’s Run Voyages which encouraged pirates to complete dangerous journeys while marked as a target. If you’d like to see what they’re up to for yourself, you can find the Bilge Rats on any Outpost, generally hanging around in or near the tavern.
Even on days when the Bilge Rats don’t have any new tricks up their sleeves, they’ll still accept leftover loot from their past adventures, such as Ritual Skulls, Ashen Keys and Ashen Chests. Rather than gold, the Bilge Rats award Doubloons for completing their challenges and earning Commendations.
These Doubloons can then be used to purchase clothing, equipment and weapons in the Bilge Rats’ very own Black Market: a shop that offers variations on and additions to previously introduced sets, so you can add the finishing touches to a look you once started or try out a brand new one. Don’t worry about missing a set you’ve been waiting for – each time the Black Market stock is refreshed, older wares are shifted into the Black Market Archive where they’re available indefinitely, just without their introductory discount.
Doubloons can also be exchanged for a Letter of Recommendation, which proves that the Bilge Rats consider you a skilled pirate and automatically increases your reputation with whichever Trading Company the letter’s addressed to. What’s reputation good for, you ask? Hmm… I’ll leave that for Duke himself to explain once he’s sobered up.
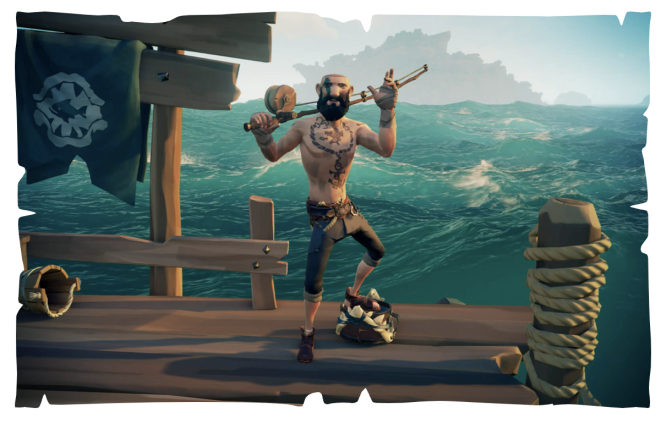
AROUND THE OUTPOSTS: THE HUNTER’S CALL
As you continue your Outpost tour, you may come to realise that there’s a Trading Company who are curiously low on representation. That’s because The Hunter’s Call representatives prefer to set up shop out on the waves where the fish are more plentiful, and so you’ll find their people stationed at Seaposts – smaller, independent trading posts scattered across the map.
The Hunter’s Call comprises Merrick and his extended family, and while these folks may claim to be interested in the thrill of hunting, I have a sneaking suspicion that they really got into business just to keep their bellies full. They value meat and fish, especially if it’s been cooked just right, and delivering them a fine fillet or a perfect pork chop is how you earn reputation with their Company.
The Hunter’s Call representatives don’t sell Voyages to visiting pirates, however. Even Merrick draws the line at taking out a bounty on a chicken. That means you’ll need to rely on your own hunting and fishing instincts to find the rarest specimens, and your chef’s instincts if you’re going to cook the resulting meat to perfection for the largest possible payout. Assuming you don’t just want to eat it yourself for the health benefits, that is. You’d be surprised which types of meat fetch the most coin – even Kraken and Megalodon can be on the menu if you’re able to rustle up the ingredients.
Surprisingly, The Hunter’s Call will also accept gems, as well as the ‘Treacherous Plunder’ you can haul up while fishing – or ‘junk’, as normal pirates call it. Just don’t expect to become a millionaire by handing over soggy old boots.
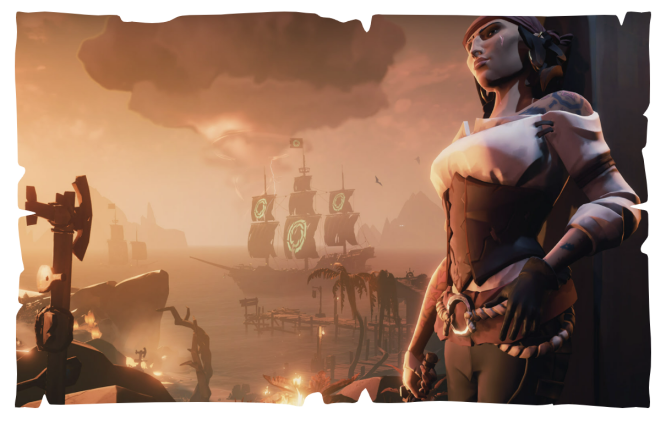
AROUND THE OUTPOSTS: THE REAPER’S BONES
Okay, so they can’t be found at Outposts. And yes, fine, they’re not a Trading Company in the traditional sense and really wouldn’t like me telling you they are. In fact, the hard-hearted pirates of The Reaper’s Bones would like nothing better than to see the other Companies crushed beneath their heel, for pirates to prove themselves as treasure-stealing titans of the seas – particularly those who represent their own cause. And that vendetta brings with it the chance to turn a tidy profit.
Put simply, the masked Reapers (via their mysterious spokesperson, the Servant of the Flame) will reward you for turning over any treasure coveted by the other Companies to them instead. Chests, cargo, skulls – they’re not fussy as long as it leaves their rivals empty-handed, and if you proved your dominance by taking that treasure directly from another crew, even better.
If that sounds too good to be true, I should add that this heavy-handed approach to business means that The Reaper’s Bones can’t or won’t send representatives of their own to Outposts. Instead, you’ll have to venture to the foreboding Reaper’s Hideout to hand over your plunder, which means you’re a lot more likely to bump into another crew of Reapers with itchy trigger fingers while your hold is full of valuables.
There are certain treasures out in the world that mean very little to the Trading Companies but are worth a great deal to The Reaper’s Bones, although carrying them aboard your ship tends to make you a visible target on the maps of other crews: Reaper’s Chests and Reaper’s Bounties are found inside shipwrecks, while mysterious Gifts might well be looted from the vault of a Skeleton Fort.
What the Reapers desire most, though, is the broken remains of flags flown by Trading Company Emissaries. Yes, even their own, if it shows the attackers to be a truly superior crew…
TOOLS OF THE TRADE: NAVIGATIONAL TOOLS
You know what kind of pirate sails without pockets stuffed full of useful items? The dead kind. It’s an unforgiving world out there, and you need every advantage you can get. That’s why you’ll soon discover your personal inventory is packed with items that will prove useful no matter what fine mess you’ve gotten yourself into.
Navigational tools include anything that helps you get from A to B more easily. Or, as the case may be, from A to B to an Outpost so you can spend everything you stole from B.
Compass: This is just the regular kind of compass, nothing magical about it, which means it’s aligned to the north as you’d expect unless you’ve had the bad luck to be caught in a storm. As you move around, it’ll spin to show you which direction you’re facing. You can also hold it up and count out slow, deliberate steps if you need to measure your paces. Compasses are so useful, you’ll find that every ship has one of its own mounted next to the wheel. No expense spared!
Spyglass: It’s not an eyeglass or a telescope, it’s a spyglass. Got it? Good, these things are important. The spyglass uses science and other boring stuff to allow you to see really far when you look through it, meaning you can spot landmarks, treasure and enemies at a distance. It’s especially effective when you’re up high, or in the crow’s nest. Remember: the glint when you use a spyglass means that although it’s easy for you to spot other pirates, they’ll be able to spot you too.

Lantern: Move around with one of these in your hand to light up the surrounding area. You can even raise the lantern higher to shine more light, which is sometimes a necessary step in solving a riddle. Of course, there are times when being seen is a bad idea, so you can also shutter the lantern to conceal it without having to put it away. Your lantern can also be used to ignite campfires, braziers and beacons. Ships have lanterns too, which can be extinguished if you’re being chased or need to be stealthy.
Pocket Watch: This reliable timepiece not only marks which hour of the day it is, which is useful if you’re underground, but the central number on the watch’s face tells you which day of the month it is, from the 1st to the 30th. Maybe you just want everyone to know when it’s your birthday, or maybe you’ve got a hold full of cargo that must be delivered by a certain date – either way, the pocket watch is the best way to keep track.
TOOLS OF THE TRADE: PRACTICAL TOOLS
Compasses, lanterns and other navigational aids are all well and good, but there’s no point finding buried treasure if you have no way to dig it up or celebrate afterwards. That’s why, as a pirate born and bred, you’re sure to have a number of multi-purpose items about your person to help you finish any Voyage in style. These include:
Tankard: This carries grog to your face so you can drink it. By default, the tankard in your inventory will have some grog in it – strong stuff, even by pirate standards, and it only takes a single serving to get you all unsteady. If you’d like more, you can refill your tankard at your ship’s grog barrel or by talking to a tavern keeper. Drink too much grog too quickly, however, and… well, you’ll find out. The tankard’s other use? Raising it to say cheers to your trusty crew!
Speaking Trumpet: The Speaking Trumpet amplifies your voice when you use it, allowing your words to carry much further than they normally would. Since your crew can already hear what you’re saying at all times, the tool’s main use is to call across to other ships from a distance. Perhaps you’ll agree upon an Alliance, make some new friends and sail together forever! I mean, stranger things have happened.
Shovel: This is used to uncover chests, bait and other items buried in the sand or soil of the islands. It’ll take a good few uses to free even the cheapest of treasure chests, so make sure the coast is clear before you start to dig. If your crewmates dig in the same place, you can dramatically speed up the work.
Bucket: This humble household item can save your life. Seriously! If your ship starts to fill with water, only the bucket can help you fight the flood and stop yourself from sinking. A full bucket can also be used to water plants, douse fires (including extinguishing anyone who might be ablaze) or stop Gold Skeletons in their tracks. You can also throw up in a bucket and then use the vomit as a projectile to temporarily blind someone, just… don’t expect them to be your friend afterwards.
Fishing Rod: You can try fishing in pretty much any body of water, from an island rockpool to the wide open sea, but you might find you have more success if you look at your Item Radial while the fishing rod’s in your hand. This will enable you to apply a piece of bait to the hook (assuming you’ve found some), which is bound to come in handy when you’re trying to land a lunker or two. Remember, any fish you catch counts as food even when it’s raw, so make sure you’ve got space in your inventory before trying to remove it from the line.
TOOLS OF THE TRADE: VOYAGES AND QUEST ITEMS
If you decide to do some work for one of the Trading Companies, sooner or later you’ll find yourself purchasing a Voyage from one of their representatives. Each Company will let you purchase up to three Voyages per day (that’s in local Sea of Thieves time), and you can carry several at once. You won’t find them cluttering up your inventory – instead they appear in your Quests tab, where they’ll remain until you propose them and your crew successfully votes on them.
When you start a Voyage, you’ll find that your inventory has been bolstered with useful maps, riddles, journals and other Quest Items that provide clues to your destination. You’ll find these on the Item Radial by default. A single Voyage might provide you with multiple clues – generally speaking, the more expensive the Voyage was to purchase, the more challenging and rewarding it will be!
Buying a Voyage isn’t the only way to get maps, bounties and the like, mind you. They can also be found bobbing about as a Message in a Bottle, stuffed inside a supply crate or barrel or even dropped by skellies you encounter along the way. Documents you find in this way don’t need to be voted on – they get added to your Quest Radial automatically, so it’s up to you and your crew to decide whether to pay them any heed.
Once a particular piece Quest Item is no longer needed (maybe because you’ve found the treasure marked on a map, or dispatched a bounty target) it’ll automatically disappear, so you don’t need to worry about keeping track of where you’ve already been. Good thing too, as if there’s one thing any pirate hates, it’s sorting out the paperwork…
TOOLS OF THE TRADE: SUPPLIES
Crates and barrels litter the Sea of Thieves like so much… litter, I suppose. Some are from shipwrecks, but others have just been forgotten about and can be found all over Outposts and islands. No-one’s going to mind if you rifle through their contents and help yourself to a couple of things. Inside, you’ll find the supplies you’ll need for daily life at sea, which come in all shapes and sizes but fall broadly into four categories.
Food: Whether it’s the classic banana or a freshly caught Splashtail, food will help you recover from injuries and, if it’s been cooked to perfection, keep you healing for a while afterwards. You can only carry five different food items, so remember to store spare supplies in the ship’s food barrel if you’re planning on doing some fishing. Even raw fish take up space. Fish and meat are harder to find by scavenging, while fruit and coconuts are commonplace.
Wooden Planks: No, not the walking kind. These stout lengths of timber will help you patch up your ship if it takes damage. They’re not the most exciting discovery in the world, but it’s smart to keep some handy at all times. They’re also a vital part of setting a campfire.
Cannonballs: They may be heavy, but there’s no harm in holding on to a few of these time-honoured argument-settlers. As you might expect, cannonballs are expended whenever you fire them out of cannons. Who knows where they end up after that? Not me. (There are many types of cannonballs and similar ammunition, but I’ll leave that for Seamark to explain.)
Bait: Slimy earthworms and plump leeches might not be the most appealing things to stuff in your pockets, but if you’re angling to be an angler they’re a necessary, wriggly evil because different species of fish have a preferred choice of snack. Bait can be dug up from earth or grass (earthworms), sand (grubs) or shorelines (leeches). You can hold 10 pieces of bait in total, not counting anything that might be attached to the hook of your fishing rod. You can nibble on your own supplies in a pinch, but even well-cooked bait will prove a poor replacement for fruit or fish. Still, if needs must…
Meanwhile, there’s nothing worse than arriving on an island with your pockets packed full of provisions, only to find some really tempting supplies that you simply can’t afford to carry. Happily, you’ll sometimes stumble upon the ever-useful Storage Crate while you’re out exploring. These can hold large quantities of supplies and vastly increase your inventory space, the downside being you have to carry the crate around with you. Better yet, they normally come with other people’s stuff – the best kind of stuff – inside them. Wood, Fruit and Cannonball Crate variants each hold a particular kind of supply in great quantities.
Seeing a gap in the market, the Merchant Alliance have now started selling Fruit, Wood, Cannonball and Storage Crates at Outposts, so stocking up for your next Voyage couldn’t be easier. Of course, the convenience of gathering supplies this way will cost you, and don’t think you’ll be getting a Fruit Crate full of pineapples either. The Merchant Alliance are running a business after all, and fruit doesn’t grow on trees! Well… you know what I mean.
Last but not least, Rowboats always contain a chest for storing supplies, which means they’re a bit like having a Storage Crate that carries you rather than the other way around! Hey, even pirates feel lazy sometimes.
TOOLS OF THE TRADE: MUSICAL INSTRUMENTS
I’m not really a shanty sort of person, but there are plenty of pirates who like nothing better than making music whenever the opportunity presents itself. Lucky for them that there’s no shortage of shiny musical instruments for sale in the equipment shop, though you’ll find a basic concertina, banjo, drum and hurdy-gurdy in your inventory to begin with.
Once an instrument is in your hands, you can either play a random shanty or bring up your Item Radial, hop to the shanties and choose the ditty you desire most. If one pirate starts playing a shanty, anyone nearby can join in on their instrument of choice, so it’s easy to form an impromptu band when you want to celebrate a successful Voyage or taunt your enemies as they sink into the briny deep. Playing while sober obviously gives the most tuneful results, but I’ve been at a few gatherings where the collaborative drunken shanties were something to behold…
Fun as they are, instruments have practical uses too. I heard that old Merrick once gathered a musical troupe to summon a sea monster, but I don’t believe a word of it. What you can try, though, is using music to mesmerise any aggressive snakes you come across. They’ll sit in a happy trance as long as someone keeps playing, which makes catching and transporting the hissy little bootlaces far less dangerous.
Certain parts of the world will react in unexpected ways when music is played. There are riddles that require you to use an instrument in a particular location, and beyond that, I remember once seeing a group of Pirate Legends in a tavern playing a tune while glancing furtively around. Come to think of it, I never did work out where they went…
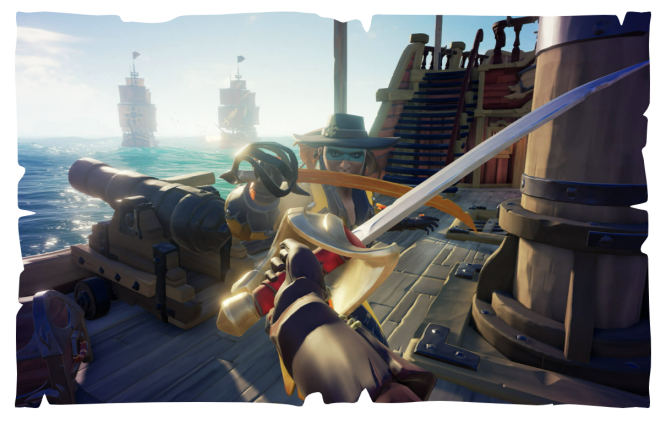
COMBAT: SWORD COMBAT
Name’s Seamark. You can call me ‘Sir’. Nura said those Academy lubbers would pay me if I agreed to teach you how to fight, so here we are. Don’t make me repeat myself.
Let’s start with your cutlass. Every pirate owns one. Some are more expensive than others but that’s just showing off, it don’t make ’em any stronger.
If you go in swinging, you’ll attack with a short combo of three quick slashes – left, right, left. It’s fast, but it’s an attack that’s easy to block or dodge. If one of your blows does miss, the combo is broken and you may not recover from your swing in time to block a counterattack. Land the whole combo, though, and you’ll do some solid damage while knocking your opponent back.
If you ready an attack until the tip of your cutlass is facing forward, you’ll perform a heavy lunge. This does a lot of damage if it connects, but miss your target and you’ll be left out of breath, unable to move or switch weapons for a couple of seconds. All the same, risk-taking fighters say it’s worth it because the heavy lunge can’t be blocked.
If you jump just before you start to lunge, you’ll leap forward a long way when you attack. Good for closing the distance or crossing wide gaps, but it can take practice to get the timing right. Don’t try it in high places until you get the hang of it.
You can also block incoming cutlass strikes with your own blade. Blocking an attack combo pushes you and your opponent apart, giving you a little space to rethink and re-engage. You can move around while blocking, and if you jump you can dodge in any direction.
That’s it.
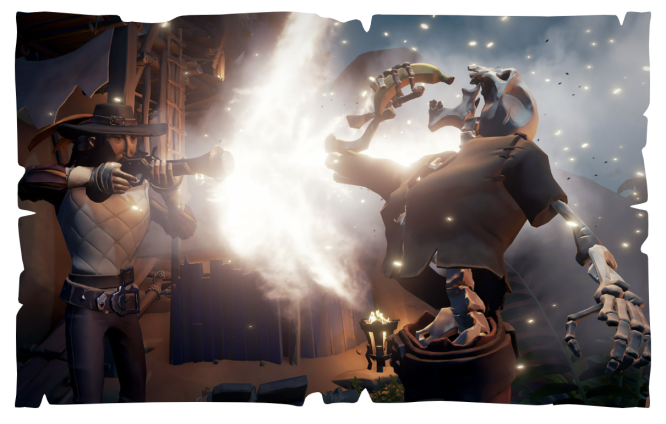
COMBAT: FLINTLOCK PISTOL COMBAT
The pistol is the first of three gun types you’ll find out here on the Sea of Thieves, and probably the most popular among novice pirates. It’s light, but still reasonably powerful. Each shot you land on an enemy will do almost the same amount of damage as a sword lunge, but unlike a cutlass, the pistol won’t give you a chance to knock your opponent back.
Pistols have decent range, so you can attack with ’em while staying out of lunging distance, or biting distance if you’re underwater and fighting off toothier foes. Get too far away from your target and your shots will be shrugged off, so finding a middle ground is important.
If you want your shots to land, you might find it easier to stand and aim while you’re still getting the hang of the thing. You can always shoot from the hip while moving, and in the heat of the action you’re likely to find yourself doing just that, but you’ll find you have greater precision if you look down the pistol’s sights before firing.
The biggest advantage of a pistol is that it’s slightly faster to load your next round than with other types of weapons. That fast second shot might just save your skin one day.
COMBAT: BLUNDERBUSS COMBAT
Is this the most famous pirate weapon? Maybe. The unique quality of a blunderbuss is that each ‘shot’ is actually 10 distinct pellets at once. These pellets are fired out randomly with a very wide spread, and the more of ’em that hit your enemy, the more damage you deal.
In the right circumstances, the blunderbuss is the most powerful weapon. With it, you can kill a pirate in a single hit as long as all the pellets you fire hit home. Maybe you can catch ’em unawares, or take advantage of a missed cutlass lunge. The rest of the time, its lack of accuracy means you’re probably best off using the blunderbuss for situations like taking on a whole gang of skeletons at once, or causing havoc inside a ship where there’s not much room for your opponents to hide.
It doesn’t make a huge difference, but you can aim a blunderbuss more precisely by squinting down the barrel rather than firing from the hip. Just be aware that it takes a long time to load each shot, so if you miss… well, best if you don’t miss.
Considering the damage it dishes out and the way it can knock enemies back when fired at close range, the blunderbuss is an excellent choice in the right hands and at the right time, but that doesn’t mean it’s always the best option.
COMBAT: EYE OF REACH COMBAT
You ever see a thing like this outside the Sea of Thieves? Crazy what they can think up nowadays. The Eye of Reach is pretty much a rifle with a spyglass attached, which makes its shots accurate over distances. We’re talking long distances. If you want to settle a score without bothering to leave the crow’s nest, this is the weapon for you.
On the other hand, you won’t be winning any quick-draw duels with an Eye of Reach. You can fire it blind in a pinch, but you’re not giving yourself much chance of hitting a target if you’re trying to aim down the sights while running around like you’re on fire. Easier to stand still and line it up just right whenever you have the opportunity. Also bear in mind that just like a spyglass, using the sights will cause a gleam that could give away your crafty sniping spot.
Shots from an Eye of Reach are powerful, more so than pistol fire, but they’re not enough to take out a healthy pirate with a single round. Unless you’re very good at hitting a moving target, it’s best to think carefully about when and where you’re going to take your shot. Looking for a Gunpowder Barrel or a skeleton that’s already taken a few blows can be more effective than trying to finish off a fighting fit foe who’s ducking and dodging towards you with their own weapon drawn. Pick the right tool for the right job, and use your surroundings.
COMBAT: AMMO AND RELOADING
Maybe there are bullets to burn where you come from, but here on the Sea of Thieves, ammunition is precious. Whichever type of gun you’re using, you’ll find that you can hold up to five rounds for it. Even if you’re carrying two different types of weapon, that means you’ve got a maximum of 10 shots before your chambers are empty, so you need to make all of ’em count.
If you need to replenish your ammunition, visit the Ammo Chest aboard your ship. That’ll refill your supply for anything you’re holding, and the chest itself will never run dry. You can also find Ammo Chests dotted around on certain islands, not to mention in Skeleton Forts. That’s good. No-one wants to leave a fight half-finished and head back to the ship just to get more bullets.

If luck is on your side, you might also stumble upon an Ammo Crate. You can think of these as portable Ammo Chests, but the downside is they can only hold 50 replacement rounds. If you want to refill an Ammo Crate, take it to an Ammo Chest, like the one on your ship. The Merchants will buy ’em from you too if they’re full.
Although you can carry five shots for each weapon, remember that it has to be reloaded after every shot and you need time to do that. If you stow your weapon or switch to a different one before you’ve finished reloading, you’ll have to start over when you switch back to that weapon.
Oh, and remember that if rival pirates board your ship, they can use your own Ammo Chest to restock. Never a good idea to let your enemy take control of the bullet supply – not if you want ’em sent scurrying from your deck empty-handed. Understand? Good.
COMBAT: THROWABLES
You ever get the urge to take out more than one pirate at the same time? I normally pick up two at a time and knock their heads together, but there are other options. Throwable weapons, for example.
My favourite type of throwable is the firebomb. I guess this doesn’t ‘kill’ in the old-fashioned sense, and you can’t use it to punch a hole in a ship, but when you chuck one it’ll set fire to anything nearby. Fire hurts pirates, obviously, and anyone they bump into while they’re burning might catch alight too. Fire doesn’t spread on land, but it will eat its way through your ship if you don’t put it out.
Oh, you can launch firebombs from your cannons, too. Try it. It’s wild.
Blunderbombs are a little different, and take their name from all the blunderbuss pellets inside ’em. Score a direct hit on an enemy with one of these and they’ll take damage, as will anyone caught in the blast area. The knockback effect will send ’em flying too, so you can blow someone clean off a ladder or over the edge of a cliff if you have good aim. Blunderbombs fired out of cannons hit even harder and can leave a ship rocking on the waves, though they won’t actually tear any holes in it – you’ll want to rely on good old-fashioned cannonballs for that.
Here’s the thing to be wary of when it comes to throwables: you may not be able to accidentally slice your shipmate’s arm off during a swordfight, but anything you throw can hurt you and your crew as well as your enemies. If you’re willing to take the risk, your ship will have a small supply of throwable weapons aboard when you set out, and you can find more in barrels and the usual places. If you’re very lucky you might even dig up a crate of firebombs, which can hold as many as 20 of ’em. Happy days.
LIFE ABOARD SHIP: WELCOME ABOARD
You’ve obviously had some experience on the waves if you’ve made it to the Sea of Thieves, but it’s still worth covering the basics of shipboard life, because things work a little differently out here.
As I mentioned when I wrote about crews, there are three different kinds of ship: the Sloop, the Brigantine and the Galleon. Sloops are designed for two pirates at most, Brigantines for three and Galleons for four, so the size of your crew will partly determine what type of ship you end up sailing. Of course, there’s nothing stopping a confident sailor from tackling one of the bigger ships with a smaller crew, or even solo.
As the smallest of the ships, Sloops are pretty nimble when compared to other, bigger options. They can fit through tight spaces, make sharper turns and weigh anchor nice and quickly. They don’t have much in the way of furnishings, though – no Captain’s cabin and no working brig – and they’re armed with just two cannons, making it hard to launch a sustained assault. Storage is almost all below deck. You need to learn how to pick your battles when using a Sloop, but an experienced pirate can get by just fine – especially as the wheel, sails and capstan are all within easy reach of a solo sailor.
At the other end of the scale sits the majestic Galleon. Three sails give these huge ships quite the commanding presence, and their eight cannons mean they can unleash serious firepower when needed. Galleons have three decks, too – the lower deck doesn’t have anything in the way of useful supplies, but it’s a good place to hide valuables (just remember to check down there for any leaks if you take damage). Of course, the trade-off for power is manoeuvrability, especially turning speed.
Brigantines sit somewhere between the Sloop and Galleon when it comes to size, speed and steering. There’s also a fourth type of vessel I should mention: the humble Rowboat. These aren’t provided as standard, but if you find a spare Rowboat on your travels you can push it into the water and climb aboard. Once you’re sitting comfortably, you’ll need to put both oars to work. If you bring the Rowboat up behind your ship, you’ll find that you can winch it out of the water and bring it along for the ride. There’s even a little chest on board! Aww.
LIFE ABOARD SHIP: WORKING THE SHIP
As I realised on the fateful day I had to extract my wedding ring from a mostly dead shark, sometimes the best way to learn something is by doing it. That’s why I’ve decided to explain how to crew a ship by describing what you’d do to set sail, and why. I’ll imagine we’re on a Sloop, but the rules are the same for any ship type.
First, we’ll set the sails. Some folks like to raise the anchor first, and each to their own, but if you’re a halfway decent crew you’ll get into the habit of doing both jobs at once. Each mast has two sets of controls for its sails, one to port and one to starboard, and each set of controls lets you adjust sail length – how much the sail is lowered – and angle. (On the Sea of Thieves, ‘raising’ sails furls them away and ‘lowering’ sails expands them.)
When your sails are lowered, they’ll catch the wind and your ship will move. The more sails you lower, the faster you’ll go, but be aware that when the sails are fully lowered it can be difficult to see what’s on the horizon. If you’re part of a crew, it might be wise to send someone up to the crow’s nest to give advance warning of what’s ahead. Oh, and angling your sails so that the wind is blowing directly into them – from behind, obviously – will earn you more speed.
Not that you’ll be going anywhere at all until the anchor’s been raised. You can do that by using the capstan. On a Sloop, that’s located up by the helm at the stern. On a Galleon it’s closer to the bow, and on a Brigantine it’s in the middle of the deck. The anchor has to be fully raised before you let go of the capstan or it’ll just splash right back down again, though you can speed up the process by having more of your crew working the capstan at the same time.
To stop the ship, either raise your sails and gradually glide to a halt or use the capstan to swiftly lower the anchor and stop dead in your tracks. The latter approach is faster, but if your wheel’s not straight, expect the ship to spin as you come to a standstill.
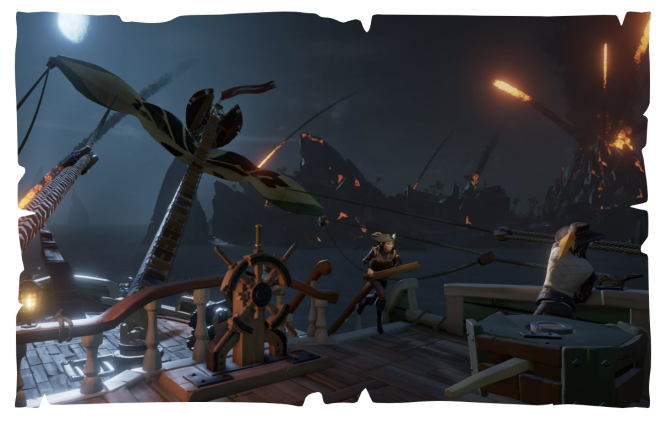
Speaking of the wheel, steering the ship is something you’re probably going to want to do. Turn the wheel left or right to alter course, and straighten out again by returning it to the centre: when you see the central peg lined up with the top of the wheel and hear a ‘thunk’, you know it’s realigned. It’s easy to lose track if you don’t pay attention, especially on a Galleon where the wheel can go through many rotations either way.
As for picking a destination, that’s best done by using the map table. Every ship has one, and it’s adorned with a full map of the Sea of Thieves plus a marker that symbolises your ship. You can place indicators on the map, spy on other ships you’re in an Alliance with or see the location of any crew flying the Reaper’s Mark flag. Just keep in mind that those crews will be itching for a fight…
LIFE ABOARD SHIP: SHIP’S WEAPONS
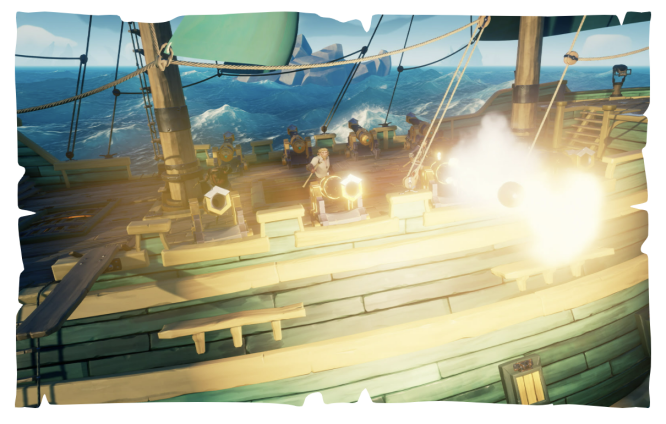
I’ll leave the ins and outs of ship combat to someone else, but your ship’s cannons are pretty hard to ignore, so here’s a quick overview. The number of cannons at your disposal depends upon the size of your ship, but they’re always positioned above deck. That means you’ll be in harm’s way while using them, so if you’re injured it might be better to busy yourself elsewhere aboard the ship unless your situation’s really desperate.
No matter how many cannons you have, they’re nothing more than fancy decorations without cannonballs, so make sure you’ve got plenty to hand before sailing into a fight. The red-tinted supply barrels aboard your ship can store hundreds of replacements, and you’ll start your adventure with a supply of 45 (or 40 on the smaller Sloop). While these barrels are located next to the cannons on a Sloop, if you’re crewing a Brigantine or Galleon you’ll need to nip below decks to replenish your supply.
Your cannonball barrels also contain another type of projectile: chainshot. These whirling dervishes barely make a dent on the hull of a ship, but if they strike the mast, capstan or wheel they’ll do a huge amount of damage – enough to topple a mast with a single blow. They can leave your target ship a sitting duck once you get the hang of firing them. (Blunderbombs, firebombs, pirates and their pets can also be fired out of cannons. Who’d be so heartless as to launch a cute little capuchin into the sky, though? Heh heh…)
Harpoons can be found at the front of your ship, and while they’re not strictly a weapon they can still help you get an edge over your opponents. If you harpoon something small, like a supply barrel, you’ll reel it in and be able to plunder its contents without risking a dip into shark-infested waters. You can even pull another pirate aboard this way, though they might not thank you for the free ride.
Hit a larger target, like another ship, and your harpoons can be used to pull you closer. The same applies to rocks, docks and other scenery, so the harpoon is a useful tool for getting your ship nice and close to an Outpost or a friendly vessel.
Lastly, let’s talk about Gunpowder Barrels, sometimes known as Kegs. The shipwright won’t load you up with any of these, and for good reason: they make a big boom if treated too roughly. If you’re brave enough to bring a few aboard, though, you can toss them overboard during a chase and lure your opponent into a collision – or ignite them yourself to cause a mighty explosion.
Gunpowder Barrels can be a great way to deal with ships approaching from the stern, where your cannons won’t reach, but you’ll want to think carefully about where you store them. Many a proud ship has met her end thanks to a deck littered with high explosives meeting a stray cannonball. Don’t say I didn’t warn you!
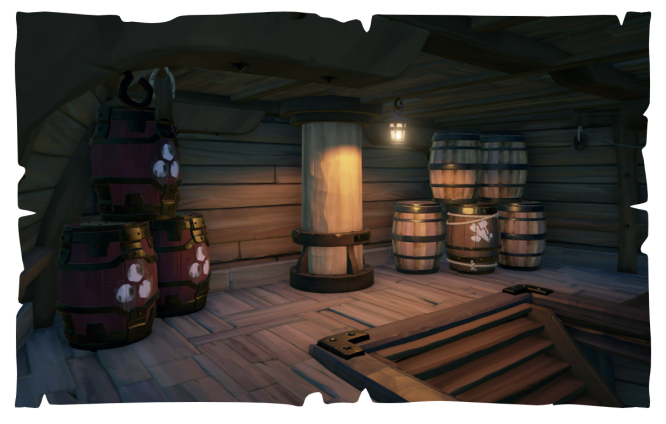
LIFE ABOARD SHIP: SHIP SUPPLIES AND CHESTS
They may not be luxurious, spacious or fresh-smelling, but the lower decks of a ship have plenty to offer the crew besides warmth and shelter. Let’s run through the many useful receptacles and resources that you’ll spot squeezed into the innards of every ship type.
Food Barrel: The place to store fruit, meat and fish to prevent impulse snacking. Has a fish ’n’ drumstick symbol on it.
Wood Barrel: Filled with the lumber you’ll need for repairs. Its symbol is two crossed planks and a mallet.
Cannonball Barrel: Red in colour and holds many, many cannonballs. Bet you can’t guess what the symbol is.
Grog Barrel: Contains a healthy amount of the good stuff, which is the best way to quench your thirst when you’re out on the waves. If you experience grog pangs while away from your ship, speak to a tavern keeper to get your tankard refilled.
Stove: This ultra-compact, energy-efficient unit can be used to fry up foods such as meat or fish. Be warned that unattended food left on the stove will start to burn and can eventually cause your ship to catch fire. If that happens, you might need to use the…
Water Barrel: The attached pump can be used to add water, which you can then scoop up in a bucket and do… you know… water stuff.
Ammo Chest: Visit this to replenish the ammo for all your firearms.
Armory: Choose between different combinations of cutlass, pistol, blunderbuss and Eye of Reach. You can only take one of each weapon type at a time, and two weapons in total.
Clothing Chest: Fancy looking fancy? Use this chest to access any clothing and accessories you’ve purchased.
Vanity Chest: Change up tattoos, beard styles, eyepatches and peg legs with the contents of this mysterious box. How does it work? Official pirate secret.
Equipment Chest: Swap out your spyglass, pocket watch, speaking trumpet and so on.
Pet Chest: Bring out any pets you’ve purchased from the Pirate Emporium. Also allows you to change their outfit and name.
Pet Cage: Smaller pets can be placed in the Pet Cage, which prevents them from roaming the ship once the door is closed. When out of the cage, they’ll stick close by their owner during their travels.
As a reminder, chests (with the exception of the Ammo Chest) can also be found dotted around Outposts, so you don’t have to dash back to the ship to pull off a quick-change act – look for them outside the appropriate shops if you’re in a hurry. The Ferry of the Damned also has an Armory of its own, so you can return to the world ready to avenge your defeat with a suitable weapon in hand.
LIFE ABOARD SHIP: SHIP DAMAGE AND REPAIR
Nothing stings quite like the first time someone puts a hole in your shiny new ship, especially when it’s followed by several more holes and the unmistakable sound of your mast collapsing. Luckily, even the most severe damage can be patched up using wooden planks without any need to visit a shipwright, as long as you don’t sink first.
Damage can come from projectiles, fire, storms, explosions, collisions, sea monster encounters and sailing into the Devil’s Shroud, so let’s take a look at what happens next.
Water: The sea is great, but it’s best to keep it outside your ship. Not only does water below decks make it harder to complete quite important tasks such as breathing, your ship will sink after taking on too much of it – going down with all your supplies and leaving your loot bobbing on the waves until that finally sinks too. Your ship can take on water from unrepaired hull damage, sailing through storms or bringing a particularly tricky Cursed Chest aboard. Handily, you can use the bucket in your inventory to scoop up the water and throw it back overboard where it belongs. This is called bailing, and it might just save your skin one day.
Hull Damage: Hull breaches, or ‘holes’ as normal people call them, are a problem because they’ll let water into your ship, eventually causing it to sink. Holes start off small and take a single wooden plank to repair. If a hole takes another hit from a cannonball, it’ll get bigger, let in more water and take longer to repair – although some powerful attacks will punch a large hole through the hull right away. Water will pool on your lowest deck, so if you can’t find the source of a mysterious leak, check everywhere in case you missed a spot… and don’t let the water level reach the top deck!
Capstan Damage: A broken capstan isn’t ideal if you’re trying to make a speedy getaway. Missing pegs mean fewer crew members can help raise the anchor, so it can be an effective way of slowing down an enemy ship’s escape.
Wheel Damage: Pegs fall off the ship’s wheel when it’s hit, and this slows down turning speed, which could lead to enemy ships running rings around you. Worse still, you might end up taking damage from a rock or Gunpowder Barrel you can no longer avoid. The wheel may seem like a low priority when you’re fighting another ship, but it’s secretly a strategic target in the right circumstances.
Mast Damage: It takes three solid cannonball strikes (or one well-aimed chainshot) to bring down a mast, but repairing one after it’s fallen is time-consuming and costly. The mast has to be winched back into position using the ship’s ropes and pulleys, then several wooden planks must be applied to the fracture point. Needless to say, a single-mast Sloop will be dead in the water if you can take down its mast, while larger ships will suffer a reduced top speed until repairs are made. Not only is taking down your opponent’s masts an effective strategy, it’s a great way to show off your sharpshooting skills.
Fire Damage: Your ship needs to smoulder for quite a while before any damage starts to manifest, so it can be tempting to leave a small fire unattended while you’re busy fighting for your life. Fire is insidious, though, and can spread from one deck of the ship to the next, which means you may think you’ve extinguished the last of it only to find a previously doused area has been reignited. It’s also surprisingly easy to scorch yourself while running around patching holes. Treat fire with the respect it deserves, especially if you’ve got livestock aboard. The Water Barrel on your ship isn’t just there for decoration – use it!
LIFE ABOARD SHIP: VOTING ON VOYAGES
It might not be the most commanding presence on the ship, but every vessel has an unassuming Captain’s Table on board that your crew will need to gather around before embarking on Voyages. On a Galleon, this table serves as a desk in the Captain’s cabin. On a Brigantine, the table can be found below decks underneath the stairs, and on a Sloop it’s under the canopy opposite the map table.
In any case, when you make use of the table, you’ll be given the option to ‘Propose Quest’ assuming you have one or more Voyages (or Tall Tale checkpoints) in your Quests tab. Each member of the crew is allowed to place down one Voyage at any given time, and all crew members can examine the details before finally voting on the Voyage they want to undertake. A majority vote is needed to clinch it, but if you’re sailing solo, naturally yours is the only vote that’s needed.
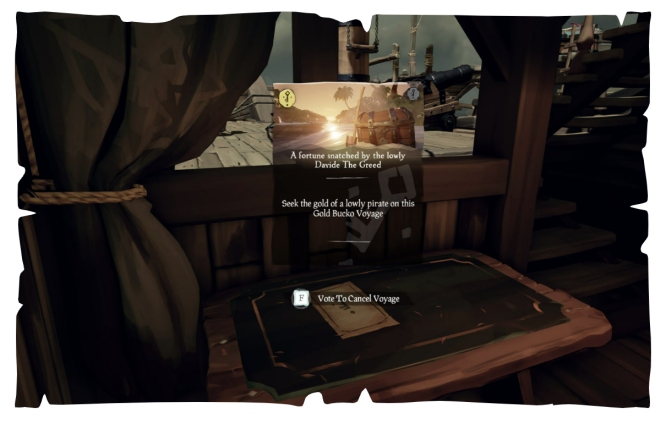
Once everyone in your crew has had their vote, the Voyage gets underway and any Quest Items such as maps are placed in your inventory. If you change your mind, you can reclaim a Voyage you’ve placed down before votes are taken. But once the Voyage is underway, beware – if the crew members vote in favour of cancelling your adventure, the Voyage Scroll will be gone for good.
The lesson here? Make sure you’re willing and able to see the job through before you propose an expensive Voyage! Don’t worry about leaving your crew behind with an unused journey on the table, as any Voyage they haven’t committed to will be returned to your pockets safe and sound once you’ve departed. Don’t ask how.
LIFE ABOARD SHIP: USING THE BRIG
Not all pirates are perfectly well-behaved. I’ll let that revelation sink in for a moment.
If you’re sailing as part of a Closed Crew, I’d like to think you can trust the person you’re inviting aboard. If you’re part of an Open Crew, though, you’ll find yourself allying with an unfamiliar face from time to time.
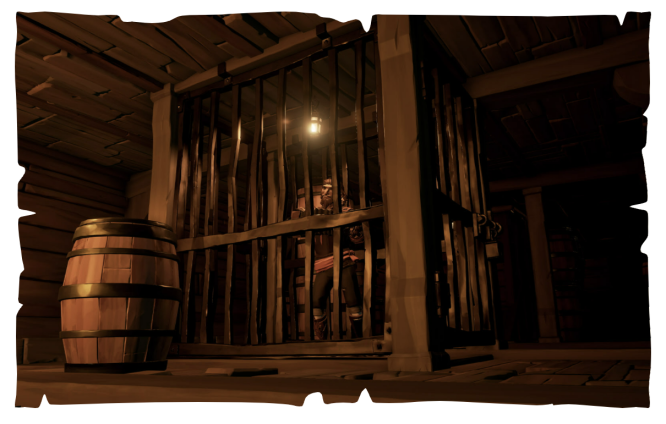
If things don’t go so well, and your adventures are being disrupted by a crewmate who’s taken to wasting supplies, starting fights, dropping treasures overboard or generally violating the Pirate Code, you have the option of using the ship’s brig as a last-ditch measure. (That’s the jail cell, not to be confused with the informal name of a Brigantine.) Only larger ship types contain a brig, mind you – they’d be a bit pointless on a humble Sloop where every vote would be a tie.
Yes, every other member of the crew must vote unanimously in favour of sending an offending pirate to the brig, and this is something you can do from the ‘My Crew’ menu. If the vote is agreed, the pirate in question will find themselves locked up on the lower deck of the ship. They can still communicate with the rest of the crew, which means there’s always a chance of working things out, but they won’t be able to assist in repairing the ship or warding off attacks.
When you’ve decided enough is enough, you can vote once again to release the rehabilitated rascal from confinement, though there is a minimum sentence that must be served before the brig’s occupant can see sunlight again. Should you ever find yourself behind bars, be warned: there’s nothing to save you from going down with the ship if your crew gets into trouble. If you really feel you’ve been wrongly accused you can remove yourself from proceedings and leave your crew behind entirely, but I’d recommend trying to patch things up. You never know when you’ll need a helping hand from a former foe turned friend.
LIFE ABOARD SHIP: SINKING AND SCUTTLING
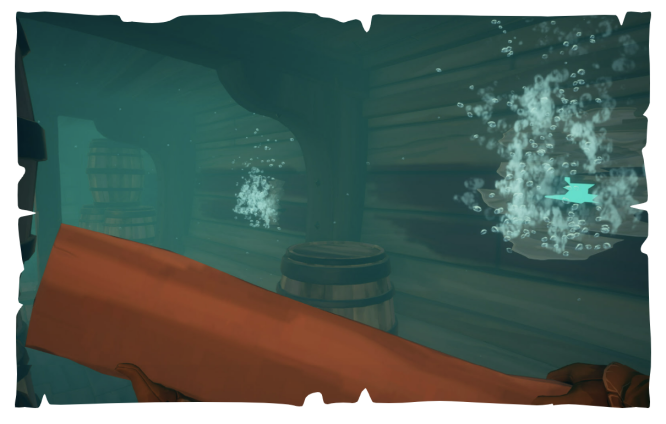
Everyone’s luck runs out in the end. Whether you’ve taken on too much storm water, fallen foul of a cursed artefact or just run out of wooden planks to make repairs, the time will come when saving your beloved ship from a watery grave becomes impossible. When the hull gives an agonised creak and you find that you can no longer patch up holes or repair other damage, it’s time to swim for safety.
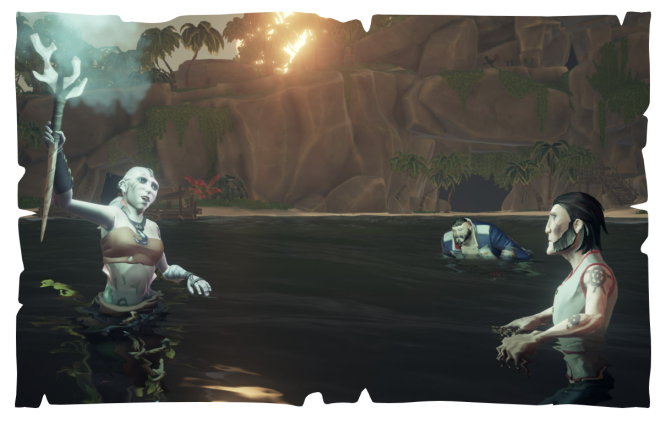
If paddling around in an ocean filled with gigantic predatory creatures seems like a bad idea, that’s because it is. Luckily, whenever you get separated from your ship – maybe it was destroyed, maybe you fell overboard or maybe your crew left you behind for a laugh – one of the merfolk will be around to help. Look for the green flare and listen out for the singing, that’s my advice. Swim over and say hello, and they’ll magically whisk you back to your missing vessel.
“But Nura,” I hear you cry, “what if my ship’s at the bottom of the sea because I’m not even half as good a pirate as you?” Well, don’t ask me how they do it, but the merfolk will have arranged for your ship to be salvaged from the depths and restored to good order. The catch? Merfolk are not particularly fussy about where they leave the ship afterwards, so you might wind up quite some way from the spot where you sank. At least you’ll be safely out of danger. Well, that particular danger.
If your ship falls into the hands of rival pirates, you find yourself irretrievably beached or you just enjoy watching things sink, you and your crew can vote to scuttle from the ‘My Crew’ menu – which will instantly deal a fatal amount of damage to your victimised vessel. Don’t think you can use this to easily escape from a firefight, however, as the merfolk won’t transport you if you’re holding valuable chests or other goods. You’ll need to defend those until your crew can pick you up again, which is easier said than done when you’re a sitting target for the very pirates you were trying to outwit…