Chapter 2-1: Ingress with Ingredients


Navigation:
Chapter 1: The Rescue
Chapter 2: The Restoration
-2-1: Ingress with Ingredients
-2-2: Eggs for cracking, Ghoulies for smacking
-2-3: Someone has a Bone to pick with you…
-2-4: Sugar, Spice and Dungweed
-2-5: A Curious Concoction
-2-6: Too many cooks spoil the broth
Chapter 3: The Riddle
Chapter 4: The Reckoning
Chapter 5: The Race
GUARDING THE GOURMET GLOW-WORMS
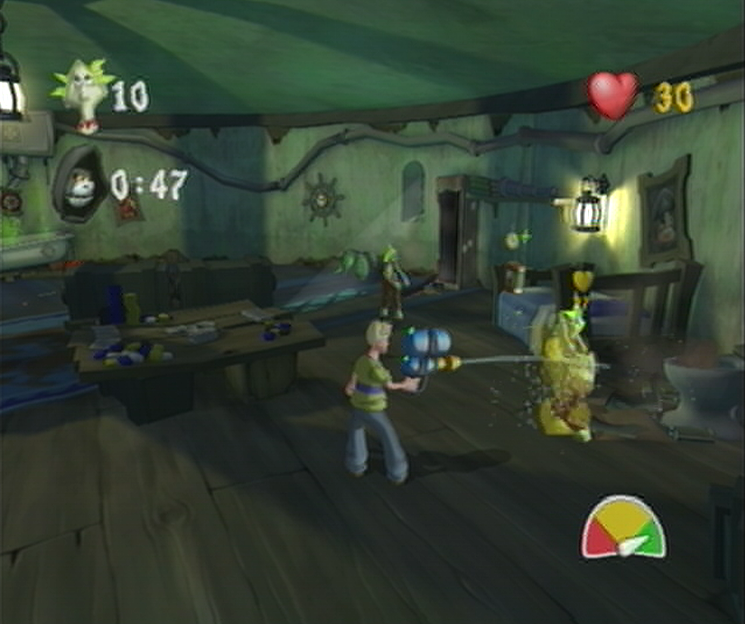
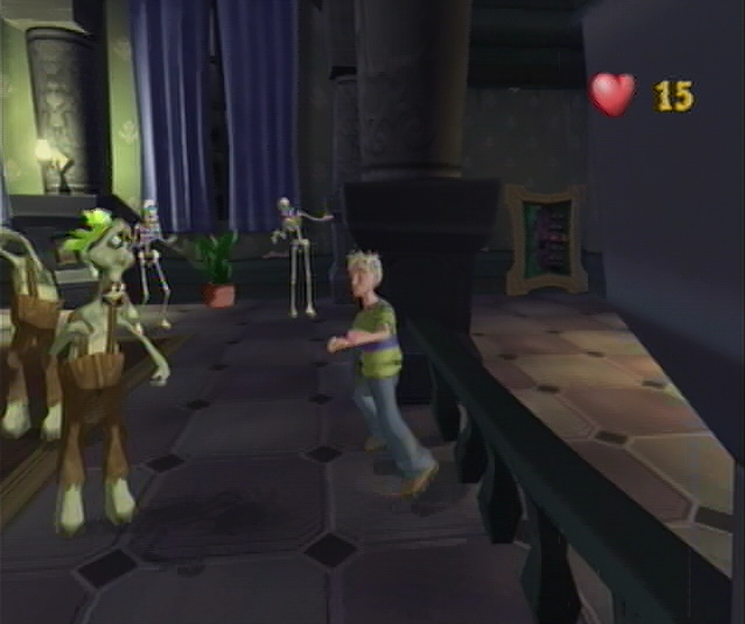
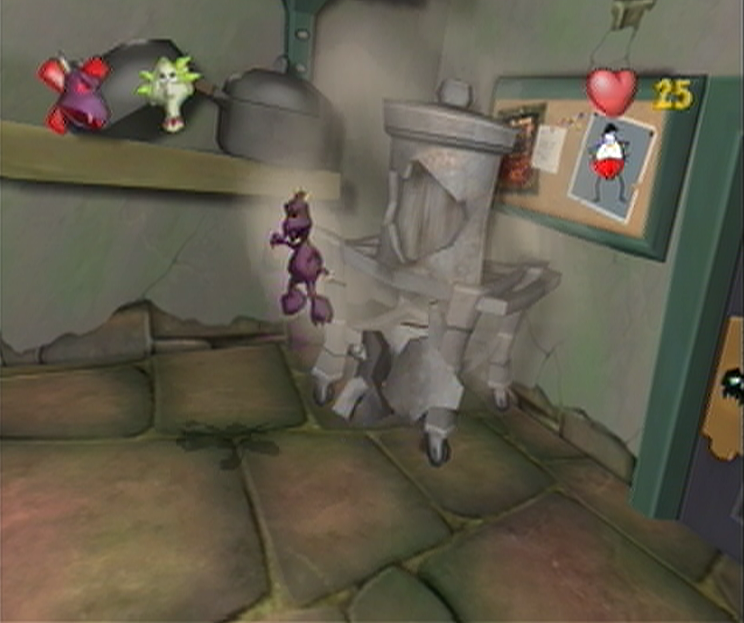
![]() Descending toward the Lighthouse Living Quarters you’ll notice that things have gotten quite eerie. While we’re sure of a surprise down the line, it’s better to prepare now while we still have the time. From where you start, make your way over toward the bathtub behind the Television set and you’ll find a pink chest to the left. Break it open and you’ll expose an Extra Time! Soup Tin, avoid collecting it and instead pick up the 25 Health Soup Tin on the table in the center. When you’re ready, walk over to the door and the challenge will begin; you’ll need to defeat 10 Zombies in 50 seconds. Wander over to the right and you’ll spot a shelving unit next to the door, break it open and you’ll find a Super Weapons! Soup Tin, pick it up and then use your untapped supply to go against the Zombies. If you’re running low on time, grab the Extra Time! Soup Tin that you found in the chest with its counterpart on the bed. Once you’ve gotten rid of at least 10 Zombies you’ll be able to progress ahead.
Descending toward the Lighthouse Living Quarters you’ll notice that things have gotten quite eerie. While we’re sure of a surprise down the line, it’s better to prepare now while we still have the time. From where you start, make your way over toward the bathtub behind the Television set and you’ll find a pink chest to the left. Break it open and you’ll expose an Extra Time! Soup Tin, avoid collecting it and instead pick up the 25 Health Soup Tin on the table in the center. When you’re ready, walk over to the door and the challenge will begin; you’ll need to defeat 10 Zombies in 50 seconds. Wander over to the right and you’ll spot a shelving unit next to the door, break it open and you’ll find a Super Weapons! Soup Tin, pick it up and then use your untapped supply to go against the Zombies. If you’re running low on time, grab the Extra Time! Soup Tin that you found in the chest with its counterpart on the bed. Once you’ve gotten rid of at least 10 Zombies you’ll be able to progress ahead.
LIGHTHOUSE STORE

![]() After a particularly intense water squirter session that saved our skin in the room above we’ll descend toward the Lighthouse Store below. As we emerge from the doorway we’ll find that Fiddlesworth has braved the Boathouse and has come forward to rip Little Willys Water Squirter from our hands -just for the time being- leaving us defenseless against the Medusas in the main area. You’ll have to be extra cautious as you work your way through the Store as you’ve only been given a meager 10 Health to start off with, which can be drained with a single failed Super Scary Shock sequence. The best way to combat this is to break the first collection of barrels you manage to spot as you descend the initial staircase toward the Medusas, inside you’ll find a Shocker Blocker! Soup Tin which will solve any Super Shock sequence automatically. Snatch it up in one fluid motion and then bolt for the Lighthouse Store Door, and you should manage to make it out alright.
After a particularly intense water squirter session that saved our skin in the room above we’ll descend toward the Lighthouse Store below. As we emerge from the doorway we’ll find that Fiddlesworth has braved the Boathouse and has come forward to rip Little Willys Water Squirter from our hands -just for the time being- leaving us defenseless against the Medusas in the main area. You’ll have to be extra cautious as you work your way through the Store as you’ve only been given a meager 10 Health to start off with, which can be drained with a single failed Super Scary Shock sequence. The best way to combat this is to break the first collection of barrels you manage to spot as you descend the initial staircase toward the Medusas, inside you’ll find a Shocker Blocker! Soup Tin which will solve any Super Shock sequence automatically. Snatch it up in one fluid motion and then bolt for the Lighthouse Store Door, and you should manage to make it out alright.
BOATHOUSE

![]() Akin to the Lighthouse Living Quarters previous, a return trip to the Boathouse will have the room completely vacant, a tip off that a challenge is sure to start should we attempt an escape. Work your way through the Boathouse and approach the open Challenge Door to meet your new breed of Ghouly; the Hunchback. Damage will only register if you hit the Hunchback in his face, anywhere else will see him completely invulnerable. In order to get to his face you’ll have to chase him down and hit him in the back a few times, then steadily work around his side toward his front. Each time you send a limb flying at the Hunchbacks face you’ll take away a single hitpoint, do this in quick succession and you’ll manage to deliver a final blow in the combination which will send the Hunchback staggering back causing a whopping 10 damage. Once you’ve done that the Hunchback will cover his face with his hand, leaving you unable to deal out any damage.
Akin to the Lighthouse Living Quarters previous, a return trip to the Boathouse will have the room completely vacant, a tip off that a challenge is sure to start should we attempt an escape. Work your way through the Boathouse and approach the open Challenge Door to meet your new breed of Ghouly; the Hunchback. Damage will only register if you hit the Hunchback in his face, anywhere else will see him completely invulnerable. In order to get to his face you’ll have to chase him down and hit him in the back a few times, then steadily work around his side toward his front. Each time you send a limb flying at the Hunchbacks face you’ll take away a single hitpoint, do this in quick succession and you’ll manage to deliver a final blow in the combination which will send the Hunchback staggering back causing a whopping 10 damage. Once you’ve done that the Hunchback will cover his face with his hand, leaving you unable to deal out any damage.
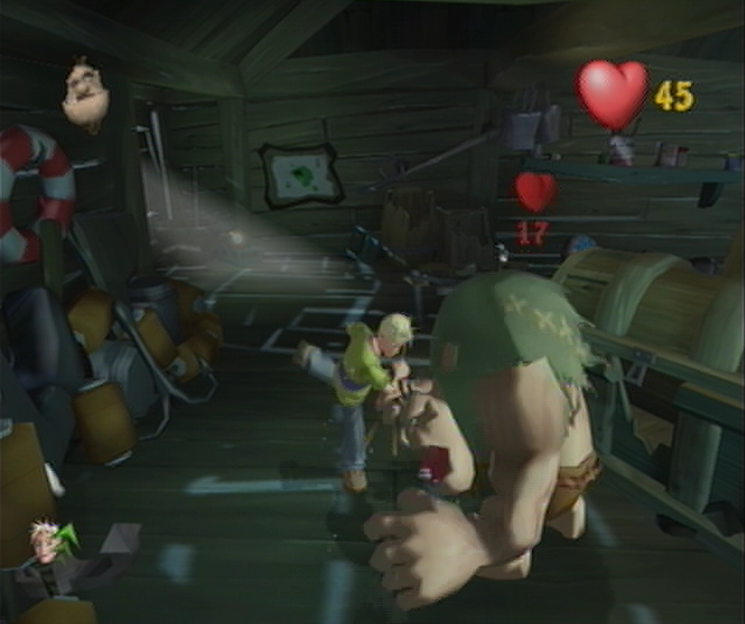
![]() If you attack the Hunchback while he’s in this condition he’ll grow violently angry and come up swinging, dishing out some serious damage as he spins his large arms around. Instead, give the Hunchback some space and he’ll let his guard down, meandering around the room allowing you a chance for a second assault. To make matters easier you’ll locate a Turbo Cooper! Soup Tin by the window next to the shelving unit with another hidden inside a barrel with a Skeletons arm sticking out behind the large center Chest. Using these Super Soups will allow you to move more quickly to the Hunchbacks face once you’ve attacked his back. You’re also free to bring out the Imp by breaking open the barrel next to the crate to the left of the center Chest. Doing so will reveal a trio of traitorous Imps that will wander over to Hunchy and attack his face directly. Once you get this Ghouly off your back the challenge will complete and you’ll be able to work your way back to Ghoulhaven Hall.
If you attack the Hunchback while he’s in this condition he’ll grow violently angry and come up swinging, dishing out some serious damage as he spins his large arms around. Instead, give the Hunchback some space and he’ll let his guard down, meandering around the room allowing you a chance for a second assault. To make matters easier you’ll locate a Turbo Cooper! Soup Tin by the window next to the shelving unit with another hidden inside a barrel with a Skeletons arm sticking out behind the large center Chest. Using these Super Soups will allow you to move more quickly to the Hunchbacks face once you’ve attacked his back. You’re also free to bring out the Imp by breaking open the barrel next to the crate to the left of the center Chest. Doing so will reveal a trio of traitorous Imps that will wander over to Hunchy and attack his face directly. Once you get this Ghouly off your back the challenge will complete and you’ll be able to work your way back to Ghoulhaven Hall.
DINING ROOM
![]() Inside the Dining Room you’ll discover that the Pirate Captain and his Cutlass Crew have conducted a fearsome feast, threatening anyone who dares to interrupt their meal. Cooper will have a little bit of trouble in this respect as the Captain will send one of his lackeys, ‘Andsome Pete, to show him the door as he tries to sneak across the floor. You shouldn’t have too much difficulty in taking out this single Zombie Pirate – but doing so will coax the Pirate Captain in sending the rest of his undead crew out to ‘run ye through’! Let the battle begin! Once the trio of Zombie Pirates begin to limp over to your current position, take advantage of this time and turn around to spot a Grandfather Clock against the wall – break it open and you’ll find a One-Hit Wonder! Soup Tin inside. Snatch up this Super Soup and pick up a pile of Burgers off the nearest table when the Zombie Pirates are close enough, send a patty off in their direction to take them out in a single hit.
Inside the Dining Room you’ll discover that the Pirate Captain and his Cutlass Crew have conducted a fearsome feast, threatening anyone who dares to interrupt their meal. Cooper will have a little bit of trouble in this respect as the Captain will send one of his lackeys, ‘Andsome Pete, to show him the door as he tries to sneak across the floor. You shouldn’t have too much difficulty in taking out this single Zombie Pirate – but doing so will coax the Pirate Captain in sending the rest of his undead crew out to ‘run ye through’! Let the battle begin! Once the trio of Zombie Pirates begin to limp over to your current position, take advantage of this time and turn around to spot a Grandfather Clock against the wall – break it open and you’ll find a One-Hit Wonder! Soup Tin inside. Snatch up this Super Soup and pick up a pile of Burgers off the nearest table when the Zombie Pirates are close enough, send a patty off in their direction to take them out in a single hit.
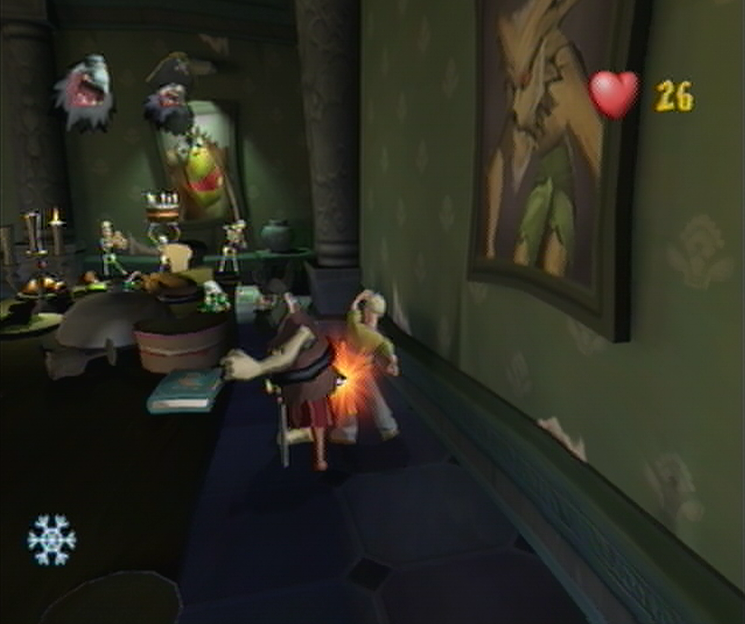
![]() Once you’ve defeated the trio, six more Zombie Pirates will burst forth from the windows around the room. Keep fighting until your One-Hit Wonder! Super Soup runs out and then work your way through the ranks toward the Captains table. You’ll find a trio of Skeletons on one side of the table and a potted plant on the other, go toward the potted plant and you’ll find a Freeze Ghoulies! Soup Tin hidden behind it. Once you’ve grabbed the Super Soup, approach the Captain and give him a swift kick to the ribs – doing so will have the Skeletons turn on the Pirates which will help to clear the room. While the freezing is still active, work your way back to the front of the room to grab the Invulnerability! Soup Tin (depicted by its Iron Heart icon for temporary invincibility) and then beat on the frozen crew until the effect has worn off. Once you manage to clear the room you’ll beat the challenge, stay away from the now traitorous Skeletons and work your way to the open challenge door.
Once you’ve defeated the trio, six more Zombie Pirates will burst forth from the windows around the room. Keep fighting until your One-Hit Wonder! Super Soup runs out and then work your way through the ranks toward the Captains table. You’ll find a trio of Skeletons on one side of the table and a potted plant on the other, go toward the potted plant and you’ll find a Freeze Ghoulies! Soup Tin hidden behind it. Once you’ve grabbed the Super Soup, approach the Captain and give him a swift kick to the ribs – doing so will have the Skeletons turn on the Pirates which will help to clear the room. While the freezing is still active, work your way back to the front of the room to grab the Invulnerability! Soup Tin (depicted by its Iron Heart icon for temporary invincibility) and then beat on the frozen crew until the effect has worn off. Once you manage to clear the room you’ll beat the challenge, stay away from the now traitorous Skeletons and work your way to the open challenge door.
EMBASSY BALLROOM
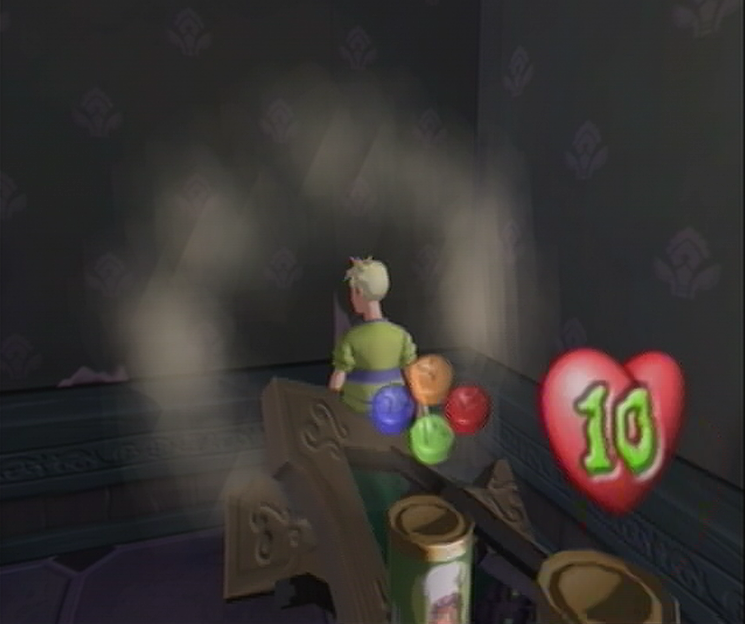
![]() The same rules to the Embassy Ballroom apply: once you step onto the dance floor you can’t interrupt the dancers, otherwise you’ll have to defeat them all in order to pass on through the exit. Unlike last time however, there isn’t an abundance of items you can use to take out the Ghoulies blocking the exit, or even cast onto the dance floor for crowd control. If you don’t feel like wandering through the floor there is a way to get through with a little help from the DJ. From your starting position, break open the large dispenser to your left to receive a 10 Health Soup Tin, then get on stage by walking up the stairs to your left as you walk toward the dance floor. Once there you should spot another 10 Health Soup Tin to bring your overall health to 35. Now that you’ve bulked up your health considerably we won’t have an issue with taking out the dancers to benefit our Ghoulies Defeated score. Grab a collection of bottles before descending to the dance floor.
The same rules to the Embassy Ballroom apply: once you step onto the dance floor you can’t interrupt the dancers, otherwise you’ll have to defeat them all in order to pass on through the exit. Unlike last time however, there isn’t an abundance of items you can use to take out the Ghoulies blocking the exit, or even cast onto the dance floor for crowd control. If you don’t feel like wandering through the floor there is a way to get through with a little help from the DJ. From your starting position, break open the large dispenser to your left to receive a 10 Health Soup Tin, then get on stage by walking up the stairs to your left as you walk toward the dance floor. Once there you should spot another 10 Health Soup Tin to bring your overall health to 35. Now that you’ve bulked up your health considerably we won’t have an issue with taking out the dancers to benefit our Ghoulies Defeated score. Grab a collection of bottles before descending to the dance floor.
![]() Once you’re on the dance floor you’ll notice a collection of portraits around the perimeter, smashing them open with bottles will reveal some Super Soups underneath – you’ll find 1 Freeze Ghoulies! Tin, 2 Super Weapons! Tins, and 1 Turbo Cooper Tin altogether. Once all the Soups have been found, start a fight with the Skeletons. It’s fairy easy to avoid the Zombies, but ignoring the Skeletons will have them looking out for items to use against you. After exhausting the bottles, pick up the lonely guitar at rear to the right of the DJ Podium. Once you’re out of usable weapons, lure all of them into one spot and freeze them with the Freeze Ghoulies! Soup Tin. Reach over the low gate near the exit and grab the potted plant – line them all up and throw it, then use any remaining time to take care of any left overs. Once you’ve done that, break the portrait of Ghoulhaven Hall to reveal a 10 Health Super Soup, survive the Super Shock sequence ahead, and then leave the Embassy.
Once you’re on the dance floor you’ll notice a collection of portraits around the perimeter, smashing them open with bottles will reveal some Super Soups underneath – you’ll find 1 Freeze Ghoulies! Tin, 2 Super Weapons! Tins, and 1 Turbo Cooper Tin altogether. Once all the Soups have been found, start a fight with the Skeletons. It’s fairy easy to avoid the Zombies, but ignoring the Skeletons will have them looking out for items to use against you. After exhausting the bottles, pick up the lonely guitar at rear to the right of the DJ Podium. Once you’re out of usable weapons, lure all of them into one spot and freeze them with the Freeze Ghoulies! Soup Tin. Reach over the low gate near the exit and grab the potted plant – line them all up and throw it, then use any remaining time to take care of any left overs. Once you’ve done that, break the portrait of Ghoulhaven Hall to reveal a 10 Health Super Soup, survive the Super Shock sequence ahead, and then leave the Embassy.
LOWER CORRIDORS
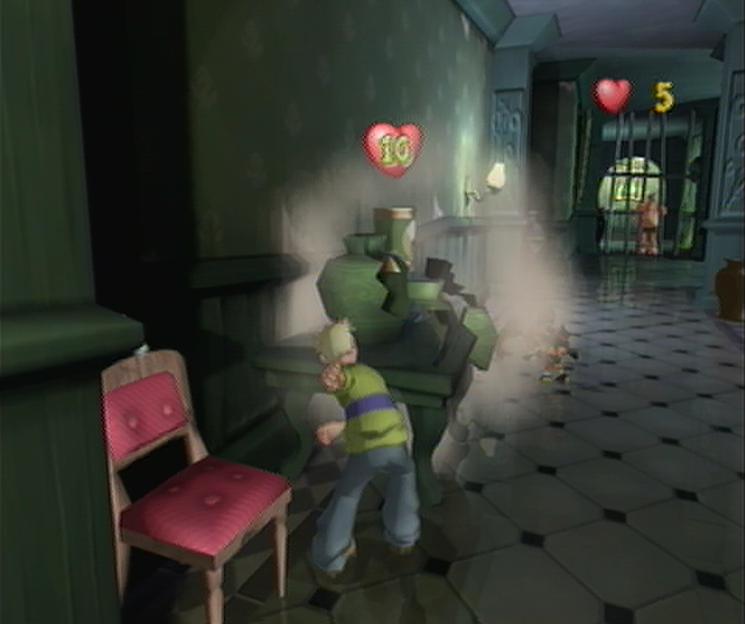
![]() The Lower Corridors can be especially nerve wracking with an extremely limited amount of health provided coupled with the ambush from the nimble Ninja Imps located throughout the passage. You can attempt to run through the onslaught as it comes, though this is ill-advised as you risk a hit to Coopers’ health; each time a new grouping of Ninja Imps expose themselves from their hiding place, Cooper will jump into the air out of fear which provides a previous group of Imps ample time to catch up and dish out the damage. Instead, you’ll notice a rather round vase atop a table on the left side of the corridor that harbors a 10 Health Super Soup Tin inside. Approach it very cautiously as your first bout of Imps are hiding in the brown vase just in front of this table, and they’ll likely spring out once you smash open the round vase. Once you’ve revealed the Health Tin inside, you’ll need to snatch it up as soon as possible and then launch toward the doorway on the opposite side of the hall.
The Lower Corridors can be especially nerve wracking with an extremely limited amount of health provided coupled with the ambush from the nimble Ninja Imps located throughout the passage. You can attempt to run through the onslaught as it comes, though this is ill-advised as you risk a hit to Coopers’ health; each time a new grouping of Ninja Imps expose themselves from their hiding place, Cooper will jump into the air out of fear which provides a previous group of Imps ample time to catch up and dish out the damage. Instead, you’ll notice a rather round vase atop a table on the left side of the corridor that harbors a 10 Health Super Soup Tin inside. Approach it very cautiously as your first bout of Imps are hiding in the brown vase just in front of this table, and they’ll likely spring out once you smash open the round vase. Once you’ve revealed the Health Tin inside, you’ll need to snatch it up as soon as possible and then launch toward the doorway on the opposite side of the hall.
SCULLERY
![]() Our return to the Scullery will prove to be as Reaper-filled as the last, though if you’re able to stick to the rules you can avoid an unwanted confrontation. Work your way through the shelves to find your way to the Challenge Door. Before you’ll get a chance to walk through, your invitation will be taken by two Zombies who enter the room. For the purposes of this challenge you’ll need to defeat both of the Zombies, but avoid defeating any Imps while you’re still stringing the Zombies along; a difficult proposition as you’ll find them getting in between your sure foot and the Zombie limb you’re aiming for. Take care of the Zombie to the right by picking up the Rare Plate and the Super Weapons! Soup Tin that can be found amongst the cluttered shelf to the right of the challenge door. Avoid smacking him into the row of plates between the shelf and the sink, as an Imp hides inside the stack of dirty dishes and will come to intervene should you expose his hiding place.
Our return to the Scullery will prove to be as Reaper-filled as the last, though if you’re able to stick to the rules you can avoid an unwanted confrontation. Work your way through the shelves to find your way to the Challenge Door. Before you’ll get a chance to walk through, your invitation will be taken by two Zombies who enter the room. For the purposes of this challenge you’ll need to defeat both of the Zombies, but avoid defeating any Imps while you’re still stringing the Zombies along; a difficult proposition as you’ll find them getting in between your sure foot and the Zombie limb you’re aiming for. Take care of the Zombie to the right by picking up the Rare Plate and the Super Weapons! Soup Tin that can be found amongst the cluttered shelf to the right of the challenge door. Avoid smacking him into the row of plates between the shelf and the sink, as an Imp hides inside the stack of dirty dishes and will come to intervene should you expose his hiding place.
![]() After a certain duration regardless whether or not you’ve defeated the first Zombie in the Scullery, you’ll find your first Imp bursting out from the metal dispensary to the left of the Challenge door. Avoid taking out this Imp at all costs and remain fixed on defeating your current Zombie and then moving onto the second under the same circumstances. If you do end up accidentally snuffing the Imp, there’s a Dizzy Reaper! Soup Tin back in the first room after the shelving units that you can use to keep the Reaper at bay while you finish up on the last Zombie. Otherwise, once both Zombies have been laid to rest, you’re free to take out your anguish on the Imps, now that the rules no longer apply to sparing them. Once you’ve kicked off the first Imp from the dispensary, expose the second Imp hiding inside the dirty dishes if you haven’t already, and then lay it on thick. Once both Zombies and Imps have been defeated you’re free to sprint toward the exit and back to the Kitchen.
After a certain duration regardless whether or not you’ve defeated the first Zombie in the Scullery, you’ll find your first Imp bursting out from the metal dispensary to the left of the Challenge door. Avoid taking out this Imp at all costs and remain fixed on defeating your current Zombie and then moving onto the second under the same circumstances. If you do end up accidentally snuffing the Imp, there’s a Dizzy Reaper! Soup Tin back in the first room after the shelving units that you can use to keep the Reaper at bay while you finish up on the last Zombie. Otherwise, once both Zombies have been laid to rest, you’re free to take out your anguish on the Imps, now that the rules no longer apply to sparing them. Once you’ve kicked off the first Imp from the dispensary, expose the second Imp hiding inside the dirty dishes if you haven’t already, and then lay it on thick. Once both Zombies and Imps have been defeated you’re free to sprint toward the exit and back to the Kitchen.
KITCHEN

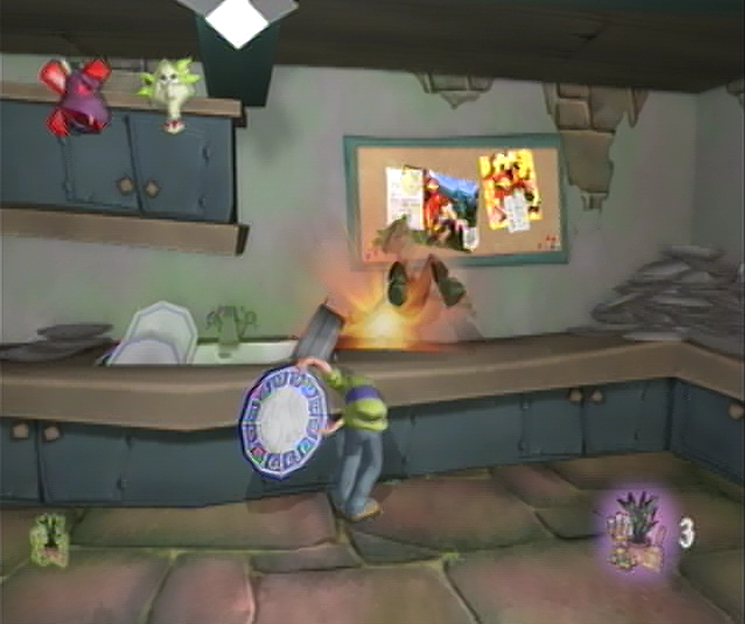
![]() With our Glow Worms secure, Ma adds them to the pot to simmer where they’ll be soon joined by the other ingredients shortly. We’ll manage to find the next ingredient – a more sensible sounding Egg – inside the Chicken Shed. Let’s get cracking shall we? Once Soupswill has finished her speech, a doorway on the opposite end of the Kitchen will open as a single Zombie Pirate shambles in. While a confrontation may seem unnecessary with the salty dog, there’s a simple means of defeating the Zombie Pirate; once approached, the Zombie Pirate he’ll drop his sword as he pulls out a large treasure chest to throw in your direction. Do what you can to avoid being on the receiving end of the plunder blunder and then rush into grab the sword when the coast is clear. Slice the Zombie Pirate with his own sword and he’ll go down in a single hit! How’s that for a weak spot? Once you’ve finished with that, continue through the frozen doorway the Pirate emerged from to enter the Ffffreezer.
With our Glow Worms secure, Ma adds them to the pot to simmer where they’ll be soon joined by the other ingredients shortly. We’ll manage to find the next ingredient – a more sensible sounding Egg – inside the Chicken Shed. Let’s get cracking shall we? Once Soupswill has finished her speech, a doorway on the opposite end of the Kitchen will open as a single Zombie Pirate shambles in. While a confrontation may seem unnecessary with the salty dog, there’s a simple means of defeating the Zombie Pirate; once approached, the Zombie Pirate he’ll drop his sword as he pulls out a large treasure chest to throw in your direction. Do what you can to avoid being on the receiving end of the plunder blunder and then rush into grab the sword when the coast is clear. Slice the Zombie Pirate with his own sword and he’ll go down in a single hit! How’s that for a weak spot? Once you’ve finished with that, continue through the frozen doorway the Pirate emerged from to enter the Ffffreezer.