Chapter 1-1: Welcome to Ghoulhaven Hall

Navigation:
Chapter 1: The Rescue
-1-1: Welcome to Ghoulhaven Hall
-1-2: A Slight Detour…
-1-3: Reunion to Repulsion
Chapter 2: The Restoration
Chapter 3: The Riddle
Chapter 4: The Reckoning
Chapter 5: The Race
SHEDDING SOME LIGHT ON THE SITUATION
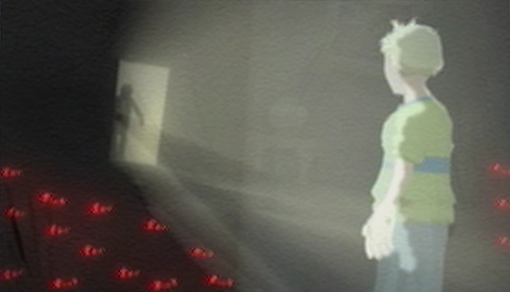
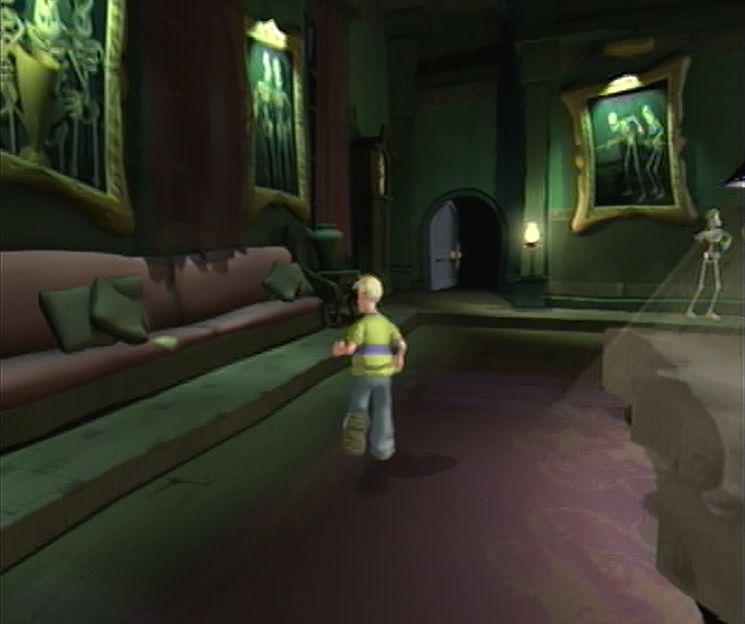
![]() Reluctantly, Cooper makes his way up the steps that lead to the large door at the front of Ghoulhaven Hall and proceeds to open it cautiously; the ancient hinges creak in protest as Cooper peers down the dark hallway. Taking a deep breath he ventures into the mansion, taking every precaution to keep his presence unknown to the Ghoulies. Just as Cooper steps away from the light and into the darkness, however, the large doors slam themselves shut, leaving Cooper locked inside! Left without recourse Cooper travels further into the darkness, feeling his way toward the center of the Grand Hallway before stopping to get his bearings. Big mistake. A thousand beady red eyes illuminate in the darkness followed by jeering snarls as they begin to collectively creep toward Cooper. Before things take a definite turn for the worst a door opens on the opposite side of the room, casting a strong light across the floor which the Ghoulies take an instant disliking to.
Reluctantly, Cooper makes his way up the steps that lead to the large door at the front of Ghoulhaven Hall and proceeds to open it cautiously; the ancient hinges creak in protest as Cooper peers down the dark hallway. Taking a deep breath he ventures into the mansion, taking every precaution to keep his presence unknown to the Ghoulies. Just as Cooper steps away from the light and into the darkness, however, the large doors slam themselves shut, leaving Cooper locked inside! Left without recourse Cooper travels further into the darkness, feeling his way toward the center of the Grand Hallway before stopping to get his bearings. Big mistake. A thousand beady red eyes illuminate in the darkness followed by jeering snarls as they begin to collectively creep toward Cooper. Before things take a definite turn for the worst a door opens on the opposite side of the room, casting a strong light across the floor which the Ghoulies take an instant disliking to.
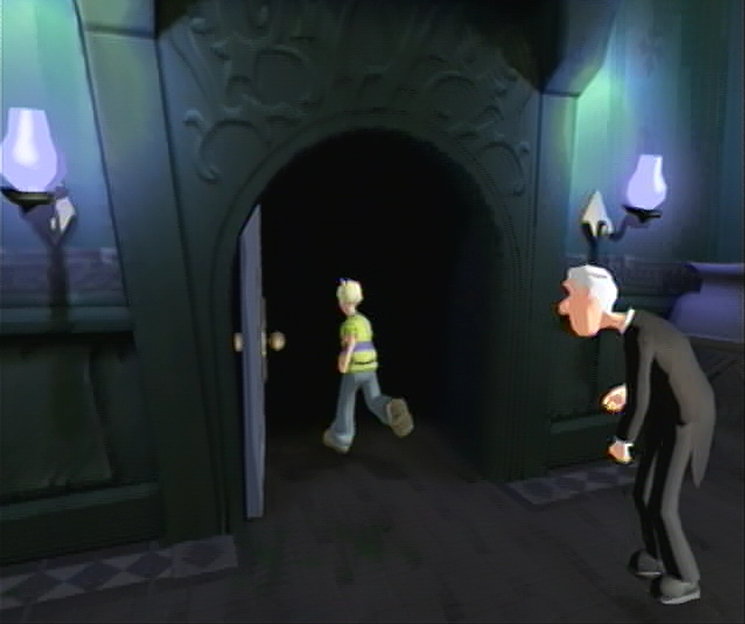
![]() A figure emerges from the open doorway, the strong light emanating from the lone candlestick he’s carried with him. “What’s all this noise? I’m trying to get some sleep, Ghoulhavens’ elderly Butler, Crivens, calls into the darkness, And who turned the lights out?”. Reaching out to the left the Butler flicks on the manual switch only to reveal the cluster of Imps surrounding Cooper that the beady eyes belonged to. “Arrgh! The Ghoulies! Leave me alone!” Crivens shouts toward the purple ankle biters. The duo share a unified scream before the Butler ducks back into his room and slams the door behind him. Wait! He’s forgetting something important! Crivens opens the door a crack and reaches for the candlestick he’s dropped out of fright before withdrawing his hand and locking the door entirely. With Crivens off the menu the Imps draw their attention back to Cooper who remains completely surrounded on all sides. He lets out a gasp as the Ghoulies edge ever closer…
A figure emerges from the open doorway, the strong light emanating from the lone candlestick he’s carried with him. “What’s all this noise? I’m trying to get some sleep, Ghoulhavens’ elderly Butler, Crivens, calls into the darkness, And who turned the lights out?”. Reaching out to the left the Butler flicks on the manual switch only to reveal the cluster of Imps surrounding Cooper that the beady eyes belonged to. “Arrgh! The Ghoulies! Leave me alone!” Crivens shouts toward the purple ankle biters. The duo share a unified scream before the Butler ducks back into his room and slams the door behind him. Wait! He’s forgetting something important! Crivens opens the door a crack and reaches for the candlestick he’s dropped out of fright before withdrawing his hand and locking the door entirely. With Crivens off the menu the Imps draw their attention back to Cooper who remains completely surrounded on all sides. He lets out a gasp as the Ghoulies edge ever closer…
Is this the end of our hero?
MAKING A GOOD FIRST IMP-RESSION!
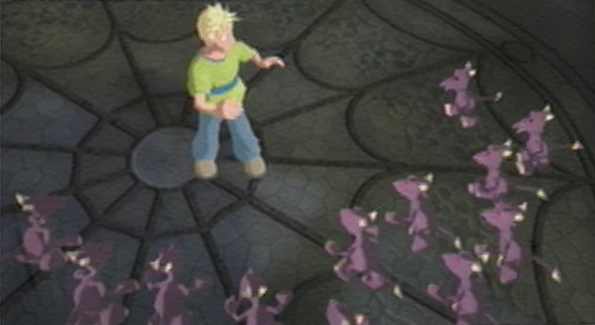
![]() Of course not! What a ridiculously short game that would be. It seems you’ll have to fend for yourself in this room; you can move freely with the left thumbstick around the area while the right thumbstick has been dedicated to controlling your attacks. Use the right thumbstick to point in the direction that you wish to attack, once you’ve done so you’ll send a limb flying in response. There are only 5 Imps that you’ll have to take out in the Grand Hallway, but each one will take two hits to defeat. The first hit will allow you to stun them in place which is handy for crowd control, while your second hit will send them careening across the room like a purple rocket. The best way to go about taking out these five Imps is to get in two quick jabs with your controlstick once you’ve chosen an Imp you’d like to defeat until you’ve kicked it across the room. You can also try to gather a few next to each other and pile into them with a hearty tackle to make quick work of them as well.
Of course not! What a ridiculously short game that would be. It seems you’ll have to fend for yourself in this room; you can move freely with the left thumbstick around the area while the right thumbstick has been dedicated to controlling your attacks. Use the right thumbstick to point in the direction that you wish to attack, once you’ve done so you’ll send a limb flying in response. There are only 5 Imps that you’ll have to take out in the Grand Hallway, but each one will take two hits to defeat. The first hit will allow you to stun them in place which is handy for crowd control, while your second hit will send them careening across the room like a purple rocket. The best way to go about taking out these five Imps is to get in two quick jabs with your controlstick once you’ve chosen an Imp you’d like to defeat until you’ve kicked it across the room. You can also try to gather a few next to each other and pile into them with a hearty tackle to make quick work of them as well.
![]() Right, now that you’ve gotten comfortable using your brawn, it’s time to use your brain by utilizing the art of armed combat. As you tour around Ghoulhaven Hall you’ll spot a number of items lying around that have a grab icon hovering above, which means the object can be fashioned as a weapon against the Ghoulies once you pick it up with the A button. Once you’ve done that you can swing away as you’d normally do with your normal control settings. Keep in mind that the objects you pick up do accumulate damage, so once you’ve exhausted an items potential as indicated by the number in the bottom right hand corner it will explode into bits; alternately you can use the B Button to destroy any item that you’ve picked up regardless of damage if you wish to switch back to unarmed combat. Luckily these rules don’t apply to the Cooks’ Chair which Crivens has provided for you! Once you’re ready, pick up the chair with A and get ready for an onslaught of Imps…
Right, now that you’ve gotten comfortable using your brawn, it’s time to use your brain by utilizing the art of armed combat. As you tour around Ghoulhaven Hall you’ll spot a number of items lying around that have a grab icon hovering above, which means the object can be fashioned as a weapon against the Ghoulies once you pick it up with the A button. Once you’ve done that you can swing away as you’d normally do with your normal control settings. Keep in mind that the objects you pick up do accumulate damage, so once you’ve exhausted an items potential as indicated by the number in the bottom right hand corner it will explode into bits; alternately you can use the B Button to destroy any item that you’ve picked up regardless of damage if you wish to switch back to unarmed combat. Luckily these rules don’t apply to the Cooks’ Chair which Crivens has provided for you! Once you’re ready, pick up the chair with A and get ready for an onslaught of Imps…
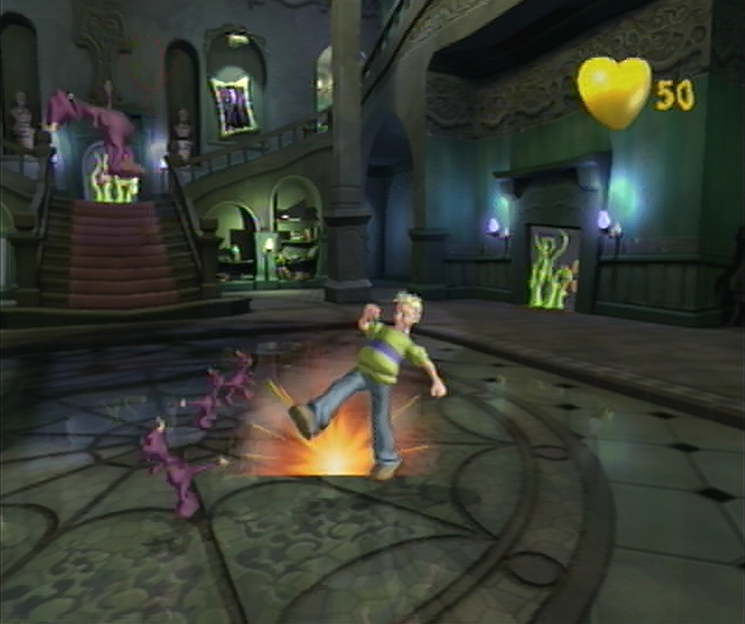
![]() This time you’ll need to defeat 10 Imps with the Cooks’ Chair to progress any further as indicated by the Challenge Rules. The Challenge will vary in every room, so pay attention to the scenario and then go to town. You can refresh yourself with the rules by pressing the Start Button and then the Y button. You shouldn’t have too much trouble in clearing this room as you’ve been given a lofty amount of health which only drops a single point if an Imp sinks its teeth into your leg, combined with the fact that the Cooks’ Chair can dispatch of each Imp with one solid hit as well. As soon as you manage to clear out the swarm with the Chair you’ll have completed the challenge as indicated by the audio cue, and the door leading to the next room will open. Wander over to Crivens and he’ll introduce himself explaining that he’ll pop up from time to time in order to provide hints as you progress through the Hall. Once he’s finished you’re free to continue through the door you’ve unlocked.
This time you’ll need to defeat 10 Imps with the Cooks’ Chair to progress any further as indicated by the Challenge Rules. The Challenge will vary in every room, so pay attention to the scenario and then go to town. You can refresh yourself with the rules by pressing the Start Button and then the Y button. You shouldn’t have too much trouble in clearing this room as you’ve been given a lofty amount of health which only drops a single point if an Imp sinks its teeth into your leg, combined with the fact that the Cooks’ Chair can dispatch of each Imp with one solid hit as well. As soon as you manage to clear out the swarm with the Chair you’ll have completed the challenge as indicated by the audio cue, and the door leading to the next room will open. Wander over to Crivens and he’ll introduce himself explaining that he’ll pop up from time to time in order to provide hints as you progress through the Hall. Once he’s finished you’re free to continue through the door you’ve unlocked.
TROPHY ROOM
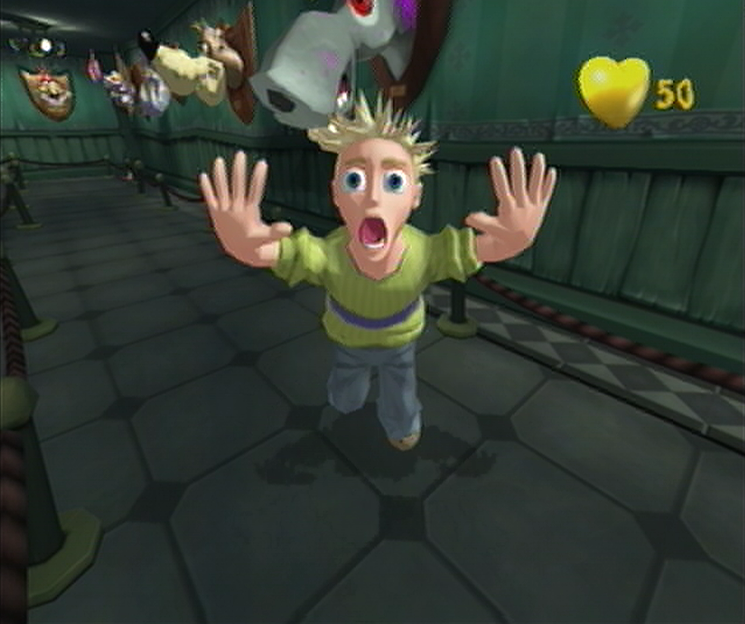
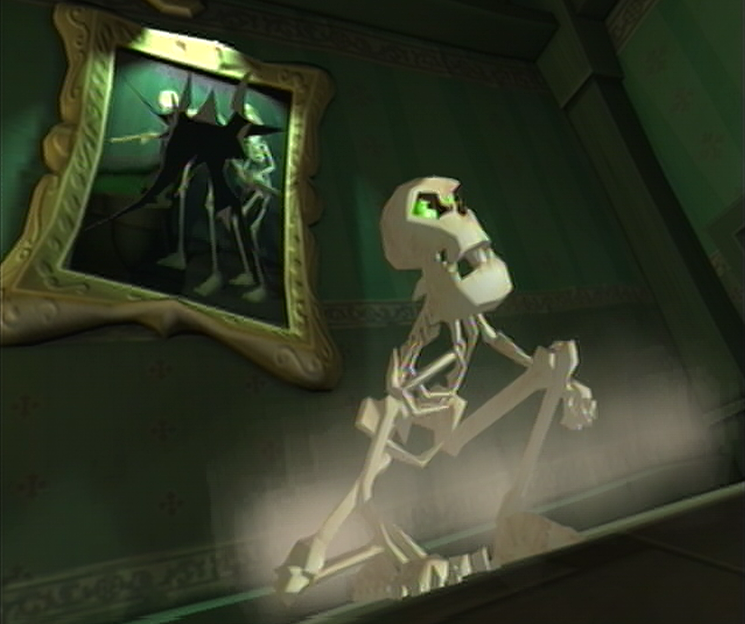
![]() This room offers up quite a different challenge to what you’re used to at this point; there are no Ghoulies to defeat, you’ll just have to survive through the room. You’ll automatically walk through the tethered hallway as Coopers perspective takes in the sights of the Grotesque Game Trophies on display along the walls which can spring to life at any moment. Should this happen you’ll find yourself in a quicktime event wherein you’ll be tasked with entering the buttons displayed on the bottom of the screen as quickly as possible. If you make a mistake you’ll be able to try again, but only after sacrificing some precious seconds that go toward entering the entire combination. If you let the rising cadence finish without entering the correct sequence you’ll suffer a Super Scary Shock and you’ll lose a total of 10 healthpoints in the process. Luckily you’re provided with 50 healthpoints as you explore this room, so you’ll manage to fail four Super Scary Shocks without penalty, often the exact number of living Game Trophies found within this room.
This room offers up quite a different challenge to what you’re used to at this point; there are no Ghoulies to defeat, you’ll just have to survive through the room. You’ll automatically walk through the tethered hallway as Coopers perspective takes in the sights of the Grotesque Game Trophies on display along the walls which can spring to life at any moment. Should this happen you’ll find yourself in a quicktime event wherein you’ll be tasked with entering the buttons displayed on the bottom of the screen as quickly as possible. If you make a mistake you’ll be able to try again, but only after sacrificing some precious seconds that go toward entering the entire combination. If you let the rising cadence finish without entering the correct sequence you’ll suffer a Super Scary Shock and you’ll lose a total of 10 healthpoints in the process. Luckily you’re provided with 50 healthpoints as you explore this room, so you’ll manage to fail four Super Scary Shocks without penalty, often the exact number of living Game Trophies found within this room.
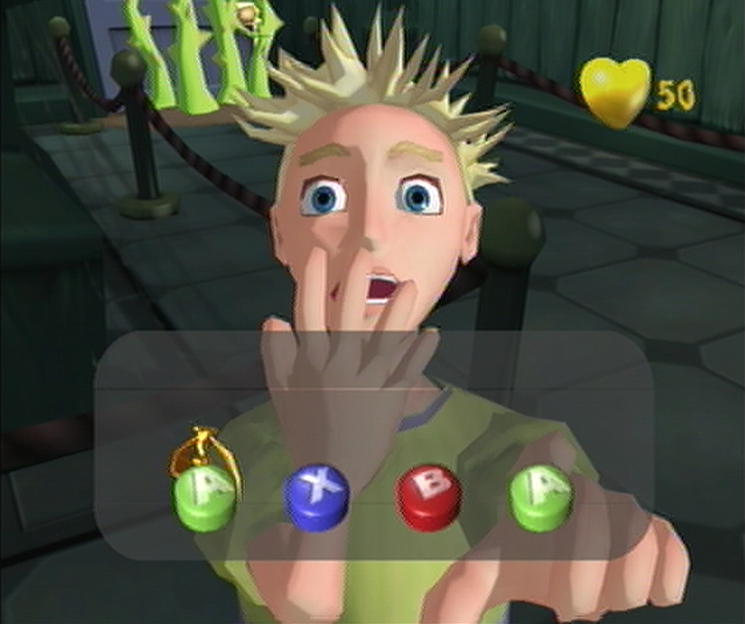
![]() The real trick is to enter the button combination as accurately as possible while speed becomes something of an afterthought. If you can keep a steady pace with entering the proper button sequence you’ll find that you’ll get through the sequence a lot more efficiently. While each living Trophies’ appearance and their Super Scary Shock button sequences are completely random, the first Super Scary Shock sequence you encounter in this room will be ‘A A A A’, so as long as you’re quick on the draw you should manage to get through that Shock unscathed. Once you’ve reached the end of the hallway you’ll automatically pick up a weighty Rare tome in the open doorway. This is a Bonus Book, one of a hundred located around Ghoulhaven Hall, and while it’s not instrumental to completing your campaign adventure it does unlock secret bonus content. You can find all 100 in the Bonus Book Location Guide, though it’s recommended to seek them out after you’ve finished with the campaign…
The real trick is to enter the button combination as accurately as possible while speed becomes something of an afterthought. If you can keep a steady pace with entering the proper button sequence you’ll find that you’ll get through the sequence a lot more efficiently. While each living Trophies’ appearance and their Super Scary Shock button sequences are completely random, the first Super Scary Shock sequence you encounter in this room will be ‘A A A A’, so as long as you’re quick on the draw you should manage to get through that Shock unscathed. Once you’ve reached the end of the hallway you’ll automatically pick up a weighty Rare tome in the open doorway. This is a Bonus Book, one of a hundred located around Ghoulhaven Hall, and while it’s not instrumental to completing your campaign adventure it does unlock secret bonus content. You can find all 100 in the Bonus Book Location Guide, though it’s recommended to seek them out after you’ve finished with the campaign…
BILLIARD ROOM
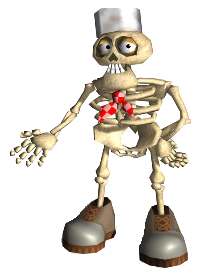
![]() Now that you’ve gotten through the Trophy Room you’ll find yourself in the Billiard Room with your health restored, which will occur each time you complete a room and enter a new one. Unlike future rooms that you’ll encounter within the game, the door on the opposite end of the Billiard Room will remain open the entire time, allowing you to pass through without penalty when you’re ready to leave – these types of rooms will become increasingly rare as you progress through the Hall. While you’re meandering about in the Billiard Room, it would be worth your while to quickly take care of the Skeleton duo having a chat near the exit. You’ll want to try to bulk up your Ghoulies Defeated counter as much as possible early on when you’re not in so much of a rush to squeeze for the 3 and a half-hour mark, especially when the difficulty of the game ramps up and you’re left trying desperately to work the offensive while you’re being overwhelmed. Once you manage to defeat the twin Skeletons you’re free to make your way through the exit door to the next area.
Now that you’ve gotten through the Trophy Room you’ll find yourself in the Billiard Room with your health restored, which will occur each time you complete a room and enter a new one. Unlike future rooms that you’ll encounter within the game, the door on the opposite end of the Billiard Room will remain open the entire time, allowing you to pass through without penalty when you’re ready to leave – these types of rooms will become increasingly rare as you progress through the Hall. While you’re meandering about in the Billiard Room, it would be worth your while to quickly take care of the Skeleton duo having a chat near the exit. You’ll want to try to bulk up your Ghoulies Defeated counter as much as possible early on when you’re not in so much of a rush to squeeze for the 3 and a half-hour mark, especially when the difficulty of the game ramps up and you’re left trying desperately to work the offensive while you’re being overwhelmed. Once you manage to defeat the twin Skeletons you’re free to make your way through the exit door to the next area.
GAMING ROOM
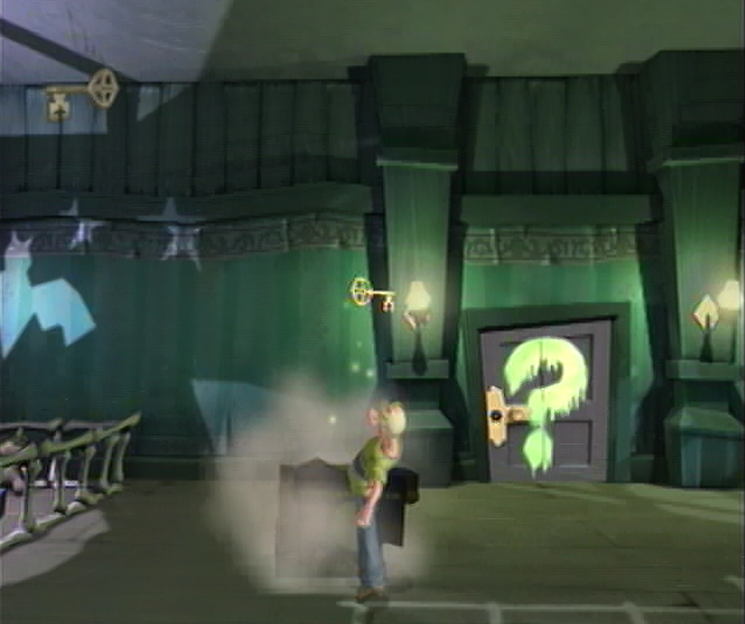
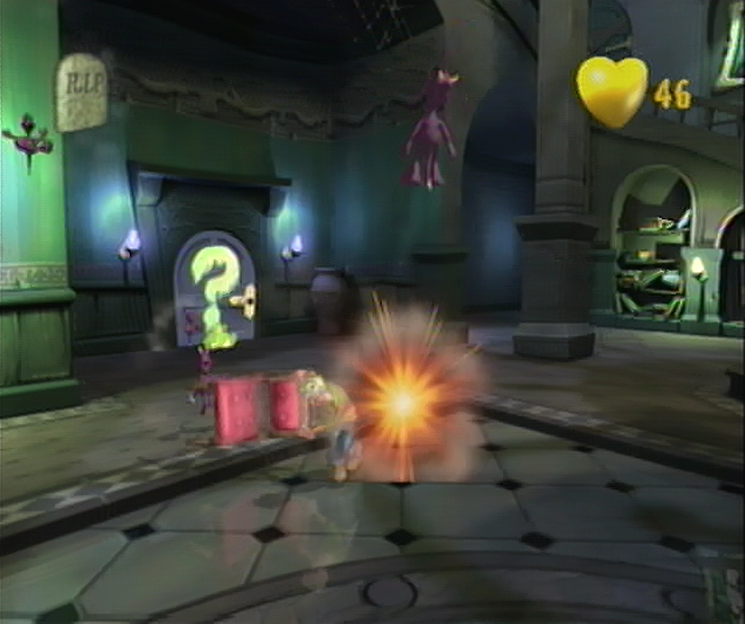
![]() As Cooper peers uneasily into the Gaming Room he manages to a gagged Amber who’s been perched precariously inside the open chamber of a large fireplace on the opposite side of the room. Suddenly the fireplace springs to life, rotating within the wall and ending its journey by putting Amber on the opposite side of the wall! To make matters worse we’ve traded off the girl for a gaggle of Ghoulies: a dozen Imps inside the opposite end of the fireplace! While your priority in this room is locating a key that’s been hidden in the room that will allow you to escape, you should focus on defeating the Imps around the room and dropping in from the windows, until Crivens pipes up regarding your priority once more. Once this occurs, make your way to the Bone Cradle on the opposite side of the room and you should manage to spot a large Xbox/Rarf box next to it; break it open and you’ll find the key inside. Carry on through the challenge door back to the Billiard Room.
As Cooper peers uneasily into the Gaming Room he manages to a gagged Amber who’s been perched precariously inside the open chamber of a large fireplace on the opposite side of the room. Suddenly the fireplace springs to life, rotating within the wall and ending its journey by putting Amber on the opposite side of the wall! To make matters worse we’ve traded off the girl for a gaggle of Ghoulies: a dozen Imps inside the opposite end of the fireplace! While your priority in this room is locating a key that’s been hidden in the room that will allow you to escape, you should focus on defeating the Imps around the room and dropping in from the windows, until Crivens pipes up regarding your priority once more. Once this occurs, make your way to the Bone Cradle on the opposite side of the room and you should manage to spot a large Xbox/Rarf box next to it; break it open and you’ll find the key inside. Carry on through the challenge door back to the Billiard Room.
BILLIARD ROOM
![]() Once you’ve traveled back to the Billiard Room a second time you’ll notice that your maximum energy has been modified by the Baron to 25. This will occur from this point forward in every room of the Hall to step up the difficulty considerably. If you take notice to the open Challenge Door on the opposite side of the room it appears as though you’ll manage to strut through this room just as last time, not so much. Take this available time to grab a pool cue from the left side of the room and when you’re ready approach the door to begin the Challenge! In response it will trap you inside as three Skeletons burst forth from the paintings located around the room; you’ll have to defeat eight of them to advance to the next room. Now that you’re armed with a Pool Cue this should be a fairly simple feat, especially if you manage some crowd control and use the improved distance from the Cue to snap across them all in one swipe, or use the Large Trophy on the couch to bowl at them from afar.
Once you’ve traveled back to the Billiard Room a second time you’ll notice that your maximum energy has been modified by the Baron to 25. This will occur from this point forward in every room of the Hall to step up the difficulty considerably. If you take notice to the open Challenge Door on the opposite side of the room it appears as though you’ll manage to strut through this room just as last time, not so much. Take this available time to grab a pool cue from the left side of the room and when you’re ready approach the door to begin the Challenge! In response it will trap you inside as three Skeletons burst forth from the paintings located around the room; you’ll have to defeat eight of them to advance to the next room. Now that you’re armed with a Pool Cue this should be a fairly simple feat, especially if you manage some crowd control and use the improved distance from the Cue to snap across them all in one swipe, or use the Large Trophy on the couch to bowl at them from afar.
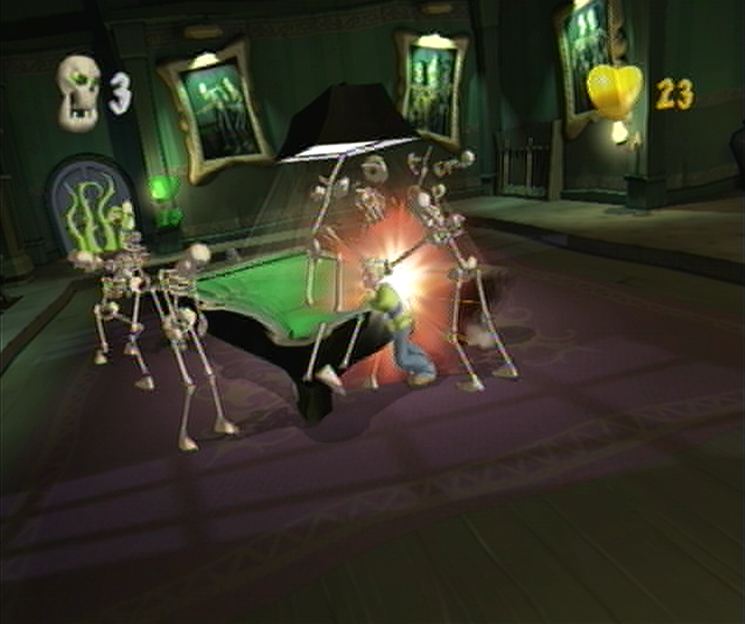
![]() Once you’ve managed to defeat the trio of Skeletons you’ll knock your counter down to 5, with an impeccable sense of timing the blanket covering the Pool Table will launch off as 6 Skeletons burst forth from the remaining Paintings. There’s no sense in trying to take on the Skeletons one a time, especially when this newly available Pool Table will do all the work for you. You’ll manage to see an ‘Item Grab’ indication on either end of this Pool Table; pressing A as you approach this icon will allow Cooper to swing the Pool Table around in one fluid motion, taking out any Skeleton that comes in contact with the table with just one hit. The most efficient way to accomplish this is by running around the perimeter Pool Table and having the Skeletons chase after you until you’ve built up a solid line-up, once the timing is right grab one of the ends and spin the table around, you shouldn’t have a problem taking out the Skeletons and solving the Challenge.
Once you’ve managed to defeat the trio of Skeletons you’ll knock your counter down to 5, with an impeccable sense of timing the blanket covering the Pool Table will launch off as 6 Skeletons burst forth from the remaining Paintings. There’s no sense in trying to take on the Skeletons one a time, especially when this newly available Pool Table will do all the work for you. You’ll manage to see an ‘Item Grab’ indication on either end of this Pool Table; pressing A as you approach this icon will allow Cooper to swing the Pool Table around in one fluid motion, taking out any Skeleton that comes in contact with the table with just one hit. The most efficient way to accomplish this is by running around the perimeter Pool Table and having the Skeletons chase after you until you’ve built up a solid line-up, once the timing is right grab one of the ends and spin the table around, you shouldn’t have a problem taking out the Skeletons and solving the Challenge.
LOWER CORRIDORS
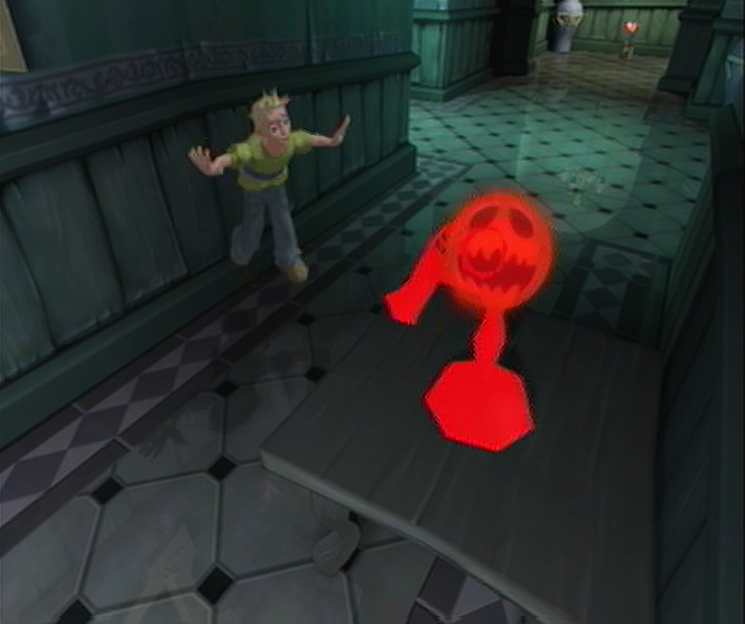
![]() Well done, you’ve made it through to the Lower Corridors! You’ll manage to find an alluring open doorway at the end of the hallway, just a brisk walks duration; there is a slight catch however that will be sure to slow your pace, but first, something to perk you up as you explore the Hall. As soon as you begin exploring the Lower Corridors you’ll spot a tin of bouncing soup, run over to it and you’ll add a single unit of energy to your health. It may not be much, but there are Soup Tins that have the power to make you invulnerable, defeat Ghoulies in a single hit and even complete the Challenge at hand. Once you’ve collected your first tin, carry on forward and attempt to squeeze between the telephone and the wall to the left. Once you’ve made your way past the phone it will spring to life, giving Cooper a Scare! In future you’ll manage to spot the red Ghoulish face beginning to expand and escape before it blossoms to encompass an infected area, but for this demonstration you won’t have the option.
Well done, you’ve made it through to the Lower Corridors! You’ll manage to find an alluring open doorway at the end of the hallway, just a brisk walks duration; there is a slight catch however that will be sure to slow your pace, but first, something to perk you up as you explore the Hall. As soon as you begin exploring the Lower Corridors you’ll spot a tin of bouncing soup, run over to it and you’ll add a single unit of energy to your health. It may not be much, but there are Soup Tins that have the power to make you invulnerable, defeat Ghoulies in a single hit and even complete the Challenge at hand. Once you’ve collected your first tin, carry on forward and attempt to squeeze between the telephone and the wall to the left. Once you’ve made your way past the phone it will spring to life, giving Cooper a Scare! In future you’ll manage to spot the red Ghoulish face beginning to expand and escape before it blossoms to encompass an infected area, but for this demonstration you won’t have the option.

![]() While Coopers total energy won’t take a hit from these Scares, you’ll find yourself unable to act on the offensive as you dodder around looking a bit daft. If you come in contact with a Ghouly while in this state they’ll manage to cause twice as much damage as usual, so keep your distance and try to wait this one out. Once you’ve managed to recover from the Scare continue down the hallway toward the second Health Soup Tin and you’ll be introduced to a new Ghouly hiding inside the vase to the left; The Spider! Their only attack is a rolling jump that takes quite some time to execute, though it does take away two health points. They may slow you down with some webbing, so keep an eye out if you hear them getting ready to spit. Make quick work of the Spider here and round the corner tightly to locate a small table that you can pick up. As you make your way toward the exit you’ll be ambushed by four more Spiders, use the table to knock them aside and work your way through the exit.
While Coopers total energy won’t take a hit from these Scares, you’ll find yourself unable to act on the offensive as you dodder around looking a bit daft. If you come in contact with a Ghouly while in this state they’ll manage to cause twice as much damage as usual, so keep your distance and try to wait this one out. Once you’ve managed to recover from the Scare continue down the hallway toward the second Health Soup Tin and you’ll be introduced to a new Ghouly hiding inside the vase to the left; The Spider! Their only attack is a rolling jump that takes quite some time to execute, though it does take away two health points. They may slow you down with some webbing, so keep an eye out if you hear them getting ready to spit. Make quick work of the Spider here and round the corner tightly to locate a small table that you can pick up. As you make your way toward the exit you’ll be ambushed by four more Spiders, use the table to knock them aside and work your way through the exit.
CINEMA
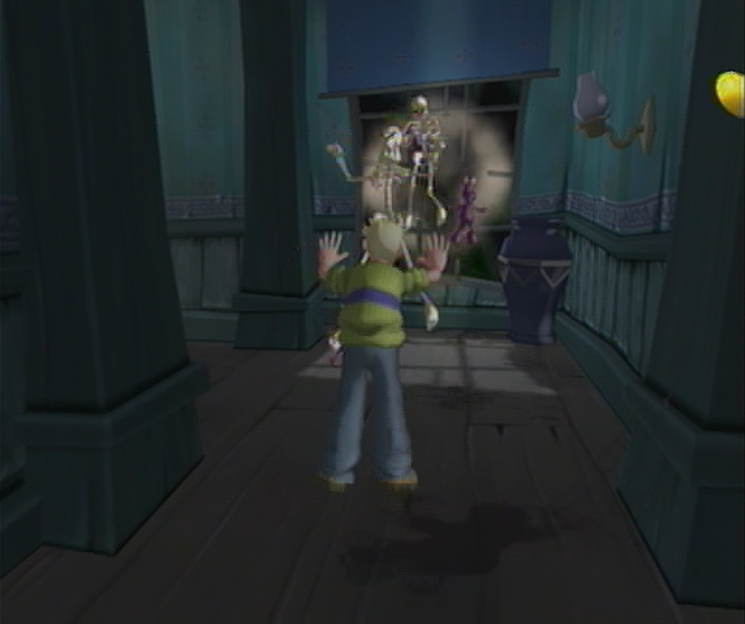
![]() Inside the Cinema is where you’ll manage to find Amber now that the Fireplace has managed to spin her around from the Games Room. As you start off you’ll have to continue ahead to tackle a set of uneasy stairs before reaching to the top and finding another set of uneasy stares from the girl bound with chains stuffed in the shelving unit with a collection of film reels. Crivens will explain that this girl is one of the ten children the Baron has taken prisoner and stowed away in the mansion, locked with a key that only he possesses. Right… well, after taking in the sights of the projection booth you’ll manage to spot a second set of stairs descending toward a lone hallway toward the main Cinema room. As you approach the window at the end of the hall however, a duo of Skeletons and Imps will break through ready to fight. Although they may have gotten the upper hand with the element of surprise, you’ll manage to take them out easily enough with just a few punches, or steady kicks with the Imps. Once you’ve finished, carry on down the hallway to have a cutscene begin…
Inside the Cinema is where you’ll manage to find Amber now that the Fireplace has managed to spin her around from the Games Room. As you start off you’ll have to continue ahead to tackle a set of uneasy stairs before reaching to the top and finding another set of uneasy stares from the girl bound with chains stuffed in the shelving unit with a collection of film reels. Crivens will explain that this girl is one of the ten children the Baron has taken prisoner and stowed away in the mansion, locked with a key that only he possesses. Right… well, after taking in the sights of the projection booth you’ll manage to spot a second set of stairs descending toward a lone hallway toward the main Cinema room. As you approach the window at the end of the hall however, a duo of Skeletons and Imps will break through ready to fight. Although they may have gotten the upper hand with the element of surprise, you’ll manage to take them out easily enough with just a few punches, or steady kicks with the Imps. Once you’ve finished, carry on down the hallway to have a cutscene begin…
![]() After Cooper makes an uneasy trek down the narrow corridor he rounds the bend as a look of surprise washes over his face. At the opposite end of the room he manages to spot the large Fireplace, along with Amber who’s getting a little fed up with Coopers’ roundabout means of escape. Taking in the problem at hand, Cooper gestures Amber to hop away from the Fireplace, as to avoid another one way trip back to the Games Room. Clutching the base of her chair, Amber moves the chair slowly away from the reach of the false fireplace. Her journey finds her atop a large suspicious looking square just in front of the fireplace… Without warning, the panel swings open revealing itself to be a trap door as Amber plummets down the open hole helpless to remove herself from her chair as she free falls in the Archives. Well, at least we don’t have to worry about that rotating fireplace puzzle any longer…
After Cooper makes an uneasy trek down the narrow corridor he rounds the bend as a look of surprise washes over his face. At the opposite end of the room he manages to spot the large Fireplace, along with Amber who’s getting a little fed up with Coopers’ roundabout means of escape. Taking in the problem at hand, Cooper gestures Amber to hop away from the Fireplace, as to avoid another one way trip back to the Games Room. Clutching the base of her chair, Amber moves the chair slowly away from the reach of the false fireplace. Her journey finds her atop a large suspicious looking square just in front of the fireplace… Without warning, the panel swings open revealing itself to be a trap door as Amber plummets down the open hole helpless to remove herself from her chair as she free falls in the Archives. Well, at least we don’t have to worry about that rotating fireplace puzzle any longer…