Chapter 2: The Jungles of South America

Navigation:
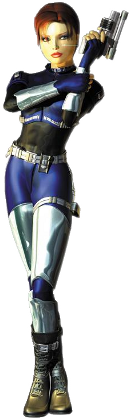
Chapter 1: Carrington Institute Training
Chapter 2: The Jungles of South America
-2-1: Infiltrating Jungle Base I
-2-2: River Crossing
-2-3: Infiltrating Jungle Base II
-2-4: Jungle Chase
-2-5: Infiltrating Jungle Base III
-2-6: dataDyne Hind Attack
-2-7: Cyborg Factory: Sniper Assignment
Chapter 3: dataDyne Cybernetic Manufacturing
Chapter 4: dataDyne Operations Base/Crash Site
Chapter 5: Captive aboard the Pelagic I
Chapter 6: Carrington Institute HQ
Chapter 7: Perfect Dark GBC Secrets and Extras
INFILTRATING JUNGLE BASE I – JANUARY 22ND 2022

![]()
![]()
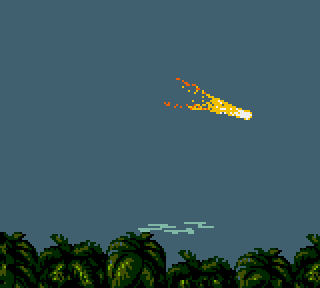
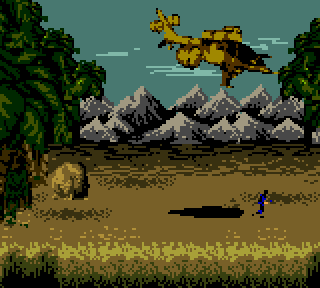
Under Carrington’s orders, Joanna Dark boards an Orca Dropship with confidential flight plans that will take her into the heart of the South American jungle. From the drop site, she watches as the pilot ascends over the trees as she prepares for her mission ahead. However, she is momentarily distracted by a low-flying object that seems to burn in the atmosphere – she observes the object as it draws nearer, before crashing in the jungle with a brilliant flash of light. This assignment seems to get stranger by the moment…
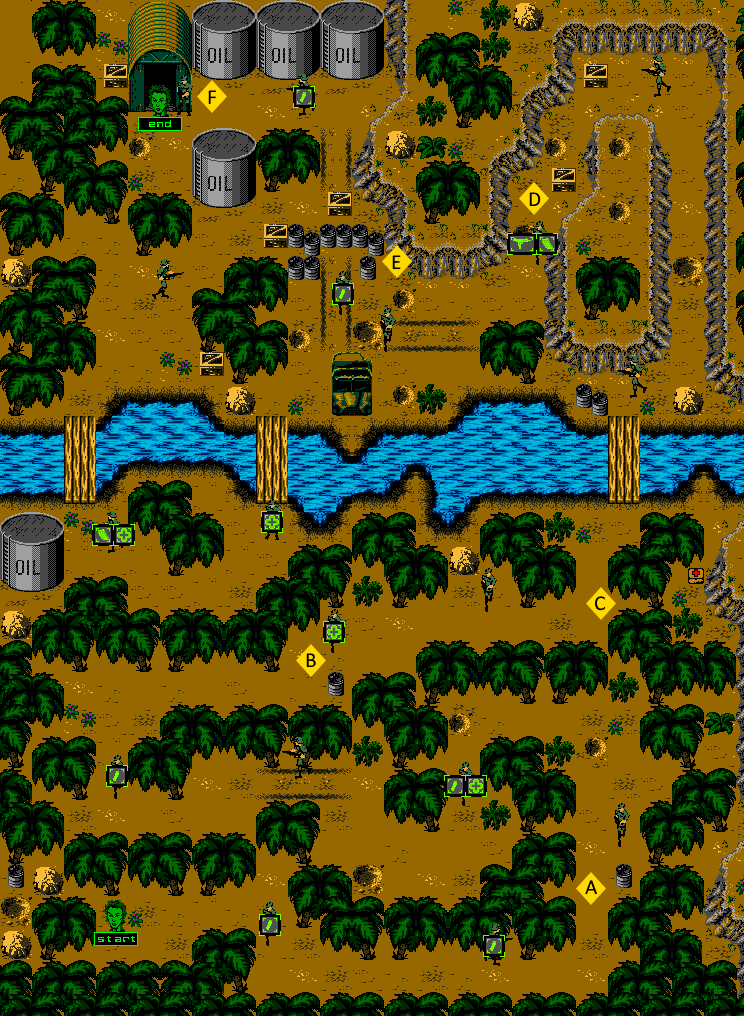
JUNGLE BASE I – LANDING SITE: MAP OVERVIEW
MISSION OBJECTIVES:
• LOCATE AND DESTROY CYBORG FACTORY
• DEFEAT MINK HUNTER
Since leaving the Carrington Institute, you’ll be equipped with the Falcon 2 and one clip of replacement ammunition – you’ll need to gather further supplies as you find them. You also won’t find any doorways in these open areas, which means that guards will give chase without reprieve if you alert them of your presence. If you can cut off any opposition with stealth and quick action you’ll stand a chance at surviving the unforgiving jungle.
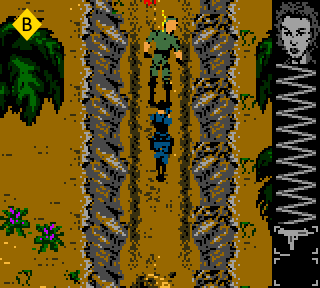
You’ll start off in a clearing, so make your way to the right and you’ll encounter the first guard that paces vertically. Stay out of sight and approach the guard when his back is turned for an assassination. Inspecting the body will reveal a clip for your Falcon 2 – pick it up and then continue to the east. If you’re lucky, you should manage to encounter the second guard as he marches to the right away from your position – bridge the gap and take him out with an assassination as well. If you’ve happened on him as he marches to the left, return fire with the Falcon 2 and you’ll take him out easily enough before you succumb to too much damage. From here, travel to the right and you’ll discover that the path turns to the north.
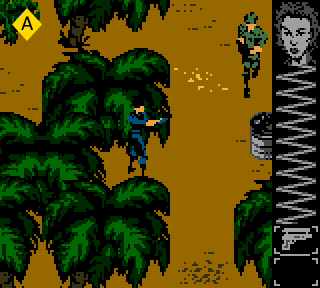
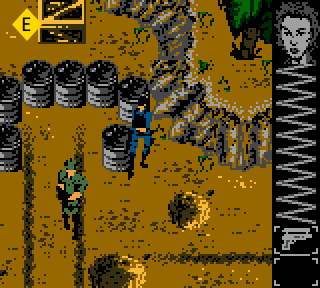
![]() You should be able to spot a small hollow across from an oil barrel that will provide cover ahead, stay along the treeline to the left and get inside the hollow as soon as you can. If you’ve been able to do this efficiently, you’ll be able to remain out of the sight of the guard pacing vertically ahead. He’ll march down towards the barrel, then turn on his heel to resume his patrol to the north. As soon as he turns, leave the safety of the hollow and get behind him for a quick assassination. The guard won’t offer up any supplies, so once he’s been taken down we’ll continue to the north and follow the path to the left when it turns again.
You should be able to spot a small hollow across from an oil barrel that will provide cover ahead, stay along the treeline to the left and get inside the hollow as soon as you can. If you’ve been able to do this efficiently, you’ll be able to remain out of the sight of the guard pacing vertically ahead. He’ll march down towards the barrel, then turn on his heel to resume his patrol to the north. As soon as he turns, leave the safety of the hollow and get behind him for a quick assassination. The guard won’t offer up any supplies, so once he’s been taken down we’ll continue to the north and follow the path to the left when it turns again.
You should be able to spot the next guard heading south here, but chasing after him proves a bit risky since his patrol is rather short. Instead, you’ll need to seek cover in another hollow between trees on the right, and if he still hasn’t appeared, make your way to a spot behind the bush on your right. Once you’ve done so, you should see the guard heading north once more as he ignores your position. From here, it’s just a simple case of following him closely and going in for yet another assassination before he has the chance to turn. If you choose to inspect the guard you’ll find a Med-Kit (25% Health Restore) and a Falcon 2 clip, though if you haven’t justified the recovery, you might want to leave the inspection for later use.
To the left of the bush and underneath the hollow above, you should be able to spot a jungle tree that acts as a corner for the next area. If you stand in front of its trunk and slightly push left you’ll be able to see a pair of horizontal tire tracks that come into view. While staying under the shelter of the tree, you’ll need to inch yourself further left until you see a guard patrolling the tracks.
If you’ve managed to stay out of his view behind the tree, he’ll turn around once he reaches the end of the path, and that’ll give you the perfect opportunity to go in for an assassination before he has the chance to face you.
Since the guard doesn’t provide us with any supplies, we’ll ignore an inspection and continue walking to the left. When you arrive at the next line of trees, you should be able to spot a guard pacing vertically on the other side. When he heads to the north, follow him stealthily and you should be able to get away with another assassination. Inspecting the guard after he’s been neutralized will surrender another clip for our Falcon 2.
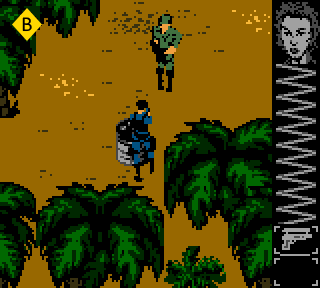
![]() We’ll continue to head right, following the jungle pathway until we can spot a lone oil barrel as the path turns to the north. If we approach the barrel and hide behind it, we’ll have ideal cover from the guard that paces vertically in this area. Wait until the guard reaches the barrel as he paces south, and then follow him as he turns around to the north. Once you’ve assassinated the guard, you’re free to inspect his body for a Med-Kit (25% Health Restore) if you require it, though once again, it might be wiser to leave it behind when you’re in desperate need for recovery, as the jungle is fairly linear which promotes backtracking.
We’ll continue to head right, following the jungle pathway until we can spot a lone oil barrel as the path turns to the north. If we approach the barrel and hide behind it, we’ll have ideal cover from the guard that paces vertically in this area. Wait until the guard reaches the barrel as he paces south, and then follow him as he turns around to the north. Once you’ve assassinated the guard, you’re free to inspect his body for a Med-Kit (25% Health Restore) if you require it, though once again, it might be wiser to leave it behind when you’re in desperate need for recovery, as the jungle is fairly linear which promotes backtracking.
If you continue heading to the right, you’ll notice a large boulder to the north – a guard paces vertically on the other side of this rock, so cautiously edge closer until you can just make out the left side of his body as he patrols. When he reaches the lowest point of the path and turns, approach him stealthily and you should be able to assassinate him before he has the chance to turn around.
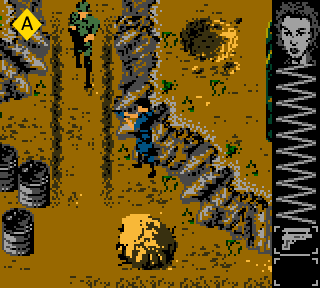
![]() The guard won’t have any supplies to offer us, so we’ll instead continue walking to the west and following the path to the north when it turns. At this point you’ll spot two points of interest – the first is a bridge over the river, and the second is a hidden Med-Kit (25% Health Restore) in the trees to the right. In order to gain access to the Med-Kit, you’ll need to approach the bridge, but then follow the shore to the right instead. Head south after you pass the tree and you’ll find that the Med-Kit is available for the taking, if you need it. Once you’re ready, we’ll begin our cautious trek over the bridge to meet further resistance.
The guard won’t have any supplies to offer us, so we’ll instead continue walking to the west and following the path to the north when it turns. At this point you’ll spot two points of interest – the first is a bridge over the river, and the second is a hidden Med-Kit (25% Health Restore) in the trees to the right. In order to gain access to the Med-Kit, you’ll need to approach the bridge, but then follow the shore to the right instead. Head south after you pass the tree and you’ll find that the Med-Kit is available for the taking, if you need it. Once you’re ready, we’ll begin our cautious trek over the bridge to meet further resistance.
Once you’ve managed to make it about halfway across the bridge, you should spot a guard ahead. He’ll patrol between the oil barrels to the left and a boulder to the right. You’ll need to start your approach when the guard heads for the boulder, and go in for a covert assassination. Once you’re finished, continue to the north until you can see the path turning to the left – stop before you reach the corner and you should manage to spot the next guard pacing horizontally. After he’s gone as far to the right as possible and prepares to turn to the left, follow behind and then assassinate him when you’ve bridged the distance.
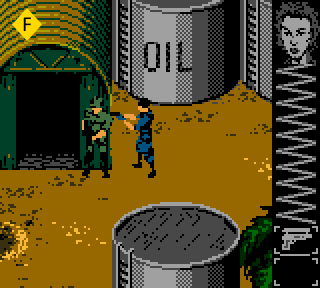
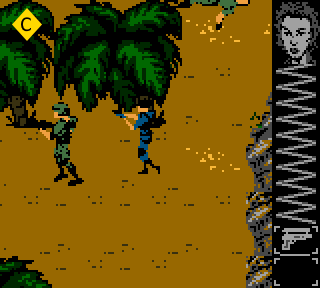
![]() From here, we’ll continue to follow the path as it turns to the south, and take refuge behind the right side of the second crate. Despite being so near to the next guard, he won’t pay us any mind as he makes his patrol to the north, and then to the south. Once he’s left the area, you can leave the safety of the crate and go in for an assassination. Inspecting the fallen guard will offer up the 6-YYY Submachine Gun and a spare clip of ammunition for it. We’ll take both items and keep them in our inventory for the time being – it would be wise to switch out if you alert the guards in the future, but it’s just too loud to remain undercover in this instance.
From here, we’ll continue to follow the path as it turns to the south, and take refuge behind the right side of the second crate. Despite being so near to the next guard, he won’t pay us any mind as he makes his patrol to the north, and then to the south. Once he’s left the area, you can leave the safety of the crate and go in for an assassination. Inspecting the fallen guard will offer up the 6-YYY Submachine Gun and a spare clip of ammunition for it. We’ll take both items and keep them in our inventory for the time being – it would be wise to switch out if you alert the guards in the future, but it’s just too loud to remain undercover in this instance.
![]() When you’re ready, we’re going to follow the rock wall to the left and then sprint alongside it – if you’re able to stay covert, sprint the distance and then take refuge behind the nearest oil barrel. From your new position, you should be able to spot a guard heading to the south, follow him closely for an assassination but then leave to the west immediately after. By doing so you’ll avoid another guard to the east that paces vertically on the other side of the jeep. When that guard starts his patrol to the north, you can go around the front of the jeep and creep up silently behind to assassinate him as well.
When you’re ready, we’re going to follow the rock wall to the left and then sprint alongside it – if you’re able to stay covert, sprint the distance and then take refuge behind the nearest oil barrel. From your new position, you should be able to spot a guard heading to the south, follow him closely for an assassination but then leave to the west immediately after. By doing so you’ll avoid another guard to the east that paces vertically on the other side of the jeep. When that guard starts his patrol to the north, you can go around the front of the jeep and creep up silently behind to assassinate him as well.
If your arrival does cause a stir however, you can switch over to the 6-YYY and return fire – you’ll invariably take some damage, but you’ll suppress the guards quickly enough, and you can always return to the earlier points in the jungle for the abandoned Med-Kits should you start feeling anxious. You can inspect the former guard for a Falcon 2 clip and then travel to the southwest to find another bridge over the river. Make sure that you’re equipped with the Falcon 2 here, as you’ll come across an oblivious guard facing to the south when you cross over – it’s just a simple matter of lining up the shot and you’ll have the assassination taken care of. This guard will surrender a Med-Kit (25% Health Restore) as well, but there’s a better alternative ahead, so we’ll leave it behind for later use.
From this point, we’ll follow the shoreline to the left so that we stay above the grouping of trees. As the next bridge comes into view, you’ll likely spot a guard pacing horizontally below. Wait until the guard reaches the trees and then turns to the west to begin following, then take him out before he has the chance to react. Inspecting this guard will provide us with a clip for the 6-YYY and a Med-Kit (25% Health Restore). You will need to take the Med-Kit if you want the 6-YYY ammunition, so either take it on the initial inspection, or return to this point when you have a need for it.
Cross the bridge to the north and you’ll notice that the second tree ahead provides a bit of cover. Stay behind its leaves, and you’ll see a guard just ahead, pacing horizontally. Wait until he’s reached the treeline on the left and then begin to follow him as he continues to patrol to the right. Neutralize the guard before he reaches the treeline to the right, and avoid inspecting his body as he has nothing to offer.
From here, we’ll continue to the northeast, passing two crates to arrive at a pair of tire tracks where we can spot the next guard pacing horizontally just ahead. Once again, we’ll need to wait behind the tree until he’s finished his patrol to the right, acting immediately as he turns and passes the tree. Follow him cautiously, and then go for an assassination – you’ll be rewarded with a Falcon 2 clip upon inspection.
![]() There’s only one more guard to neutralize in this area and we’ll have successfully infiltrated the first half of the Jungle Base. Continue heading to the the left and you’ll come upon the entrance to a warehouse – the front of which is blocked by a guard facing to the south. Approach the guard slowly and line up your Falcon 2 for an assassination, then pull the trigger to neutralize any threat this area poses. You can now return to any previous Med-Kits to recover, as we’ll be unable to return to the landing site once we’ve progressed to the second half of the jungle. When you’re ready to move on, enter the darkness of the warehouse.
There’s only one more guard to neutralize in this area and we’ll have successfully infiltrated the first half of the Jungle Base. Continue heading to the the left and you’ll come upon the entrance to a warehouse – the front of which is blocked by a guard facing to the south. Approach the guard slowly and line up your Falcon 2 for an assassination, then pull the trigger to neutralize any threat this area poses. You can now return to any previous Med-Kits to recover, as we’ll be unable to return to the landing site once we’ve progressed to the second half of the jungle. When you’re ready to move on, enter the darkness of the warehouse.
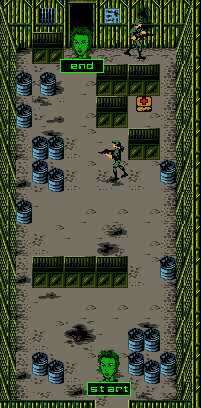
JUNGLE BASE WAREHOUSE I: MAP OVERVIEW
When you’ve arrived in the warehouse, approach the set of dumpsters by heading north, then head to the left towards the wall. You’ll be able to pass through a thin gap here to the north where you can take cover behind a lone oil barrel. From your current vantage point you’ll spot a guard pacing ahead horizontally – when he’s faced away from you and begins his patrol to the right, come out from hiding and go in for a quick assassination.
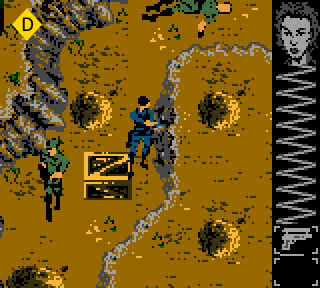
Once he’s been neutralized, we’ll head to the north where a series of dumpsters have been arranged in a ‘C’ shape, with the corner missing. Stand in this gap and you should be able to see the guard pacing horizontally in front of the exit. When the guard reaches the end of his patrol to the left, he’ll turn on his heel and prepare to march to the right – this is your cue to head north, passing the dumpsters as you close in for an assassination. Neither guard offers up any supplies, but if you continue walking to the right, you’ll find a gap in the dumpsters leading to a Med-Kit (25% Health Restore).
Now that the warehouse is finished, we’ll exit to the north and take care of the second half of the Jungle Base.
JUNGLE BASE I – RIVER’S EDGE : MAP OVERVIEW

The second you’ve emerged from the warehouse and into the jungle, you’ll need to head south east towards a line of oil barrels and take cover behind the latter three. When the guard ahead begins to head to the right, pass through the gap between the barrels and come in close for an assassination.
Once you’ve finished, follow the path to the northwest and you’ll pass a large oil drum. Work your way around the jungle tree and seek shelter behind the bush directly ahead of it. From your current position, you should be able to spot the legs of the the next guard pacing horizontally. Predictably, you’ll need to wait until the guard has finished walking to the left and turns before you can approach him stealthily. Once you’ve caught up, assassinate him before he reaches the end of his patrol to the right.
Inspecting the fallen guard will provide a Machine Gun clip for the 6-YYY. If you’ve been itching to get some use out of it, we’re going to get a chance to storm the base now.
When you’re ready, switch over to the 6-YYY and rush out onto the path to the northeast – you’ll encounter the next guard pacing horizontally in front of a jungle tree that blocks the northern path. Open fire as you rush in and you’ll take him out with little resistance. From here, head to the southeast and you’ll encounter the next guard as you pass by a bush. Put down some suppression fire with the 6-YYY to take him down, and then do the same for the guard that arrives just behind him. That was fun. Inspecting the first guard in this area will provide us with a clip for the Falcon 2, which we’ll switch back to during this time.
![]() It’s likely that you took some damage during the 6-YYY rampage, so let’s take care of that – if you move to the northeast you should be able to locate a series of barrels and a single boulder to the right. Standing behind the boulder and inching Joanna’s position slightly further north will reveal a guard that paces vertically through the tire tracks ahead. When the guard resumes his patrol to the north, follow him covertly and go in for an assassination with the Falcon 2 when you’re close enough. Inspecting the fallen guard will reveal a Machine Gun clip for the 6-YYY along with a Med-Kit (25% Health Restore).
It’s likely that you took some damage during the 6-YYY rampage, so let’s take care of that – if you move to the northeast you should be able to locate a series of barrels and a single boulder to the right. Standing behind the boulder and inching Joanna’s position slightly further north will reveal a guard that paces vertically through the tire tracks ahead. When the guard resumes his patrol to the north, follow him covertly and go in for an assassination with the Falcon 2 when you’re close enough. Inspecting the fallen guard will reveal a Machine Gun clip for the 6-YYY along with a Med-Kit (25% Health Restore).
When you’re finished, we’ll head to the south towards the pool of water, following the perimeter to the east. Before we leave the waters edge however, we’ll switch back over to the 6-YYY as we begin our second rampage.
![]() When you’re ready, head to the north and you’ll encounter the first guard; open fire with the 6-YYY and you’ll take him out in seconds. The second guard can be found standing in the middle of the pathway to the north, making him vulnerable to a head-on assault. Once you’ve rushed him with the 6-YYY in a blaze of glory, you’ll manage to take out both guards. Upon inspection, you’ll find that the first guard offers up a Med-Kit (25% Health Restore) which we can use. The second guard would have provided us with a 6-YYY Submachine Gun, but since we’re already holding one, we won’t be able to pick it up.
When you’re ready, head to the north and you’ll encounter the first guard; open fire with the 6-YYY and you’ll take him out in seconds. The second guard can be found standing in the middle of the pathway to the north, making him vulnerable to a head-on assault. Once you’ve rushed him with the 6-YYY in a blaze of glory, you’ll manage to take out both guards. Upon inspection, you’ll find that the first guard offers up a Med-Kit (25% Health Restore) which we can use. The second guard would have provided us with a 6-YYY Submachine Gun, but since we’re already holding one, we won’t be able to pick it up.
From this point, we’ll head to the north and follow the path as it turns to the west. There should be a guard here that paces the path horizontally, though he’ll either be approaching your position, or leaving your position. If you find that you encounter the guard from the front, use the 6-YYY to make quick work of him. If you manage to have the guard walking away, switch over to the Falcon 2 and go in for an assassination.
![]() Once the guard has been neutralized, you should be near a large boulder on the shore of the river’s edge. If you look to the south of this boulder, you’ll spot a jungle tree along with a guard that paces horizontally to the south. Switch over to the Falcon 2 if you haven’t done so already, and wait until the guard has his back turned as he resumes his patrol to the left. Approach him stealthily from behind the tree and then assassinate when the opportunity presents itself. You won’t find any further supplies on the guards until you’ve moved on to the next mission, so ignore the inspection and carry on down to the south.
Once the guard has been neutralized, you should be near a large boulder on the shore of the river’s edge. If you look to the south of this boulder, you’ll spot a jungle tree along with a guard that paces horizontally to the south. Switch over to the Falcon 2 if you haven’t done so already, and wait until the guard has his back turned as he resumes his patrol to the left. Approach him stealthily from behind the tree and then assassinate when the opportunity presents itself. You won’t find any further supplies on the guards until you’ve moved on to the next mission, so ignore the inspection and carry on down to the south.
When you arrive at the bush, you should manage to spot the next guard patrolling horizontally below. Wait until he’s also resumed his patrol to the right and sneak up behind for an assassination.
Hug the treeline as you continue to the left here, and when you have the chance to progress north, you should spot another guard pacing vertically, with his path ending at a barrel. For the easiest assassination, wait until he’s left the barrel to the north and passes your current position to take him out without alerting the last guard.
For the finale, we’ll remain close to the right treeline and locate the barrels the last guard was walking towards – once we’ve done so, we’ll hide behind the barrel closest to the right.

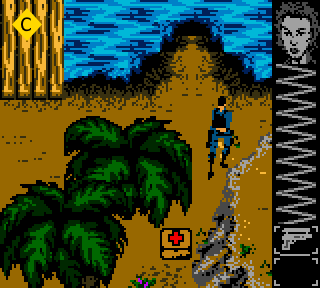
![]() From this position, you should be able to see the final guard making his way down to the south, and then to the north as he paces vertically. When he turns to head north, leave the barrel as you close in on the guard for an assassination. Once you’ve taken him out you’ll have infiltrated the first Jungle Base successfully, dispatching all of the guards – all that’s left is to walk onto the northern wharf ahead, and then get into the raft found docked on the right side. Once you’ve launched into the South American channel, you’ll begin the second stage of your mission to locate the Cyborg Factory with the treacherous River Crossing…
From this position, you should be able to see the final guard making his way down to the south, and then to the north as he paces vertically. When he turns to head north, leave the barrel as you close in on the guard for an assassination. Once you’ve taken him out you’ll have infiltrated the first Jungle Base successfully, dispatching all of the guards – all that’s left is to walk onto the northern wharf ahead, and then get into the raft found docked on the right side. Once you’ve launched into the South American channel, you’ll begin the second stage of your mission to locate the Cyborg Factory with the treacherous River Crossing…