Chapter 1-5: Final Test


Navigation:
Chapter 1: Carrington Institute Training
-1-1: Basic Training
-1-2: Search & Rescue
-1-3: Stealth Training
-1-4: Advanced Training
-1-5: Final Test
Chapter 2: The Jungles of South America
Chapter 3: dataDyne Cybernetic Manufacturing
Chapter 4: dataDyne Operations Base/Crash Site
Chapter 5: Captive aboard the Pelagic I
Chapter 6: Carrington Institute HQ
Chapter 7: Perfect Dark GBC Secrets and Extras
CARRINGTON INSTITUTE: FINAL TEST

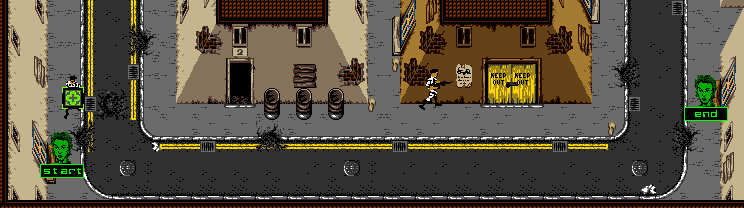
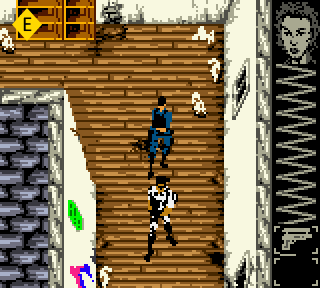
Now that you’re back out in the streets, walk to the left so that you’re facing the Advanced Training exit – Carrington will prompt you to use your initiative to locate all of the hostages in the area. When he’s finished delivering the objective, travel to the north along the wall of the Advanced Training building. You may encounter a guard along the northern wall, so be prepared to return fire with your Falcon 2 – he doesn’t carry anything on his person, so once you’ve reached the northern wall turn to the left and continue walking west behind the building. Once you emerge from the alleyway you should notice some cow graffiti directly ahead, along with a guard that paces the area horizontally. Wait for the guard to turn around and start heading south and you’ll manage to sneak up behind him for a quick assassination. He carries a Med-Kit (25% Health Restore) if you need to recover, though you can always return to the assailed guard later on should you need it. From here, we’ll continue to walk to the west until we come upon our first unlocked door. You’ll notice that there’s a Med-Kit (25% Health Restore) in the alleyway next to the entrance, keep its location in mind should you need it later on. When you’re ready, enter the building to rescue the first hostage.
MISSION OBJECTIVES:
• RESCUE HOSTAGES
• REACH EXIT
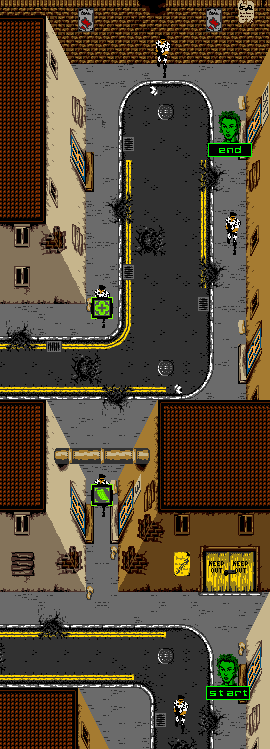
FINAL TEST: NORTHWEST INTERIOR MAP OVERVIEW
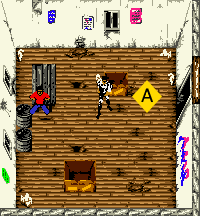
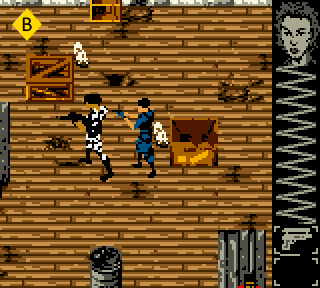
![]() Inside the Northwest building, a single guard stands at attention facing to the south. Luckily, we’ve come in from an entrance to the east, which means we can employ a bit of stealth and approach the guard silently until we’ve bridged the gap and then go in for a quick and easy assassination. That’s all there is to it – you won’t encounter any further resistance in this room, so just sprint to the left and you’ll find the first hostage tied to the table. Once you’ve reached the hostage and freed him from his bounds, simply turn on your heel and leave through the exit you initially came in from on the right. Easy!
Inside the Northwest building, a single guard stands at attention facing to the south. Luckily, we’ve come in from an entrance to the east, which means we can employ a bit of stealth and approach the guard silently until we’ve bridged the gap and then go in for a quick and easy assassination. That’s all there is to it – you won’t encounter any further resistance in this room, so just sprint to the left and you’ll find the first hostage tied to the table. Once you’ve reached the hostage and freed him from his bounds, simply turn on your heel and leave through the exit you initially came in from on the right. Easy!
CARRINGTON INSTITUTE: FINAL TEST II
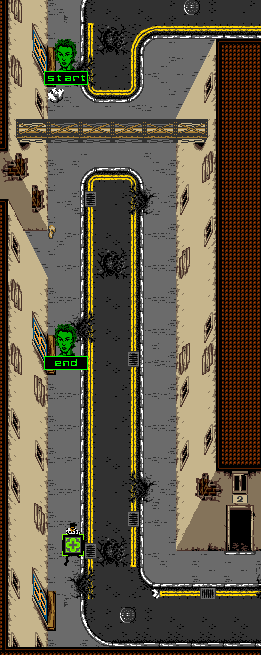
Once you’ve returned to the streets, continue heading to the south and you’ll spot the next guard pacing vertically – you should be able to close in on his position and then deliver the fatal blow without much issue. Inspecting his body afterwards will reveal an ammunition clip for your Falcon 2. You’ll find the entrance to the West Interior near the downed guard, just before you see a large ventilation shaft overhead.
When you’re ready, enter the West Interior.
FINAL TEST: WEST INTERIOR MAP OVERVIEW
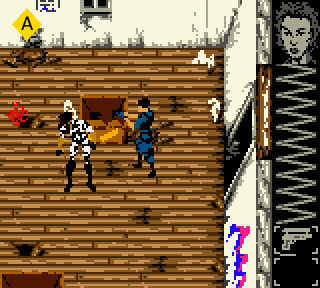
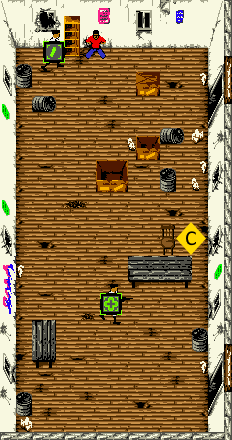
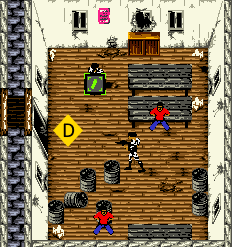
![]() You’ll find that this room has been fortified in a similar fashion as the interior before it – one single guard stands at attention, facing away from the only viable entrance. Stealthily, make your way across the room and you’ll line up an ideal shot with the back of the guards head, once you pull the trigger you’ll neutralize any threat he poses. You’ll need to rescue all four tied hostages in this room, with three on the left side, and the final hidden in the right corner below the entrance. Once you’ve liberated all four hostages in this area, you can leave the West Interior through its entrance. Five hostages down, four to go!
You’ll find that this room has been fortified in a similar fashion as the interior before it – one single guard stands at attention, facing away from the only viable entrance. Stealthily, make your way across the room and you’ll line up an ideal shot with the back of the guards head, once you pull the trigger you’ll neutralize any threat he poses. You’ll need to rescue all four tied hostages in this room, with three on the left side, and the final hidden in the right corner below the entrance. Once you’ve liberated all four hostages in this area, you can leave the West Interior through its entrance. Five hostages down, four to go!
CARRINGTON INSTITUTE: FINAL TEST III
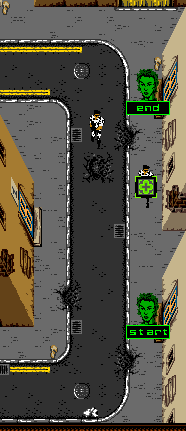
Once you’ve re-emerged in the streets, heading directly to the south will reveal the next open door – however, rather than entering inside immediately, we’re going to circumvent a trap that awaits us. Travel south past the doorway and you’ll discover another guard standing at attention, facing away from us. Assassinate the guard and he’ll provide yet another Med-Kit (25% Health Restore) should you need it, otherwise you can choose to return if you haven’t inspected him. From here, we’ll backtrack to the north to enter the open door we’ve passed.
FINAL TEST: SOUTHWEST INTERIOR MAP OVERVIEW
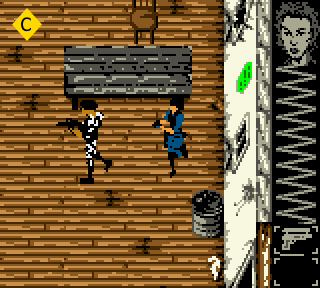
![]() Once you’ve entered the Southwest Interior, seek cover behind the cardboard box to the left and wait. A guard that paces the area horizontally will appear to march towards the box and then turn as he heads to the left. Follow the guard closely and then go in for an assasination when you get the chance. Rescue the hostage next to the bookshelf and then head back to the entrance. Rather than leaving straight away, follow the south wall and you’ll come across a table. A guard routinely paces the length of the table, so wait until he’s turned back to the left and then work your way over for a quick assassination.
Once you’ve entered the Southwest Interior, seek cover behind the cardboard box to the left and wait. A guard that paces the area horizontally will appear to march towards the box and then turn as he heads to the left. Follow the guard closely and then go in for an assasination when you get the chance. Rescue the hostage next to the bookshelf and then head back to the entrance. Rather than leaving straight away, follow the south wall and you’ll come across a table. A guard routinely paces the length of the table, so wait until he’s turned back to the left and then work your way over for a quick assassination.
This guard has another Med-Kit (25% Health Restore) on his person, and since we’ve now uncovered four of them we now have more kits than we can use at 100% restore. If you’d like, you can inspect the guard here to heal whatever health deficit you’ve endured to this point, but it should be definite overkill. When you’re ready to leave, you can continue to the south to discover the lower exit.
CARRINGTON INSTITUTE: FINAL TEST IV
When you’ve emerged in the streets from the lower entrance, you should notice that assailed guard that we took care of earlier. We would have had to contend with him head-on if we hadn’t, so luckily, we no longer have to. Remember, that inspecting his body will reveal a Med-Kit (25% Health Restore) should we need it later. When you’re ready, head to the south until you encounter the roof and travel along the wall to the east. After you pass by three barrels, you’ll find a lone guard patrolling the area horizontally. If you’ve stuck to the southern wall, he shouldn’t be able to see you at all. Since traveling to the north will compromise your position, we’re not going to take out this guard – instead we’ll travel to the east. Once you arrive at the south east corner, switch over to your MG1-16G and then enter the doorway found to north.
FINAL TEST: SOUTHEAST INTERIOR MAP OVERVIEW

![]() You’ll be set upon immediately by a pair of guards in the Southeast Interior, one appears to the east and the other to the northeast. Take care of the northeast guard first by firing in his direction as you walk towards him so that the hostages are out of harms way. Once he’s been dealt with, focus your efforts on taking out the guard that appeared to the east, who should now be in pursuit to your south. Once both guards have been taken out, you can inspect the northeast guard for a replacement clip for the Falcon 2 and then rescue both hostages in this area. Once you’re finished, we’ll exit back to the streets from the west entrance.
You’ll be set upon immediately by a pair of guards in the Southeast Interior, one appears to the east and the other to the northeast. Take care of the northeast guard first by firing in his direction as you walk towards him so that the hostages are out of harms way. Once he’s been dealt with, focus your efforts on taking out the guard that appeared to the east, who should now be in pursuit to your south. Once both guards have been taken out, you can inspect the northeast guard for a replacement clip for the Falcon 2 and then rescue both hostages in this area. Once you’re finished, we’ll exit back to the streets from the west entrance.
CARRINGTON INSTITUTE: FINAL TEST V
Head north from the Southeast entrance and you’ll come across two more guards ahead – open fire with the MG1-16G and you should be able to take them out without much difficulty. The guard closest to the sidewalk will harbor a Med-Kit (25% Health Restore) when inspected, so if your health is looking a little dire following the back-to-back confrontation you can pick it up. This would also be a good time to consider backtracking to the previous Med-Kits in the street if you need them, otherwise, you can carry on through the doorway that the guards were pacing in front of to the right.
FINAL TEST: EAST INTERIOR MAP OVERVIEW
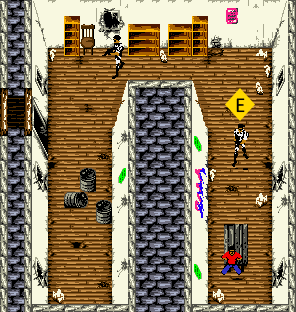
![]() The first guard in the Eastern Interior is positioned to the northeast – he’s facing to the south, so there’s no way to remain covert to pass him – either take him on with the whatever remains of the MG1-16G, or chase it with three shots of your Falcon 2 to neutralize the guard. Ignore the inspection and switch over to the Falcon 2 for a stealthy assassination; we’re going to continue to the east, and then travel south down the corridor to find the last guard in this room facing away from us. After you’ve taken out the guard with a single shot, travel to the south and you’ll find the final hostage tied to table. Rescue him and return to the streets.
The first guard in the Eastern Interior is positioned to the northeast – he’s facing to the south, so there’s no way to remain covert to pass him – either take him on with the whatever remains of the MG1-16G, or chase it with three shots of your Falcon 2 to neutralize the guard. Ignore the inspection and switch over to the Falcon 2 for a stealthy assassination; we’re going to continue to the east, and then travel south down the corridor to find the last guard in this room facing away from us. After you’ve taken out the guard with a single shot, travel to the south and you’ll find the final hostage tied to table. Rescue him and return to the streets.
CARRINGTON INSTITUTE: FINAL TEST VI
From here, head north until you find a large yellow door marked ‘Keep Out’, then head to the west but stop before you get to the edge of the alleyway. You should be able to spot a guard that is headed south through the gap – if you wait by the corner, the guard should pass by without paying you any attention. Once it’s safe to do so, follow the guard and then go in for an assassination; you’ll be rewarded with a clip for the MG1-16G when you inspect the guard. When you’re ready, we’ll continue to the north through the alleyway and follow the sidewalk to the right as we continue to head up. We will eventually arrive at another guard which we can dispatch easily with our reloaded MG1-16G. With that out of the way, we’ll continue north until we come across a door to the right marked ‘exit’. It should be open since we’ve managed to rescue all 9 hostages in the Final Test Training simulation, otherwise you’ll have to backtrack to find the hostages you’ve missed. With the door open, we’ll travel inside to finish our field training.
FINAL TEST: CARRINGTON INSTITUTE MAP OVERVIEW
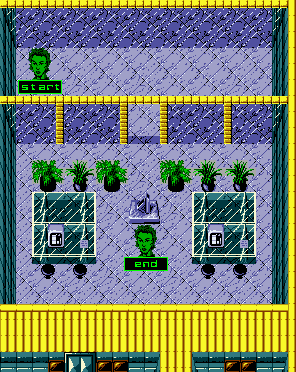
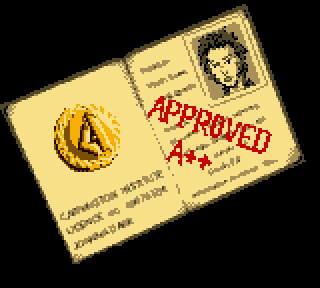
![]() With the urban setting behind us, we’ll find ourselves back inside the Carrington Institute proper. All you’ll need to do from this point is carry on to the right until you spot an entryway to the south. As soon as you travel through the entryway you’ll have proven yourself as a recognized Carrington Institute Agent. After receiving her license at the graduation ceremony, Joanna Dark is approached by Daniel Carrington who briefs the newest qualified operative on her first special assignment deep in the jungles of South America. A conspiracy towards the insidious dataDyne corporation is just beginning to make itself known…
With the urban setting behind us, we’ll find ourselves back inside the Carrington Institute proper. All you’ll need to do from this point is carry on to the right until you spot an entryway to the south. As soon as you travel through the entryway you’ll have proven yourself as a recognized Carrington Institute Agent. After receiving her license at the graduation ceremony, Joanna Dark is approached by Daniel Carrington who briefs the newest qualified operative on her first special assignment deep in the jungles of South America. A conspiracy towards the insidious dataDyne corporation is just beginning to make itself known…
Daniel Carrington: Excellent, Joanna! Your skills have grown. I’m proud of what you have accomplished. Now it is time to give you a real mission. You will be dropped into a South American jungle. The exact location must remain classified. A cyborg manufacturing plant is hidden near the drop zone. Destroy it!
Joanna Dark: How should I deal with any opposition?
Daniel Carrington: You must proceed with caution. The factory will be heavily defended, and any forces you come across will be well armed. Intel data indicates there is an attack helicopter that performs routine patrol flights. Use force where necessary, Joanna, but be careful not to compromise the mission.
Joanna Dark: I won’t let you down, sir.