Chapter 6-2: Carrington Institute Floor II


Navigation:
Chapter 1: Carrington Institute Training
Chapter 2: The Jungles of South America
Chapter 3: dataDyne Cybernetic Manufacturing
Chapter 4: dataDyne Operations Base/Crash Site
Chapter 5: Captive aboard the Pelagic I
Chapter 6: Carrington Institute HQ
6-1: Carrington Institute Floor I
6-2: Carrington Institute Floor II
6-3: Carrington Institute Floor III
6-4: Carrington Institute Floor IV
6-5: dataDyne Attack
Chapter 7: Perfect Dark GBC Secrets and Extras
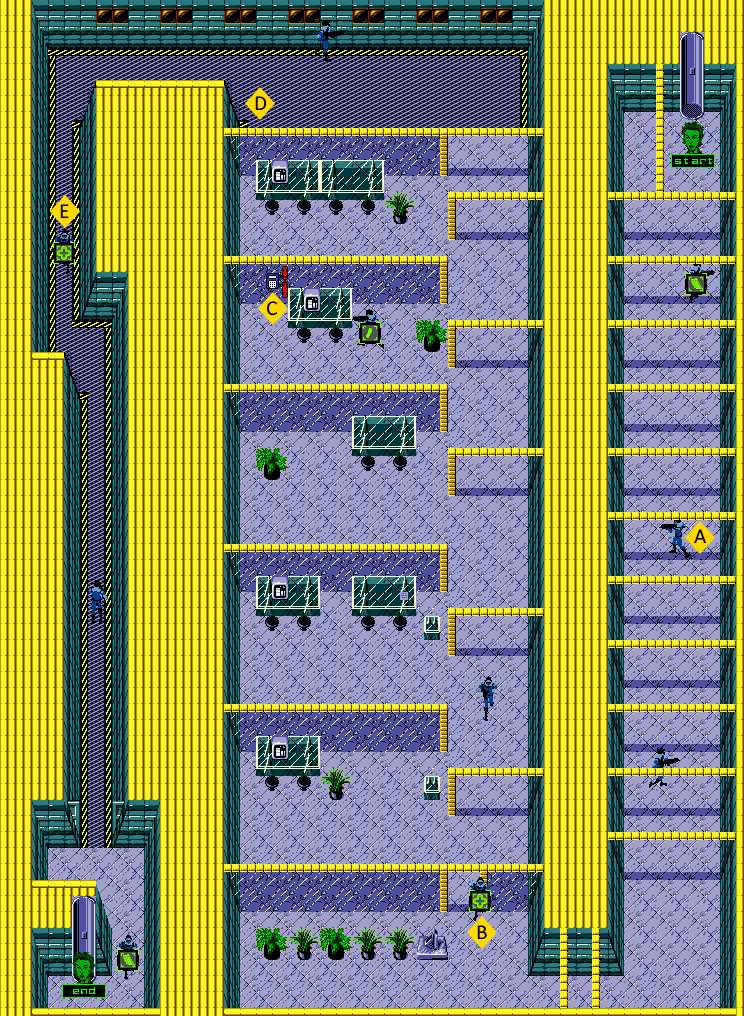
CARRINGTON INSTITUTE FLOOR II: MAP OVERVIEW
MISSION OBJECTIVES:
• PREVENT DATADYNE FROM DESTROYING CI HQ
• KILL ALL DATADYNE GUARDS
As soon as you set foot onto the second floor, you’ll be provided with a single minute to find and defuse the timer, all the while facing off against dataDyne opposition. Luckily, you’ll only need to contend with six guards en-route to the device, and all can be taken out covertly.
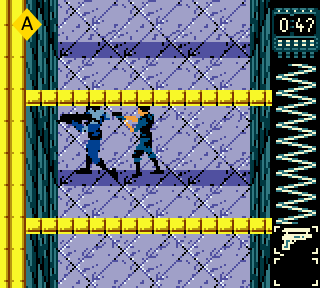
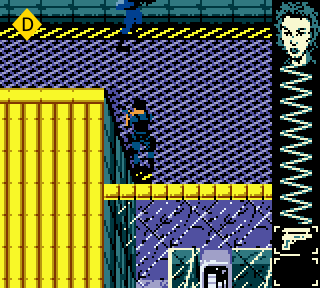
![]() From where you start at the elevator, head to the south and you’ll encounter the first guard pacing horizontally. Assassinate him with the Falcon 2 as he heads towards the wall, and then quickly inspect him for a Machine Gun ammunition clip. Continue heading to the south and you’ll locate the next guard, also pacing the width of the hall. Assassinate him with the Falcon 2 from behind, and then carry on to the final guard in the hall below. Once you’ve managed to assassinate the third guard whilst avoiding detection, you should have a little over 40 seconds remaining to defuse the Explosive Device.
From where you start at the elevator, head to the south and you’ll encounter the first guard pacing horizontally. Assassinate him with the Falcon 2 as he heads towards the wall, and then quickly inspect him for a Machine Gun ammunition clip. Continue heading to the south and you’ll locate the next guard, also pacing the width of the hall. Assassinate him with the Falcon 2 from behind, and then carry on to the final guard in the hall below. Once you’ve managed to assassinate the third guard whilst avoiding detection, you should have a little over 40 seconds remaining to defuse the Explosive Device.
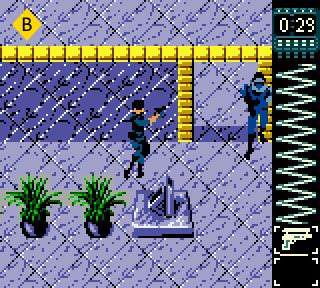
![]() Sprint to the south from here to arrive at the end of the hallway, then continue sprinting as you hug the bottom wall and begin making your way to the west. You should be able to pass by the fourth guard stationed at a doorway and facing your direction; fortunately we’ve managed to stay out of sight by tracing the southern wall. Once you’ve passed the doorway, you should be able to locate a Carrington Institute statue next to a potted plant to the north – if you walk through the gap between these objects, you’ll be able to approach the doorway ahead and then assassinate the guard with your Falcon 2.
Sprint to the south from here to arrive at the end of the hallway, then continue sprinting as you hug the bottom wall and begin making your way to the west. You should be able to pass by the fourth guard stationed at a doorway and facing your direction; fortunately we’ve managed to stay out of sight by tracing the southern wall. Once you’ve passed the doorway, you should be able to locate a Carrington Institute statue next to a potted plant to the north – if you walk through the gap between these objects, you’ll be able to approach the doorway ahead and then assassinate the guard with your Falcon 2.
This guard will provide us with a Med-Kit (25% Health Restore), but we’ll return for it once the pressing matter of the Explosive Device has been dealt with. Travel north through the doorway, and you’ll locate a glass table next to a beam – walk between the table and the beam and you’ll arrive at a cubicle divider. Position yourself in front of the yellow cubicle divider and then wait a few seconds for the fifth guard to make his way to the south. Once the guard has passed your location, covertly approach him from behind and go in for an assassination.
Once the guard has been dealt with, we’ll make up for lost time by positioning ourselves in the middle of the overhead beams and sprinting to the north, passing by the next two cubicles.
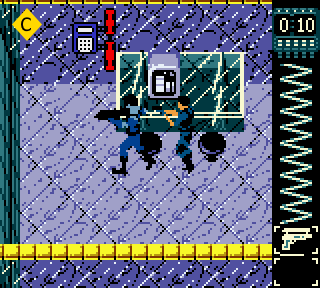
![]() The fourth cubicle – distinguished by the large potted plant at its entrance – is where you’ll locate the Explosive Device. Approaching the potted plant covertly from the right side will allow us to witness the sixth guard approach it on the left as she finishes his patrol to the east. Once the guard turns around, we’ll use the little time remaining to approach him from behind for an assassination via Falcon 2, and then sprint to the Explosive Device affixed on the cubicle divider, next to the desk. If everything goes as intended, you should be able to disarm the Explosive Device with around 10 seconds of time to spare.
The fourth cubicle – distinguished by the large potted plant at its entrance – is where you’ll locate the Explosive Device. Approaching the potted plant covertly from the right side will allow us to witness the sixth guard approach it on the left as she finishes his patrol to the east. Once the guard turns around, we’ll use the little time remaining to approach him from behind for an assassination via Falcon 2, and then sprint to the Explosive Device affixed on the cubicle divider, next to the desk. If everything goes as intended, you should be able to disarm the Explosive Device with around 10 seconds of time to spare.
If you’re unable to reach the device on any floor, the resulting explosion will result in an instant death, failing the mission. However, you’ll be able to continue from the furthest floor you’ve reached, making this mission incredibly forgiving.
Now that we have the time, you can inspect the sixth guard for a Falcon 2 ammunition clip, and then choose to return to the fourth guard in the doorway for the Med-Kit (25% Health Restore) if you’ve incurred any damage on the way to the Explosive Device.
![]() When you’re ready to continue, we’ll head to the north in order to pass the final cubicle and make our way to the grated flooring on the opposite side. Once you’ve crossed the threshold to the metal grating, stay at the bottom of the path so that you’re hugging the cubicle divider as you travel west and you’ll arrive at a corner where the cubicle meets the wall of the Institute. Remain in this corner and you’ll witness the seventh guard above your location, patrolling to the east – once he passes your corner, covertly approach the guard from behind and you’ll be able to easily assassinate him with the Falcon 2.
When you’re ready to continue, we’ll head to the north in order to pass the final cubicle and make our way to the grated flooring on the opposite side. Once you’ve crossed the threshold to the metal grating, stay at the bottom of the path so that you’re hugging the cubicle divider as you travel west and you’ll arrive at a corner where the cubicle meets the wall of the Institute. Remain in this corner and you’ll witness the seventh guard above your location, patrolling to the east – once he passes your corner, covertly approach the guard from behind and you’ll be able to easily assassinate him with the Falcon 2.
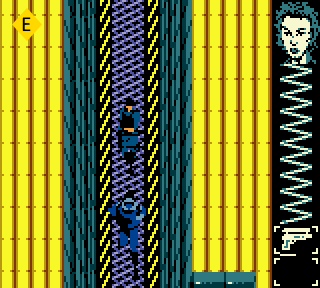
![]() From here, we’ll follow the grating to the west, passing by our corner until the path turns to the south. Follow the path into a thin corridor and you’ll encounter the eighth guard heading south as well – bridge the distance to the guard before he reaches the southern wall and then assassinate him with the Falcon 2. If you’ve taken any damage on the current floor, you can inspect the fallen guard for a Med-Kit (25% Health Restore) – otherwise, it’s preferable to wait until the two remaining guards ahead have been dealt with. Cautiously begin inching your way down the south through the thin corridor and you’ll encounter the ninth guard.
From here, we’ll follow the grating to the west, passing by our corner until the path turns to the south. Follow the path into a thin corridor and you’ll encounter the eighth guard heading south as well – bridge the distance to the guard before he reaches the southern wall and then assassinate him with the Falcon 2. If you’ve taken any damage on the current floor, you can inspect the fallen guard for a Med-Kit (25% Health Restore) – otherwise, it’s preferable to wait until the two remaining guards ahead have been dealt with. Cautiously begin inching your way down the south through the thin corridor and you’ll encounter the ninth guard.
As soon as the guard steps into view and begins heading towards your position, turn around and retrace your steps to the north – doing so will allow you to remain covert as you remain hidden from his line of sight. Keep a safe distance as you arrive the point in which the path widens, and then continue north to return to the body of the eighth guard. From here, you should be able to witness the tenth guard reaching the wall at the top of the widened path as he turns around and continues him patrol to the south. Once this opportunity presents itself, covertly approach the guard from behind and then assassinate him with your Falcon 2.
To locate the final guard, you’ll need to continue heading to the south until the thin corridor opens to reveal the room containing the elevator to the third floor. It’s likely that when you enter this area, you’ll be able to witness the guard heading south – unfortunately, the guard is too far away from our position to successfully approach for an assassination, giving us two alternative approaches.
For a more direct confrontation, switch over to the 6-YYY and follow the guard; open fire the second you’ve managed to bridge the gap and you’ll put the guard down with a three round burst. To remain convert, cautiously edge your way towards the guard as you enter the room, and then prepare to turn around and head north when he steps into view. You’ll need to keep your distance, but keep the top of the guard visible as you return to the thin corridor – if you’ve accomplished this, you’ll discover that the guard will turn around as he reaches the rightmost wall, allowing you to approach him for an assassination.
Once the final guard has been neutralized, inspect his body for a Machine Gun clip, and return to the seventh guard for the Med-Kit (25% Health Restore) if you require it, and haven’t done so already.
Since we’ve disarmed the Explosive Device and dealt with all of the dataDyne opposition on the second floor, we’ll head south and then enter the elevator to reach the third floor.