Chapter 6-1: Carrington Institute HQ


Navigation:
Chapter 1: Carrington Institute Training
Chapter 2: The Jungles of South America
Chapter 3: dataDyne Cybernetic Manufacturing
Chapter 4: dataDyne Operations Base/Crash Site
Chapter 5: Captive aboard the Pelagic I
Chapter 6: Carrington Institute HQ
6-1: Carrington Institute Floor I
6-2: Carrington Institute Floor II
6-3: Carrington Institute Floor III
6-4: Carrington Institute Floor IV
6-5: dataDyne Attack
Chapter 7: Perfect Dark GBC Secrets and Extras
CARRINGTON INSTITUTE HQ
![]()
![]()

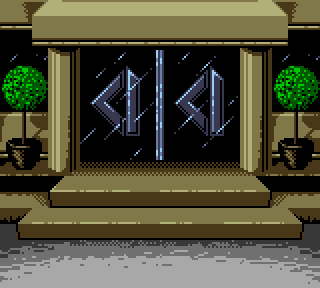
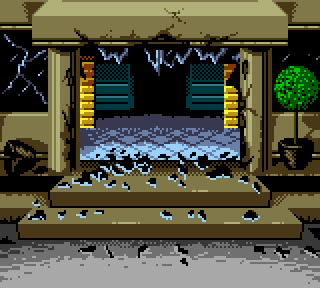
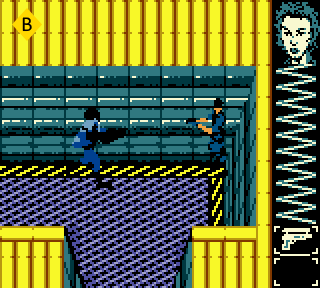
As Joanna had suspected, dataDyne would seek vengeance for her intervention in South America, though much sooner than she realized. While the agent prepared to debrief in her office, the sounds of idle chatter and keystrokes were overpowered by a sudden explosion that rocked the ground floor; dataDyne Shock Troopers had launched an attack against the Institute, priming C4 to gain entry into the building as they filed inside. Amidst the chaos, Daniel Carrington reaches out to Joanna Dark from his office on the fourth floor…
Daniel Carrington: The institute is under attack.
Joanna Dark: What?!
Daniel Carrington: Joanna, you’ve got to stop them… and quickly.
Joanna Dark: Leave it to me.
CARRINGTON INSTITUTE FLOOR I: MAP OVERVIEW
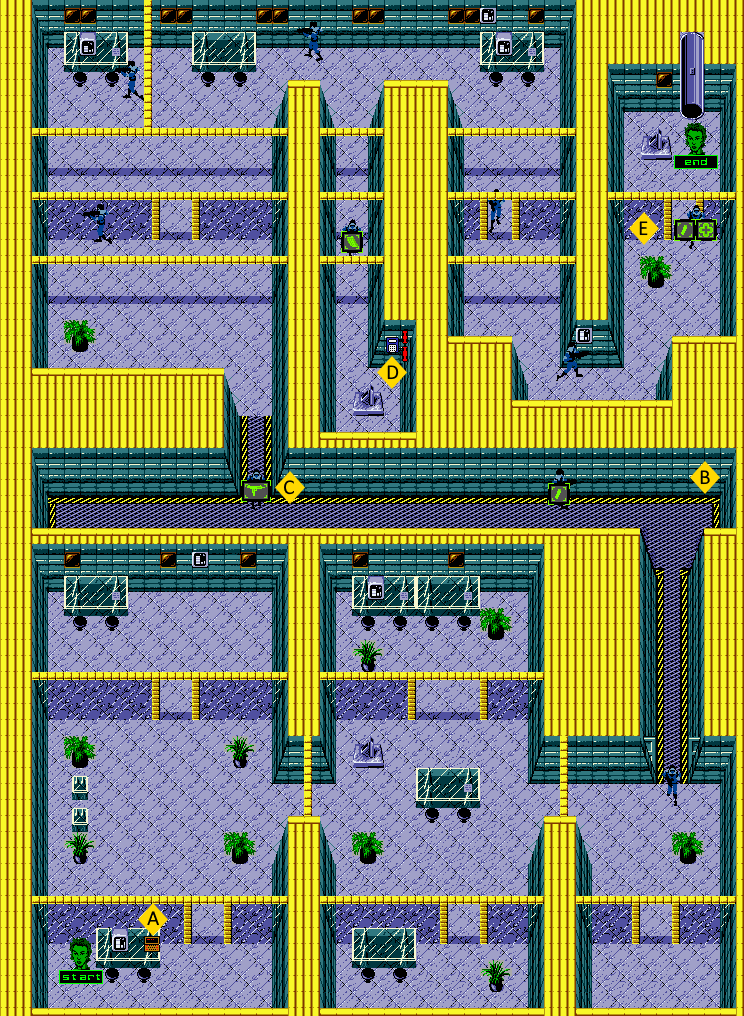
MISSION OBJECTIVES:
• PREVENT DATADYNE FROM DESTROYING CI HQ
• KILL ALL DATADYNE GUARDS
![]() You’ll start off in Joanna’s cubicle on the first floor of the Institute; the dataDyne Shock Troopers have armed explosive devices on each floor giving you a limited time to defuse each one as you progress upwards, eliminating dataDyne’s forces all the while. Fortunately, the first floor provides us a bit of a caveat, as the timer won’t begin until we pick up the Laptop Computer from Joanna’s desk. With this in mind, we’ll just avoid collecting the laptop until we’ve eliminated all ten guards on the first floor in our own time, and then make our way back to the desk to begin the defusing mission, which makes things significantly easier.
You’ll start off in Joanna’s cubicle on the first floor of the Institute; the dataDyne Shock Troopers have armed explosive devices on each floor giving you a limited time to defuse each one as you progress upwards, eliminating dataDyne’s forces all the while. Fortunately, the first floor provides us a bit of a caveat, as the timer won’t begin until we pick up the Laptop Computer from Joanna’s desk. With this in mind, we’ll just avoid collecting the laptop until we’ve eliminated all ten guards on the first floor in our own time, and then make our way back to the desk to begin the defusing mission, which makes things significantly easier.
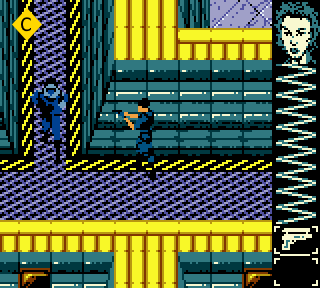
From your cubicle, move around the desk to the right and then head north into the first enclosure between offices. Locate a pair of potted plants to the east, and then pass through the gap provided to enter the second enclosure as evidenced by the beam overhead. Once you’re inside the second enclosure, you’ll find a large desk in the center of the area; continue heading east as you pass the desk and you’ll move into the third enclosure and encounter the first dataDyne soldier pacing to the south. If you choose to approach the dataDyne soldier from behind as he moves into your enclosure, you’ll be provided with a brief window to assassinate him with the Falcon 2 before he’s managed to turn around. Alternatively, if you stay out of sight as he enters the room and wait for him to resume his patrol to the north, you’ll be provided with a much more generous window to assassinate him as you silently stalk him through the long hallway ahead.
Once you’ve managed to assassinate the first guard, we’ll continue through the hallway until the path branches off to the west. You’ll encounter the second guard as you head west, but depending on your timing, will either be heading west away from your position, or east towards it.
![]() If the guard is heading away from your current position to the west, it’s a simple manner of assassinating him with the Falcon 2 as you bridge the gap. If the guard is heading east towards your position though, you’ll find that keeping your distance and heading in the same direction will cause the guard to remain oblivious. Curiously, even when you’ve been arrived at the corner of this hallway and the guard appears to be closing in on your position, you’ll find that remaining still against the wall will have the guard ignoring you as he simply continues his patrol to the west. Once this occurs, you can approach the second guard as intended from behind, and assassinate him with the Falcon 2.
If the guard is heading away from your current position to the west, it’s a simple manner of assassinating him with the Falcon 2 as you bridge the gap. If the guard is heading east towards your position though, you’ll find that keeping your distance and heading in the same direction will cause the guard to remain oblivious. Curiously, even when you’ve been arrived at the corner of this hallway and the guard appears to be closing in on your position, you’ll find that remaining still against the wall will have the guard ignoring you as he simply continues his patrol to the west. Once this occurs, you can approach the second guard as intended from behind, and assassinate him with the Falcon 2.
![]() Inspecting the second guard will provide us with a Falcon 2 clip, which we’ll take with us as we continue to the west. You’ll be able to locate the next guard ahead, traveling through a thin corridor that branches off to the north; approach the guard from the right side as he enters the area, and then assassinate him with the Falcon 2 when the opportunity presents itself. Inspecting the third guard will relinquish the 6-YYY Sub-machine Gun, which we’ll equip in place of the Falcon 2 for our confrontation ahead. From here, begin heading north into the next area and you’ll locate a horizontal beam that divides the room into two.
Inspecting the second guard will provide us with a Falcon 2 clip, which we’ll take with us as we continue to the west. You’ll be able to locate the next guard ahead, traveling through a thin corridor that branches off to the north; approach the guard from the right side as he enters the area, and then assassinate him with the Falcon 2 when the opportunity presents itself. Inspecting the third guard will relinquish the 6-YYY Sub-machine Gun, which we’ll equip in place of the Falcon 2 for our confrontation ahead. From here, begin heading north into the next area and you’ll locate a horizontal beam that divides the room into two.
The fourth guard can be found on the opposite side of the beam, pacing horizontally as he patrols the area. Keep your finger on the trigger of the 6-YYY Sub-machine Gun as you pass underneath the beam, and open fire if the guard has rushed towards your location. If you’ve managed to approach the guard while he’s facing away from your location, you can switch over to the Falcon 2 for an assassination.
Once you’ve managed to neutralize the fourth guard, we’ll continue with the 6-YYY as we head north through the doorway provided. If you’re especially fortunate, you should be able to reach the fifth guard ahead as he patrols to the west, giving you an ideal opportunity to covertly approach him with the Falcon 2 for an assassination. Otherwise, you’ll be thrust into a confrontation as soon as you’ve passed under the beam. Respond in kind with a few suppressive rounds from the 6-YYY in this scenario and you’ll take him out without issue.
The sixth guard can be found standing at attention to the northeast of your current location, after the rightmost desk. Given his watchful position, it’s not possible to covertly approach the guard, so you’ll be forced to open fire with the 6-YYY as he becomes alerted to your presence.
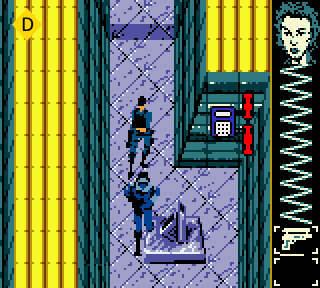
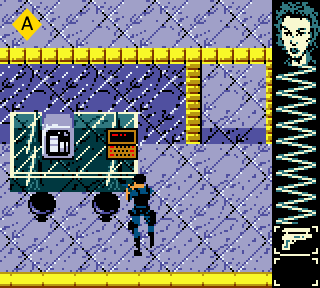
![]() Once you’ve taken him out, step over his body to the right and then make your way south to discover a thin corridor that harbors the next guard. Keep your finger ready on the trigger of the 6-YYY, as the guard will rush towards your position if he’s facing to the north. Otherwise, you’ll be able to covertly assassinate the guard with the Falcon 2 if he’s patrolling to the south. In either case, follow the corridor to its end once the seventh guard has been neutralized and you’ll discover the location of the Explosive Device. Keep this location in mind, as we’ll need to return with the Laptop Computer once we’ve taken out the remaining guards.
Once you’ve taken him out, step over his body to the right and then make your way south to discover a thin corridor that harbors the next guard. Keep your finger ready on the trigger of the 6-YYY, as the guard will rush towards your position if he’s facing to the north. Otherwise, you’ll be able to covertly assassinate the guard with the Falcon 2 if he’s patrolling to the south. In either case, follow the corridor to its end once the seventh guard has been neutralized and you’ll discover the location of the Explosive Device. Keep this location in mind, as we’ll need to return with the Laptop Computer once we’ve taken out the remaining guards.
From here, we’re going to head back up through the corridor away from the Explosive Device and head east to arrive at a desk in the corner of the room. Heading south from the desk reveals the eighth guard stationed at a doorway, facing away from us, which gives us an ideal opportunity to approach him from behind an assassinate him with the Falcon 2. Travel through the doorway when this is accomplished and you’ll spot the ninth guard patrolling horizontally below – as the guard heads to the east, you’ll be able to covertly approach him from behind for an assassination. If you’ve missed your window of opportunity, return to the north and stand in the shadow of the beam overhead; the guard will return to the west and remain oblivious to your position – take advantage of his short-sightedness via assassination once he begins heading east again.
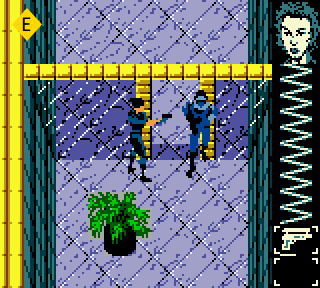
![]() As you prepare to head north, stick closely to the west wall so that you remain on the left side of the potted plant ahead. If you’ve done this correctly, you’ll be able to remain covert as the final guard comes into view, standing at attention in the doorway. From the corner, you should be able to approach the guard with the Falcon 2 drawn and remain undetected, silently approaching him on the left for an assassination. Upon inspection, the guard will provide us with a Med-Kit (25% Health Restore) along with a Falcon 2 clip. Now that all of the guards on this floor have been neutralized, we can return to the Laptop Computer.
As you prepare to head north, stick closely to the west wall so that you remain on the left side of the potted plant ahead. If you’ve done this correctly, you’ll be able to remain covert as the final guard comes into view, standing at attention in the doorway. From the corner, you should be able to approach the guard with the Falcon 2 drawn and remain undetected, silently approaching him on the left for an assassination. Upon inspection, the guard will provide us with a Med-Kit (25% Health Restore) along with a Falcon 2 clip. Now that all of the guards on this floor have been neutralized, we can return to the Laptop Computer.
Without the pretense of stealth, you’re free to sprint back to Joanna’s office without any risk of alerting the guards. Once you’ve retraced your steps and have returned to the Laptop, you’ll receive a call from Max Hunter who informs you about the defusing process as you attempt to exit to the enclosure.
With only a minute provided to defuse the Explosive Device, you’ll need to sprint back through the offices until you’ve arrived on the north side of the floor, travel south through the thin corridor and then approach the aforementioned Explosive Device.
Once the device has been disarmed, we’ll leave the corridor and make our way towards the final guard where we procured a Med-Kit (25% Health Restore) previously. Now that the floor has been secured, and all of the dataDyne soldiers have been neutralized, we can pass through the doorway to the north and make our way to the elevator ahead which will take us to the second floor…