Chapter 1-3: Stealth Training


Navigation:
Chapter 1: Carrington Institute Training
-1-1: Basic Training
-1-2: Search & Rescue
-1-3: Stealth Training
-1-4: Advanced Training
-1-5: Final Test
Chapter 2: The Jungles of South America
Chapter 3: dataDyne Cybernetic Manufacturing
Chapter 4: dataDyne Operations Base/Crash Site
Chapter 5: Captive aboard the Pelagic I
Chapter 6: Carrington Institute HQ
Chapter 7: Perfect Dark GBC Secrets and Extras
CARRINGTON INSTITUTE: STEALTH TRAINING
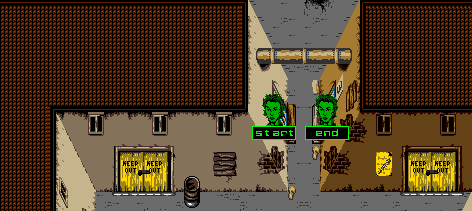
As you emerge in the streets once more, you’ll discover that the Stealth Training portion takes place in the building directly across from your current position. Once again, we’ve provided an Overview Map of the entire area, but you shouldn’t have any trouble taking a few steps to the door marked with a “3” and then entering.
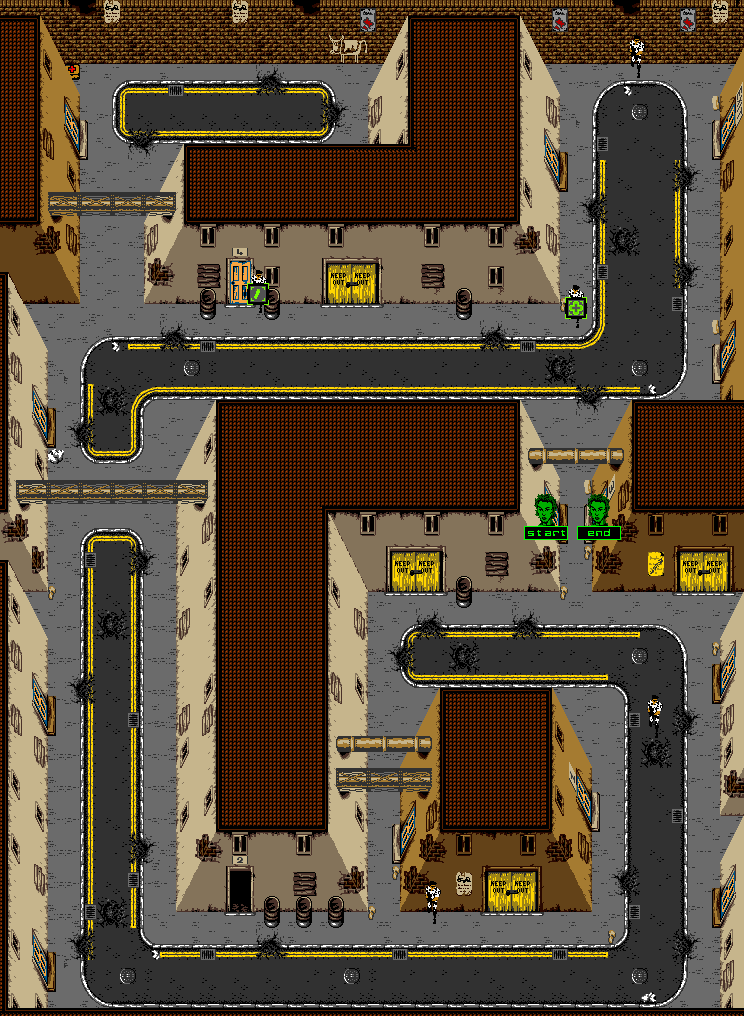
STEALTH TRAINING: MAP OVERVIEW
MISSION OBJECTIVES:
• COMPLETE TARGET RANGES
• AVOID GUARDS
• REACH EXIT
You’ll notice from the Overview Map that the Stealth Training mission is a lot shorter than the previous training segments, but it’s by no means an easier objective because of it. In fact, you’ll find that the Stealth Training is one of the most difficult of your assignments because you’ll need to clear the entire area without being detected once – no matter how far into the building you progress, if you’re spotted by a single guard you’ll have to restart from the beginning of this section.
As Carrington points out, the only way to survive through evasion is avoid sprinting altogether, and only take out your targets through assassination; if you goad them into reacting and returning fire you’ll botch the operation.
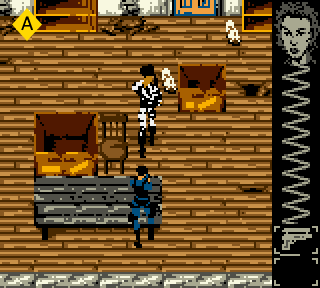
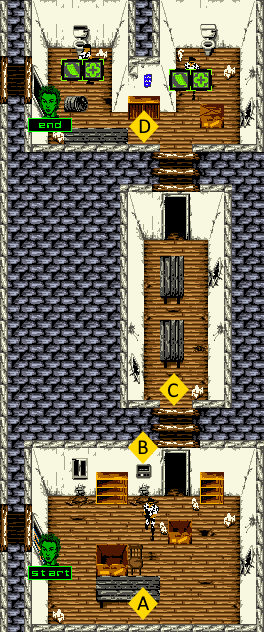
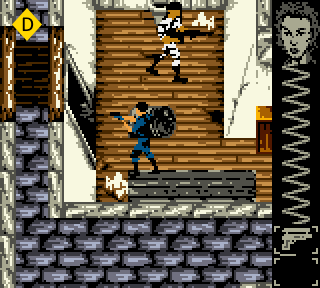
![]() Luckily the first guard in this room is quite easy to take out – work your way to the south and you’ll locate a table that the guard paces in front of vertically. If you position yourself so that you’re between the table and the southern wall you’ll notice that the pacing guard doesn’t pay you any attention. When the guard reaches the table and turns around to pace north, come out from behind the table and get as close to the guard as possible so you’re both walking in the same direction. When the time is right and you’ve managed to line up your Falcon 2 with the back of the guards head, pull the trigger to assassinate him with a single shot.
Luckily the first guard in this room is quite easy to take out – work your way to the south and you’ll locate a table that the guard paces in front of vertically. If you position yourself so that you’re between the table and the southern wall you’ll notice that the pacing guard doesn’t pay you any attention. When the guard reaches the table and turns around to pace north, come out from behind the table and get as close to the guard as possible so you’re both walking in the same direction. When the time is right and you’ve managed to line up your Falcon 2 with the back of the guards head, pull the trigger to assassinate him with a single shot.
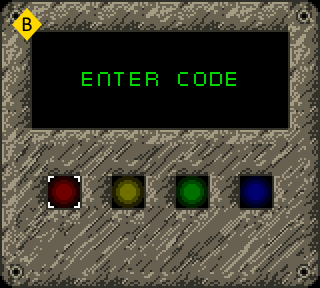
![]() Inspecting the fallen guard will prove fruitless, as he won’t have anything on him, so let’s instead carry on ahead to the locked door so we can interface with the Door Control panel. As we’ve experienced previously during the Search & Rescue segment of our training, this Door Control panel puzzle features an upgraded design of four colored buttons with a six combination code sequence that you’ll need to repeat to pass the test. You’ll be given two attempts on a single combination before you’re shown a new sequence, but once you’ve managed to complete the Door Control puzzle, we’ll continue ahead through the unlocked door.
Inspecting the fallen guard will prove fruitless, as he won’t have anything on him, so let’s instead carry on ahead to the locked door so we can interface with the Door Control panel. As we’ve experienced previously during the Search & Rescue segment of our training, this Door Control panel puzzle features an upgraded design of four colored buttons with a six combination code sequence that you’ll need to repeat to pass the test. You’ll be given two attempts on a single combination before you’re shown a new sequence, but once you’ve managed to complete the Door Control puzzle, we’ll continue ahead through the unlocked door.
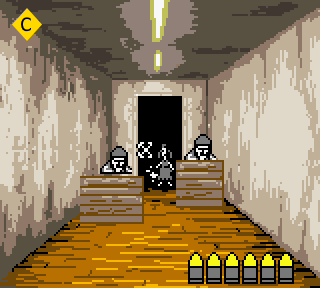
![]() Stepping across the threshold to the next room will begin the latest Target Range with a new twist. This time, you’ll be presented with a decoy target: an innocent little girl holding a teddy bear. If you shoot this civilian target during the Target Range, you’ll instantly fail the mission and be forced to restart. The little girl will only appear in the doorway as she ‘runs’ in and out of view – unfortunately this space is also shared by a large soldier who pans across the same field. On either side of the doorway you’ll spot two soldiers that pop up in and out of view – there are no decoys here, so you’ll have a license to kill whenever you spot one of them making an appearance.
Stepping across the threshold to the next room will begin the latest Target Range with a new twist. This time, you’ll be presented with a decoy target: an innocent little girl holding a teddy bear. If you shoot this civilian target during the Target Range, you’ll instantly fail the mission and be forced to restart. The little girl will only appear in the doorway as she ‘runs’ in and out of view – unfortunately this space is also shared by a large soldier who pans across the same field. On either side of the doorway you’ll spot two soldiers that pop up in and out of view – there are no decoys here, so you’ll have a license to kill whenever you spot one of them making an appearance.
Try to line up your shots so you can fire at the lower half of the soldier in the doorway while also panning left and right to take out the barrack soldiers on either side of him, and avoid shooting the little girl target at all costs. If you can manage to hit 10 out of the 15 intentional targets, you’ll clear the Target Range for Stealth Training.
Once you’re finished, we’ll pass through this room and approach the doorway to the north – take care that you don’t emerge in the next area too soon or you’ll immediately be found by the guards and fail the mission. This room has two patrolling guards – the one that you can immediately see on the right will pace vertically, and the one on the left found after the cabinet will pace horizontally.
![]() The easiest way to tackle this room is to watch as the guard on the left heads up to the north and then quickly duck into the room and make your way to the left. If you continue walking between the table and the overturned barrel, you should be able to make it to the exit before the right guard returns or the left guard has spotted you. You can also use the same technique, but turn around when you arrive at the table and orient yourself so that you can sneak up on the right guard as he paces to the north and assassinate him. Then return to the table and either exit, or get the jump on the left guard. Both will offer a Med-Kit (25% Health Restore) and a Machine Gun clip for your MG1-16G.
The easiest way to tackle this room is to watch as the guard on the left heads up to the north and then quickly duck into the room and make your way to the left. If you continue walking between the table and the overturned barrel, you should be able to make it to the exit before the right guard returns or the left guard has spotted you. You can also use the same technique, but turn around when you arrive at the table and orient yourself so that you can sneak up on the right guard as he paces to the north and assassinate him. Then return to the table and either exit, or get the jump on the left guard. Both will offer a Med-Kit (25% Health Restore) and a Machine Gun clip for your MG1-16G.
Either technique is viable, but the latter is far more risky for a higher reward. In any case, head towards the exit found on your left and you’ll have completed the Stealth Training mission.