Chapter 4-1: dataDyne Operations Base/Crash Site


Navigation:
Chapter 1: Carrington Institute Training
Chapter 2: The Jungles of South America
Chapter 3: dataDyne Cybernetic Manufacturing
Chapter 4: dataDyne Operations Base/Crash Site
4-1: dataDyne Operations Base I
4-2: dataDyne Operations Base II
4-3: Attack Cyborg II
4-4: dataDyne Operations Base III
4-5: dataDyne Operations Base IV
Chapter 5: Captive aboard the Pelagic I
Chapter 6: Carrington Institute HQ
Chapter 7: Perfect Dark GBC Secrets and Extras
INVESTIGATING THE CRASH SITE – JANUARY 24TH 2022
![]()
![]()
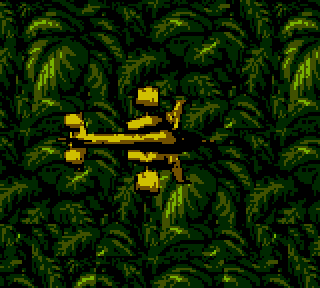
Surveying the wild expanse from above, the Orca Dropship patrols the air with heightened scrutiny. Under Joanna’s instruction, the pilot slows his approach as he navigates to a clearing – the location of the crash site.
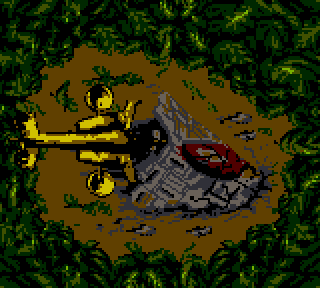
In the center of the debris field is something that appears unquestionably alien in nature, though it requires further investigation from the ground. This vantage point also provides another curious detail, as Joanna can just make out the entrance of a base hidden by the jungle canopies.
As the Dropship pilot maneuvers through towards a clearing and lands covertly, Joanna heads out towards the base in the hopes that her investigation will lead her towards the crash site.
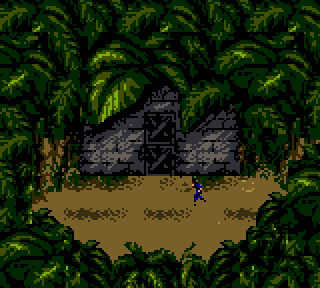
Her suspicions of something sinister afoot are all but confirmed when she glimpses the dataDyne insignia on the door to the hidden base. Without any other recourse, Joanna makes her way inside…
DATADYNE OPERATIONS BASE I: MAP OVERVIEW
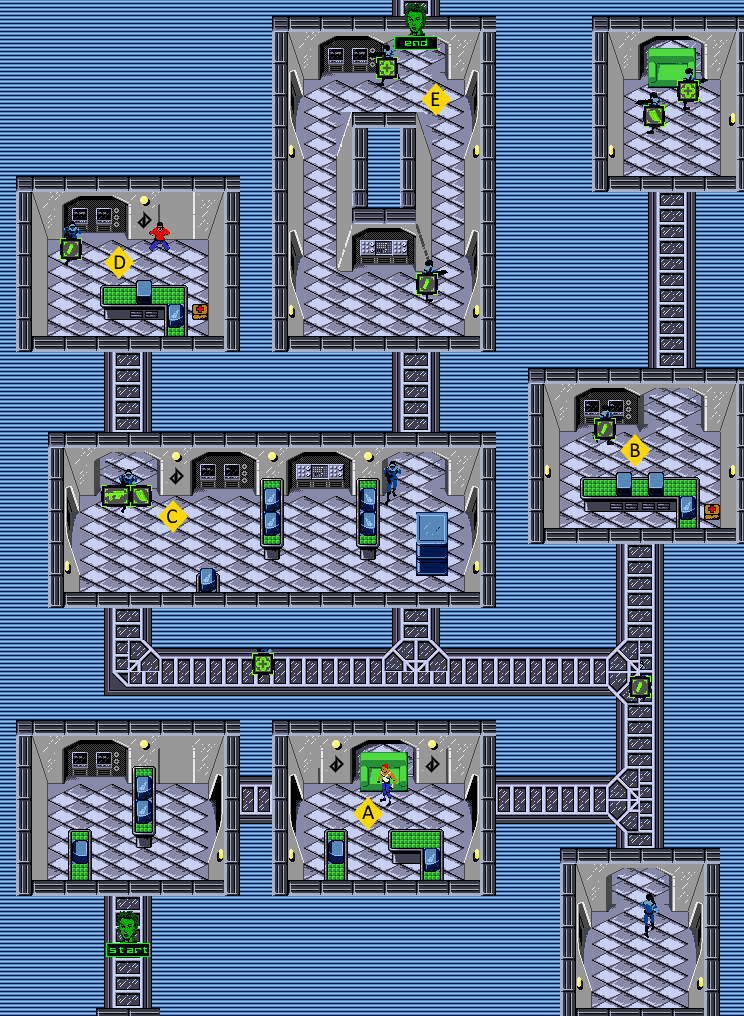
MISSION OBJECTIVES:
• FIND LAPTOP COMPUTER
• SWITCH OFF POWER MATRIX
• DOWNLOAD CRASH DATA FROM MAINFRAME
• LOCATE CRASH SITE
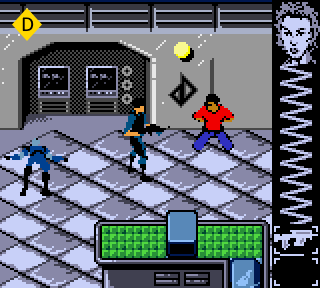
![]() Since we’re starting a new mission, all of the weapons that we collected during the Cybernetics chapter are no longer available to us. We’ll have to make do with our Falcon 2 for the time being and keep our eyes open for new weapons. From the initial tunnel at the entrance of the dataDyne Operations Base, we’ll head north into the first room and then locate an open walkway to the east. Walk through this entrance and you’ll enter the second area where you should be able to identify Max Danger from our previous factory exploits. Approach Max and he’ll fill you in on your mission objectives in the Operations Base.
Since we’re starting a new mission, all of the weapons that we collected during the Cybernetics chapter are no longer available to us. We’ll have to make do with our Falcon 2 for the time being and keep our eyes open for new weapons. From the initial tunnel at the entrance of the dataDyne Operations Base, we’ll head north into the first room and then locate an open walkway to the east. Walk through this entrance and you’ll enter the second area where you should be able to identify Max Danger from our previous factory exploits. Approach Max and he’ll fill you in on your mission objectives in the Operations Base.
Max Danger: Joanna, the cleanup operation is well underway. dataDyne are moving the wreckage as we speak.
Joanna Dark: Max, hi. How do I access the crash site?
Max Danger: You will need two key cards to get access to the crash site. But there’s more: I’ve been in contact with the Institute and Carrington has instructed me to update your mission objectives.
Joanna Dark: What are they?
Max Danger: You must steal a laptop computer and download the dataDyne files onto it. The files are stored on a mainframe in the west wing of the base. It is locked by an additional key card.
Joanna Dark: Is that all?
Max Danger: No, you’ll need to switch the power matrix off before you can perform the download. The room containing the matrix is probably deep inside the base.
Joanna Dark: Okay. I’d better get moving.
Once you’ve finished your rendezvous with Max, continue to the east and then enter the glass tunnel.
You’ll find that the tunnel will converge to a pathway to the north and a pathway to the south – we’re going to ignore the path to the south entirely and start to head to the north. You’ll encounter a guard at the second split in the tunnel ahead, so be prepared with your Falcon 2 and you should be able to take him out with three shots while sustaining minimal damage.
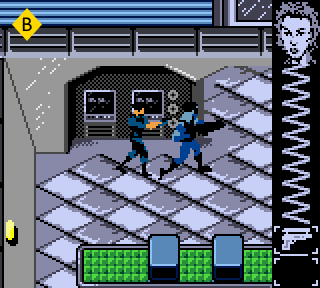
![]() Inspect the fallen guard to obtain ammunition for the Falcon 2, then continue to the north until the tunnel leads into the next room. From your current vantage point you should be able to locate a guard to the north that paces the room horizontally. As long as you can remain behind the desk, you’ll remain hidden from this guard – once he reaches the eastern wall, he’ll turn on his heel and continues his patrol to the right. During this instance, you’ll need to come out of hiding and bridge the distance where the guard can be easily taken out with a quick assassination. Inspect the guard and you’ll obtain another clip for the Falcon 2.
Inspect the fallen guard to obtain ammunition for the Falcon 2, then continue to the north until the tunnel leads into the next room. From your current vantage point you should be able to locate a guard to the north that paces the room horizontally. As long as you can remain behind the desk, you’ll remain hidden from this guard – once he reaches the eastern wall, he’ll turn on his heel and continues his patrol to the right. During this instance, you’ll need to come out of hiding and bridge the distance where the guard can be easily taken out with a quick assassination. Inspect the guard and you’ll obtain another clip for the Falcon 2.
If you continue to the east and then head south when you arrive at the wall, you’ll be able to locate a Med-Kit (25% Health Restore) on the other side of the desk. This should replenish nearly all of your health that you might have lost during the encounter with the first guard. While there is a tunnel to the north, it will only lead us into an ambush with two guards that we can only emerge worse-off from, so we’re going to ignore the northern tunnel and instead retrace our steps to the south to the location of the first fallen guard.
Once you’ve returned to the fallen guard in the tunnel, enter the tunnel that branches off to the west. Eventually you’ll come across a path that heads north – we’re going to ignore this for now and instead we’ll edge our way carefully to the west past the north tunnel. When this is accomplished, we’ll head north so that we’re brushing against the top of the tunnel and then cautiously make our way to the west once more.
You should come across a stationary, southern-facing guard soon after – as we’re on the same alignment, it shouldn’t be too difficult to approach this guard undetected and assassinate him with the Falcon 2. This guard will provide us with a Med-Kit (25% Health Restore) upon inspection, but we’re going to leave it behind and pick it up at a later point in the mission if things get particularly dire.
From this point, we’ll head back to the east towards the northern pathway that we skipped before. Make sure to position yourself on the left side of the northern path, and hug the wall as you turn the corner heading west so that you enter the room with as little visibility as possible. If you’ve done this correctly, you’ll be able to pass the first desk without being set upon by a guard just north of the entrance. If you continue to the west, eventually you’ll come across a computer monitor atop a desk on the southern portion of the room.
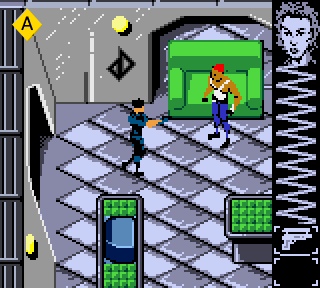
![]() From here, we just need to go north to the opposite side of the room where we’ll find two computer screens embedded in the wall, then east towards a southern-facing guard in the doorway. If you approach the guard from the right, you’ll be able to assassinate him without issue. Inspecting the fallen guard will provide us with a Machine Gun clip and a new weapon known as the Fantom. This sub-machine gun is quite similar to the 6-YYY with its fast rate of fire, though you’ll be required to fire 4 bullets rather than 3 to take down any guards. When you’re ready, continue north through the doorway the guard stood in front of.
From here, we just need to go north to the opposite side of the room where we’ll find two computer screens embedded in the wall, then east towards a southern-facing guard in the doorway. If you approach the guard from the right, you’ll be able to assassinate him without issue. Inspecting the fallen guard will provide us with a Machine Gun clip and a new weapon known as the Fantom. This sub-machine gun is quite similar to the 6-YYY with its fast rate of fire, though you’ll be required to fire 4 bullets rather than 3 to take down any guards. When you’re ready, continue north through the doorway the guard stood in front of.
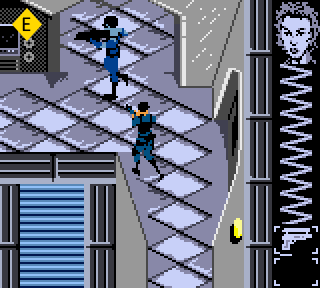
![]() As you cross the threshold, you should notice a single guard facing south, parallel to a Hostage. While you’ve been effectively covered by the desk from being seen, the guard won’t move from his position, which means that if you come out behind the desk you’ll be spotted immediately. Since our option for stealth has been compromised, we’ll need to take out this guard in a more direct method. Switch over to the Fantom and then rush out towards the guard, opening fire as soon as you’ve lined up with his position. After you’ve taken out the guard with four rounds, inspect his body and you’ll recover a Falcon 2 clip.
As you cross the threshold, you should notice a single guard facing south, parallel to a Hostage. While you’ve been effectively covered by the desk from being seen, the guard won’t move from his position, which means that if you come out behind the desk you’ll be spotted immediately. Since our option for stealth has been compromised, we’ll need to take out this guard in a more direct method. Switch over to the Fantom and then rush out towards the guard, opening fire as soon as you’ve lined up with his position. After you’ve taken out the guard with four rounds, inspect his body and you’ll recover a Falcon 2 clip.
If you’ve sustained any significant damage from the crossfire, you’ll find a Med-Kit (25% Health Restore) to the east on the other side of the desk. Rescue the Hostage in this room before you leave, and then return to the south where we retrieved the Fantom from the fallen guard.
From here, begin to make your way to the east, passing by a single desk in your path until you can locate the guard we passed initially to enter the room. You won’t be able to take out this guard covertly, as there’s too much space between his position and the desk, so your only option left is to put down some suppression fire with the Fantom.
The easiest method is to return to the southern wall, and then while you’re out of sight, line yourself up with the guard above and then open fire as you walk to the north. The guard will return fire the moment you’ve revealed yourself, but if you’re quick enough you shouldn’t take too much damage. Once the guard has been neutralized, we’re going to switch over to the Falcon 2 and then cautiously head north into the previously guarded tunnel.
There’s a chance that as you emerge on the opposite side, you’ll be able to covertly assassinate a guard that paces horizontally by following him to the right without stopping, though this demands very fortunate timing.
If you’ve missed this your window of opportunity, the Fantom will allow you to dispatch the guard without much resistance – it’s not an ideal solution, but it’s one that will leave you better off than trying to fend off the alerted guard with the Falcon 2.
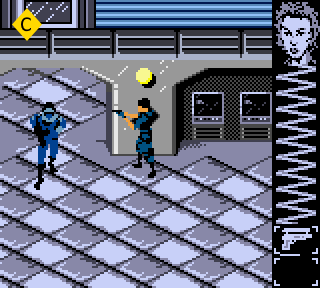
![]() Once you’ve managed to take out the guard, retrieve the Falcon 2 clip with an inspection and then follow the right path to the north. As you reach the edge of the right path, stay out of sight and you should be able to locate the final guard pacing horizontally to the right. Once the guard turns on his heel and continues his patrol to the left, begin your approach and take him out with an assassination when you’ve bridged the distance. Inspect the guard for a Med-Kit (25% Health Restore), and then continue through the doorway to the north in order to successfully clear dataDyne’s first Operations base.
Once you’ve managed to take out the guard, retrieve the Falcon 2 clip with an inspection and then follow the right path to the north. As you reach the edge of the right path, stay out of sight and you should be able to locate the final guard pacing horizontally to the right. Once the guard turns on his heel and continues his patrol to the left, begin your approach and take him out with an assassination when you’ve bridged the distance. Inspect the guard for a Med-Kit (25% Health Restore), and then continue through the doorway to the north in order to successfully clear dataDyne’s first Operations base.