Chapter 3-1: dataDyne Cybernetic Manufacturing


Navigation:
Chapter 1: Carrington Institute Training
Chapter 2: The Jungles of South America
Chapter 3: dataDyne Cybernetic Manufacturing
3-1: Cybernetics Division I
3-2: Cybernetics Division II
3-3: Attack Cyborg
3-4: Cybernetics Division III
3-5: Cybernetics Division IV
3-6: Mink Hunter
Chapter 4: dataDyne Operations Base/Crash Site
Chapter 5: Captive aboard the Pelagic I
Chapter 6: Carrington Institute HQ
Chapter 7: Perfect Dark GBC Secrets and Extras
DATADYNE CYBERNETIC FACILITY: MAP OVERVIEW
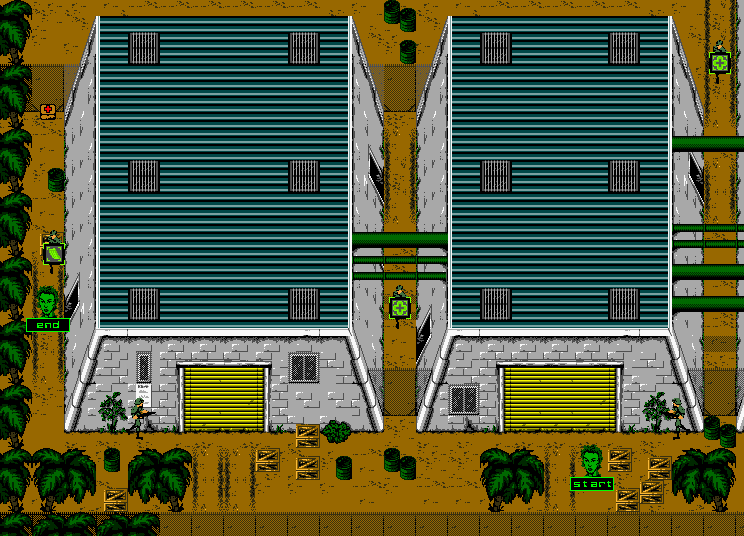
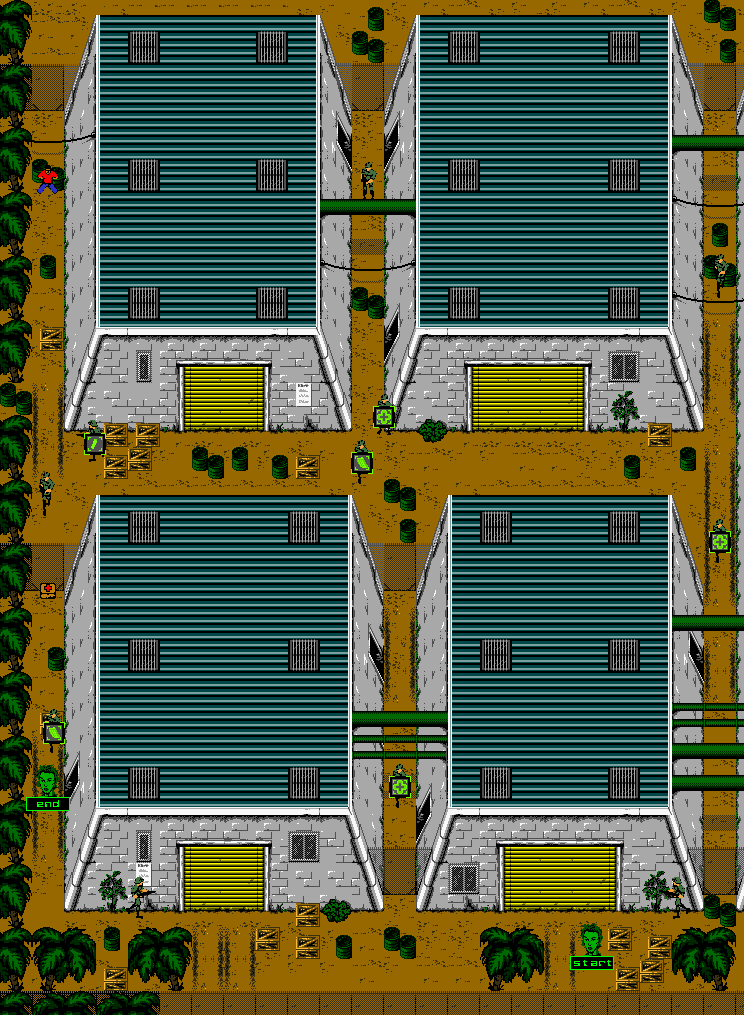
The grounds of the Cybernetics Facility houses four installations that you’ll need to explore over the course of your mission. Given that the middle of the facility is separated by a large fence, you’ll only need to reference the lower and upper half of the exterior when completing this mission. Despite this, we have provided an overview for both segments of the Cyborg Factory, should you need it.
From where you begin, you’ll likely be thrown into a confrontation from a guard to the northeast. If you still have some ammunition for the Shotgun, you can easily dispatch this guard in a single shot, otherwise you’ll need to resort to using the 6-YYY so that you don’t come under too much fire.
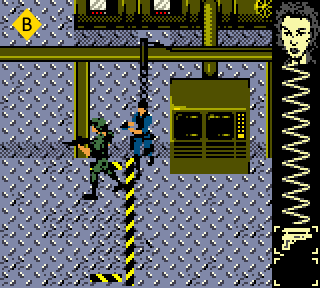
Once the guard has been dealt with, we’ll continue on to the west, passing by a collection of oil drums and crates to arrive at the second garage. As you approach the corner, you’ll likely come across the second guard patrolling horizontally. Use the 6-YYY or the Shotgun to take him out quickly, and then make your way around to the side of the building as you continue to the north.
We’re going to avoid entering the door to our right just yet, and instead we’ll keep heading north until we confront the final guard in this area, which we’ll take out once more with the 6-YYY or the Shotgun.
Before we inspect this guard, you’ve likely noticed that your inventory is getting rather full – if you don’t have any space available, you won’t be able to pick up any new supplies. Since you can only inspect a guard once, you’ll lose out picking up any desired supplies if you’re carrying too many things, and you won’t get a second chance, unfortunately.
Rather than miss out, we’re going to pause the game and use the directional pad to tab over to our ammunition inventory and clear up a bit of space. Hover over one of the Pistol icons and press A – you’ll notice that you have the option to ‘Equip’ or ‘Drop’.
Move down to the ‘Drop’ option and press A, and then press A again to confirm your selection, and you’ll drop the Pistol Ammo, freeing up one inventory slot. Repeat this process with another Pistol icon, and three Machine Gun icons and you should be left with at least 5 free inventory slots.
From here, we’ll inspect the fallen guard to recover a Machine Gun clip, and then we’ll walk past the crate and an oil drum to the north to find a Med-Kit (25% Health Restore). When you’ve picked up the Med-Kit, retrace your steps to the south and enter the factory entrance to the right.
CYBERNETICS I INTERIOR: MAP OVERVIEW
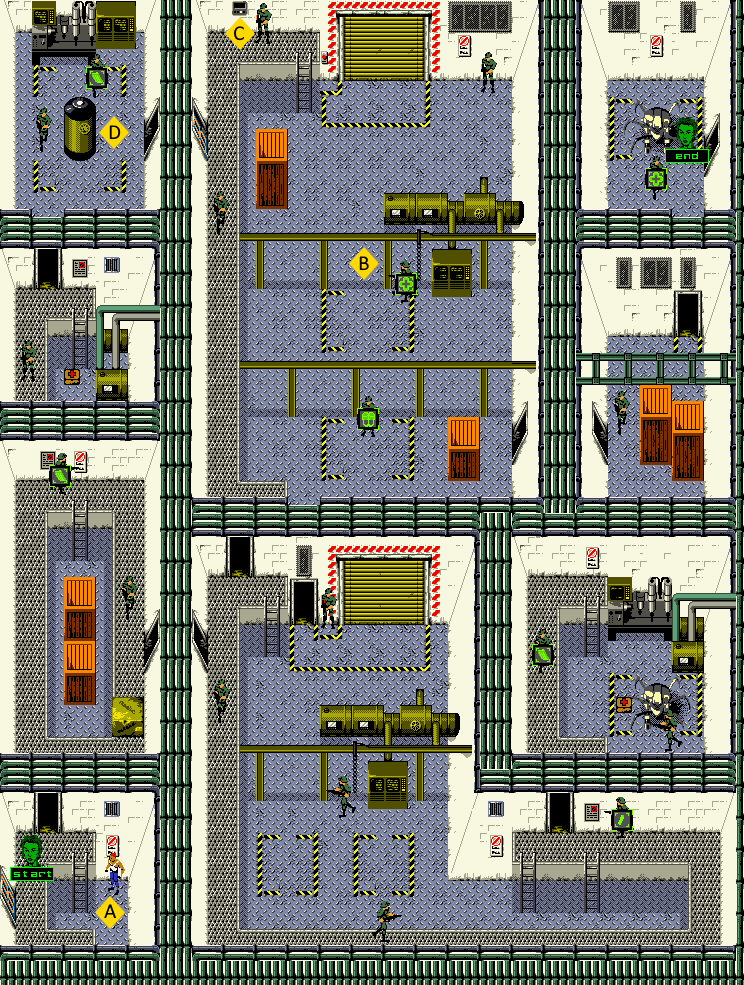
MISSION OBJECTIVES:
• LOCATE VOLATILE LIQUID CANNISTER
• PLACE C4 EXPLOSIVE ON CANNISTER
• REACH FACTORY EXIT
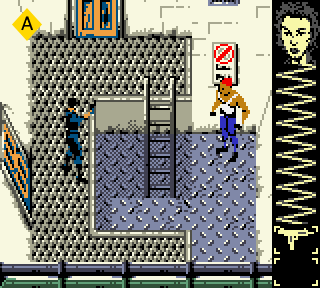
![]() After you enter the factory you’ll notice that there isn’t any means of progressing forward; the door you’ve come in from is locked, as is the door adjacent on the catwalk. Fortunately, this provides us with a bit of privacy with Carrington Institutes Informant, Max Danger, with whom Daniel Carrington has arranged a meeting. Approach the ladder from the catwalk above and then descend towards Max to obtain the C-4 Explosives. As he points out, we’ll need to locate the cannister in each interior and then place a C-4 charge on its surface in order to destroy the entire factory and curb the terrorist plot.
After you enter the factory you’ll notice that there isn’t any means of progressing forward; the door you’ve come in from is locked, as is the door adjacent on the catwalk. Fortunately, this provides us with a bit of privacy with Carrington Institutes Informant, Max Danger, with whom Daniel Carrington has arranged a meeting. Approach the ladder from the catwalk above and then descend towards Max to obtain the C-4 Explosives. As he points out, we’ll need to locate the cannister in each interior and then place a C-4 charge on its surface in order to destroy the entire factory and curb the terrorist plot.
Max Danger: Agent Dark, I didn’t think you would make it past the attack helicopter.
Joanna Dark: It didn’t give me too much trouble, who are you?
Max Danger: My name is Danger, Max Danger. I’m an under-cover agent for the Carrington Institute. I have been sent to update you on the mission.
Joanna Dark: OK, Max, what have you got for me?
Max Danger: We’ve just discovered this facility is producing high-tech weaponry for terrorist operations. I’ve never seen anything so advanced. It uses a highly volatile liquid, which is stored in containers throughout the factory. A C-4 charge in each factory should cause a chain reaction… and BOOM!
Joanna Dark: That simple huh?
Max Danger: No, you have to ensure that the man behind this little operation – Mink Hunter – doesn’t escape. You must deal with him before you blow this place up.
Once you’ve finished speaking with Max, you’ll notice that the door to the north has been opened. Climb the ladder and travel through the door, then continue walking north on the left side of the catwalk. As the catwalk turns the corner to travel south, you should be able to spot a guard pacing horizontally just ahead of a ladder. If you’re close enough, you’ll be able to bridge the distance between the guard and assassinate him with your Falcon 2, otherwise you’ll need to equip the 6-YYY and take him out with a spray of Machine Gun fire.
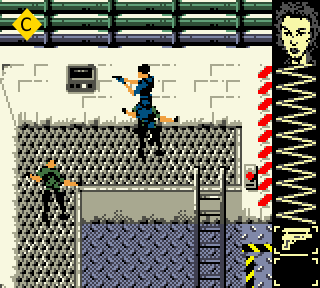
Once the guard has dropped, inspect him to obtain a Machine Gun clip and then use the ladder to descend towards the pair of crates found on the lower level. If you travel on the right side of the crates, you’ll locate a guard that paces horizontally in front of the entrance to the next area. Fortunately, you won’t be seen from his perspective on the catwalk, so you’ll only need to stand in front of the door with your Falcon 2 drawn, and squeeze the trigger when your pistol is aligned with his head.
After you’ve assassinated the guard, climb back up the ladder and work your way to the entrance that the guard was patrolling in front of. As you pass through the door, head immediately to the north in order to escape a guard pacing vertically just below. Pass through the door to the north next to a ladder and you’ll find a long section of catwalk along the wall that you won’t be able to deviate from. After you pass a locked door to your left, you should be able to locate a guard pacing horizontally – if you’re lucky, you’ll be able to assassinate him with the Falcon 2, otherwise you should swap over to the 6-YYY to mitigate as much damage as possible.
Once you’ve dealt with the guard, you should be able to spot a Door Control panel on the wall next to a second guard. We’re going to avoid interacting with the Door Control puzzle for now, and instead we’ll carry on to the right along the north wall in order to align ourselves with the second guards position and assassinate him with the Falcon 2.
From here, we’ll head down the ladder to the right, but turn around as soon as we’ve descended so that we’re pushing up against the garage. Walk alongside the northern wall and you’ll come across a guard facing south after you’ve passed the garage – line up the Falcon 2 with the guards head and take the shot for an easy assassination.
![]() Traveling to the south will reveal a large computer system connected to the beam that spans the length of the room. If you follow the system around to its right, sticking close to it, you’ll witness a guard to the south travelling to the west towards the other side of the room. Go around the system and sneak up on the guard in order to assassinate him with your Falcon 2. The guard does provide a Med-Kit (25% Health Restore) when inspected, so you can take this from him if you require it, or save it for later when you do. When you’re finished, easing slowly to the south will reveal another guard beyond the second beam.
Traveling to the south will reveal a large computer system connected to the beam that spans the length of the room. If you follow the system around to its right, sticking close to it, you’ll witness a guard to the south travelling to the west towards the other side of the room. Go around the system and sneak up on the guard in order to assassinate him with your Falcon 2. The guard does provide a Med-Kit (25% Health Restore) when inspected, so you can take this from him if you require it, or save it for later when you do. When you’re finished, easing slowly to the south will reveal another guard beyond the second beam.
This guard is stationary and faces to the south, so it’s quite easy to sneak up from behind and take him out with your Falcon 2 without any resistance. Inspecting the guard will provide us with 8 rounds of Shotgun ammunition, which will definitely come in handy in the rooms ahead.
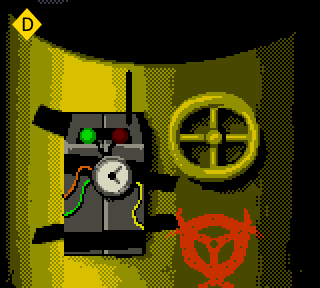
![]() From here we’ll return to the Door Control panel – head back up to the north, climb the ladder up to the catwalk and then interface with the panel on the wall. The Door Control puzzle functions similarly to the ones you’ve dealt with at Carrington Institute, with a six color combination featured in the Stealth Training. You’ll be permitted three mistakes per sequence entry – once you’ve failed to enter correct code on the third attempt you’ll be provided with a new code. Once you’ve cleared Door Control, equip the Shotgun and then follow the catwalk to the southwest – you’ll discover that the locked door is now open.
From here we’ll return to the Door Control panel – head back up to the north, climb the ladder up to the catwalk and then interface with the panel on the wall. The Door Control puzzle functions similarly to the ones you’ve dealt with at Carrington Institute, with a six color combination featured in the Stealth Training. You’ll be permitted three mistakes per sequence entry – once you’ve failed to enter correct code on the third attempt you’ll be provided with a new code. Once you’ve cleared Door Control, equip the Shotgun and then follow the catwalk to the southwest – you’ll discover that the locked door is now open.
![]() Prepare for an encounter as you cross the threshold, as you’ll be set upon immediately from a guard to the northwest. Respond with a single blast from your Shotgun and you’ll stifle the threat, inspect the guard and you’ll obtain a Machine Gun clip. Once you’ve done so, approach the large canister in the center of the room from its right side and you’ll successfully plant the C-4 explosive. From your current position, you should be able to spot a second guard pacing vertically on the other side of the room. Swap over to the Falcon 2 and then approach the guard from behind to assassinate him without issue.
Prepare for an encounter as you cross the threshold, as you’ll be set upon immediately from a guard to the northwest. Respond with a single blast from your Shotgun and you’ll stifle the threat, inspect the guard and you’ll obtain a Machine Gun clip. Once you’ve done so, approach the large canister in the center of the room from its right side and you’ll successfully plant the C-4 explosive. From your current position, you should be able to spot a second guard pacing vertically on the other side of the room. Swap over to the Falcon 2 and then approach the guard from behind to assassinate him without issue.
From here, we’ll head south and find a doorway that heads into a connecting room. Once inside, head to the right and you’ll discover a ladder that leads down to a lower level. Descend to the lower floor from the catwalk and you’ll find a Med-Kit (25% Health Restore) that we can take with us. Ignore the guard on the left side of the catwalk and rush out of the room when you’re ready to move on.
When you’re back in the room with the cannister, head to the right to find your way back into the main area. Once you’ve done this, we’ll follow the catwalk to the north passing the Door Control panel and then use the ladder to descend onto the lower floor. From here, we’ll head south and pass by the two beams that stretch the length of the room, turning to the right after clearing the second. Make your way past the fallen guard that provided up with the 8 Shotgun Rounds and you’ll come across a large crate with a doorway just beyond it.
As you travel through the doorway, you’ll spot another guard that patrols vertically past your current position. Fortunately for us, this means that the guard will walk into his own assassination if you line up the Falcon 2 with his head and fire just as he passes.
Once you’ve taken him out, head to the next doorway found to the north and you’ll locate the last guard, patrolling vertically as well. Stay within the safety of the doorway until the guard finishes his patrol to the south, and then start to follow him from behind as he heads back up north. When the time is right, go in for an assassination with the Falcon 2 and then inspect the guard for a Med-Kit (25% Health Restore).
Once you’re all healed up, walk through the door on the right side of the room to clear the first factory.