GoldenEye 007 Walkthrough 8-1: Aztec


Navigation:
Mission 1: Arkangelsk
Mission 2: Severnaya
Mission 3: Kirghizstan
Mission 4: Monte Carlo
Mission 5: Severnaya
Mission 6: St. Petersburg
Mission 7: Cuba
Mission 8: Teotihuaca’n
– 8-1: Aztec
Mission 9: el-Saghira
You’ve come a long way, 007! Trevelyan is out of the way and all of Janus has been swept under the rug. You did one hell of a job out there, and MI6 will remember this one for years to come. But we’re not done with you yet! Complete every main mission on Secret Agent difficulty, and you will unlock another mission that Her Majesty’s Secret Service has been forgetting about in the back of the file cabinet. Terrorism never sleeps, James, and someone has to worry about all those bad people out there. The Prime Minister has the media to contend with. How about we take care of these pesky, little rocks in our shoes without the public’s opinions, alright?
MISSION 8: TEOTIHUACA’N – STAGE 2: AZTEC COMPLEX
Objectives:
1- Reprogram the Shuttle Guidance System (Agent)
2- Launch the Shuttle (Agent)
M Briefing: The Drax launch facility is located in a South American Aztec ruin. They are scheduled to launch a stolen Nasa shuttle with an unknown military payload. We’re sending you in alone, 007. Penetrating the base security will be tricky, but once you’re in, we believe you will be able to recover the shuttle right out from under their noses.
Q Branch: Simple plan, 007. Reprogram the guidance computer with the information on this floppy – then we take control as soon as the old girl reaches orbit. Now pay attention, one thing we don’t know is the Drax launch protocol – you’ll have to find that data and install it to initiate the launch. Can’t be too difficult to spot, it’ll be lying around in some high security area.
Moneypenny: Quetzacoatl ring any bells, James? No, I didn’t think so…

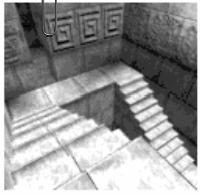
![]() MISSION 8: TEOTIHUACA’N – STAGE 1: AZTEC – MAPS
MISSION 8: TEOTIHUACA’N – STAGE 1: AZTEC – MAPS
These declassified maps from MI6 give a satellite view of the Aztec Complex – our intelligence has also taken great care to provide internal blueprints for any area that our cameras haven’t been able to peer inside of, giving you complete visibility of every location in your mission. Crucial provisions like Body Armor and hidden Weapons have also been detailed inside the dossier, along with other points of interest during the assignment.Click here to expand the dossier and take a closer look at the maps provided within. You may use these maps before the mission starts to familiarize yourself with the region, and refer to them throughout as you need them.
Good luck, 007!
AZTEC COMPLEX, TEOTIHUACA’N
This mission is often considered the most difficult one in the game. Don’t expect this to be a push-over in any respect, so just keep a cool head and a steady trigger hand. You will start out in a smashing tuxedo in a small alcove. The second that you step out, two Drax soldiers on your left and one on your right will take aim. Pop in and out of the alcove to take them all out while they’re firing. The exit door is the lightly-colored stone on the opposite wall. Make sure to reload.
In the next room, six enemies will be waiting. Pistol down the first, and wait to two more to appear. Grab their guns, and you should be able to scope out the other three from across the room with the AR33. Head up the stairs and through the next stone door.
Change of pace much? The next room is the computer center of the facility. Guards are hiding in the alcoves on each side. Again, wait for them to come to you before putting holes in them. They might do some damage because some of these enemies are too close for comfort. If you don’t screw up, you should make it out of this room in one piece. You cannot access the guidance system area yet; you need a key for that. That is what you are going to go find.
If a guard already isn’t opening a door from the left side, go to the console and open it manually. In this hallway with cool lighting, the guards will not notice you until you walk in. Get some headshots from a distance. Turn the corner very slightly, and get three more. Turn right again into a classy meeting room. Shoot the two computers from a distance. Guards from either side will walk head-on into your gunfire. Haha. Walk through the vent on the right, and keep going until you approach the second place where you can turn right. Do not step out! There will be two drone guns directly to your left. Peek around and shoot the first. Take careful aim and duck to take out the second further down. What a pain.
On the very right of the vents will be the only Body Armor in the stage. Grab it; you will need it. Head forward, shooting up any guards who walk in. Notice what they will drop: Moonrakers! These laser blasters don’t require any ammunition except light rays, so pick up a few to keep for later. Walk forward until you reach the end of the vent. Step back a little when you see the bursts of fire from outside.
There are more drone guns in this next room. Four of them. That’s right. Pull out the AR33 here. It is tough to see, but if you inch forward gradually, you can aim the scope of the rifle at the barrel of the drone gun and kill it. Inch forward again, because the second gun is to your upper-right very close to you. Once you spot it, destroy it. When both of those are gone, run out of your hideaway and dash to the left. Hang around the space shuttle and turn around. The other two drone guns will be visible but very far away. Your next threat is four guards below the turrets shooting lasers at you. Hide behind walls or crates and shoot them as you like. Take out all four of the humans before sniping out the drone guns. With that, the room is clear.
There will be another vent passageway across from where you entered. Hop in to find yourself in pre-Hispanic Mexico again. Walk down the stairway to reach a room down below, in other words, your nightmare. In here will be a few guards, but you can ignore them because you have another problem on your hands. Jaws will lock his sights on your with twin AR33’s. Run. This goliath of James Bond canon is the most feared beast that 007 has ever faced, but here he can be beaten by some swift footing. Behind you will be that same rectangle of stairs that you came from. Lead Jaws here and he will chase you without another thought.
Run around in a square, shooting at Jaws the whole way ’round. He can only shoot in four cardinal directions, not diagonally and at angles like you can with all your dexterity. Avoid all direct confrontation with him and shoot him only when he can’t shoot you. Jaws has a lot of stamina so it might take a while for him to go down. Hang in there. Once he does fall, collect your loot; Jaws was holding plenty of firepower, but more importantly, he was carrying a Key Card.
Go back all the way to the shiny, black room near the beginning with the glass. To get through the meeting room/exhaust chamber, you need to climb up the stairs near the shuttle and activate the console. The hatch will open and you can get past by running back through the vents again and back through the meeting room and cool-lighting hallway. Once you open the glass doors, close them behind you to block enemy fire. Look at all the techy stuff in front of you. Select Q’s guidance data from your items menu and upload it into the disk reader on the desk. Also grab the Launch Protocol Data there. Leave. Make sure to shoot all enemies in your way; they are infinite at this point.
In the shuttle room, head to the right where the four laser dudes were. There will be some mainframes there. Select the Launch Protocol and use it on the mainframe. The launch timer will begin. Before the shuttle can take off, however, the exhaust bay needs to be open. Climb back up the ladder (watch your back), and activate the console again. It will take time for the hatch to open and for the countdown to finish, so sit tight. Stand next to the console and wait for enemies to appear. Camp here until the shuttle launches.