Chapter 3-2: Second Stanza in the Stables


Navigation:
Chapter 1: The Rescue
Chapter 2: The Restoration
Chapter 3: The Riddle
-3-1: Fetching up the First Verse
-3-2: Second Stanza in the Stables
-3-3: Well Versed in Backtracking
-3-4: Don’t Fear the Reaper
-3-5: Method to the Madness
-3-6: Requisite for a Reckoning
Chapter 4: The Reckoning
Chapter 5: The Race
A STABLEHAND NEEDS A STABLE HAND
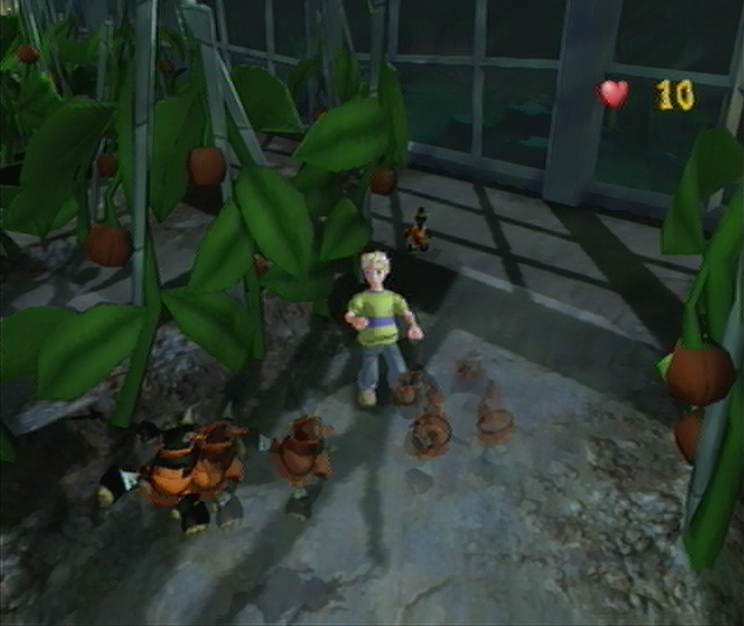
![]() Back in the Greenhouse you’ll be tasked with working your way through the maze once more, but this time your efforts are somewhat hindered as Ninja Imps smash through the glass to confront you at various stages throughout. You’ll find a few Energy Boost! Soup Tins scattered around, but only in feeble increments; you’ll have to really on your own nimble skill to escape the Ninja Imps here. The only bit of help you’ll find is collecting the Shocker Blocker! Tin found just before the large open area with a Scary Shock waiting underneath the soil. Regardless, you should manage to preserve your health if you find yourself amidst a brawl. Don’t get overwhelmed if you’re suddenly surrounded by Imps, a single kick is enough to send them into their dizzied state, so use this to give yourself more leeway as you plot your escape route while a few are temporarily paralyzed in this mode. Once you manage to make it through the onslaught just carry on through the open Challenge Door.
Back in the Greenhouse you’ll be tasked with working your way through the maze once more, but this time your efforts are somewhat hindered as Ninja Imps smash through the glass to confront you at various stages throughout. You’ll find a few Energy Boost! Soup Tins scattered around, but only in feeble increments; you’ll have to really on your own nimble skill to escape the Ninja Imps here. The only bit of help you’ll find is collecting the Shocker Blocker! Tin found just before the large open area with a Scary Shock waiting underneath the soil. Regardless, you should manage to preserve your health if you find yourself amidst a brawl. Don’t get overwhelmed if you’re suddenly surrounded by Imps, a single kick is enough to send them into their dizzied state, so use this to give yourself more leeway as you plot your escape route while a few are temporarily paralyzed in this mode. Once you manage to make it through the onslaught just carry on through the open Challenge Door.
DUNFIDDLIN COTTAGE GARDEN

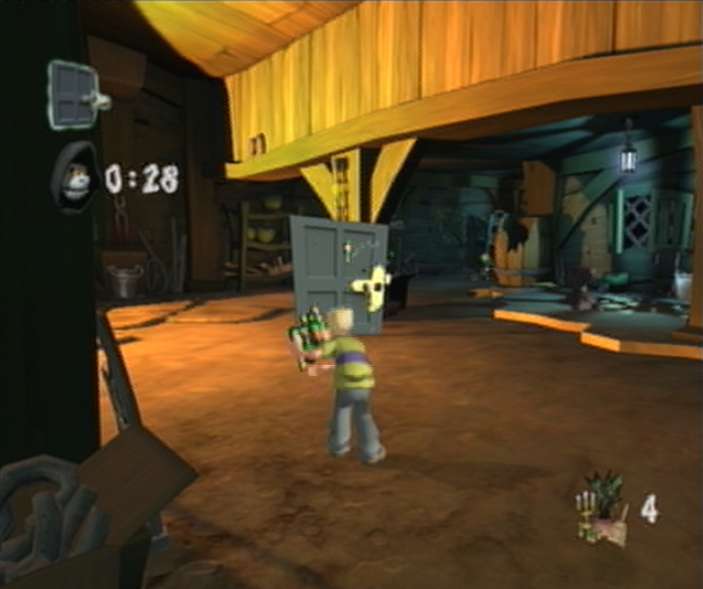
![]() As you start off, work your way around the entrance of the greenhouse to the right and you’ll spot a troff leaning against the corner of Greenhouse. Work your way around this troff and you’ll discover a Turbo Cooper! Soup Tin, snatch it up quickly and we’ll begin our descent towards the Cottage on the opposite side of the Garden. Once you’ve managed to get nearer the large Oak tree you’ll spot a dozen Spiders or so waiting in the branches. Coax them out and then proceed to exterminate each one. You shouldn’t waste too much time traveling around the tree and having the Spiders plop down in the process. Once you’ve managed that, continue towards the gate that surrounds the Cottage and you’ll find a new Ghouly adversary; the volatile Worm! Working like a ticking time bomb, this Ghouly will come bounding after you ready to explode as indicated by the clock above its head. You’ll have to wait until at least 3 seconds remain before kicking it away where it’ll explode from afar.
As you start off, work your way around the entrance of the greenhouse to the right and you’ll spot a troff leaning against the corner of Greenhouse. Work your way around this troff and you’ll discover a Turbo Cooper! Soup Tin, snatch it up quickly and we’ll begin our descent towards the Cottage on the opposite side of the Garden. Once you’ve managed to get nearer the large Oak tree you’ll spot a dozen Spiders or so waiting in the branches. Coax them out and then proceed to exterminate each one. You shouldn’t waste too much time traveling around the tree and having the Spiders plop down in the process. Once you’ve managed that, continue towards the gate that surrounds the Cottage and you’ll find a new Ghouly adversary; the volatile Worm! Working like a ticking time bomb, this Ghouly will come bounding after you ready to explode as indicated by the clock above its head. You’ll have to wait until at least 3 seconds remain before kicking it away where it’ll explode from afar.
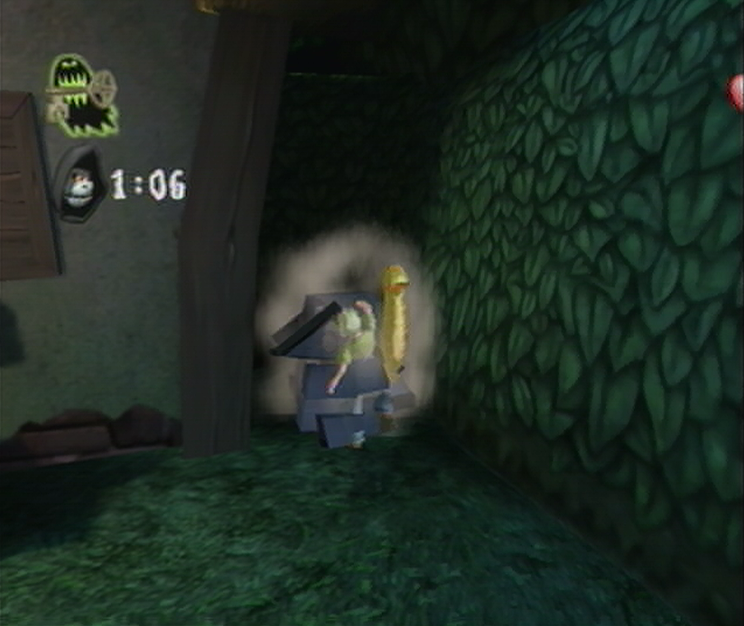
![]() If you give it too much recovery time and kick it before it reaches the final seconds, it’s likely that your kick won’t send it far enough for the timer to count down properly. Once you’ve managed to deal with the first Worm, it’s time to venture into the gate where you’ll meet the rest of the family, take a few jaunty steps toward the alluring Cottage door for the challenge to begin. This time you’ll be tasked with locating the correct Worm harboring the Ghouly Key and defeating it before 1 minute and 20 seconds winds down. Don’t panic as you scan the yard for the glowing Worm, as its craftily hidden and won’t bee in this assortment. Instead you should manage to spot a small pond on the right side of the yard, with a lone Honeycomb Hive tucked in between a large hedge and the Cottage itself ahead. Smash open the Hive and make quick work of the Glowing Worm inside to expose the Ghouly Key, which will solve the Challenge and grant you access to Dunfiddlin Cottage.
If you give it too much recovery time and kick it before it reaches the final seconds, it’s likely that your kick won’t send it far enough for the timer to count down properly. Once you’ve managed to deal with the first Worm, it’s time to venture into the gate where you’ll meet the rest of the family, take a few jaunty steps toward the alluring Cottage door for the challenge to begin. This time you’ll be tasked with locating the correct Worm harboring the Ghouly Key and defeating it before 1 minute and 20 seconds winds down. Don’t panic as you scan the yard for the glowing Worm, as its craftily hidden and won’t bee in this assortment. Instead you should manage to spot a small pond on the right side of the yard, with a lone Honeycomb Hive tucked in between a large hedge and the Cottage itself ahead. Smash open the Hive and make quick work of the Glowing Worm inside to expose the Ghouly Key, which will solve the Challenge and grant you access to Dunfiddlin Cottage.
DUNFIDDLIN COTTAGE
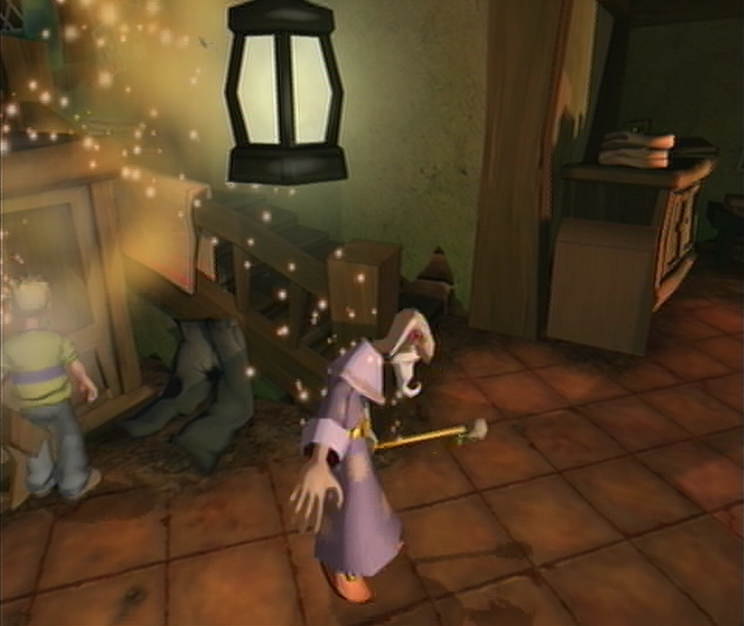
![]() From where you enter Dunfiddlin Cottage you’ll need to venture ahead to leave the Kitchen and enter the main living area. As you might have noticed from the lack of Ghoulies, this room harbors a Warlock that we’ll need to expose, though Fiddlesworth is somewhat a hoarder, so we have our work cut out for us. There are a number of places that the Warlock might find itself in, not limiting itself to the barrel and large chest to the right of this doorway, the cabinet wedged in between the staircases leading upstairs, the closet next to Fiddlesworths’ bed and the cabinet closest to the fireplace on the ground floor. If you manage to expose a few ill-placed Flying Imps in the process, deal with them quickly and continue searching. Once you’ve managed to expose the Warlock the Challenge will begin; you’ll have to deal with this manic magician using 20 hits or less! There are plenty of items at your disposal including the Television Set and chest of drawers upstairs that can be thrown from afar.
From where you enter Dunfiddlin Cottage you’ll need to venture ahead to leave the Kitchen and enter the main living area. As you might have noticed from the lack of Ghoulies, this room harbors a Warlock that we’ll need to expose, though Fiddlesworth is somewhat a hoarder, so we have our work cut out for us. There are a number of places that the Warlock might find itself in, not limiting itself to the barrel and large chest to the right of this doorway, the cabinet wedged in between the staircases leading upstairs, the closet next to Fiddlesworths’ bed and the cabinet closest to the fireplace on the ground floor. If you manage to expose a few ill-placed Flying Imps in the process, deal with them quickly and continue searching. Once you’ve managed to expose the Warlock the Challenge will begin; you’ll have to deal with this manic magician using 20 hits or less! There are plenty of items at your disposal including the Television Set and chest of drawers upstairs that can be thrown from afar.
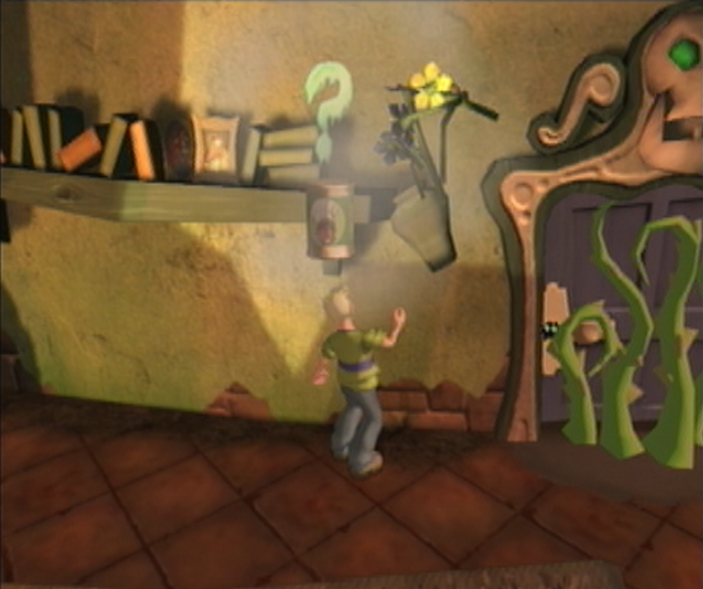
![]() You’ll have to intervene with your own fists as well, so either wait until the Warlock has finished his casting to work your way over to him before he disappears, or confront him as soon as he’s teleported to a location that’s too close for comfort. There’s also an Invisibility! Soup Tin located in a crate underneath the window to the Kitchen that can be used to sneak up on the Warlock, as well as a Knock Down Mania! Tin in a crate between the pink couch and wooden table in the center of the room. Once the Warlock is defeated the challenge will solve, but another waits us before we can exit the Cottage, so don’t attempt to leave just yet. Instead, venture back toward the fireplace and you should manage to spot a single cluttered shelf to the right, next to a curious looking door with a Skeletons’ face overhead. Approach this shelf and uppercut the rightmost area to smash open a flower pot to expose a Challenge Complete! Soup Tin that we’ll leave behind.
You’ll have to intervene with your own fists as well, so either wait until the Warlock has finished his casting to work your way over to him before he disappears, or confront him as soon as he’s teleported to a location that’s too close for comfort. There’s also an Invisibility! Soup Tin located in a crate underneath the window to the Kitchen that can be used to sneak up on the Warlock, as well as a Knock Down Mania! Tin in a crate between the pink couch and wooden table in the center of the room. Once the Warlock is defeated the challenge will solve, but another waits us before we can exit the Cottage, so don’t attempt to leave just yet. Instead, venture back toward the fireplace and you should manage to spot a single cluttered shelf to the right, next to a curious looking door with a Skeletons’ face overhead. Approach this shelf and uppercut the rightmost area to smash open a flower pot to expose a Challenge Complete! Soup Tin that we’ll leave behind.
![]() Now that we’re ready to make extremely quick work of our new-found challenge, it’s time to get things started. From the cluttered shelf, work your way up either of the dual staircases to ascend toward Fiddlesworths’ resting area and ultimately through the thin hallway towards the alluring open Challenge Door. Once you’ve gotten close enough, four Flying Imps will roll out from within as the door slams behind them. For the purposes of this Challenge you’ll have to defeat at least 6 Ghoulies using Weapons only, a difficult prospect given our latest developments with the Warlock. Rather than scouring the floor for unused weapons, we’ll be tasked with returning to the thin shelf on the ground level and acquiring the Challenge Complete! Soup Tin to do away with the unnecessary expectations. While the challenge has been solved, the Ghoulies are still just as lively, so you’ll have to do your best to avoid taking any damage while working your way back up through the open Challenge Door.
Now that we’re ready to make extremely quick work of our new-found challenge, it’s time to get things started. From the cluttered shelf, work your way up either of the dual staircases to ascend toward Fiddlesworths’ resting area and ultimately through the thin hallway towards the alluring open Challenge Door. Once you’ve gotten close enough, four Flying Imps will roll out from within as the door slams behind them. For the purposes of this Challenge you’ll have to defeat at least 6 Ghoulies using Weapons only, a difficult prospect given our latest developments with the Warlock. Rather than scouring the floor for unused weapons, we’ll be tasked with returning to the thin shelf on the ground level and acquiring the Challenge Complete! Soup Tin to do away with the unnecessary expectations. While the challenge has been solved, the Ghoulies are still just as lively, so you’ll have to do your best to avoid taking any damage while working your way back up through the open Challenge Door.
WORKSHOP
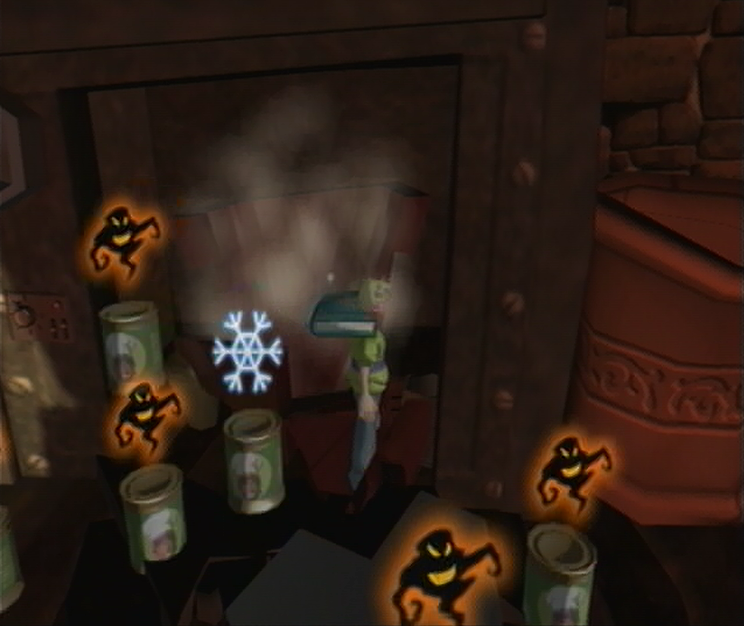
![]() To save ourselves the trouble later on, we’ll start out in the Workshop by grabbing the large Egyptian Urn to the left and cast it into the fire, doing so will take care of the Cursed Mummy hiding inside as well as add to our Ghoulies Defeated Score without a drawn out confrontation. Next, we’ll work our way to the right and break open the large Kiln door as well as the large pot inside to find a Freeze Ghoulies! Soup Tin amongst a flood of Unfavorable Soups. Avoid picking any of the Tins up and work your way around the large fire in the center of the room to the right in order to cast our final Egyptian Urn into the fire which can be found against a large pot next to the second mouth. If there’s any time remaining it would be wise to start cracking open the Rare branded pottery around the Workshop to expose a few Tins of Miniature Cooper! Soups, but otherwise there isn’t much to work with before the Challenge Door slams shut and you’ve found yourself with several Skeletons to contend with!
To save ourselves the trouble later on, we’ll start out in the Workshop by grabbing the large Egyptian Urn to the left and cast it into the fire, doing so will take care of the Cursed Mummy hiding inside as well as add to our Ghoulies Defeated Score without a drawn out confrontation. Next, we’ll work our way to the right and break open the large Kiln door as well as the large pot inside to find a Freeze Ghoulies! Soup Tin amongst a flood of Unfavorable Soups. Avoid picking any of the Tins up and work your way around the large fire in the center of the room to the right in order to cast our final Egyptian Urn into the fire which can be found against a large pot next to the second mouth. If there’s any time remaining it would be wise to start cracking open the Rare branded pottery around the Workshop to expose a few Tins of Miniature Cooper! Soups, but otherwise there isn’t much to work with before the Challenge Door slams shut and you’ve found yourself with several Skeletons to contend with!
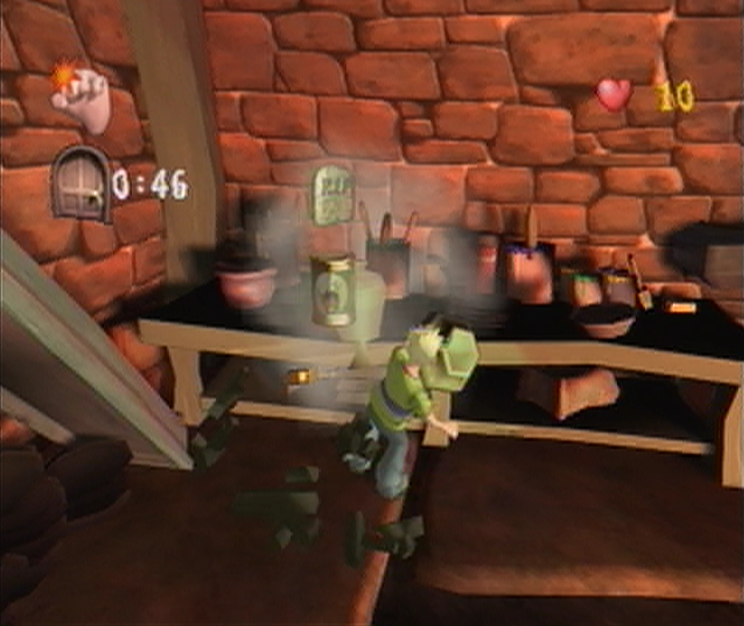
![]() We’ll need to work quickly to ensure that the Skeletons don’t get any “bright ideas” to start grabbing weaponry around the Workshop, so we’ll approach the workbench in the corner of the room across from the Kiln and to the left. Smash open the two slightly green bits of pottery on the left side of the table to expose a One-Hit Wonder! Soup Tin and crack open the Rare branded pots around the room as you lap around the central fire. Avoid the Unfavorable Soups and once you’ve made your way back, pick up the One-Hit Wonder! Soup Tin and start taking out the Skeletons! Be sure to target the Skeletons brandishing weaponry, but remain unbiased as you break bones throughout. Once the One-Hit Wonder! dissipates, work your way towards the Freeze Ghoulies! Tin while picking up Miniature Cooper! Soups along the way. Once the Skeletons have been frozen, activate the rest of the Miniature Coopers and make your escape once the clock winds down.
We’ll need to work quickly to ensure that the Skeletons don’t get any “bright ideas” to start grabbing weaponry around the Workshop, so we’ll approach the workbench in the corner of the room across from the Kiln and to the left. Smash open the two slightly green bits of pottery on the left side of the table to expose a One-Hit Wonder! Soup Tin and crack open the Rare branded pots around the room as you lap around the central fire. Avoid the Unfavorable Soups and once you’ve made your way back, pick up the One-Hit Wonder! Soup Tin and start taking out the Skeletons! Be sure to target the Skeletons brandishing weaponry, but remain unbiased as you break bones throughout. Once the One-Hit Wonder! dissipates, work your way towards the Freeze Ghoulies! Tin while picking up Miniature Cooper! Soups along the way. Once the Skeletons have been frozen, activate the rest of the Miniature Coopers and make your escape once the clock winds down.
FARMYARD

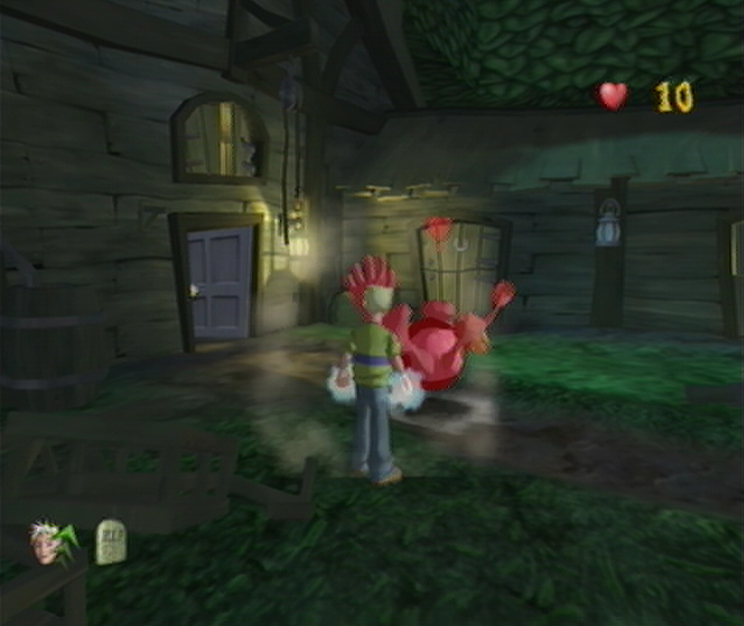
![]() You’ve got quite the heady task ahead as you emerge into the Farmyard, as you’ll be tasked with defeating a Jessie N’ Clyde trio with only 10 health alloted. Before you go pounding on the Workshop door to be let back in however, there’s a bit of a trick to dealing with these massive monsters. If you approach a Jessie N’ Clyde from where you stand, you’ll have the dual duo chase you about until they catch up. If you back up and place yourself behind the crumbly wall however, the duo will be unable to pass through and will forget about the entire incident, allowing you to venture back through and deal some more damage before hiding away like a coward. To get things started you’ll have to effectively lure your first Jessie N’ Clyde over and overstep its boundaries so that it turns around, then sneak up on it and start flailing away to take a good chip off its total energy. Once you’ve knocked the Jessie N’ Clyde to the ground, run back to your save haven and repeat the process over again.
You’ve got quite the heady task ahead as you emerge into the Farmyard, as you’ll be tasked with defeating a Jessie N’ Clyde trio with only 10 health alloted. Before you go pounding on the Workshop door to be let back in however, there’s a bit of a trick to dealing with these massive monsters. If you approach a Jessie N’ Clyde from where you stand, you’ll have the dual duo chase you about until they catch up. If you back up and place yourself behind the crumbly wall however, the duo will be unable to pass through and will forget about the entire incident, allowing you to venture back through and deal some more damage before hiding away like a coward. To get things started you’ll have to effectively lure your first Jessie N’ Clyde over and overstep its boundaries so that it turns around, then sneak up on it and start flailing away to take a good chip off its total energy. Once you’ve knocked the Jessie N’ Clyde to the ground, run back to your save haven and repeat the process over again.
![]() You should manage to squeeze in about 20 points of damage with each confrontation; 10 will be dedicated to your initial punches and the other 10 will be dealt from your finishing move once you’ve put it in a dizzied state, which means that each Jessie N’ Clyde will need to be lured five times. Once you’ve managed to defeat the first Jessie N’ Clyde, and repeat this strategy on the second, you should manage to spot a wooden Harvester next to a wheel to the left in front of a vined Challenge Door where the second Jessie N’ Clyde was patrolling. Smash open the Harvester and you’ll find a One-Hit Wonder Tin inside which you’ll collect immediately before heading down the path ahead and spotting a single barrel next to a collection of hay bales to the right. Pick up the barrel once you have the One-Hit Wonder! Soup and cast it toward the final Jessie N’ Clyde. With any luck you should manage to bowl it over, allowing you to pass through the Challenge Door unhindered.
You should manage to squeeze in about 20 points of damage with each confrontation; 10 will be dedicated to your initial punches and the other 10 will be dealt from your finishing move once you’ve put it in a dizzied state, which means that each Jessie N’ Clyde will need to be lured five times. Once you’ve managed to defeat the first Jessie N’ Clyde, and repeat this strategy on the second, you should manage to spot a wooden Harvester next to a wheel to the left in front of a vined Challenge Door where the second Jessie N’ Clyde was patrolling. Smash open the Harvester and you’ll find a One-Hit Wonder Tin inside which you’ll collect immediately before heading down the path ahead and spotting a single barrel next to a collection of hay bales to the right. Pick up the barrel once you have the One-Hit Wonder! Soup and cast it toward the final Jessie N’ Clyde. With any luck you should manage to bowl it over, allowing you to pass through the Challenge Door unhindered.
FOUNDRY
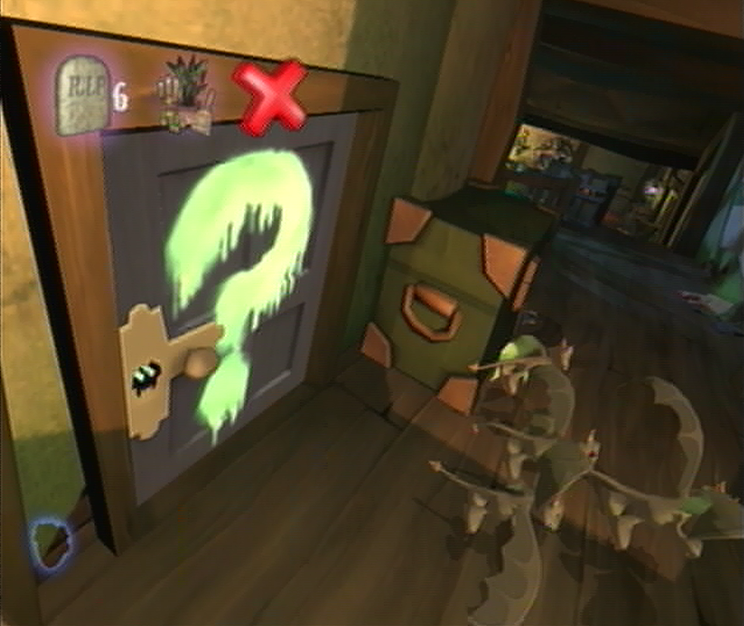
![]() This room can be especially difficult, given that the rules prohibit you from defeating any Ghoulies, even if you happen to unearth them while you search for the Key you’ll have to remain pacifistic to avoid summoning the Reaper. To start out, we’ll need to approach the Challenge Door but avoiding getting too close in order to break open the two crates that sit near the exit. In doing so you’ll expose a single 10 Energy Boost! Tin and a Traitor Fever! Soup. Once you’ve managed that, we’ll turn around and explore the floor to find the Key hidden inside one of the Rare branded items around the room, which can be found in plenty supply. If you happen to unearth the key after the destruction of your first Rare item, you’ll have to expose a Ghouly by breaking one of the other Rare items and then carry on towards the Challenge Door with your Ghouly in tow. Once you’ve gotten close enough, approach the Challenge Door and you’ll expose the Haunted Door that was hiding all along!
This room can be especially difficult, given that the rules prohibit you from defeating any Ghoulies, even if you happen to unearth them while you search for the Key you’ll have to remain pacifistic to avoid summoning the Reaper. To start out, we’ll need to approach the Challenge Door but avoiding getting too close in order to break open the two crates that sit near the exit. In doing so you’ll expose a single 10 Energy Boost! Tin and a Traitor Fever! Soup. Once you’ve managed that, we’ll turn around and explore the floor to find the Key hidden inside one of the Rare branded items around the room, which can be found in plenty supply. If you happen to unearth the key after the destruction of your first Rare item, you’ll have to expose a Ghouly by breaking one of the other Rare items and then carry on towards the Challenge Door with your Ghouly in tow. Once you’ve gotten close enough, approach the Challenge Door and you’ll expose the Haunted Door that was hiding all along!
![]() Before the Haunted Door has a chance to catch up with you, run back towards the exposed Super Soups and collect them all. This will refill your Energy if you’ve had any difficulty in luring over your Ghouly adversary, and have them start fighting the Haunted Door once they’ve caught the fever. After you’ve managed this, turn around and grab the large metal keg next to the crates and toss it into the ensuing battle in order to take a healthy chunk out of the Haunted Doors energy. Head back towards the main area and you’ll spot a pillar to the left of the large fireplace; behind it you’ll find a collection of decanters and paint cans that you can use to keep the Haunted Door at bay. It’s likely that the Traior Fever has run its course, or your Ghouly adversary has seen its end, so it’s best to deal with the Haunted Door quickly here as it has its sights firmly on Cooper. Once you’ve defeated the Haunted Door, it’s just a short trek through the real Challenge Door.
Before the Haunted Door has a chance to catch up with you, run back towards the exposed Super Soups and collect them all. This will refill your Energy if you’ve had any difficulty in luring over your Ghouly adversary, and have them start fighting the Haunted Door once they’ve caught the fever. After you’ve managed this, turn around and grab the large metal keg next to the crates and toss it into the ensuing battle in order to take a healthy chunk out of the Haunted Doors energy. Head back towards the main area and you’ll spot a pillar to the left of the large fireplace; behind it you’ll find a collection of decanters and paint cans that you can use to keep the Haunted Door at bay. It’s likely that the Traior Fever has run its course, or your Ghouly adversary has seen its end, so it’s best to deal with the Haunted Door quickly here as it has its sights firmly on Cooper. Once you’ve defeated the Haunted Door, it’s just a short trek through the real Challenge Door.
STABLES
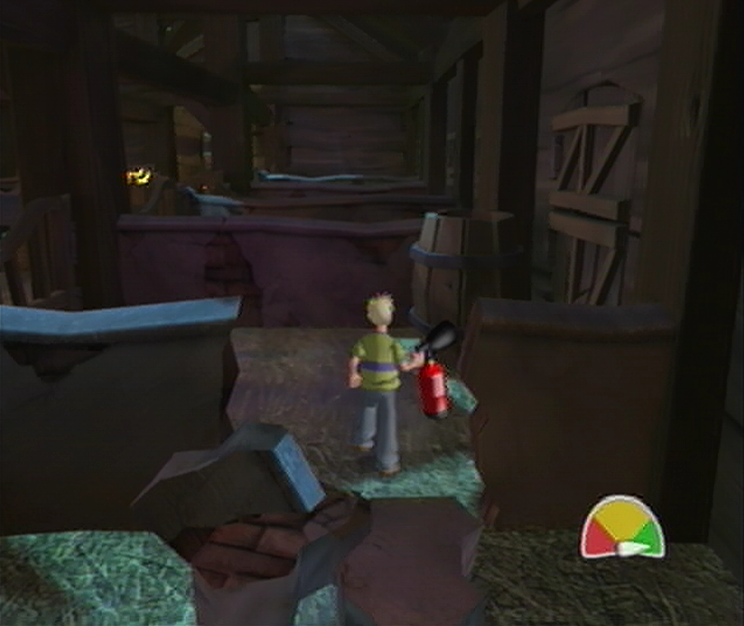
![]() As you start off, smash open the barrel to the left to expose a Fire Imp and a Shocker Blocker! Soup Tin and then work your way ahead to Mr. Ribs before the Imp has a chance to attack. Once you’ve gotten the Fire Extinguisher off of Ma’s assistant, we’ll turn back around and use it to make quick work of the Fire Imp before snatching up the Shocker Blocker and entering the rightmost stable. Using your Extinguisher, you’ll have to swing at the large crack found in the wall of the first Stable to send it crumbling, effectively creating a makeshift entrance that we’ll use to carry on to the second Stable. Before we get too carried away however, we’ll want to swing at the barrel in the second stall to expose the Fire Imp hiding inside and then deal with it quickly using the Extinguisher before breaking the next wall to the third Stable. This time the walls won’t crumble underneath the raw power of your Extinguisher, so you’ll have to break down the Stable door instead to enter the alleyway.
As you start off, smash open the barrel to the left to expose a Fire Imp and a Shocker Blocker! Soup Tin and then work your way ahead to Mr. Ribs before the Imp has a chance to attack. Once you’ve gotten the Fire Extinguisher off of Ma’s assistant, we’ll turn back around and use it to make quick work of the Fire Imp before snatching up the Shocker Blocker and entering the rightmost stable. Using your Extinguisher, you’ll have to swing at the large crack found in the wall of the first Stable to send it crumbling, effectively creating a makeshift entrance that we’ll use to carry on to the second Stable. Before we get too carried away however, we’ll want to swing at the barrel in the second stall to expose the Fire Imp hiding inside and then deal with it quickly using the Extinguisher before breaking the next wall to the third Stable. This time the walls won’t crumble underneath the raw power of your Extinguisher, so you’ll have to break down the Stable door instead to enter the alleyway.

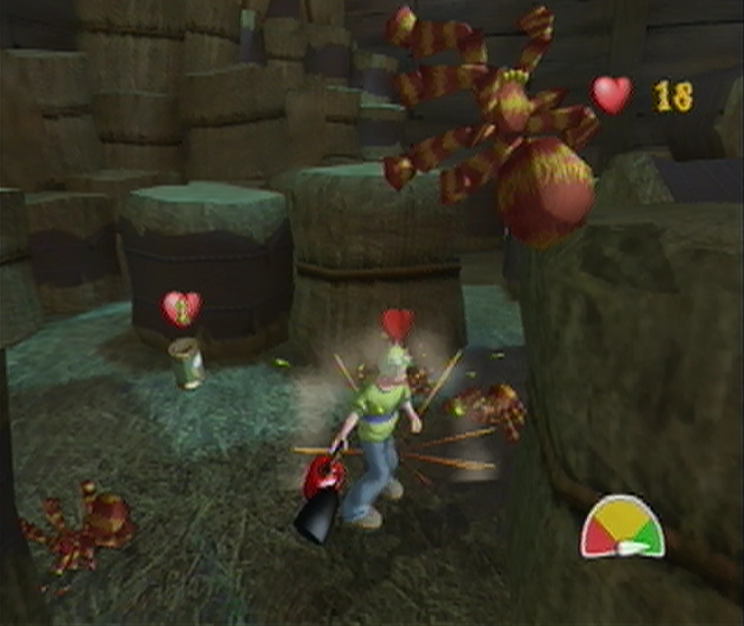
![]() Take out Fire Imp overhead in this area, and then break open the barrel that blocks off the entire area just to the right of the stable door. After you’ve done that, smash open the large blue crate to the left and defeat the final Fire Imp in this area. Break open the stable door after the crate and you’ll find yourself on the opposite end in the first stable. Break through the weak spot of the stable wall found nearest the door, and you’ll find the next soft spot in the center of the next stable wall. Once you’re into the third stable, break open the large barrel and take care of the Fire Imp hidden inside. After breaking through one more stable wall, crack open the stable door in this area and take care of the aimless Imp flying about before heading into the stable directly across the way and cracking open the large blue crate for another Imp. Not too far to go now; locate the soft spot back near the stable door and pass through into the next stall where you’ll find the weak spot in the center.
Take out Fire Imp overhead in this area, and then break open the barrel that blocks off the entire area just to the right of the stable door. After you’ve done that, smash open the large blue crate to the left and defeat the final Fire Imp in this area. Break open the stable door after the crate and you’ll find yourself on the opposite end in the first stable. Break through the weak spot of the stable wall found nearest the door, and you’ll find the next soft spot in the center of the next stable wall. Once you’re into the third stable, break open the large barrel and take care of the Fire Imp hidden inside. After breaking through one more stable wall, crack open the stable door in this area and take care of the aimless Imp flying about before heading into the stable directly across the way and cracking open the large blue crate for another Imp. Not too far to go now; locate the soft spot back near the stable door and pass through into the next stall where you’ll find the weak spot in the center.
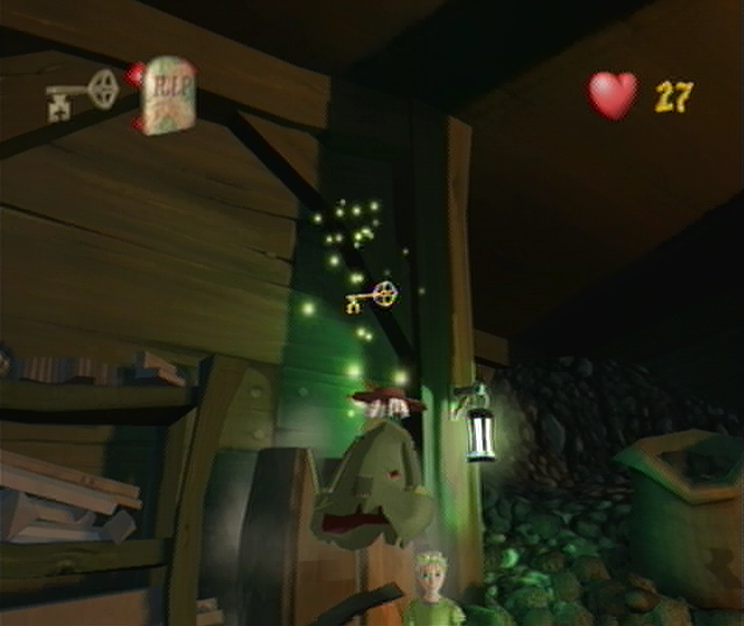
![]() Once you’ve made it through, locate and destroy the stable door in front of the fallen ceiling beam and then take care of the final Imp in this central alley. Find your way to the last leg of your journey by breaking the final stable door down on the opposite side of the alley. From here it’s just a matter of tackling down the weak center wall of this area and then extinguishing the last Imp found inside the barrel located in the corner. Now that we’ve finished up with that bit of leg work, we’re ready to carry on through the pillars of hay ahead, but not before we take care of the Spider waiting in the awning overhead and then have our Shocker Blocker! Tin protect us as a Dropper plops down from the ceiling. Once you’ve managed to slug all of the Spiders with your extinguisher to benefit your Ghoulies Defeated Score you’ll have the fruits of your labor tacked up on the wall ahead; the second bit of the Baron’s Rhyme! Approach it quickly and then get ready to leg it back to the entrance!
Once you’ve made it through, locate and destroy the stable door in front of the fallen ceiling beam and then take care of the final Imp in this central alley. Find your way to the last leg of your journey by breaking the final stable door down on the opposite side of the alley. From here it’s just a matter of tackling down the weak center wall of this area and then extinguishing the last Imp found inside the barrel located in the corner. Now that we’ve finished up with that bit of leg work, we’re ready to carry on through the pillars of hay ahead, but not before we take care of the Spider waiting in the awning overhead and then have our Shocker Blocker! Tin protect us as a Dropper plops down from the ceiling. Once you’ve managed to slug all of the Spiders with your extinguisher to benefit your Ghoulies Defeated Score you’ll have the fruits of your labor tacked up on the wall ahead; the second bit of the Baron’s Rhyme! Approach it quickly and then get ready to leg it back to the entrance!
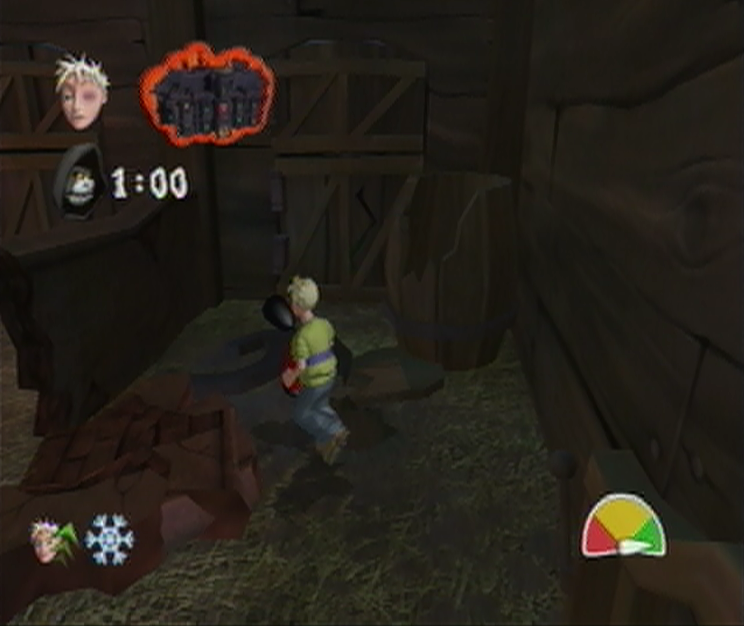
![]() Thanks to our compulsive trek through the Stables the first time, we won’t bump into any surprises on the way back, especially when they lead to a visit from the Reaper. From your current position, follow the wall to your right to locate and acquire a Freeze Ghoulies! Tin as well as a Turbo Cooper! Tin. Now it’s just a simple manner of retracing your steps through the Stables until you’ve emerged back at the entrance. If you’re especially quick, the Freeze Ghoulies and Turbo Cooper should have you covered until you’ve moved through three quarters of the Stable maze where you’ll have to deal with a Fire Imp that’s made it from the entrance of the room. Manage to complete the labyrinth soon after and you’ll confront the final duo of Fire Imps back where we met Mr. Ribs with the Extinguisher. With the Stables complete and time to spare we’ll duck out this room back through the Challenge Door where we’re sure to find a most difficult scenario waiting for us in the Foundry…
Thanks to our compulsive trek through the Stables the first time, we won’t bump into any surprises on the way back, especially when they lead to a visit from the Reaper. From your current position, follow the wall to your right to locate and acquire a Freeze Ghoulies! Tin as well as a Turbo Cooper! Tin. Now it’s just a simple manner of retracing your steps through the Stables until you’ve emerged back at the entrance. If you’re especially quick, the Freeze Ghoulies and Turbo Cooper should have you covered until you’ve moved through three quarters of the Stable maze where you’ll have to deal with a Fire Imp that’s made it from the entrance of the room. Manage to complete the labyrinth soon after and you’ll confront the final duo of Fire Imps back where we met Mr. Ribs with the Extinguisher. With the Stables complete and time to spare we’ll duck out this room back through the Challenge Door where we’re sure to find a most difficult scenario waiting for us in the Foundry…