Grabbed by the Ghoulies Bonus Book Guide

![]() Grabbed by the Ghoulies will see you collecting an assortment of eerie collectibles to progress through Ghoulhaven Hall and escape with your girlfriend Amber intact. The most desirable collectibles however, are a collection of Rare weighty tomes called Bonus Books. You’ll manage to find a single Bonus Book in each room you enter throughout your adventure, bringing the grand total to one hundred. While the first few can be found in plain sight, they become increasingly difficult later on, requiring you to break certain objects to find them inside, or traveling well off the beaten path to find it tucked away out of view.
Grabbed by the Ghoulies will see you collecting an assortment of eerie collectibles to progress through Ghoulhaven Hall and escape with your girlfriend Amber intact. The most desirable collectibles however, are a collection of Rare weighty tomes called Bonus Books. You’ll manage to find a single Bonus Book in each room you enter throughout your adventure, bringing the grand total to one hundred. While the first few can be found in plain sight, they become increasingly difficult later on, requiring you to break certain objects to find them inside, or traveling well off the beaten path to find it tucked away out of view.
Sometimes you’ll even have to choose between an available exit, or an onslaught of Ghoulies that come between you and the sought after prize. For every five Bonus Books you manage to obtain, you’ll unlock a secret Bonus Challenge that can be played in the Bonus menu. Beat the challenge and you’ll acquire a page to your own Bonus Book Gallery that shows the development of Grabbed by the Ghoulies including removed rooms, eliminated enemies and a cavalcade of concept art.
Collect all 100 Bonus Books and beat the 20 challenges throughly enough and you’ll manage to unlock a secret challenge mode where you’ll play the adventure over again as Amber.
The easiest way to go about collecting all 100 Bonus Books is to play through your entire game file once without worrying about collecting any of them whatsoever. Each time you come across a new ‘scene’ it will be added to your Bonus Challenges where you can replay it. Once you’ve finished your game you can utilize this menu by re-visiting all of the rooms without the tedium of watching cutscenes or completing the challenges set to advance to the next room for another Bonus Book. As soon as you’ve grabbed the Book that you were looking for, you’re free to pause the game and exit back to the Bonus Scene Selection without losing your progress. Once you’ve collected the Bonus Book for a Scene you’ll find that a Bonus Book icon has been placed next to its heading in the Scenes menu, which makes for easy categorization when viewing the rooms you’ve already completed. Below you’ll find a chronological listing of each and every Bonus Book found in Grabbed by the Ghoulies.
CHAPTER ONE BONUS BOOKS
BONUS BOOK 1
![]()
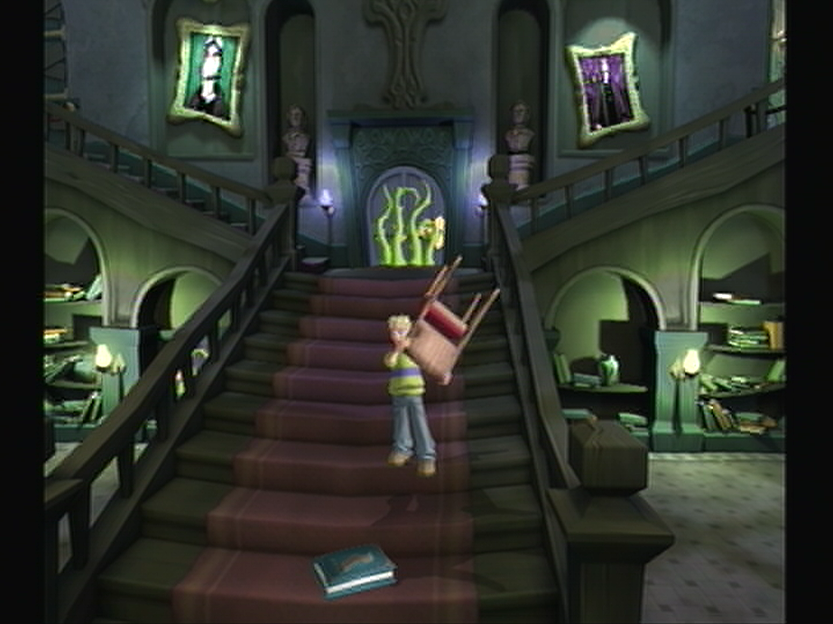
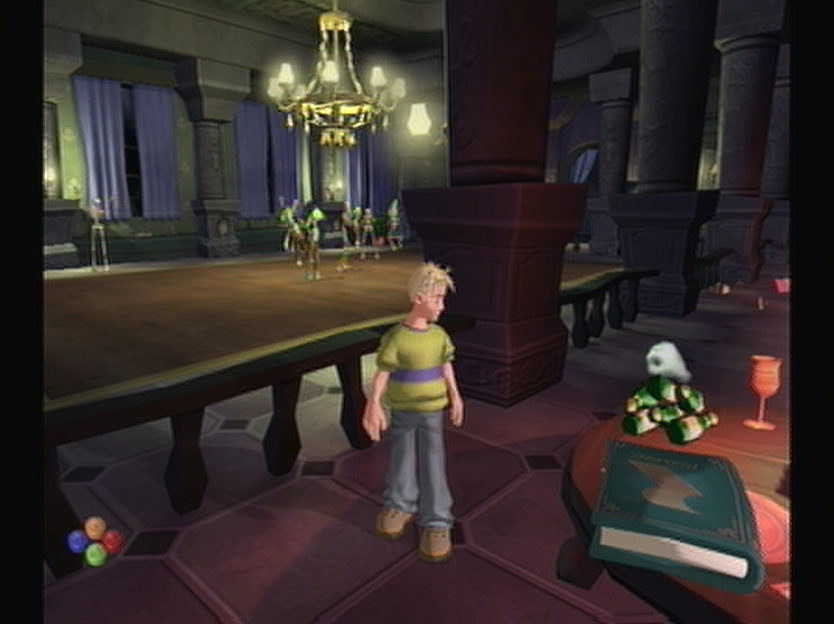
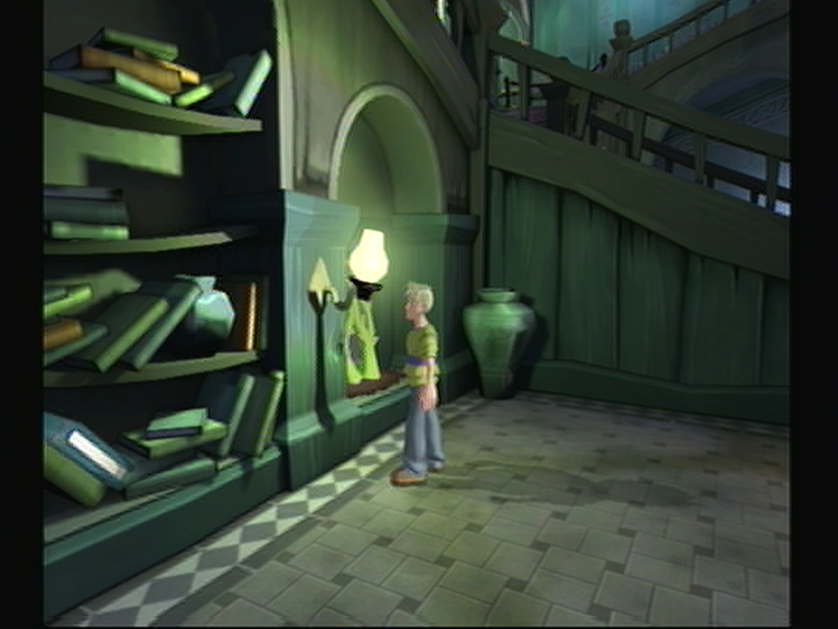
CHAPTER 1: SCENE 1: GRAND HALL
The first Bonus Book is the easiest of the lot to obtain, and rightfully so as it will start you on your journey straight away. As soon as you enter the Grand Hall for the first time you’ll need to fend yourself off from an onslaught of Imps. If you can manage it, you can sneak away from the mob and work your way up the staircase where the Bonus Book can be found near the base. If you’d rather wait until you’ve dispatched both waves, ignore Crivens’ invitation to carry on through the doorway and use this time to ascend the staircase. Once you’ve gotten the Bonus Book you’re free to carry onward to the Trophy Room.
[expand image]
BONUS BOOK 2
![]()
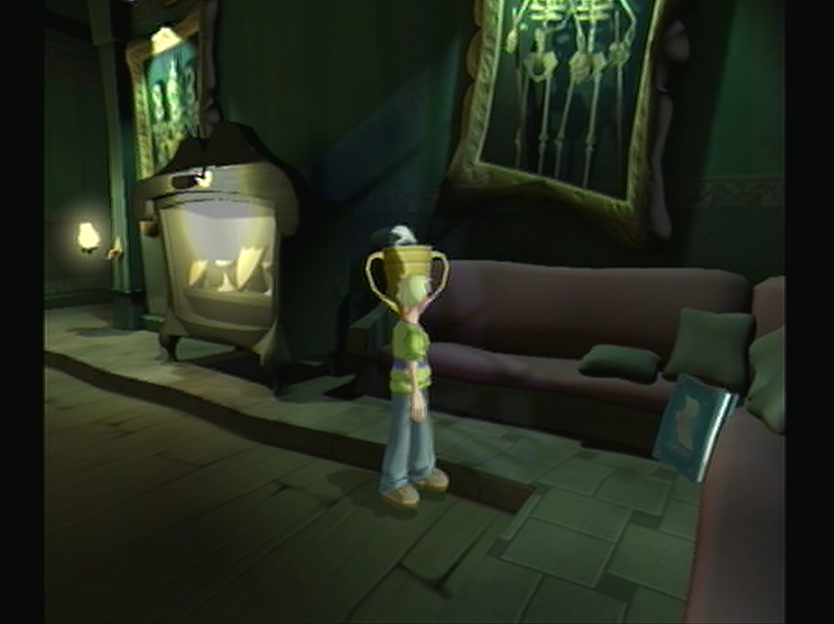
CHAPTER 1: SCENE 2: TROPHY ROOM
Within the Trophy Room it would appear that Cooper has scrapped the logic of “Looking high and low” and just stuck to looking high up at the grotesque Trophy heads on the wall. You won’t need to worry about missing out on the Bonus Book as you pass through this harrowing hall as you’ll automatically pick it up as you walk through the door on the other side of the room. Be ready to fend for your life as occasionally one of the Trophy heads will spring to life, and if you aren’t quick enough on the draw your health will take a hit. Panic twice and you’ll have to start the room over for another chance at the Bonus Book.
[expand image]
BONUS BOOK 3
![]()
CHAPTER 1: SCENE 3: BILLIARD ROOM
While the Billiard Room encourages you to run right to the end you’ll really have to embrace exploration if you hope to collect all of the Bonus Books, and while these earlier rooms are fairly easy, you’ll have a much more difficult search later on. Case in point you’ll manage to find the third Bonus Book around the corner slumped up against the middle of the couch to the right next to the Trophy cabinet, which you’d easily miss if you beelined to the exit. Once you’ve picked up the book you’re free to carry on toward the exit, be sure not to disturb the Skeletons chatting next to the door and walk on through to safety.
[expand image]
BONUS BOOK 4
![]()
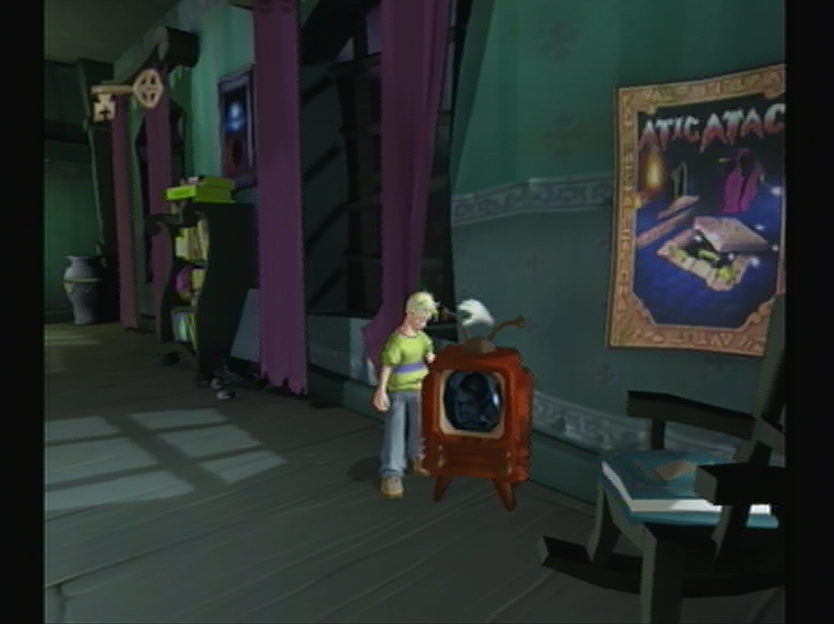
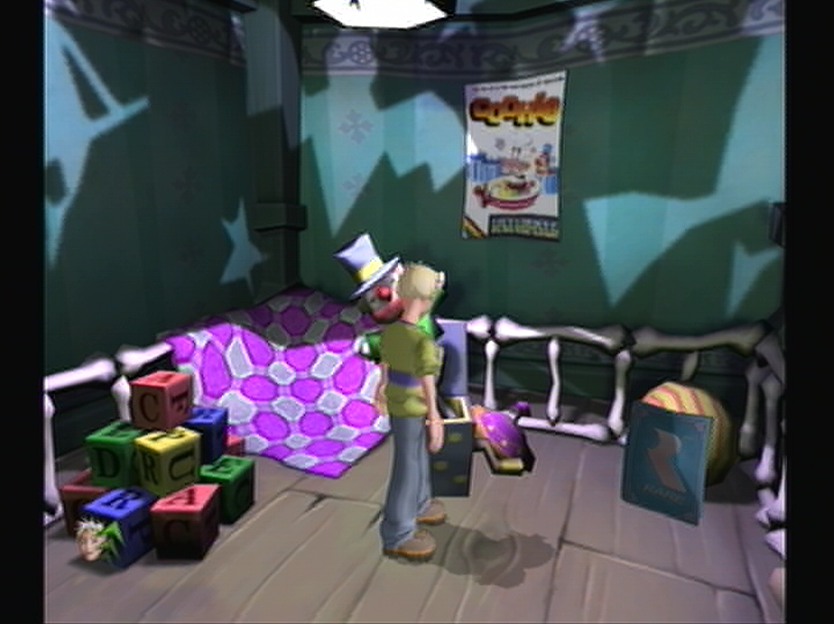
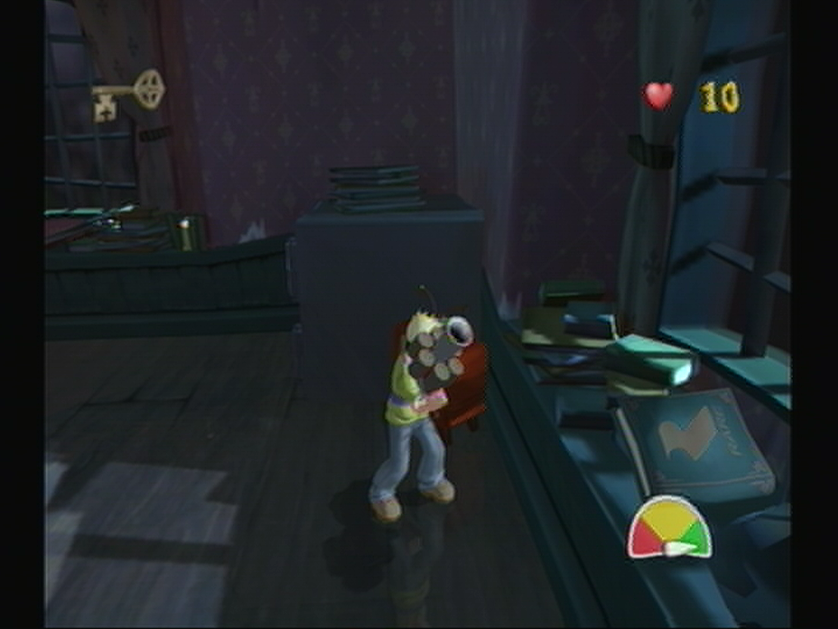
CHAPTER 1: SCENE 4: GAMING ROOM
The forth Bonus Book is rather easy to find, though when you start off you’ll be facing the wrong direction. Spin yourself around and walk past the two card tables and by the Thorned Challenge Door all the while avoiding the Imps on hot pursuit. You’ll manage to spot a Television Set and a Rocking Chair just around the corner beside a window and underneath an Atic Atac Poster. Make your way over to the scene and you’ll see the forth Bonus Book cradled in the frame of the Rocking Chair. Give yourself some distance from the fiendish Imps and snatch it up leaving the Rocking Chair barren.
[expand image]
BONUS BOOK 5
![]()
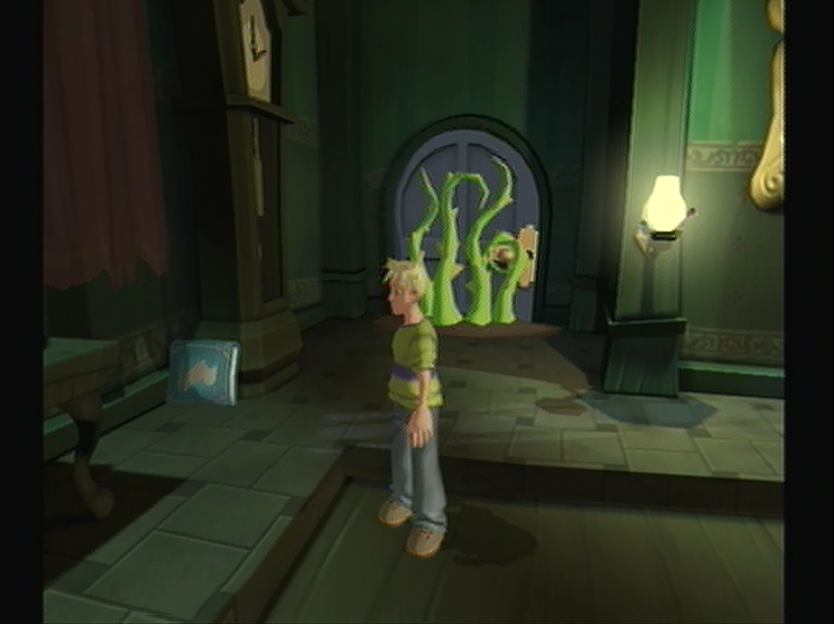
CHAPTER 1: SCENE 5: BILLIARD ROOM
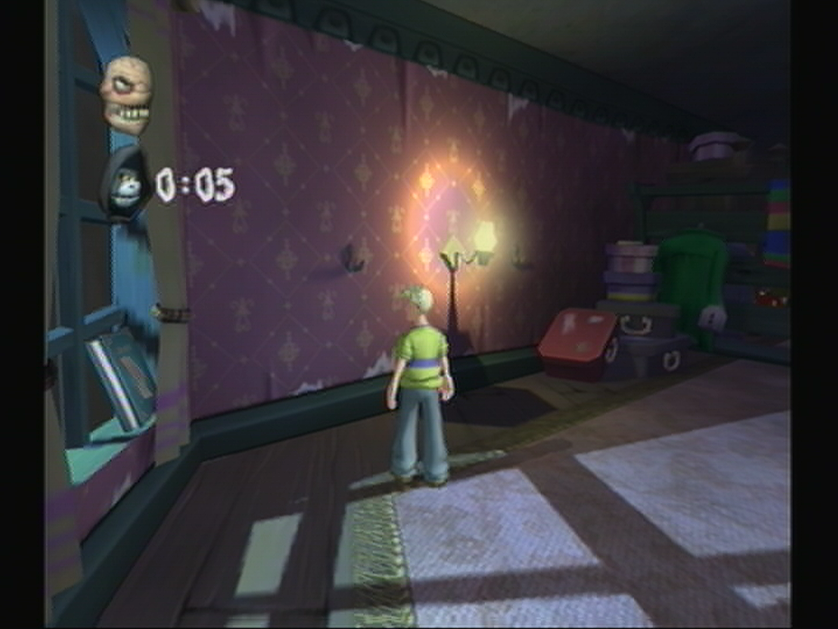
This next Bonus Book is rather tricky and shows you just how deceptive the Bonus Books can be. Once Baron Von Ghoul finishes his blurb and interferes with your health you’ll be able to move forward, do so and move the camera to face the door you’ve just emerged from. If you’ve done this correctly you’ll spot the fifth Bonus Book laying against the Grandfather Clock to the left of the screen. If you’ve followed this guide chronologically you should now have collected your fifth Bonus Book meaning you’ve unlocked your first Bonus Challenge! Pause the game and exit to the Features Menu after you’ve grabbed it.
[expand image]
BONUS BOOK 6
![]()
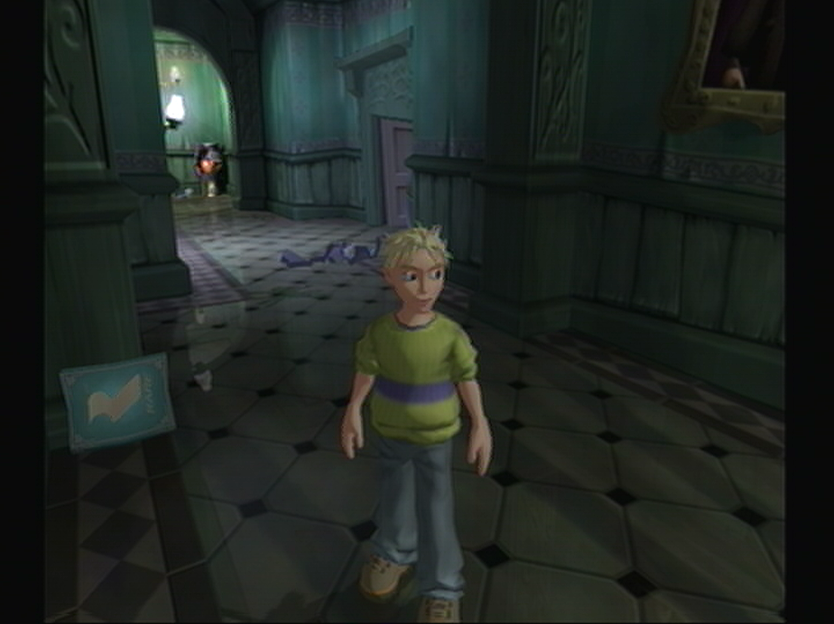
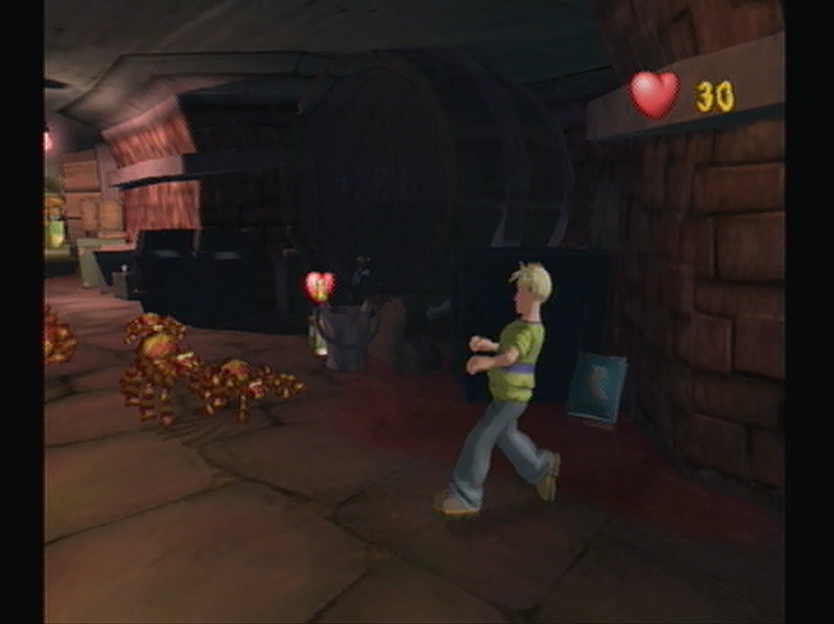
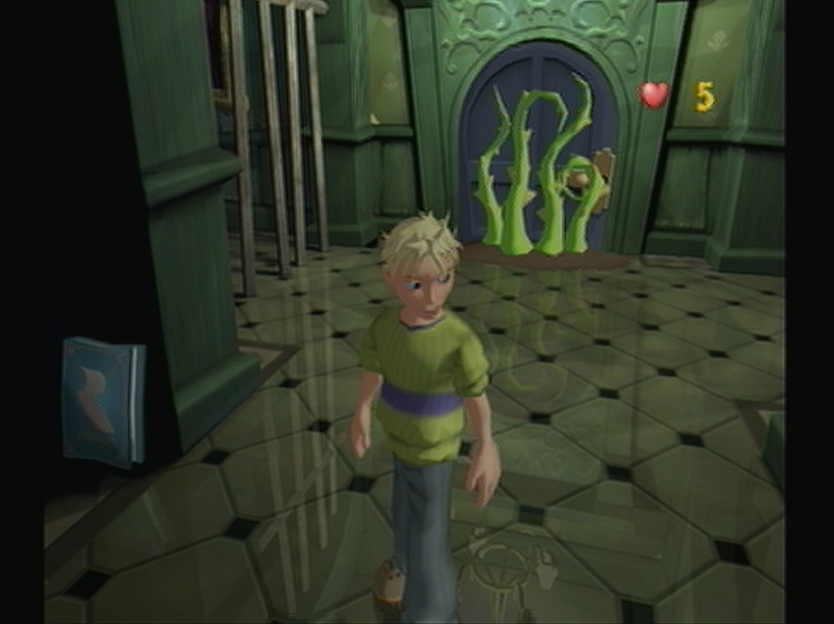
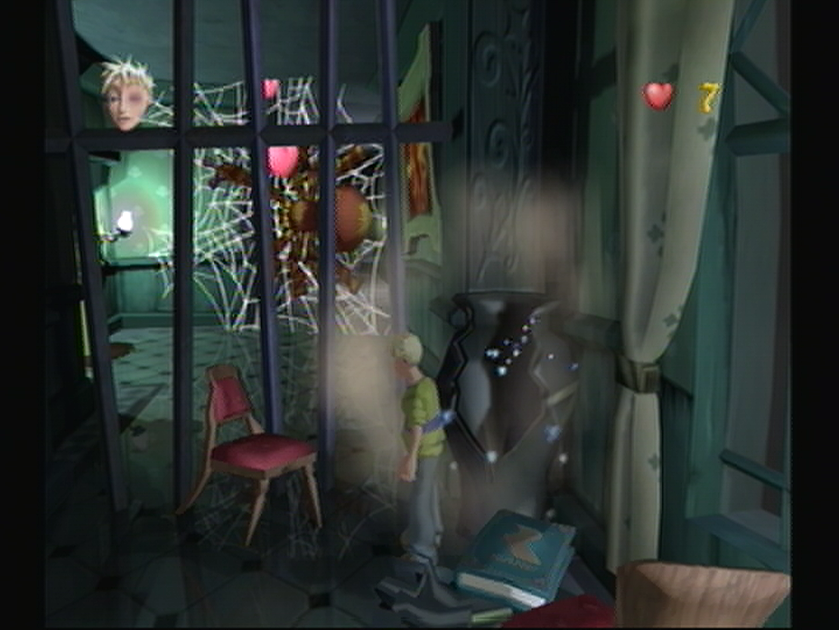
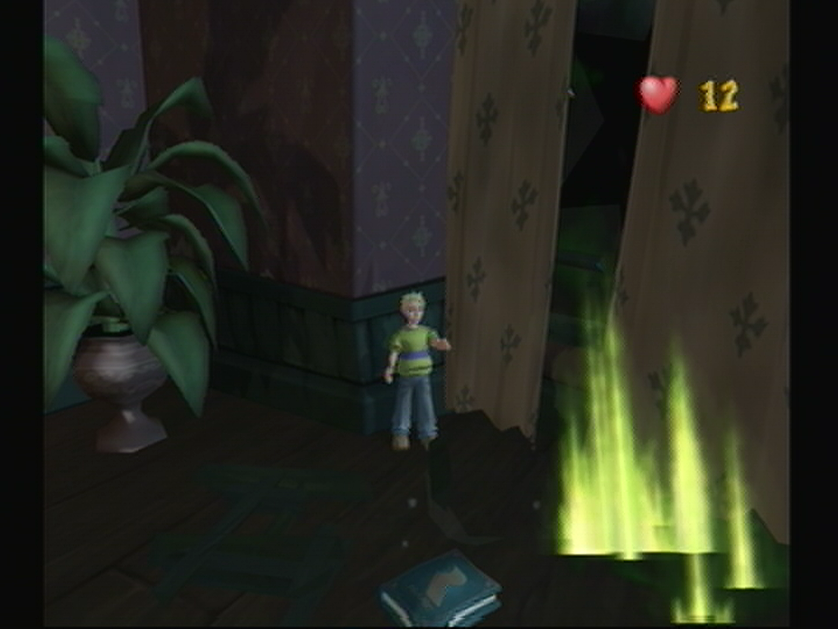
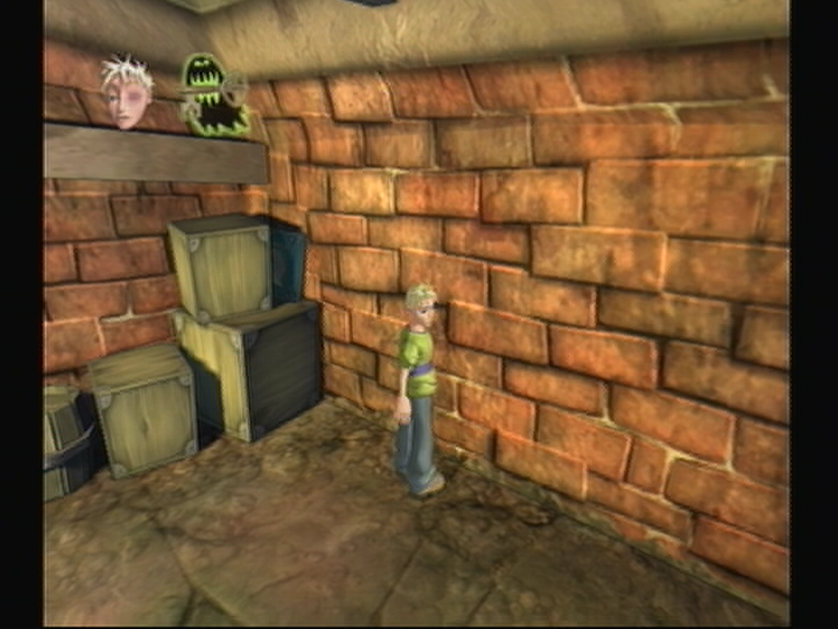
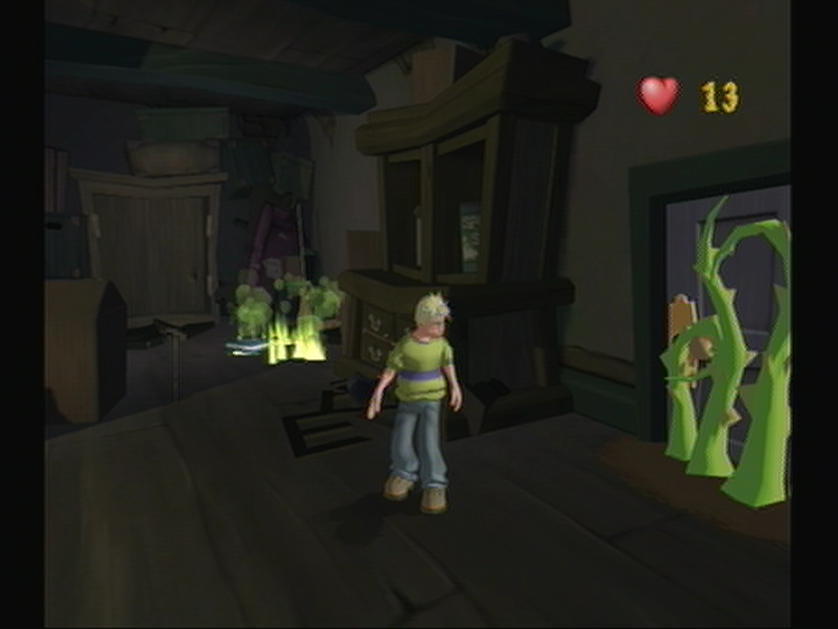
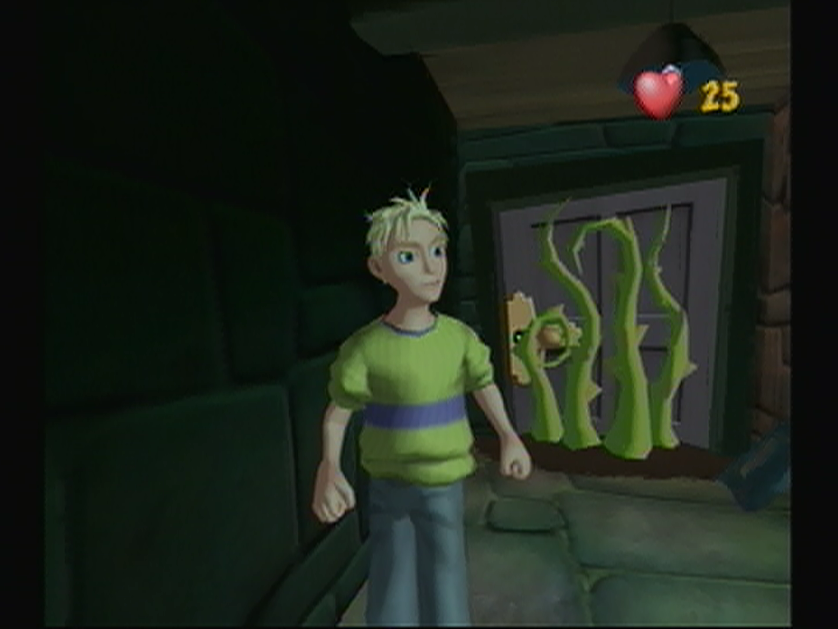
CHAPTER 1: SCENE 6: LOWER CORRIDORS
If the last Bonus Books placement was a little deceiving, the sixth Bonus Book is absolutely conniving! You’ll find yourself in the Lower Corridors with incredibly low vitality, made worse with the Super Scary Shock Telephone ahead. Take some time to rest once you’ve been shocked and carry on ahead. Whipping around the corner you’ll be assaulted by five Spiders, with your low health it would seem best to escape through the door ahead. Ignoring the door however and continuing toward the bars with the dancing Ghoulies down the hall will reveal the sixth Bonus Book hidden behind the wall to the right of this scene.
[expand image]
BONUS BOOK 7
![]()
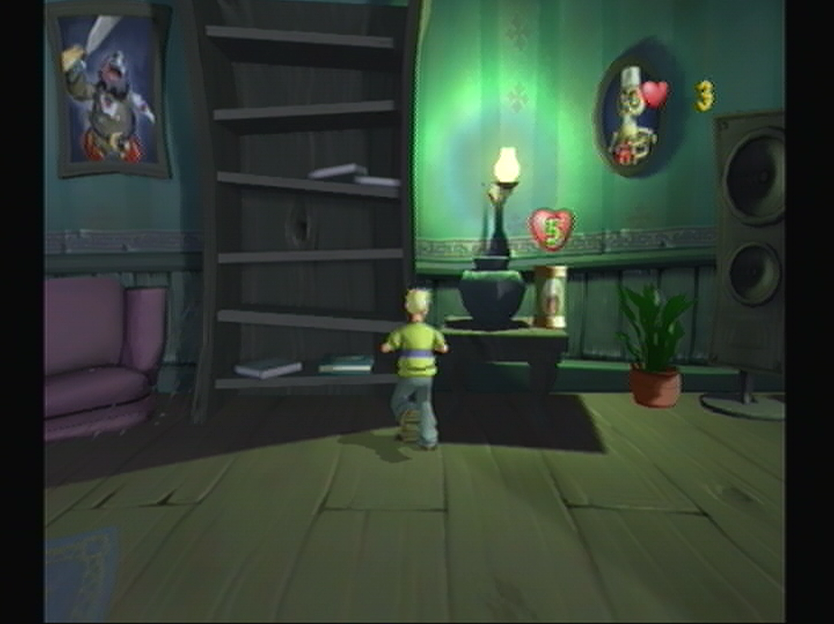
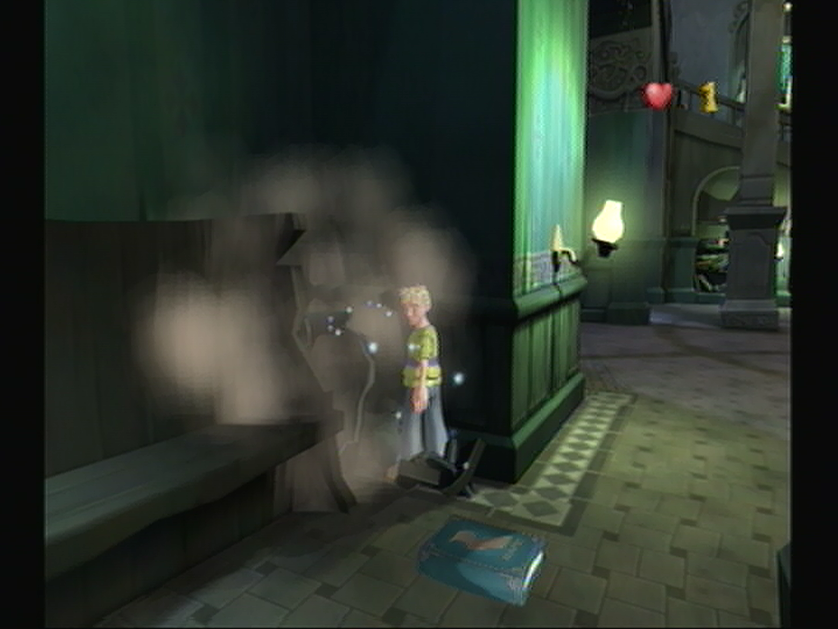
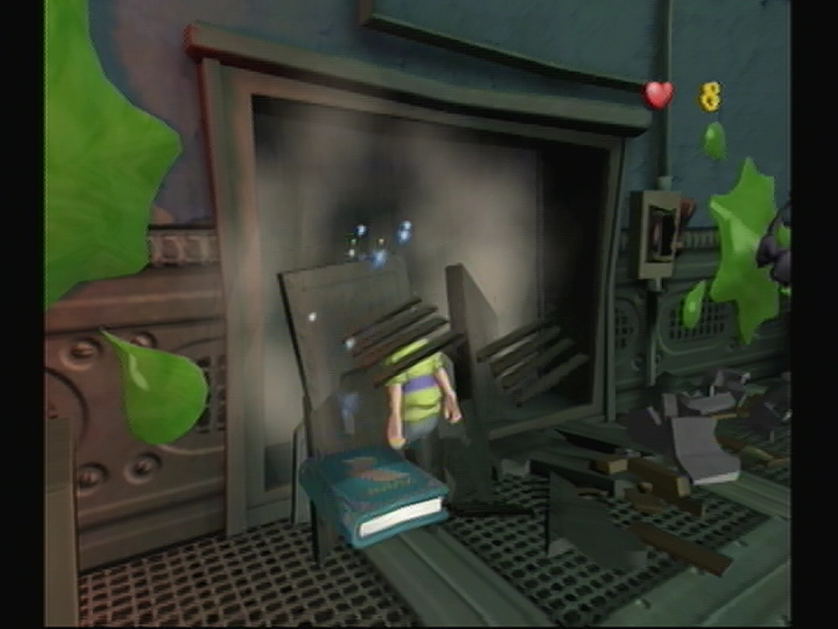
CHAPTER 1: SCENE 7: CINEMA
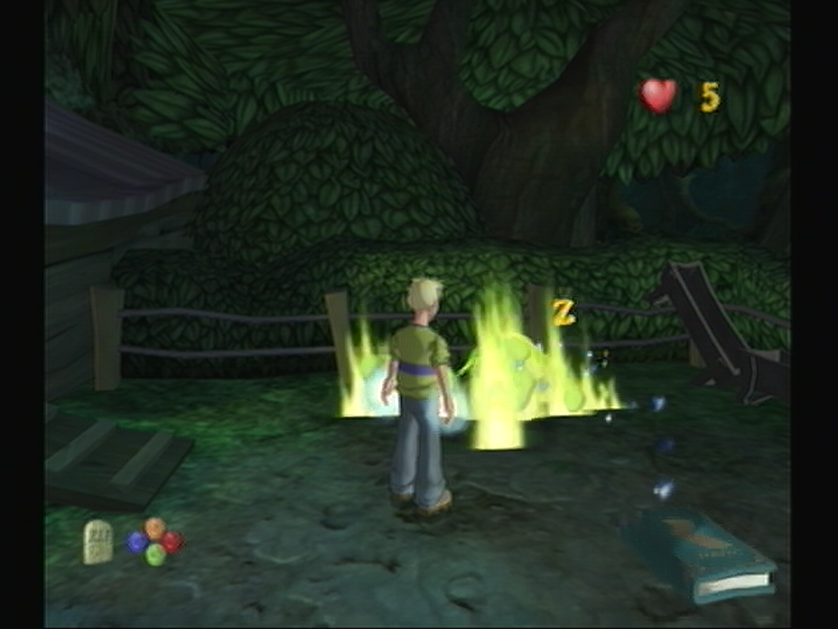
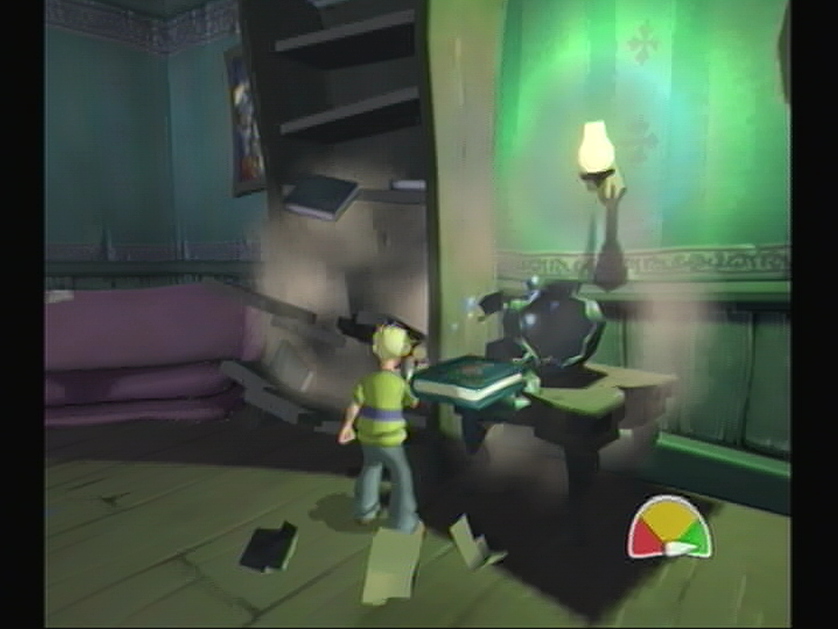
Bonus Book Seven is home to yet another deceptive exit. Once you’ve descended down the staircase that leads to the main area of the Cinema you’ll face a number of Ghoulies that burst forth from the window ahead. Choose flight over fight and run down the hallway to begin a Cutscene that sends off Amber squarely into the basement. As soon as you regain control, charge to the other side of the room toward the Haunted Television Set, refrain from entering the Fireplace and instead continue straight ahead where you’ll find the Bonus Book on the bottom of a lone Bookshelf next to a couch.
[expand image]
BONUS BOOK 8
![]()
CHAPTER 1: SCENE 8: GAMING ROOM
Luckily this Bonus Book won’t cause you too much trouble so long as you know precisely where not to tread. In this case you’ll want to avoid the alluring open door at the other end of the room as stepping near it will begin the challenge and thus unwanted interference. Instead, you’ll need to work your way around the corner to your left where you’ll find a game of darts set up and continue until you see a play pen constructed from bones. You’ll need to do a bit of breaking and entering to smash an entrance into the play pen, then venture on inside where you’ll spot the Eighth Bonus Book resting on a large ball.
[expand image]
BONUS BOOK 9
![]()
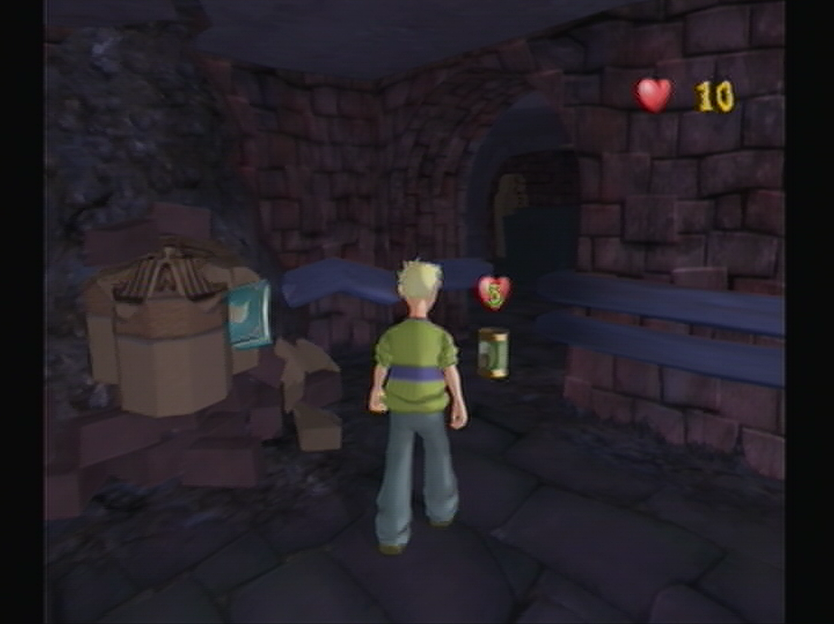
CHAPTER 1: SCENE 9: BASEMENT
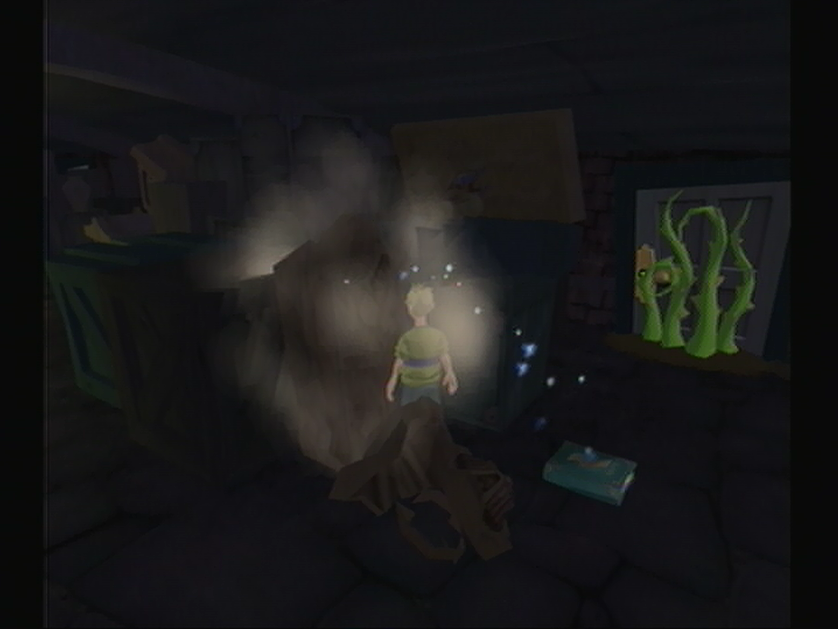
This next Bonus Book requires you go through bit of an endurance test before you go about collecting it. In the basement you’ll be alloted a meager 10 health as you venture through the creepy corridors all the while you’ll be subject to a few dozen falling Spiders; so long as you keep sprinting through the corridors and ignore them you should be fine. After you pass a pipe spouting steam you’ll manage to spot a swaying light bulb on a string, round the corner and you’ll see a Sarcophagi nearly buried in rubble. The lid of the coffin has been breached and the contents – the Ninth Bonus Book – is yours for the taking.
[expand image]
BONUS BOOK 10
![]()
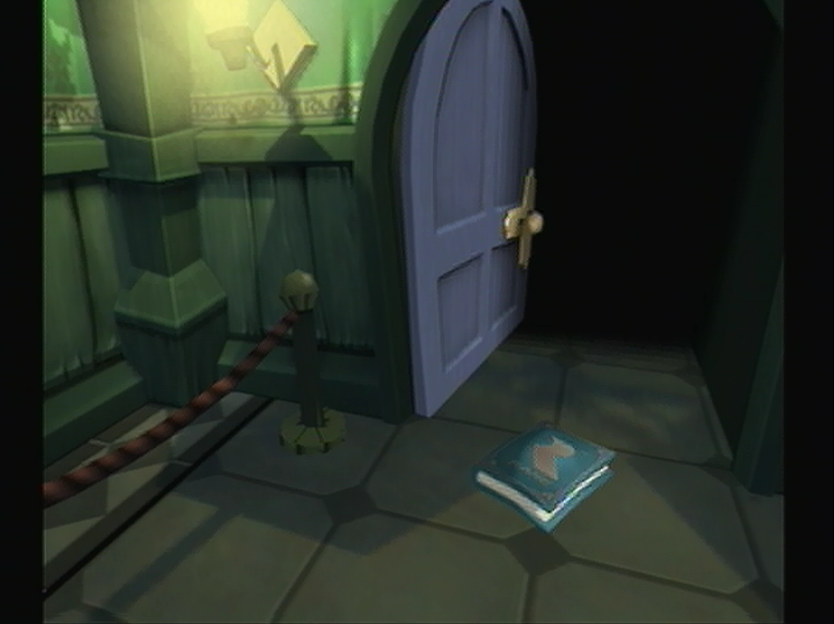
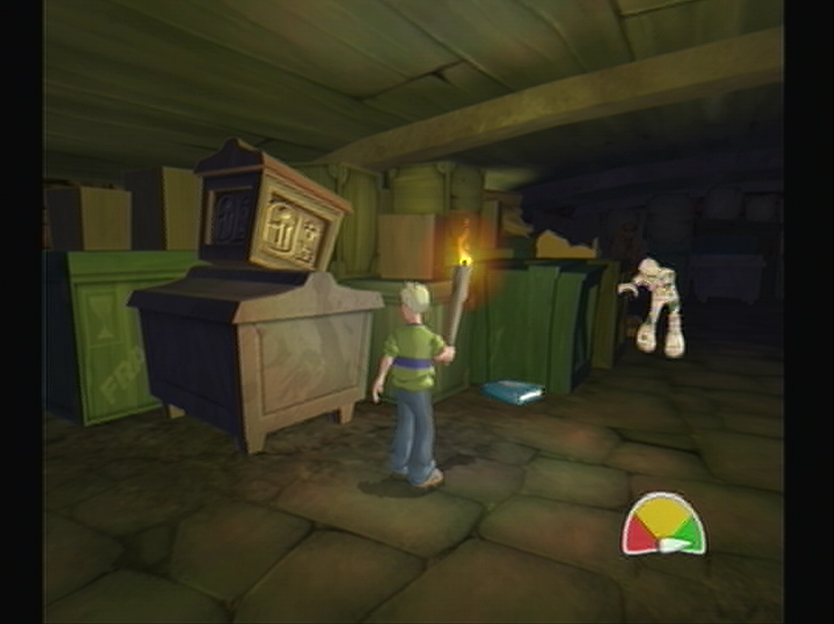
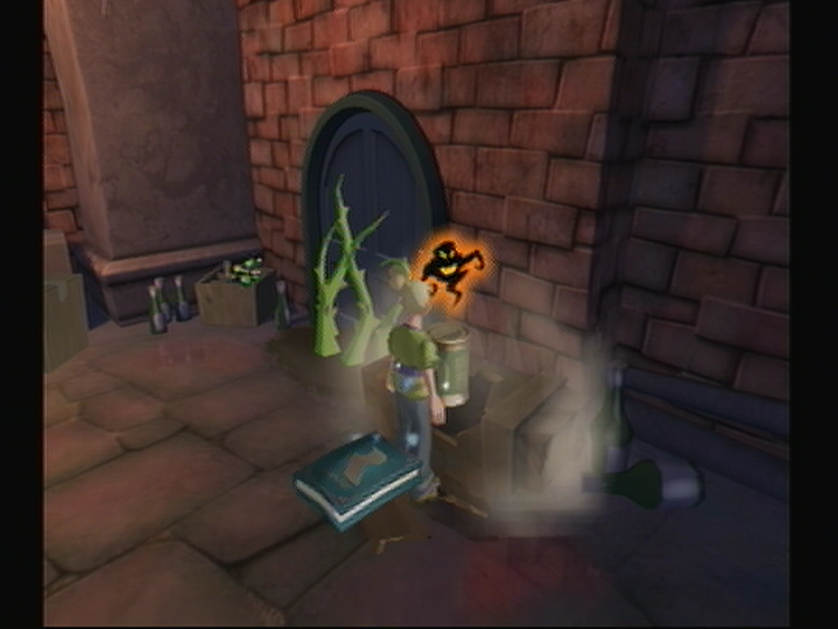
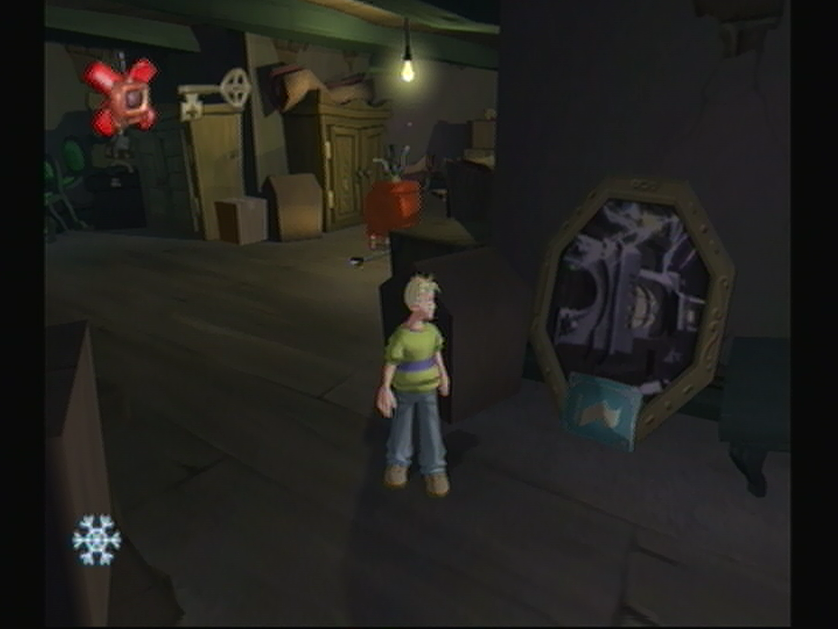
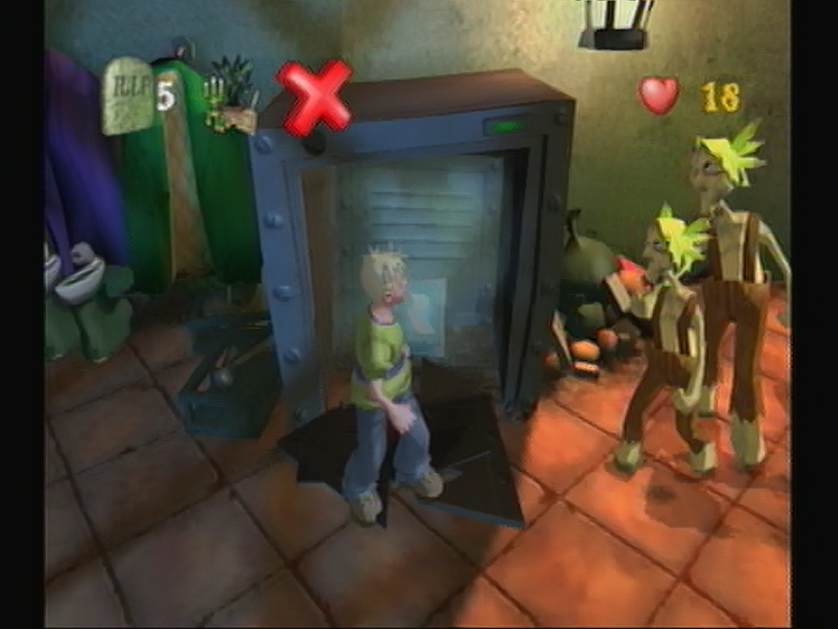
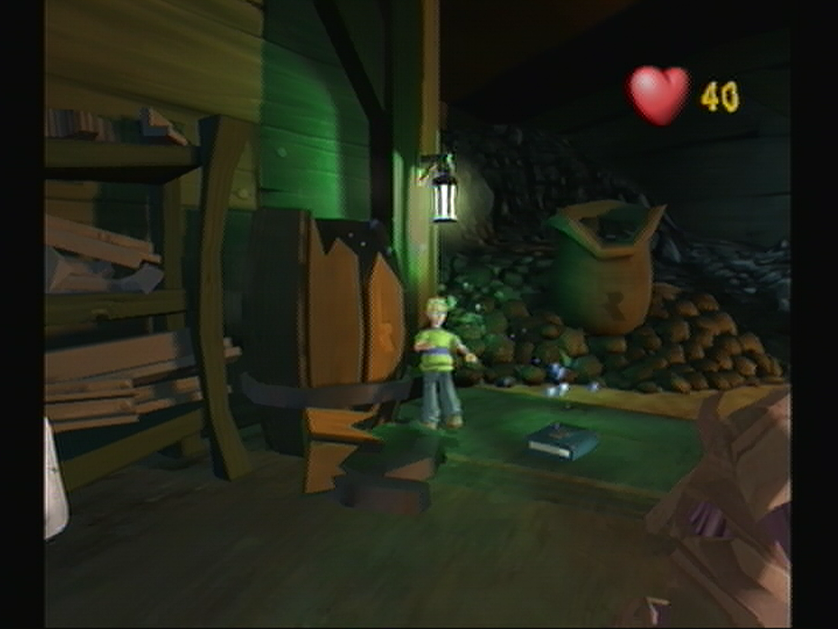
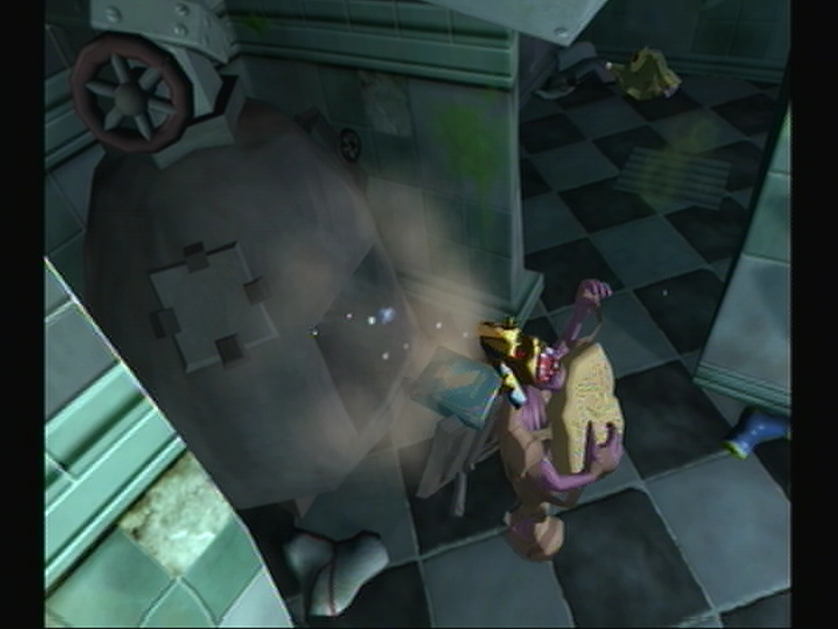
CHAPTER 1: SCENE 10: RELIC STORE
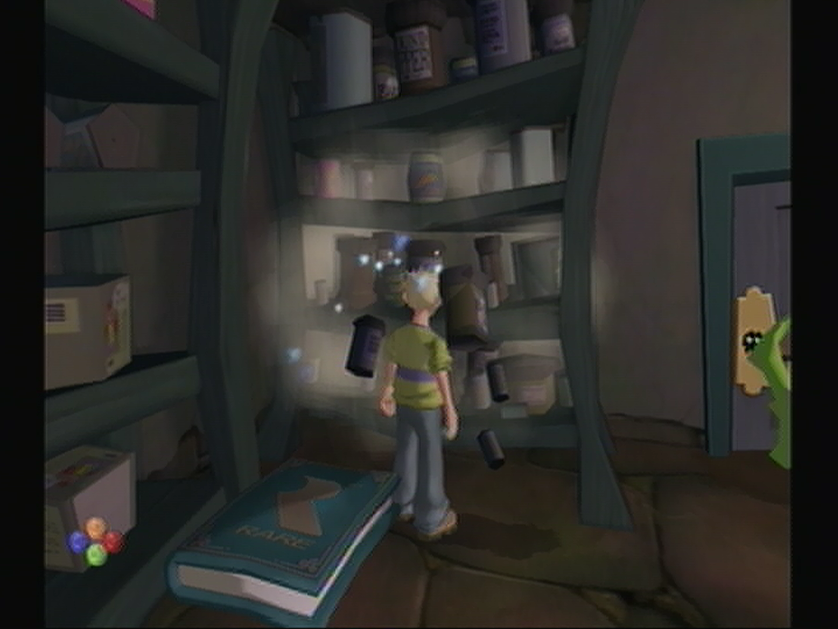
Armed with a single torch acquired from the Basement, Cooper must venture through the Relic Store to find the Tenth Bonus Book amongst the ancient antiques. Thankfully, Coopers torch gives us a glimpse toward the Book very early on, and if you’ve got a keen eye you’ll manage to spot the light hit the book as the words ‘Relic Store’ appear on screen. Watch from Coopers view until the Mummy jumps out, then enter the quick combination of buttons to survive the Super Shock sequence. Once you’ve gotten control, carry on to the left where you’ll find the Bonus Book on the floor hidden by a green crate.
[expand image]
BONUS BOOK 11
![]()
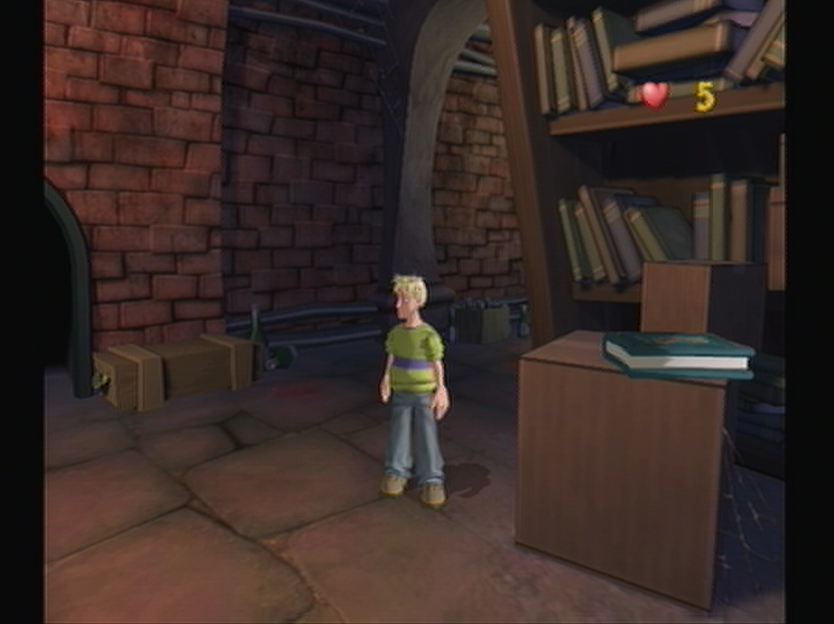
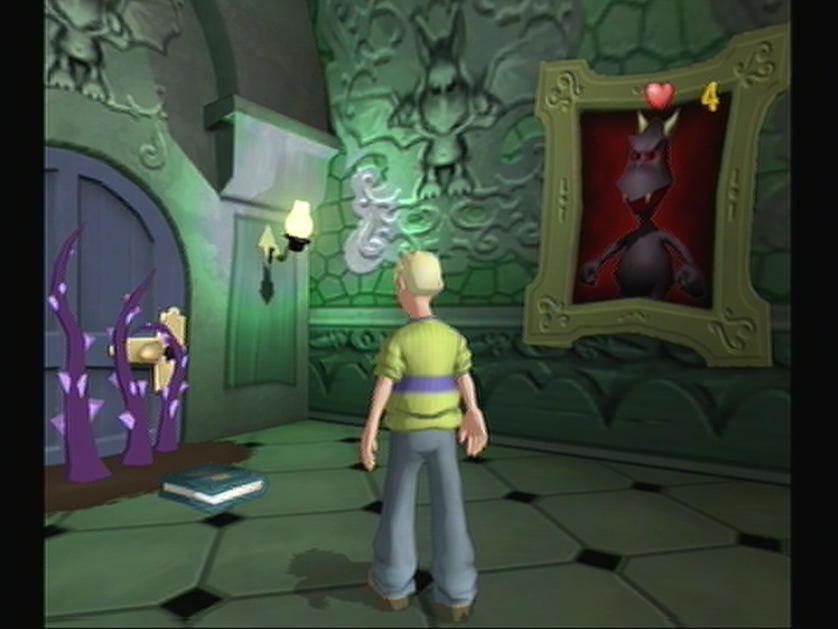
CHAPTER 1: SCENE 11: YE OLDE ARCHIVES
A much deserved reunion turns to repulsion after the mad Dr. Krackpot turns Amber into a hideous version of her former self. You’ll need to survive the Scary Shock once Amber reveals herself, lest you’ll be forced to replay the Scene over again. Once you’ve managed that a pair of Skeletons will be released into the room to attack Amber, take note of where they’ve come from and sprint forward between the two shelves and turn left where they end. From here you’ll spot the exit, but if you follow the shelving unit to your left around the corner you’ll manage to spot the Bonus Book located atop a cardboard box.
[expand image]
BONUS BOOK 12
![]()
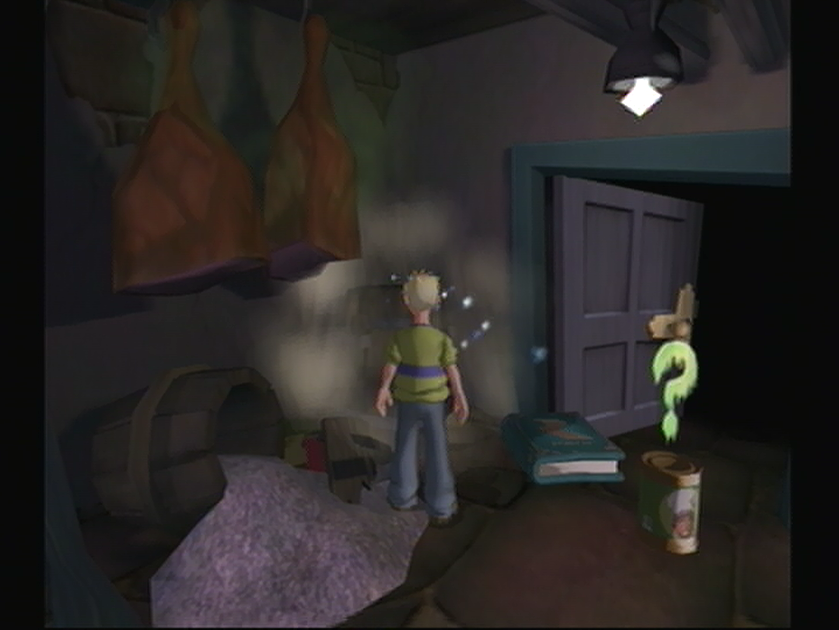
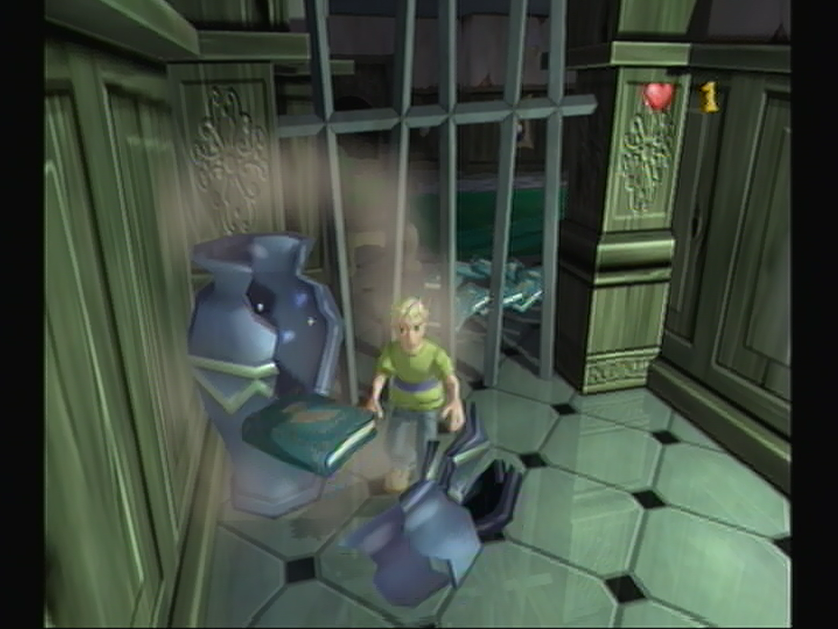
CHAPTER 1: SCENE 12: CELLAR
The Twelfth Bonus Book will hardly prove a challenge as you’ll be tasked with braving only a few Spiders, a stark comparison to the dozen found in the Basement. From the entrance you’ll need to carry on forward to the single red light bulb on a string hanging from the ceiling. You should manage to see a barrel to your left and if you continue onward you’ll see a tin of Soup boasting a single unit of energy. Ahead of this tin is a small blue crate that’s been placed against the large barrel to your left. Work your way around the crate and you’ll discover the Bonus Book hidden from view just behind.
[expand image]
BONUS BOOK 13
![]()
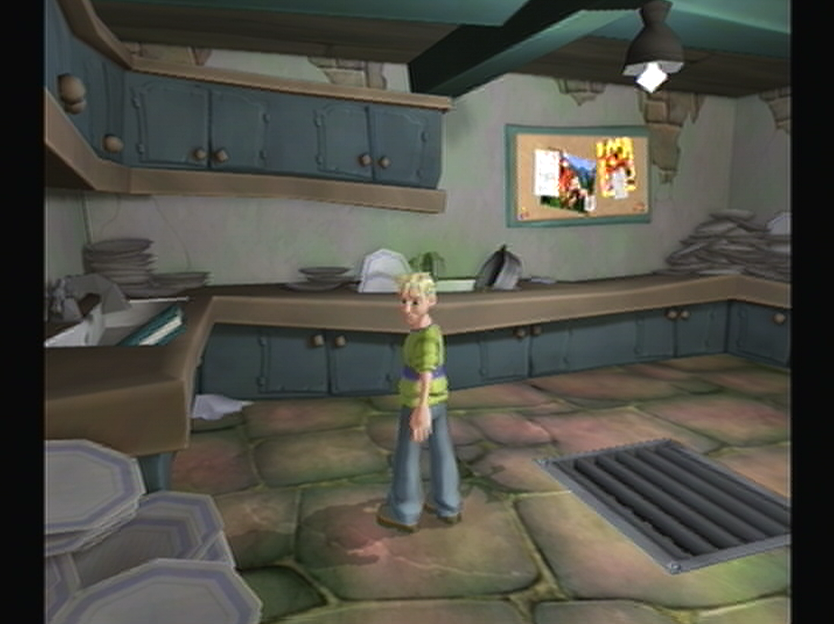
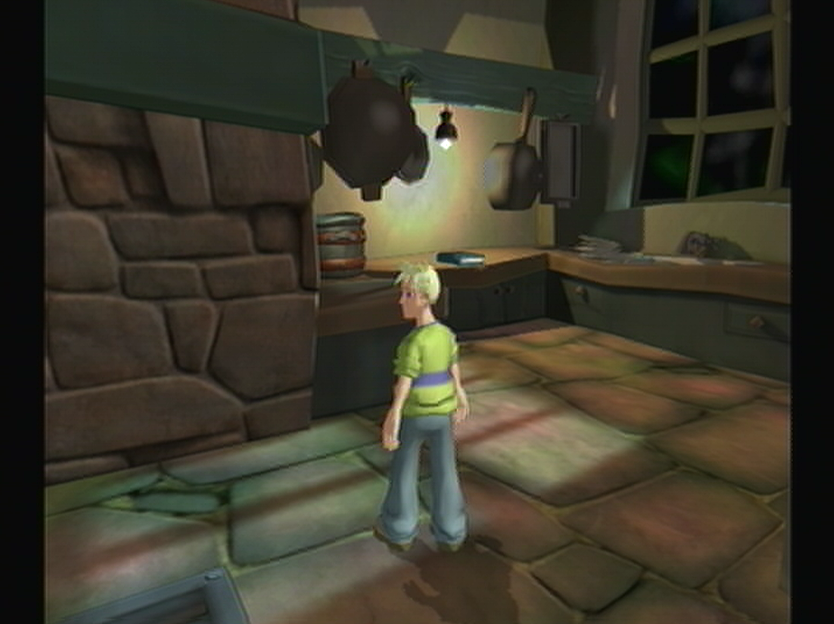
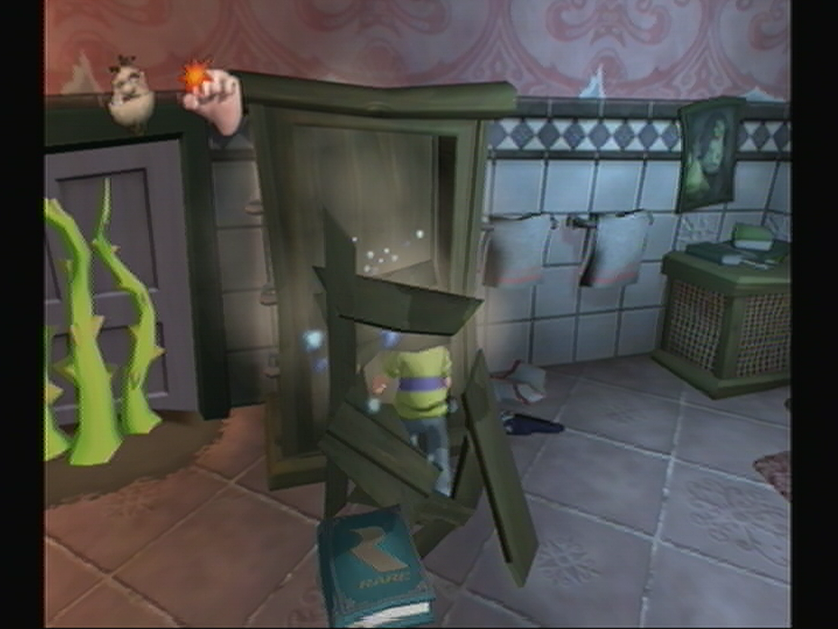
CHAPTER 2: SCENE 1: KITCHEN
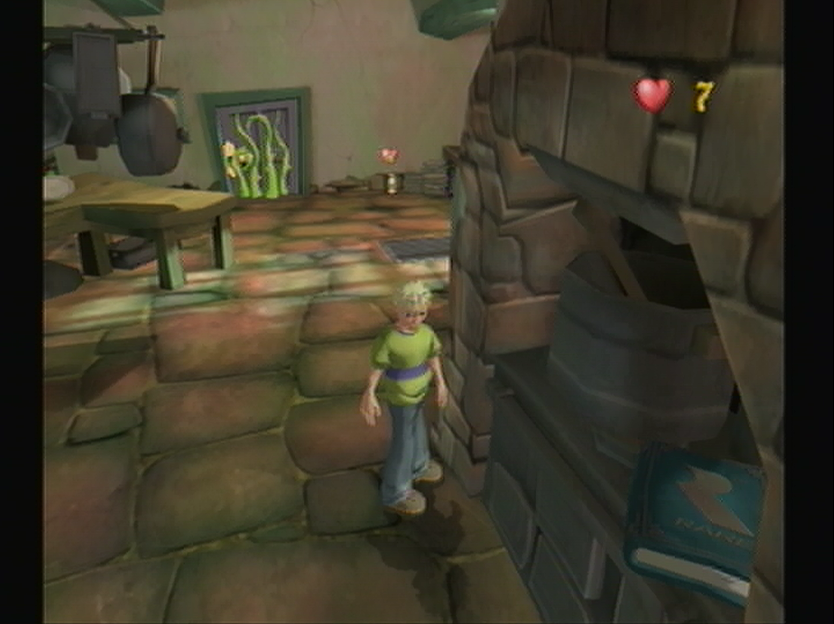
It’s apparent that Ma Soupswill has run into a bit of trouble with a gang of rogue Fire Imps that terrorize the Kitchen. Beckoning Cooper over, she’ll provide him with a Fire Extinguisher. Fortunuately, we won’t have to do anything with the Fire Imps in our search, as you’ll be able to see the Bonus Book atop a ledge on the Stove ahead. You shouldn’t have a problem avoiding the Fire Imps as you complete the relatively short trek over. Be wary of the Imp’s hot headed attacks; if an Imp charges into Cooper you’ll receive 1 damage, if you’re hit with a fireball you’ll lose 2, so watch out!
[expand image]
BONUS BOOK 14
![]()
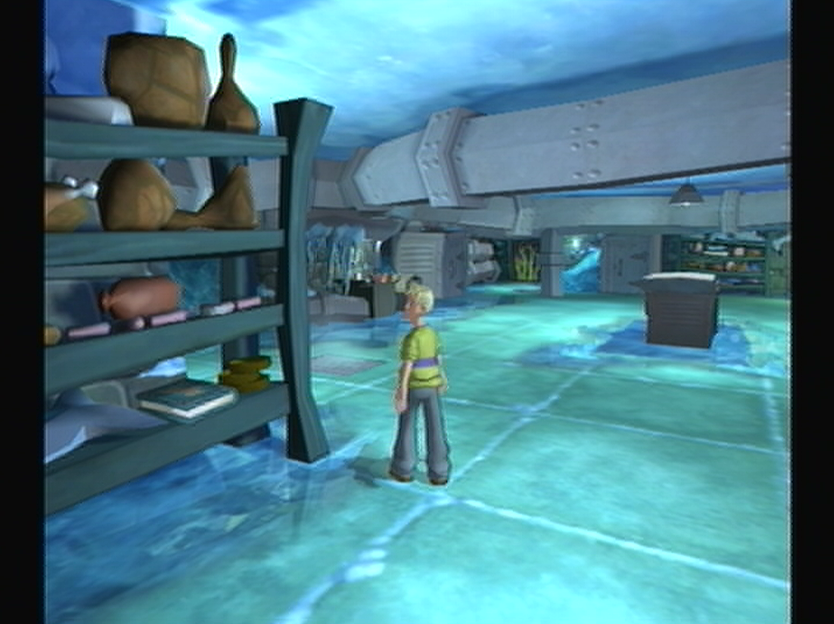
CHAPTER 2: SCENE 2: SCULLERY
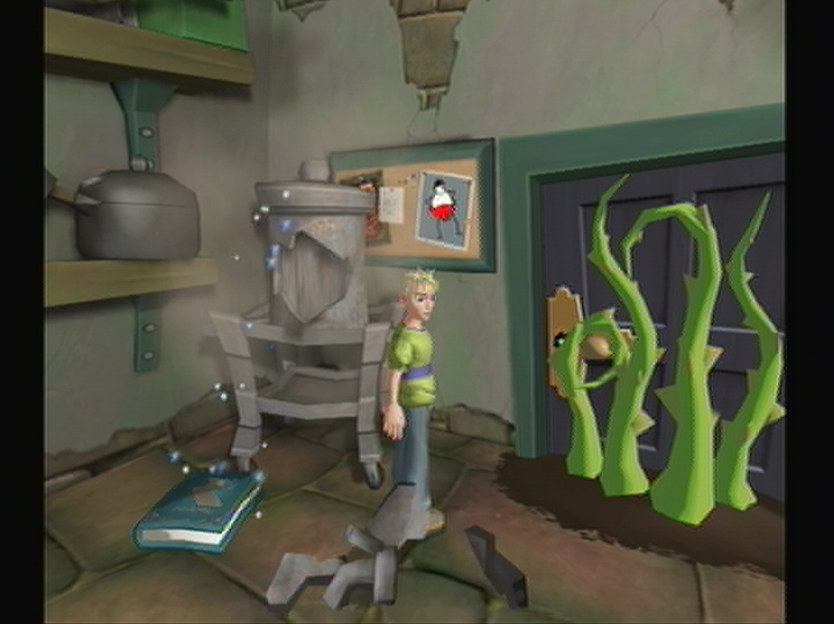
While it’s a relatively small area, it would be in your best interest to avoid exploring the Scullery to spot the Bonus Book out of the corner of your eye. That’s because the Scullery harbors your first hidden Bonus Book; it’s stashed away inside one of the rooms breakable objects until such a time as you find it. The search isn’t to be an extensive one as you’ll manage to locate the breakable object – namely the large metal water dispenser atop a cart – right at the beginning next to the door directly behind you. Luckily there’s no enemies to avoid yet, so smash it open quickly and grab the newly discovered Bonus Book off the floor.
[expand image]
BONUS BOOK 15

![]()
CHAPTER 2: SCENE 3: LOWER CORRIDORS
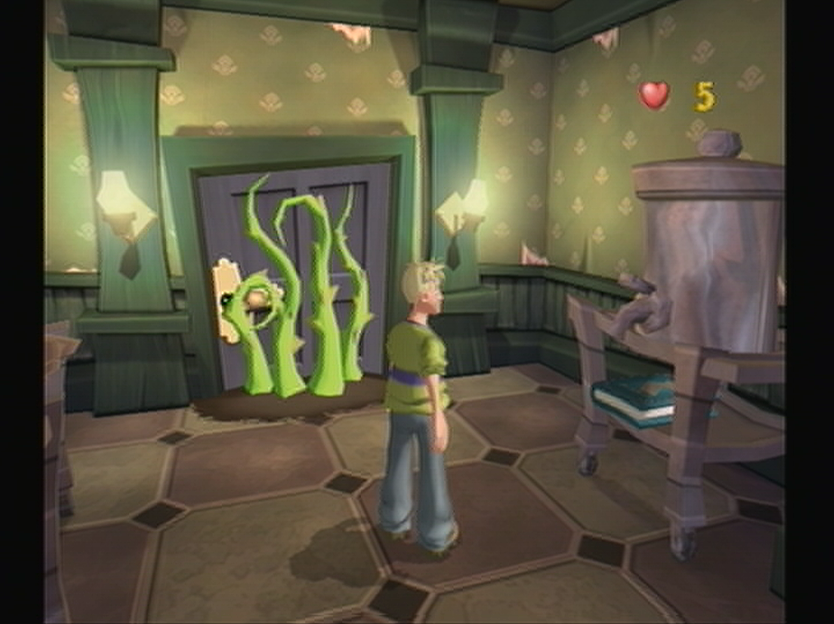
You’ll be tempted with another early exit as you make your way through the Lower Corridors, but you’ll need to resist walking through and press on toward the Bonus Book which lies directly across from the exit. With only 5 health to spare you won’t have much leeway against the Haunted Chairs; just do your best to avoid getting swept off your feet and continue on to the barred portion of the Corridor. Once there you’ll spot a bricked area to your left with a single crate in the corner; pick up the crate and you’ll spot an upside down Bonus Book that was previously hidden by the crate.
[expand image]
BONUS BOOK 16
![]()
CHAPTER 2: SCENE 4: EMBASSY BALLROOM
In stark contrast to the previous rooms, you’re in for quite a trek as you’ll have to brave the Ghoulies on the dance floor to find the Bonus Book. From the spot where the blue Ghouly drops down and gives you a shock, head to the left of the room where you’ll find a number of tables set up with a few bottles on top. Grab the bottles and use them to attack the Skeleton blocking the exit from afar. Once you’ve managed to defeat the Skeleton venture onto the floor and avoid all the Ghoulies, if you manage to go through unscathed you’ll spot a corridor parallel to the dance floor exit with a Bonus Book on the metal dispenser cart.
[expand image]
BONUS BOOK 17
![]()
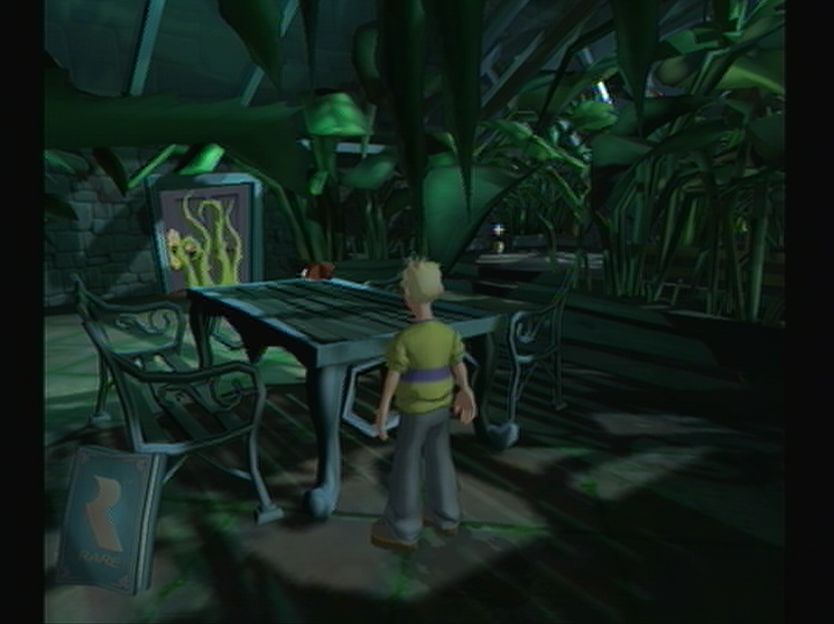
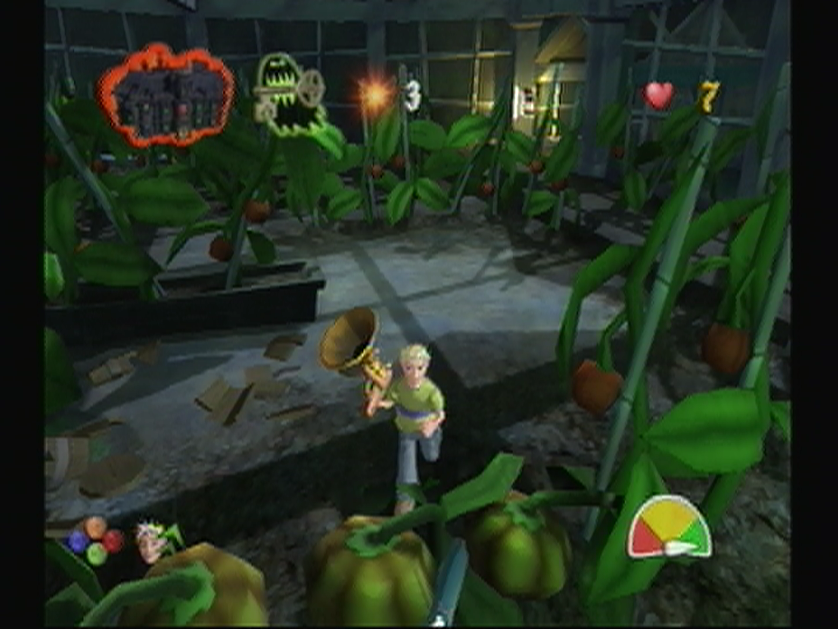
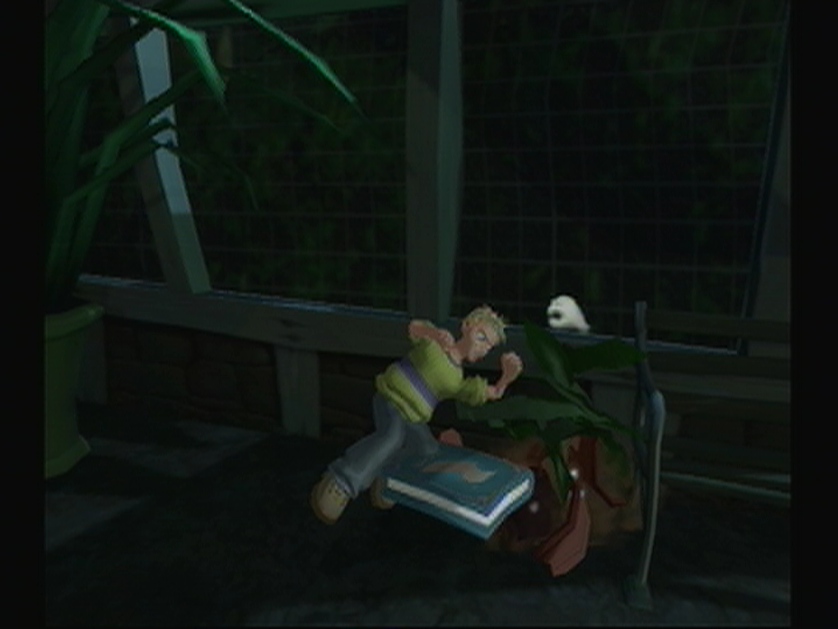
CHAPTER 2: SCENE 5: CONSERVATORY
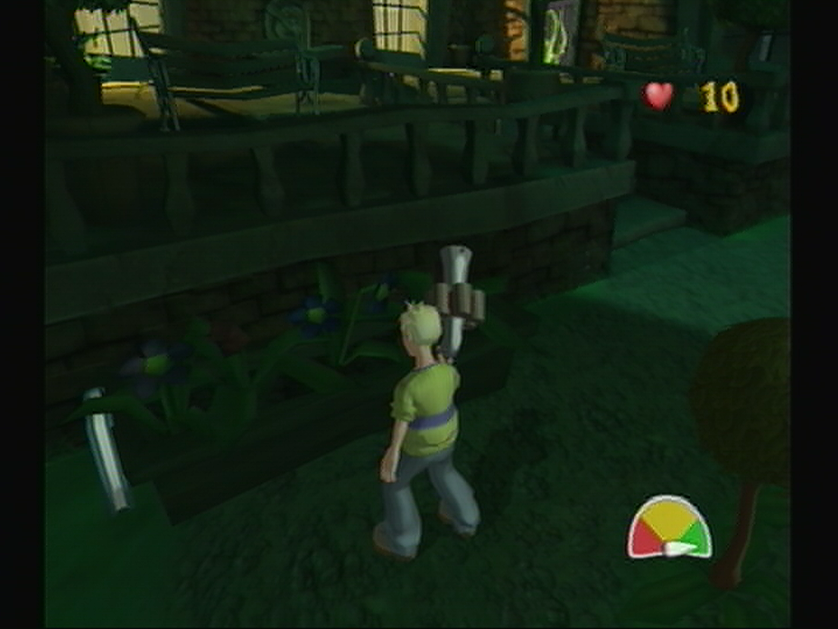
Taking its sheer size into account, scouring the abundant greenery around the Conservatory could have you searching for days, luckily the Bonus Book hasn’t been planted behind obscure vegetation, and you’ll find it generally close to home. That said you shouldn’t stray too far away when you’ve entered the room, and instead focus on manipulating the camera to the right which has been altered to make you miss the wrought-iron table. Work your way toward the table avoiding the chanting Ninja Imps just outside the boundary and you’ll spot the Bonus Book propped against bench closest to the wall at the rear.
[expand image]
BONUS BOOK 18
![]() CHAPTER 2: SCENE 6: BOATHOUSE
CHAPTER 2: SCENE 6: BOATHOUSE
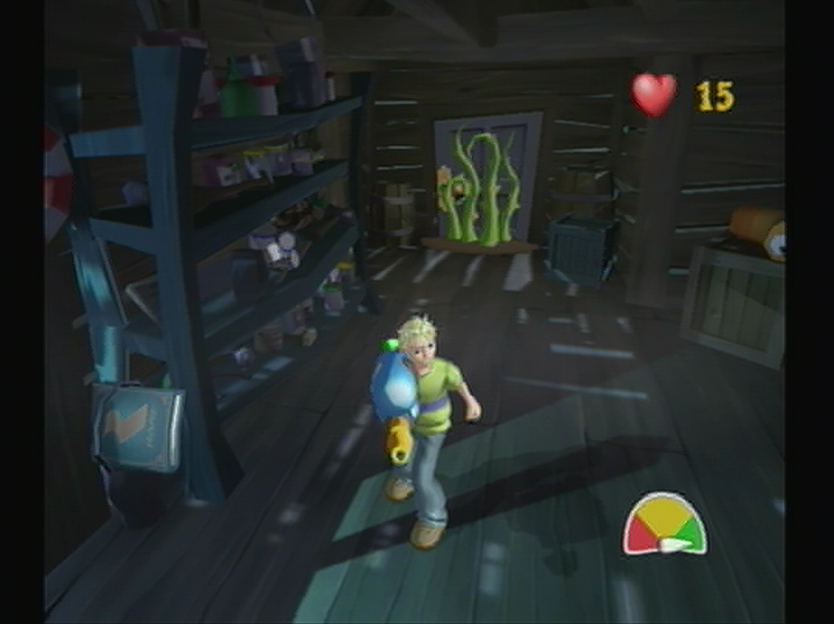
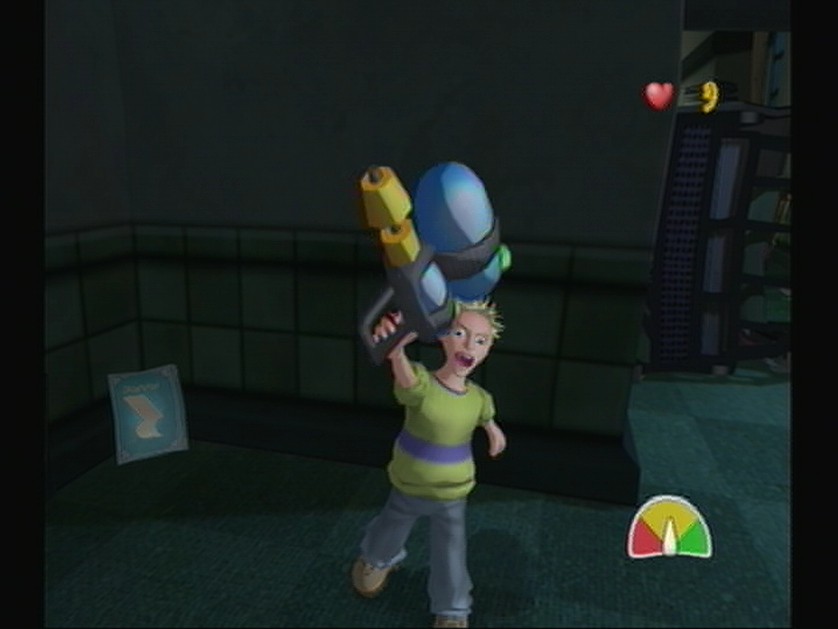
After a meeting with the grounds keeper Fiddlesworth, Cooper will venture into the Boathouse armed with “Little Willy’s Water Pistol”. While you’ll find two Zombies found inside, defeating the duo summons a gaggle of Ghoulies. This is both a hindrance to your progress as well as a distraction to finding the Bonus Book, so we’ll avoid interacting with the undead as much as possible. On that end, as soon as you enter the Boathouse you’ll spot a shelf to your immediate right teeming with an assortment of tin cans. Work your way around the shelf ignoring the Zombies and you’ll spot the Bonus Book propped up against the side farthest from the door you’ve entered from.
[expand image]
BONUS BOOK 19
![]()
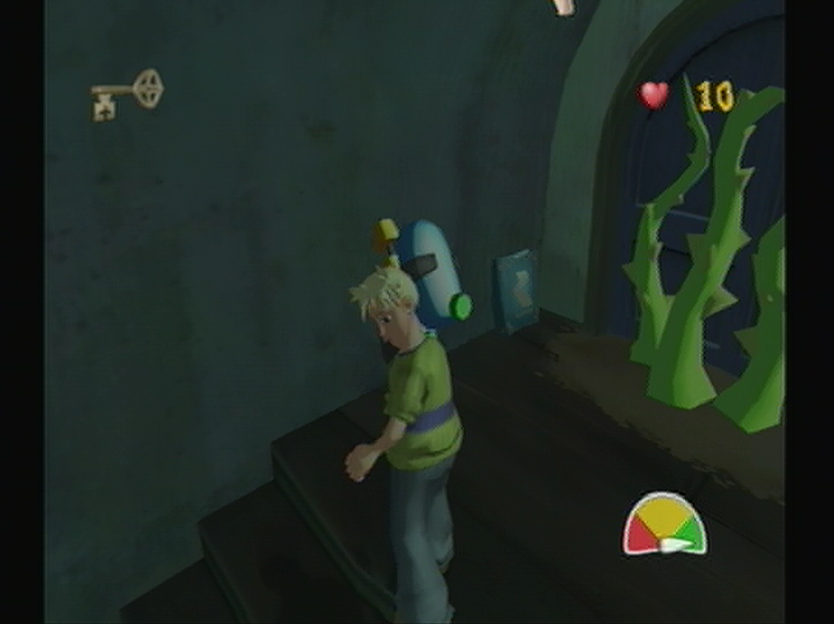
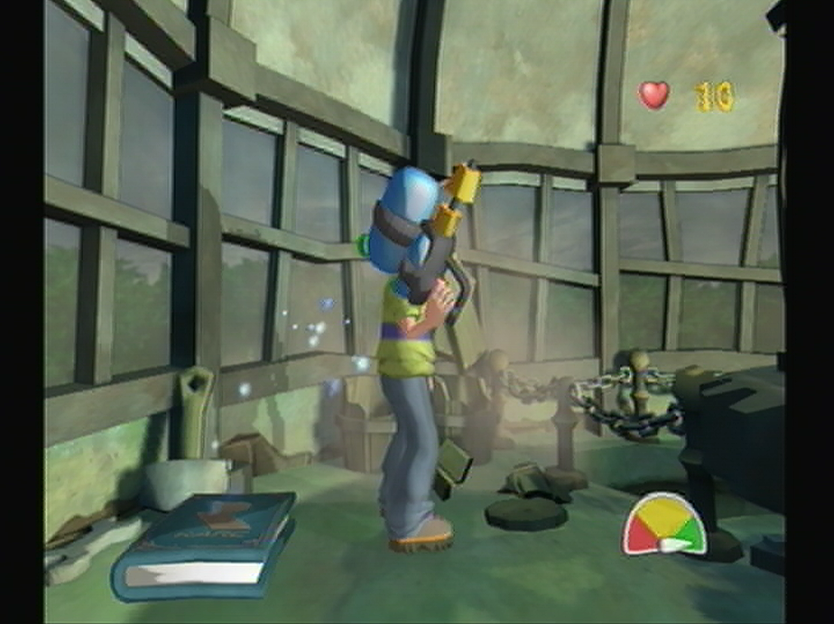
CHAPTER 2: SCENE 7: LIGHTHOUSE STORE
This next Bonus Book is one of the easiest within the entire game to collect, yet it is one of the commonly missed as well. As you step into the Lighthouse Store you’ll come across a large circular room filled with crates and chests. Among these items are three patrolling Medusas which would certainly add to the trouble of finding the Bonus Book if it were hidden amongst the rubbish. From where you start, you’ll just need to turn around from where you stand until you spot the Thorned Challenge Door directly behind you with the Bonus Book resting against its frame. Grab it and exit back to the Menu. Easy!
[expand image]
BONUS BOOK 20
![]()
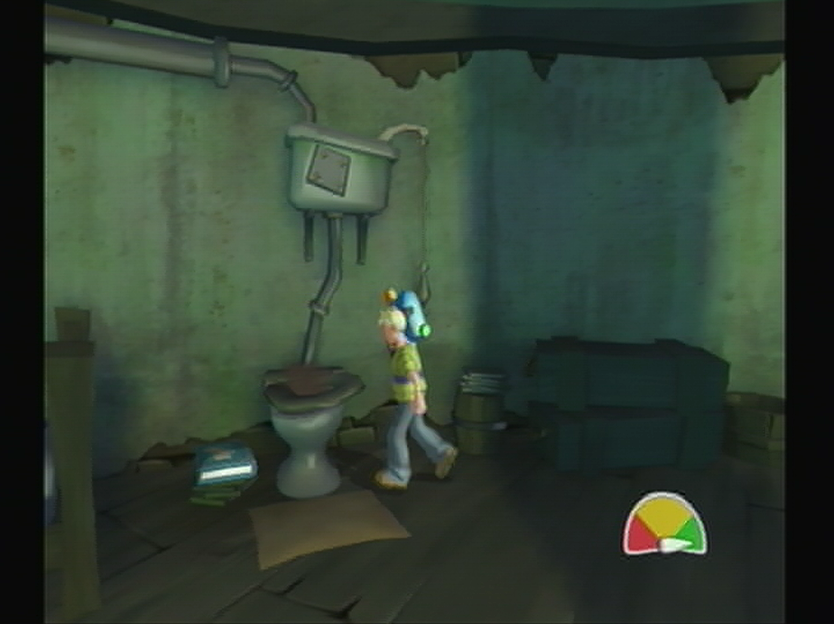
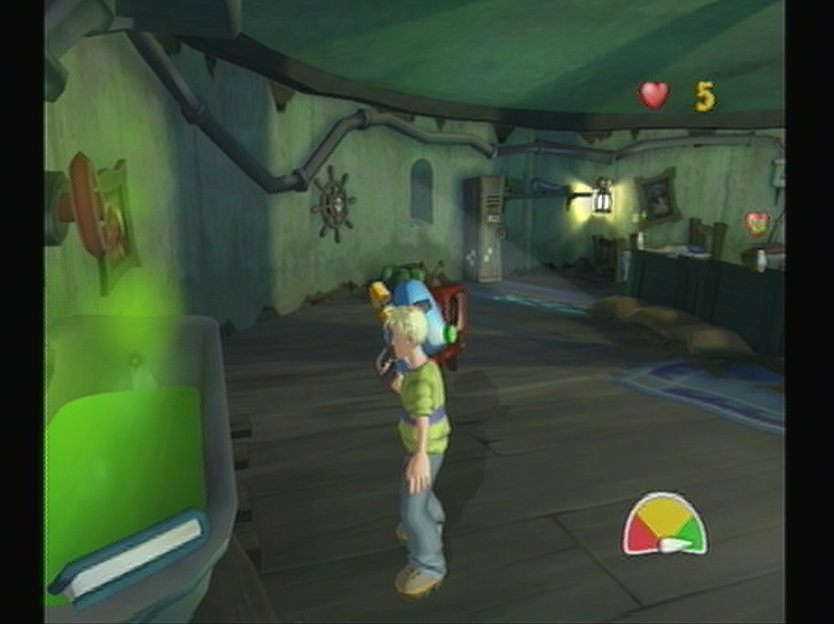
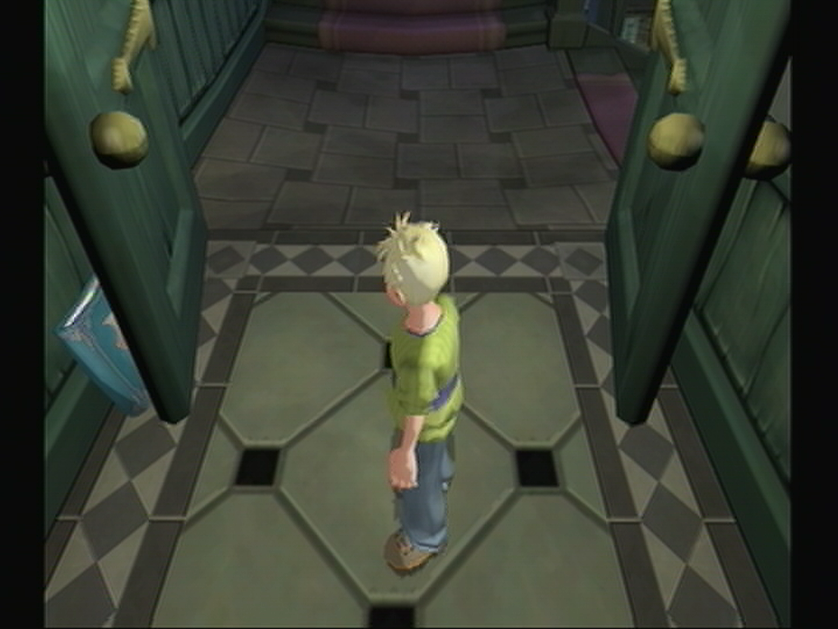
CHAPTER 2: SCENE 8: LIGHTHOUSE LIVING QUARTERS
This next Bonus Book offers itself up nearly as easily as the one found in the Lighthouse Store previous, you’ll just need to keep your wits about to avoid a Zombie assault. As you enter the room, Crivens will reveal the traitorous nature of the Ghoulies, who will fight each other until one of them is defeated. Use these precious seconds to venture over to the right side of the room without disturbing the Haunted Television Set on the other side and you’ll spot a lone toilet. On the floor to the left hand side of the bowl you’ll find some ‘reading material’ in the form of the 20th Bonus Book.
[expand image]
BONUS BOOK 21
![]()
CHAPTER 2: SCENE 9: LIGHTHOUSE LANTERN ROOM
The Lighthouse Lantern Room will hardly prove a challenge in collecting the Bonus Book as the only resistance you’ll find is a lone Imp protecting the base of the stairs, which will only appear if you collect the Glow Worms and will only hinder your progress if you haven’t chosen the Scene from the Bonus Book Menu. From the entrance of the Lantern Room it’s a very linear trek up the stairs and around the base. Once you’ve followed the room around you’ll find a chain hung across the stairs you entered the room from, with two small barrels just underneath it, smash them open and you’ll find the Bonus Book.
[expand image]
BONUS BOOK 22
![]()
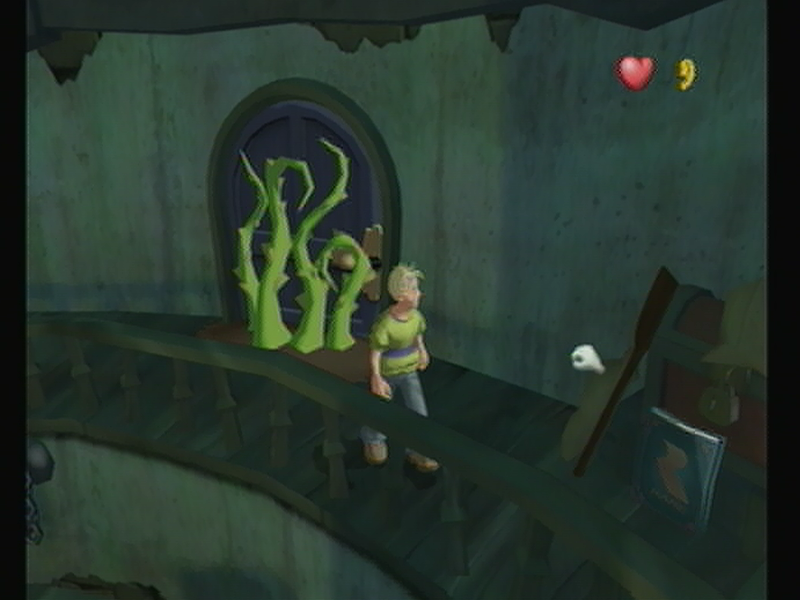
CHAPTER 2: SCENE 10: LIGHTHOUSE LIVING QUARTERS
Back at the Lighthouse Living Quarters you’ll find the Zombie patrons have left, leaving the room entirely deserted. If you wish to keep it this way make no attempt to exit through the open door or you’ll begin the next challenge against a gaggle of Zombie Ghoulies. Instead, from where you stand at the Thorned Challenge Door you should manage to spot a collection of barrels filled with laundry behind you, if you follow this wall away from the counter you’ll spot a dingy Bathtub filled with noxious green sludge. At the head of the tub you should spot the Bonus Book taking in a nice soak.
[expand image]
BONUS BOOK 23
![]()
CHAPTER 2: SCENE 11: LIGHTHOUSE STORE
Once you’ve returned to the Lighthouse Store you’ll return Little Willys Water Pistol back to Fiddlesworth as he returns to the Farmyard. To make matters worse you’ll only be alloted 10 Health Points in this room, rather rough shape if you intend to deal with the Medusa’s just a floor below. Luckily you won’t have to venture away from the stairwell at all; just like last time the Lighthouse Store offers up an insultingly easy Bonus Book if you know where to look. In this case you’ll find the Bonus Book propped up against a Treasure Chest directly behind you across from the Thorned Challenge Door.
[expand image]
BONUS BOOK 24
![]()
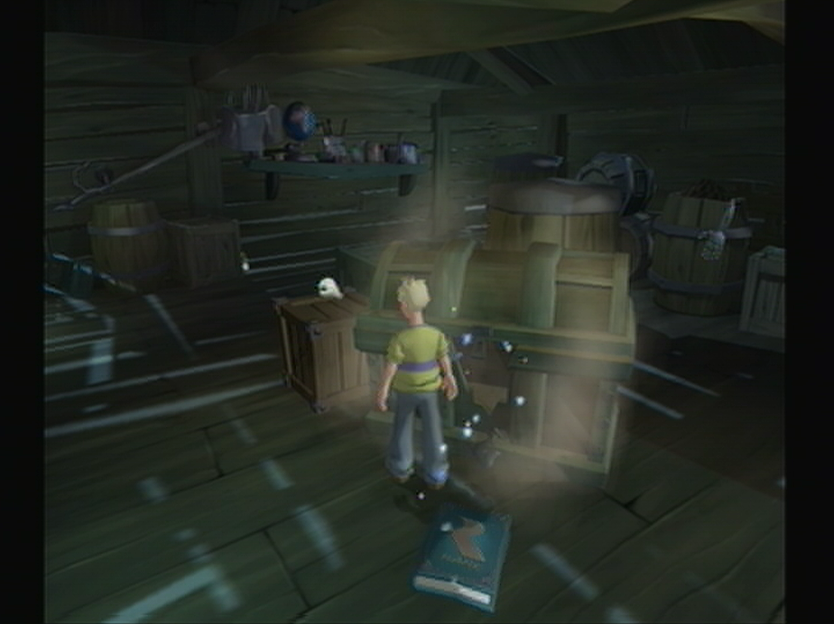
CHAPTER 2: SCENE 12: BOATHOUSE
Akin to the Lighthouse Living Quarters before it, you’ll find that on the return trip the Zombies that once patrolled the Boathouse have taken leave and the room is currently vacant because of it. Stay away from the alluring open door at the other side of the room, as attempting to walk through will start a challenge. Instead, if you seek treasure you need only approach the large Treasure Chest in the center of room. Though the chest is locked, it’s rotted exterior is no match for a wayward Cooper kick which will break open the front and relinquish its booty; the next Bonus Book.
[expand image]
BONUS BOOK 25
![]()
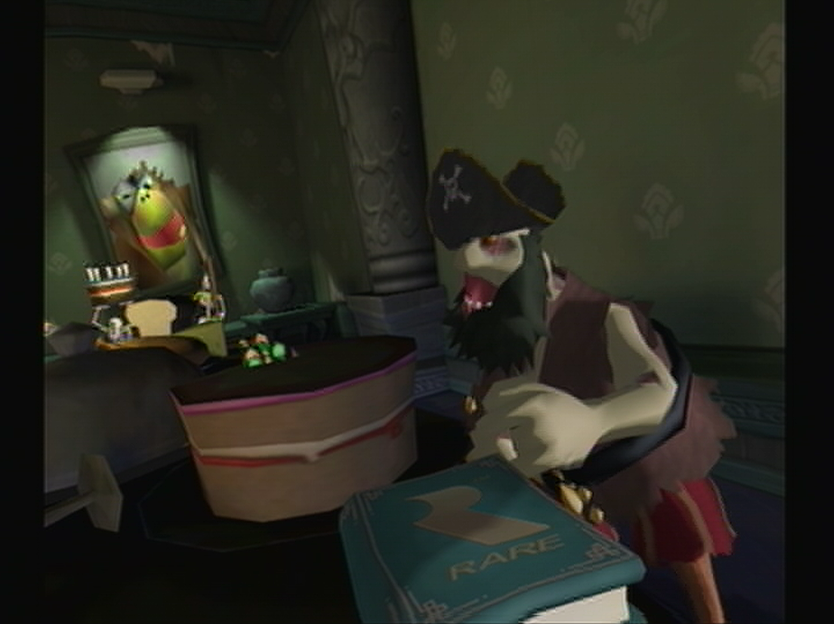
CHAPTER 2: SCENE 13: DINING ROOM
On the theme of nautical nonsense it looks as though the Zombie Pirates have migrated from the Lighthouse to the Dining Room of Ghoulhaven Hall, entrusting the Bonus Book with the Captain of the cutlass crew. You’ll be able to spot the Bonus Book when he announces your presence when you enter the room. The easiest method to obtaining it is to follow the wall to the right toward the Captain. Once you reach the corner of the table you’ll spot a Freeze Ghoulies Soup Tin which will definitely help as you run up to the Captain and snatch up the booty underneath his petrified body.
[expand image]
BONUS BOOK 26
![]()
CHAPTER 2: SCENE 14: EMBASSY BALLROOM
As you step up to the latched gate that borders the dance floor you’ll manage to spot the Bonus Book tauntingly placed just out of reach on a table to the right, you’ll have to get past the other entrance by weaving through the crowd and doing your level best not to get hit, if you do you’ll have to battle in the ballroom. Once you reach the other side you’d do well to smash the portrait to the left which contains a Shocker Blocker, this will prevent the Dropper Ghouly ahead from leading to your demise. Once you’ve managed to get past that bit, walk ahead and turn right at the tables to find your Bonus Book at the end.
[expand image]
BONUS BOOK 27
![]()
CHAPTER 2: SCENE 15: LOWER CORRIDORS
Once again the Lower Corridors will play to your fleeting instinct by allotting you only 5 Health Points and expecting you to run through a room of nimble little Ninja Imps toward the door. While you won’t have to put up with the insufferable Imps this time, the Bonus Book is also made easier by reducing the journey to a few jaunty steps. Just as last time you’ll manage to locate the Bonus Book hidden against a pillar in the bricked up annex right across from the Thorned Challenge Door, and while it was expected that you run the entire gauntlet last time, this time the annex is right across from where you start. Beauty!
[expand image]
BONUS BOOK 28
![]()
CHAPTER 2: SCENE 16: SCULLERY
While some rooms like the Scullery may appear to be empty at first, it could mean that one of the Ghoulies is just waiting to pop out from hiding! Case in point, you’ll manage to spot the Bonus Book in the Scullery as you emerge from the shelving units toward the area with the metal dispenser we found our first hidden Bonus Book inside. From here you’ll manage to spot the Bonus Book getting a nice wash in the sink directly across from the corridor of cutlery. As you approach it you’ll find a duo of Zombies bursting forth from the dispenser, ignore them at all costs and continue onward to collect the Bonus Book.
[expand image]
BONUS BOOK 29
![]()
CHAPTER 2: SCENE 17: KITCHEN
While this next Bonus Book is out in plain sight when you locate it, it can be a bit tricky trying to navigate through the Kitchen. Once the Baron has decided to on your health you’ll manage to move, make your way across the room and pass in front of Ma Soupswill where you’ll Soup Tin boasting 5 Health Points in front of the Stove. Follow the wall that the Soup Tin rests against and you’ll locate a Thorned Challenge Door to the left of a bookshelf. Around the corner you’ll find a hidden annex with a counter that heads around to a window. You’ll spot the Bonus Book underneath a single hanging light bulb here.
[expand image]
BONUS BOOK 30
![]()
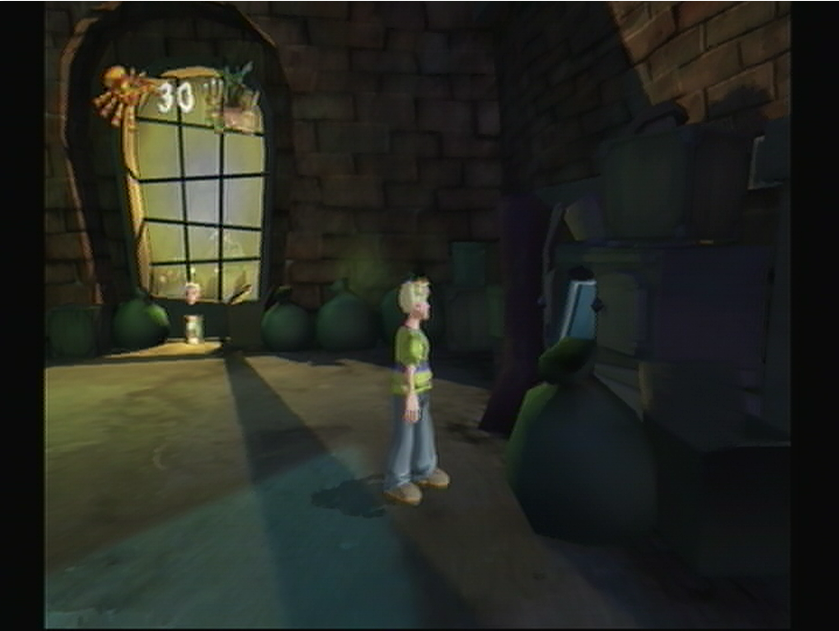
CHAPTER 2: SCENE 18: FFFFREEZER
Although after this number we’ll have collected 30 Bonus Books, they haven’t gotten too difficult – yet – so we’re in for another simple search for this one. As you enter the Ffffreezer you’ll need to make your way across the room to the other side toward the exit as you normally would. Be sure not to disturb the storage unit in the center of the room or you’ll release quite a number of Ghoulies from inside. Once you reach the other side, locate the exit door and then turn around completely until you spot a shelving unit located just past the freezer vault. You’ll manage to find the Bonus Book up for grabs on the bottom shelf.
[expand image]
BONUS BOOK 31
![]()
CHAPTER 2: SCENE 19: GARBAGE YARD
The Garbage Yard shouldn’t cause you much trouble given its size, though you might have some trouble scouting the Bonus Book amongst the piles of junk. From the ramp, make your way into the main area of the Garbage Yard by rounding the destroyed wall until you spot a Dumpster in the center. You should manage to locate two garbage cans ahead on either side of a new area, once you step in between them you’ll activate a challenge! Ignore these Spiders and make your way to the window on your immediate right. You’ll find the Bonus Book inside the doors of a busted stove top along the wall as you round the corner.
[expand image]
BONUS BOOK 32
![]()
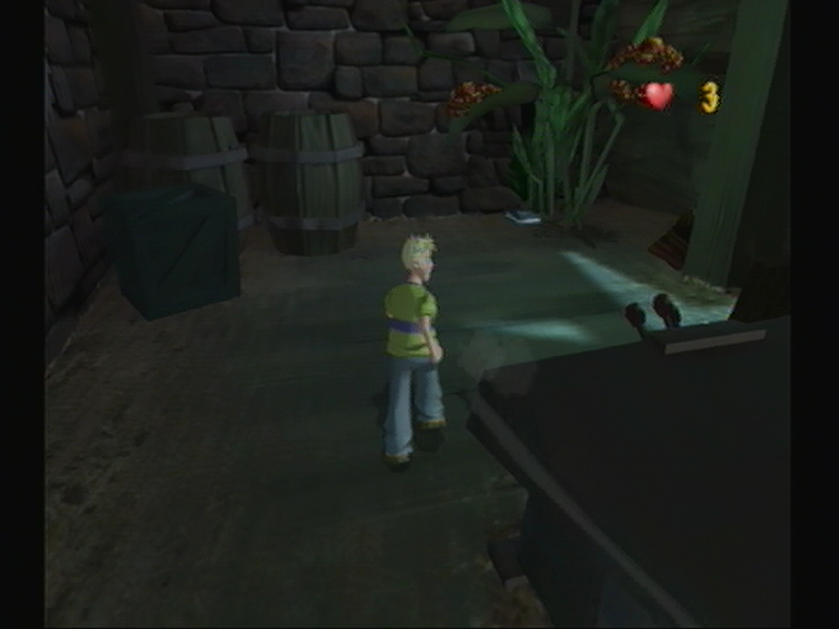
CHAPTER 2: SCENE 20: WOOD SHED
With only 3 Health provided in the Woodshed, this Bonus Book is going to test your patience! You’ll constantly be dogged by Flying Imps and Spiders aiming to give you a wing whack or wrangle you with webbing, so keep running and don’t stop! From the start collect some extra health if needed and head to the right to travel between the following log corridors. Once you’ve passed a chained log you’ll spot some plant life ahead. Don’t take the short cut in between the table saws and instead carry on forward where you’ll find three spiders holed up in a plant, with the Bonus Book just below for the taking. Grab it and get out!
[expand image]
BONUS BOOK 33
![]()
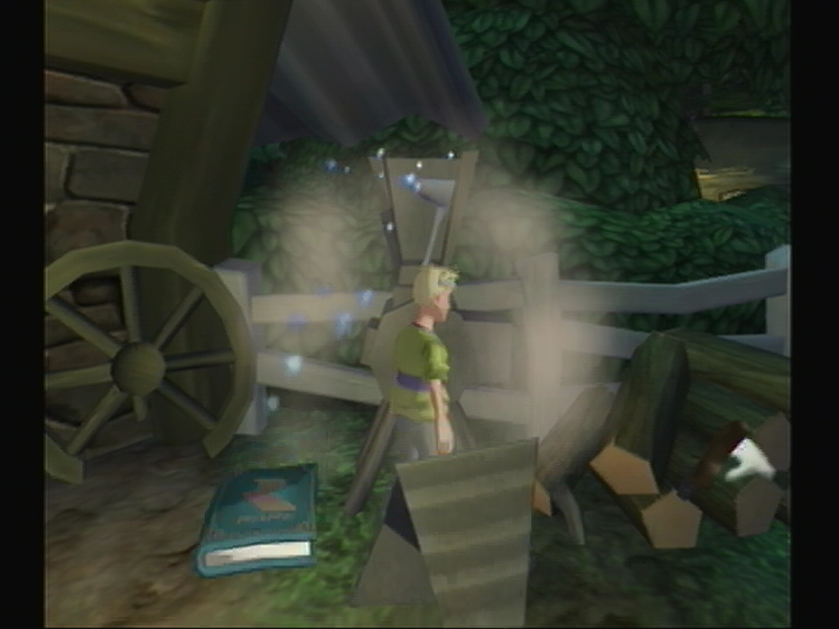
CHAPTER 2: SCENE 21: FARMYARD
As you enter the Farmyard you’ll be treated to Coopers perspective, complete with heavy breathing and nervous glances. Take note however as Cooper looks toward the left before the word “Farmyard” appears you’ll manage to catch glimpse of a wooden grinder sitting against the fence. Once you regain control after hearing the plight of Fiddlesworth you should manage to see a few logs on your left hand side. Manipulate the camera around Cooper so that you’re focusing on the fence and you’ll spot the aforementioned grinder. Give it a taste of your hardened fists and you’ll cause the Bonus Book to fly out from within.
[expand image]
BONUS BOOK 34
![]()
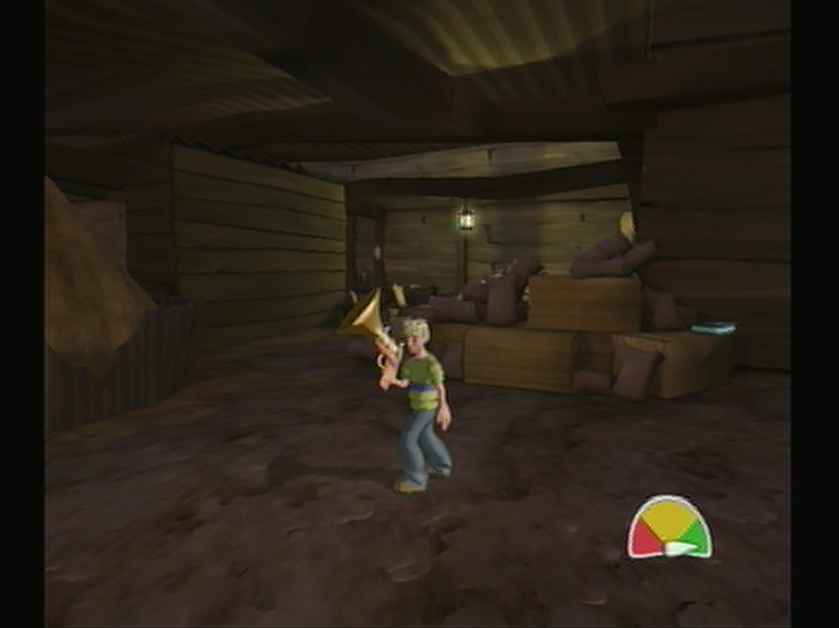
CHAPTER 2: SCENE 22: CHICKEN SHED
If you wander over to the overturned wheelbarrow from where you start you’ll spot a Chicken Coop on the opposite side of the room. That’s where we’ll find the Bonus Book. Navigate through the first hay bale path and you’ll come to a second open area with two wooden buckets. After passing through this area you’ll find the next path constructed with Chicken Wire, pass through it and you’ll emerge in the Bonus Book area. To your left you’ll find the Chicken Coop that we’ve spotted from our wheelbarrow vantage spanning across the wall, you’ll find the Bonus Book tucked away atop a hay bale where you entered from.
[expand image]
BONUS BOOK 35
![]()
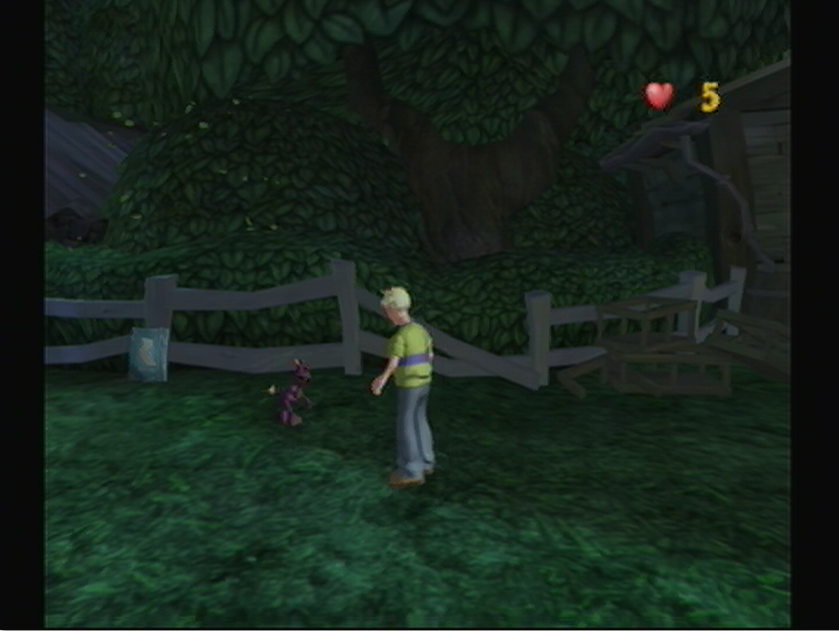
CHAPTER 2: SCENE 23: FARMYARD
The Bonus Book for the Farmyard is just about the easiest they come at this point in the game; you won’t manage to find freebies like this for much longer. After a quick introductory to the Egg-napped scenario you’ll be in control and ready to start searching, don’t move from your spot however, as things are about to get extremely linear. If you look past the Well ahead to the background you’ll see a tiny fence with a broken plank. As you edge closer to the fence you’ll spot an Imp sitting on a post and directly underneath you’ll find the 35th Bonus Book. Ignore the Ghoulies attempts to stop you and pick up the Bonus Book.
[expand image]
BONUS BOOK 36
![]()
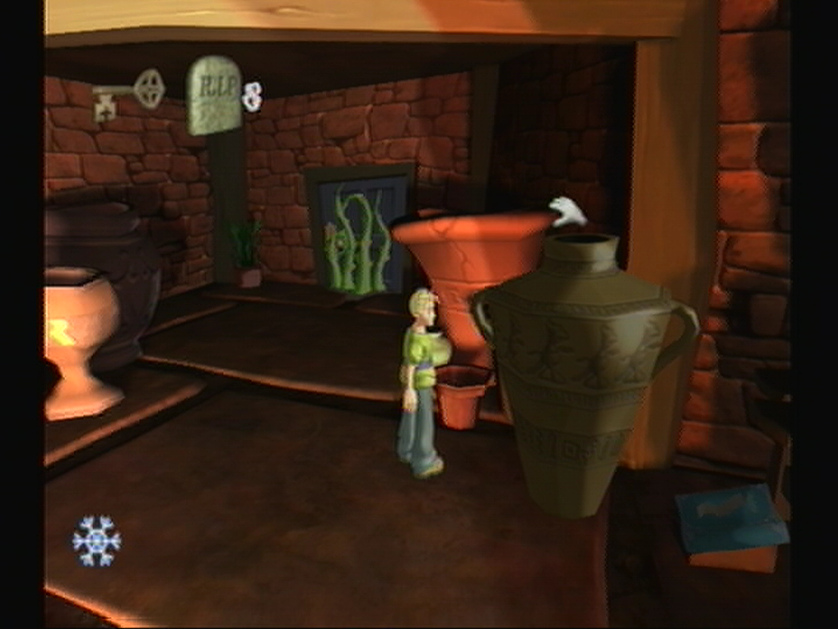
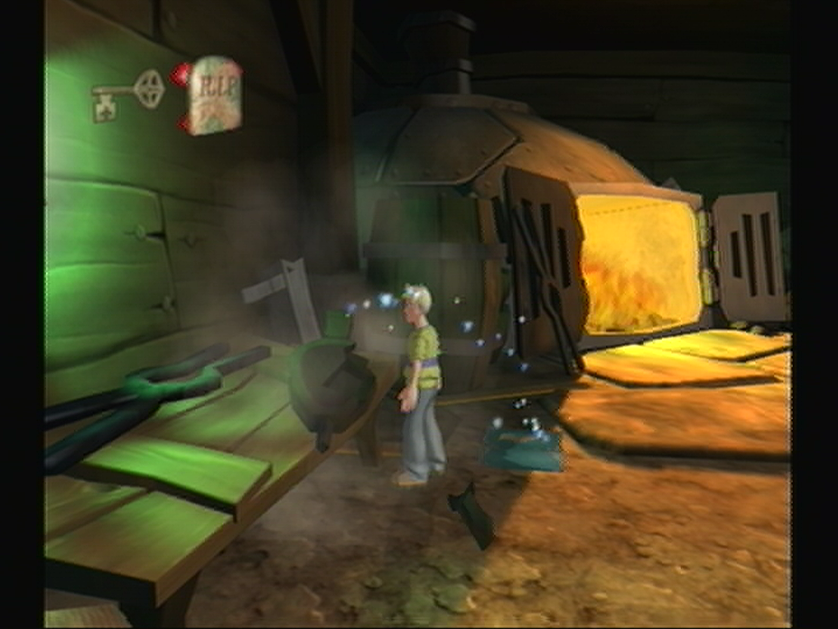
CHAPTER 2: SCENE 24: WORKSHOP
Starting off in the Workshop you’ll find yourself on the wrong side of the room where you’ll find the Bonus Book. Good stuff! You’ll find a Skeleton cooking eggs in the Kiln ahead, so long as you leave him undisturbed you’ll prevent the challenge from starting up. Take note of which fireplace the Skeleton was using, as you’ll have to travel to the fireplace opposite by working your way around the right side of the Kiln. Once you’ve done that you should spot a Thorned Challenge Door to your right. Keep an eye out for a large vase by the doorway that you’ll be able to pick up, next to it underneath a table you’ll find the Bonus Book.
[expand image]
BONUS BOOK 37
![]()
CHAPTER 2: SCENE 25: LOWER CORRIDORS
With only 10 Health Points to spare in these cramped quarters it’s time for another fight or flight scenario that sees you trying to make an escape or stay behind to search for the Bonus Book. The best way to go about touring the Lower Corridors without a grim compromise is to take out the sentient Chairs blocking the path quickly with the collection of clay pots and potted plant located directly behind you. Once you’ve managed that just make your way around the corner where you’ll spot the alluring open door and a large vase next to a barred off area, a healthy swing at the vase will offer up the 37th Bonus Book found inside.
[expand image]
BONUS BOOK 38
![]()
CHAPTER 2: SCENE 26: PANTRY
As you start off in the Pantry, make your way into the center of the room and you’ll initiate a fight with a Haunted Coat. As the challenge begins you’ll watch Mr. Ribs escape through the only exit; the locked challenge door, which happens to also harbor the next Bonus Book. Leave the coat on the line and flee toward the exit through the corridor of shelving units. Once you reach the door you’ll spot a barrel on the left hand side; smash it open and you’ll find the Bonus Book along with a Complete Challenge Soup Tin. Grab the Bonus Book first as grabbing the Soup Tin will cause the Haunted Door to spring to life.
[expand image]
BONUS BOOK 39
![]()
CHAPTER 2: SCENE 27: KITCHEN
Finished with the chase, Cooper will have finally cornered Mr. Ribs in the Kitchen with the stolen Egg. While you’re free to chase the bonehead around the room – you should focus on collecting the Bonus Book. The first step is to locate the cauldron the center of the Kitchen. Once there you should spot a spherical Christmas Pudding on the table ahead; go around the table and travel through the hallway to the left. From here, locate a boarded up door on the right side of the hall, directly across you’ll find the frozen frame decorated in ice that takes you to the Frrrreezer, propped up against it is the Bonus Book.
[expand image]
BONUS BOOK 40
![]()
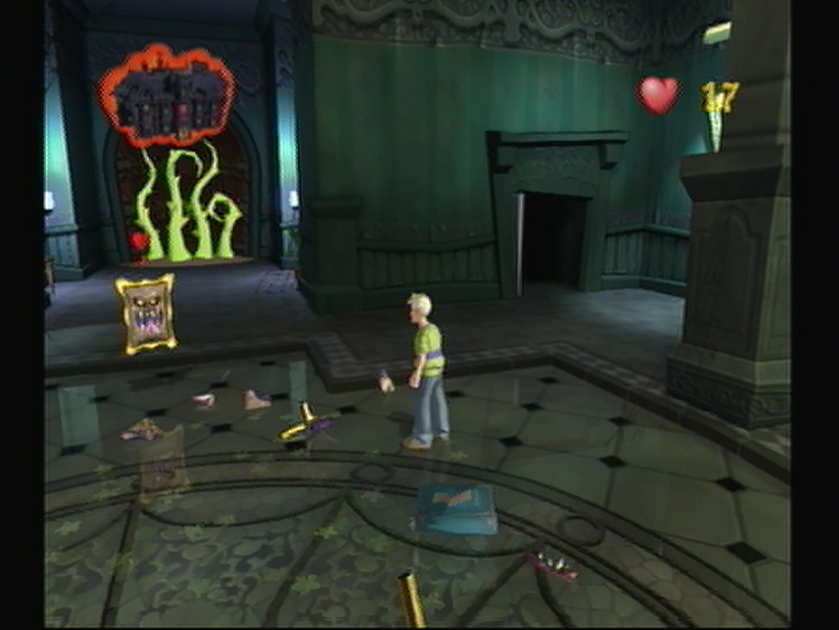
CHAPTER 2: SCENE 28: GRAND HALLWAY
It’s rather self-defeating to go about searching the Grand Hall for the Bonus Book when the Reaper is summoned the second you’ve busted a bench, luckily this Bonus Book hasn’t been hidden inside an item, but rather this is your first encounter with the illusive tome placed inside one of the Ghoulies which will give itself up when the correct creature has been subdued. In this case you’ll want to beat your feet over to the alluring open door where you’ll spot two Haunted Paintings on the wall. Lure them away from anything breakable and work your stuff; the Bonus Book will fall out of the first Portrait you defeat.
[expand image]
BONUS BOOK 41
![]()
CHAPTER 2: SCENE 29: CLOAK ROOM
As you enter the Cloak Room you should spot a green costume trunk in the background in between two racks of coats to the left and right hand side. Once you’ve passed the rack of coats to your left you’ll find it harbors the Haunted Cloak! Once it’s been revealed you’ll begin the challenge, with 40 seconds of freedom alloted before the Reaper is summoned. Avoid the Haunted Cloak propped against the trunk and venture toward the windows on the opposite side. You’ll find the Bonus Book propped up against the right window frame, hidden behind the veil of the curtain just begging to be snatched up.
[expand image]
BONUS BOOK 42
![]()
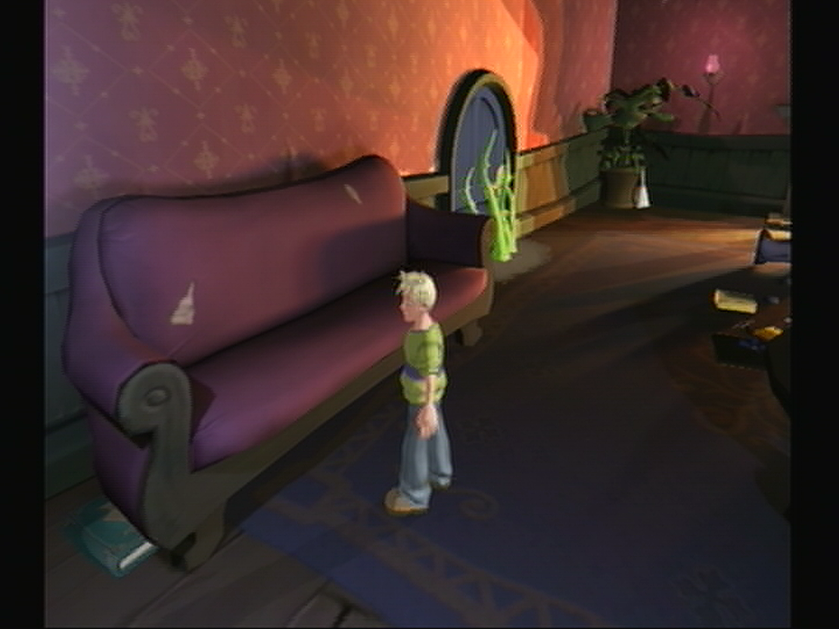
CHAPTER 2: SCENE 30: SITTING ROOM
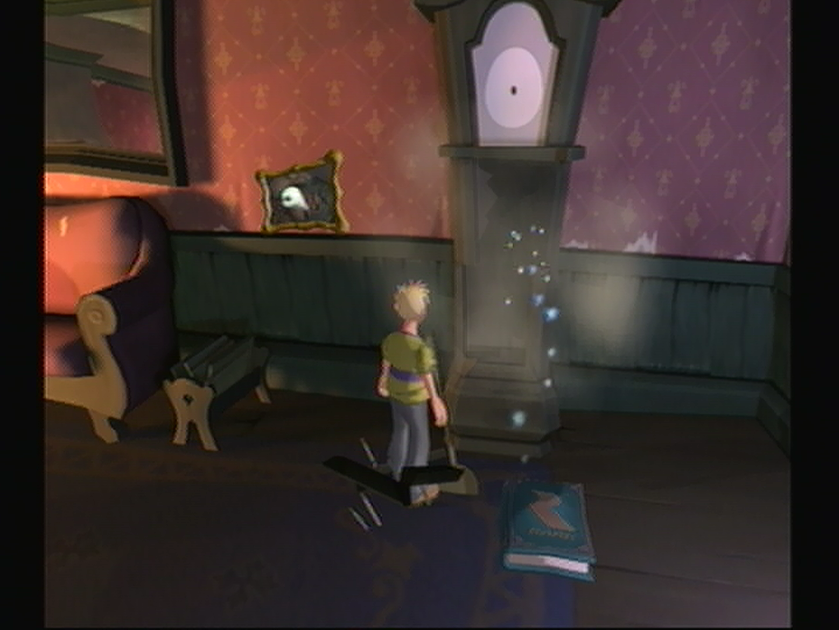
While the search for the Bonus Books is starting to get a little extensive – if not exhaustive – the Sitting Room will offer up a well deserved break with an easy Bonus Book to be found within the cramped quarters. As you enter the room, you’ll be treated to Coopers petrified perspective which happens to show off a large Grandfather Clock to the right side of the room after the words ‘Sitting Room’ come into view. Once you’ve regained movement, travel over to the Grandfather Clock and give it a steady kick to the Pendulum and you’ll expose the Bonus Book that was hiding behind the glass.
[expand image]
BONUS BOOK 43
![]()
CHAPTER 2: SCENE 31: MUSIC ROOM
After an impromptu introduction to the cleaning woman, Babs Buffbrass, you’ll acquire the Soda Pop Gun – a weapon capable of firing explosive rounds of Soda Pop at unsuspecting Ghoulies. Don’t get too trigger happy in the Music Room however, you don’t want to lose your bearings for the Bonus Book. It’s rather easy to find this time, from where you stand after your health has been decided, turn around completely and you’ll discover a small area with a Harp and other instruments stored in the corner. Closest to the window across from the Harp you’ll spot an Accordion with the Bonus Book placed on top.
[expand image]
BONUS BOOK 44
![]()
CHAPTER 2: SCENE 32: WALLED GARDEN
The Walled Garden offers up one of the most difficult Bonus Books to locate if you have no idea where to go about searching. From where you stand in the Walled Garden avoid the Flying Imp and turn around completely where you’ll spot a Thorned Challenge Door. Travel left along the wall until you pass the tall window and you should find a large stone patio. Refrain from ascending the steps to a higher level and instead focus on a lone flower box in front of the railing. Manipulate the camera and you’ll find the Bonus Book out of view wedged between the surrounding wall and the flower box.
[expand image]
BONUS BOOK 45
![]()
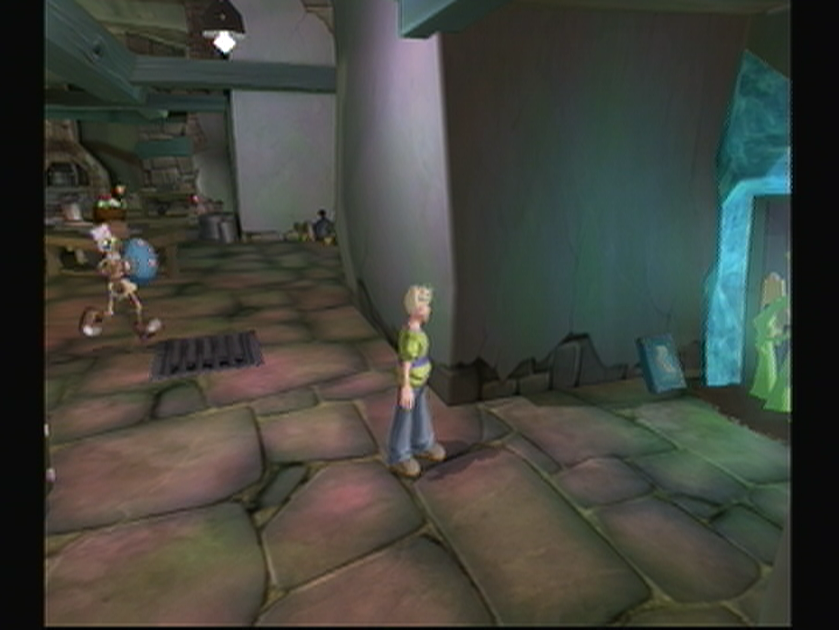
CHAPTER 2: SCENE 33: STUDY
The biggest hurdle you’ll face in the Study is dispatching Jessie N’ Clyde in the center of the room. You shouldn’t have much trouble dispatching this Ghouly with your Soda Pop Gun, but given your low vitality it might make things easier to call for some assistance – namely the friendly Imp inside the Rare Jar just right of the bookcase at the bottom of the stairs here. Once Jessie N’ Clyde have been dealt with, make your way to the right side of the room where you’ll find a desk surrounded by three windows. If you work your way over to the safe in the corner next to the Television you’ll find the Bonus Book on the windowsill.
[expand image]
BONUS BOOK 46
![]()
CHAPTER 2: SCENE 34: MUSIC ROOM
Time to step things up a bit with some tedium and turmoil! You’ll have to complete the first challenge in the Music Room to find the Bonus Book, so you’ll be tasked with downing 30 Ninja Imps before you can progress. Once you’ve done that you’ll have to return the Soda Pop Gun to Babs waiting at the door, as you follow her out to leave however you’ll find a Hunchback has burst forth from inside the piano! Now that you’ve started the second challenge in this room, you’ll have to acquire your Bonus Book by defeating the Hunchback, all the while taking abuse from the Skeletons as well. Hang up Hunchy and you’ll get the Book.
[expand image]
BONUS BOOK 47
![]()
CHAPTER 2: SCENE 35: SITTING ROOM
The Sitting Room will once again provide an easy Bonus Book if you can avoid confrontation with the Ghoulies. As the challenge begins, you should manage to spot a Portrait resting on a pink couch – it’s right next to the Thorned Challenge Door and across from the Grandfather Clock that harbored the Bonus Book last time. Once the challenge is underway make your way around the pink couch to the armrest closest to the Challenge Door, and then manipulate the camera toward the Thorned door and you should manage to spot the Bonus Book subtly tucked underneath the couch.
[expand image]
BONUS BOOK 48
![]()
CHAPTER 2: SCENE 36: CLOAK ROOM
You’ll have to heed caution if you hope to find this next Bonus Book, as the room has been filled with Medusas ready to take advantage of your low vitality. To get to the Bonus Book undetected you’ll need to do a bit of cloaking yourself and grab the Invisibility Soup Tin found inside the wardrobe to your right after the Chest as you start off. Busting the Cabinet will summon the Reaper, but you should be able to sneak by stealthily. Approach the window to the right where we found the Bonus Book last time and you’ll spot a green trunk; break it open to find the Bonus Book inside.
[expand image]
BONUS BOOK 49
![]()
CHAPTER 2: SCENE 37: GRAND HALLWAY
As you emerge in the Grand Hallway once more you’ll find a duo of Skeleton Maids giving everything a nice dusting, unfortunately you happen to be on their list as well and with only 20 health you’ll only manage to survive four hits. While the door on the opposite side of the room looks alluring, you’ll have to approach the Thorned Challenge door between the pillars that you can see from where you start off. Make sure to avoid the Maids and after a healthy jog the Thorned Door should come into view, along with a collection of books in an alcove to the left. You’ll find the Bonus Book among them.
[expand image]
BONUS BOOK 50

![]()
CHAPTER 2: SCENE 38: KITCHEN
Just as our last venture into Ma Soupwills Kitchen, the entire area has become plagued with fiesty Fire Imps and you’ll be tasked with extinguishing the lot. If you seek the Bonus Book however, you should avoid doing so as you’ll miss your chance on exploring the room as the game advances you to the next room. Instead, approach the frothing green Cauldron in the center and turn left when you spot three bouncing Soup Tins. Squeeze yourself between the counter and table and you’ll come across a large green shelving unit next to a Thorned Challenge Door. Smack it and you’ll find the 50th Bonus Book.
[expand image]
BONUS BOOK 51
![]()
CHAPTER 2: SCENE 39: CELLAR
Now that we’ve reached our half-way point it seems as though the Bonus Book in the Cellar wanted to crank the difficulty setting up to a ridiculous standard. Luckily there isn’t a time limit, but even so you could be searching for ages and turn up empty handed every time. The key to finding this Bonus Book is staying close to home and seeking in the shadows, case in point you’ll spot a stack of crates in the corner across from a Dizzy Reaper Soup Tin directly behind you. If you inspect them and manipulate the camera to focus behind the crate on top you’ll find the Bonus Book hiding in the shadows.
[expand image]
BONUS BOOK 52
![]()
CHAPTER 2: SCENE 40: YE OLDE ARCHIVES
After a return trip to the Archives doesn’t go quite as Cooper had hoped he’s faced with a more terrifying version of Amber than he had previously! We’ll have to back out from the battle if we hope to find the Bonus Book however, as we’ll have little time for searching with Amber on our toes. As the match begins you’ll have to head to your immediate right down the corridor with bottles on either side. When you reach its end turn left and you’ll spot a Thorned Challenge Door with a long crate to the right. Break the crate and you’ll find the Bonus Book inside, snatch it up before Amber finds you!
[expand image]
BONUS BOOK 53
![]()
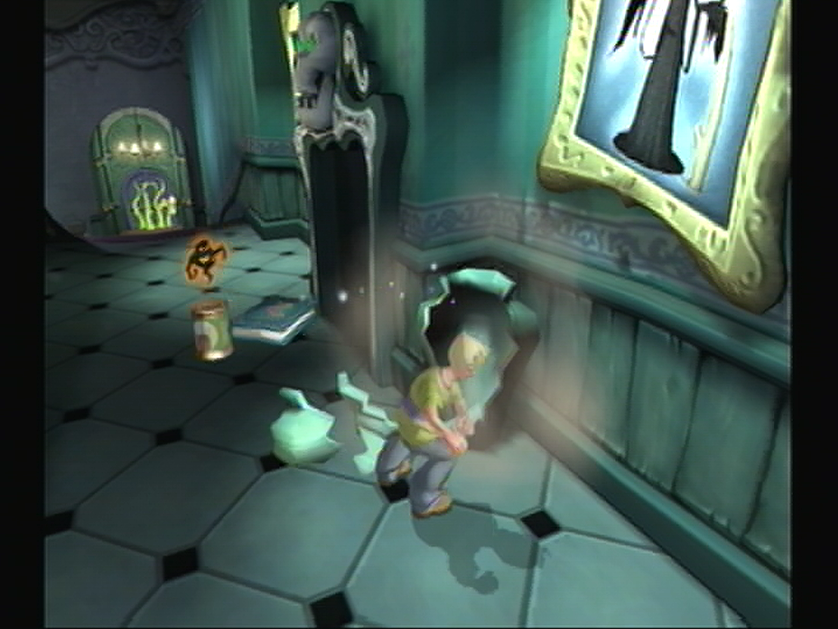
CHAPTER 3: SCENE 1: GRAND HALLWAY
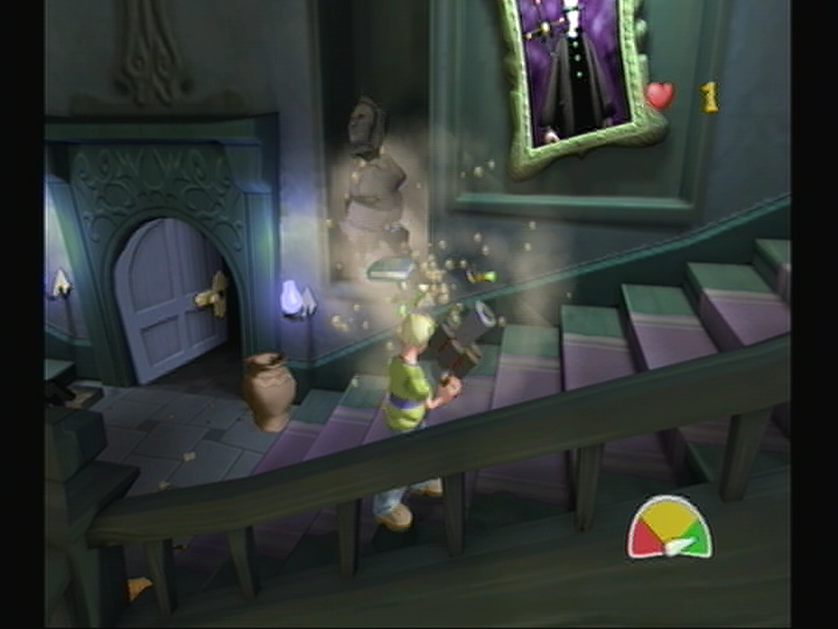
As you start Chapter Three, you’ll be facing an open door without any challenges and given a single unit of health, which looks like a brilliant prospect to simply continue progressing through the game. However, to find the Bonus Book you’ll have to turn around completely and walk toward the pillar to the left where you’ll spot the Thorned Challenge Door where we defeated two Haunted Portraits for the 40th Bonus Book. If you travel along the wall here towards the right you’ll manage to spot a decrepit looking bench with a vase tucked in beside it. Smash open the vase and you’ll find the Bonus Book inside.
[expand image]
BONUS BOOK 54
![]()
CHAPTER 3: SCENE 2: HOUSEKEEPING STORE
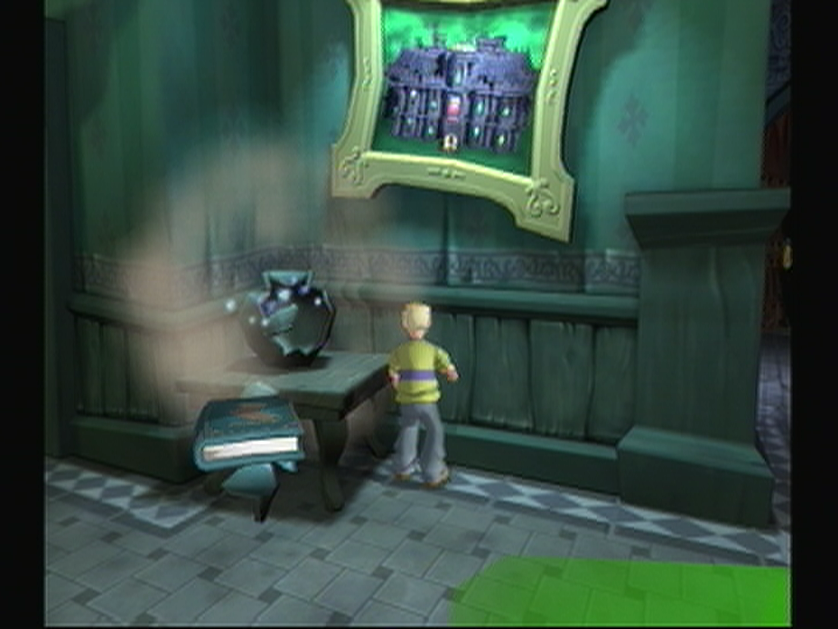
This next Bonus Book is quite easy to find, though you’ll have to cross over to the other side of the room to find it, which makes you vulnerable from the Haunted Television Set. For the easiest route simply venture toward the wall of crates directly ahead and turn right after you pass two large crates against the wall. You should see a portrait of Dr. Krackpot, smash it and you’ll receive a Freeze Ghoulies Tin. Make your way past the frozen Television and turn to the left when you reach the other side. If you look around this area you’ll spot a portrait of Ghoulhaven Hall with the Bonus Book in front.
[expand image]
BONUS BOOK 55

![]()
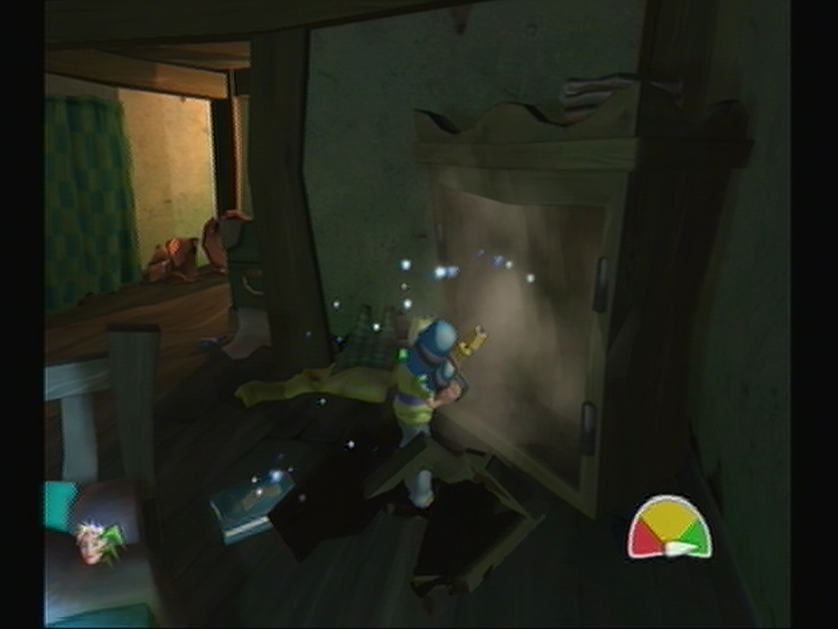
CHAPTER 3: SCENE 3: CRIVENS’ QUARTERS
Akin to the Kitchen, Crivens’ Quarters is experiencing an Imp infestation all its own. You shouldn’t have much to worry about at 30 Health Points as each aerial Imp attack only takes 3 each time. While the battlements are hectic, the quickest way to snatch up the Bonus Book is during the challenge. When you’re ready, work your way over to the left side of the room where you’ll spot Crivens hiding in a wardrobe, if you scan the area you should manage to find a light blue bed in the corner with a bedside table. Be wary if the Telephone atop the table has a Super Scary Shock in store, and break it open for the Bonus Book.
[expand image]
BONUS BOOK 56
![]()
CHAPTER 3: SCENE 4: HOUSEKEEPING STORE
Upon returning to the Housekeeping Store you’ll find that this Bonus Book isn’t about to go down without a fight. That’s because the book is held captive by the Warlock, with his debut occurring in a shabby old broom closet. Instead of searching for the Bonus Book you’ll have to expose the Warlock hiding in one of the Rare wardrobes around the room, once you’ve found him get ready to fight. Once you’ve managed to defeat the Warlock the challenge will complete and you’ll be able to pick the Bonus Book out from its Ghoulish remains. Give the Book a a good wipe before you take it will you?
[expand image]
BONUS BOOK 57
![]()
CHAPTER 3: SCENE 5: GRAND HALLWAY
You shouldn’t expect a warm welcoming upon returning to the Grand Hallway, as the area has its fair share of Skeletons, Pirates and Haunted Portraits, the latter of which will begin attacking as soon as you step foot into the room! The easiest way to go about grabbing this Bonus Book is to venture to the left side of the room toward the bench where we found Bonus Book 53 to find an Invisibility Soup Tin. Use the Soup to stealth past the Skeletons at the top of the stairs and past the Pirates to the right. You’ll find the Bonus Book in front of Baron Von Ghouls’ Purple Thorned Challenge Door after you finish your ascent.
[expand image]
BONUS BOOK 58
![]()
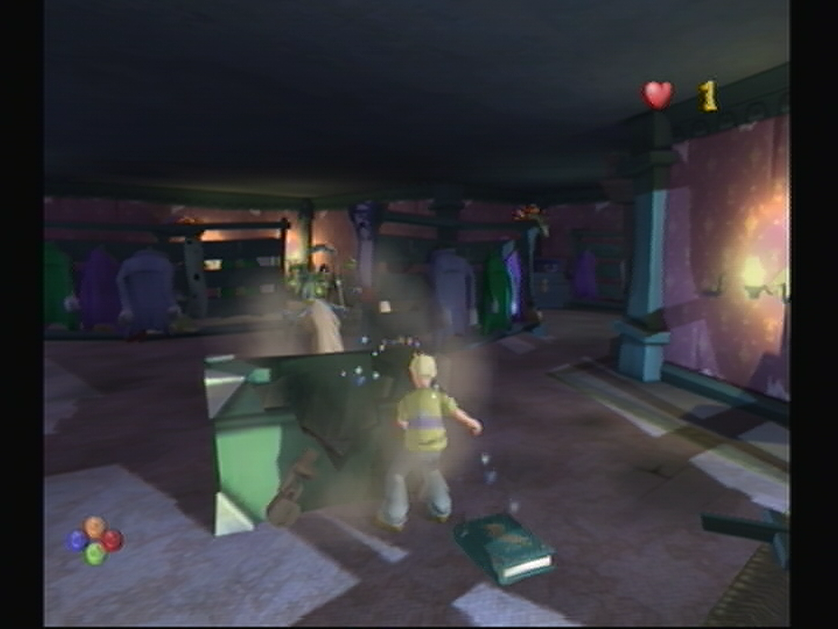
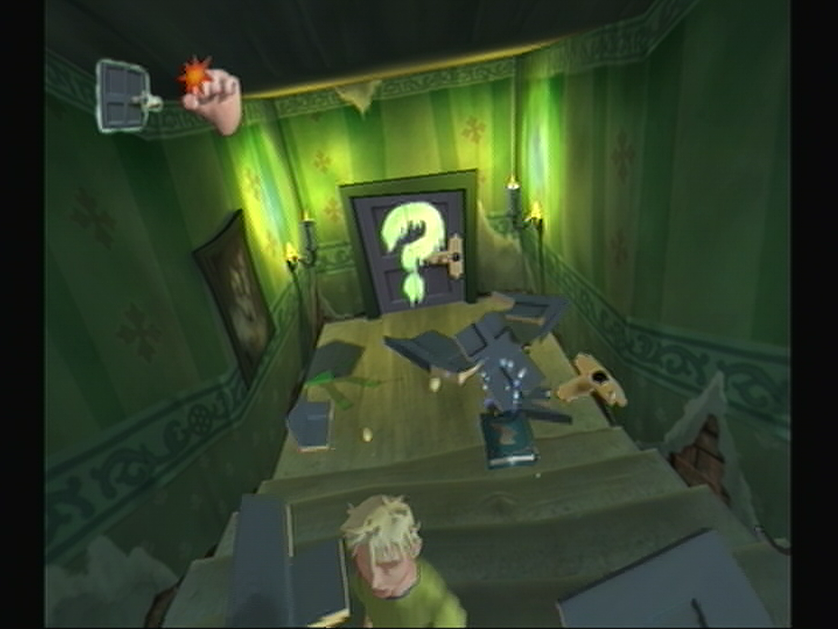
CHAPTER 3: SCENE 6: UPPER CORRIDORS
You’ll need to keep your wits about in the Upper Corridors as you’ll have only a single unit of energy. Make quick work of the Haunted Portraits and then smash the vase to the left to reveal three Miniature Cooper Soup Tins. Collect them and you’ll have them clearing the Mummies ahead. Avoid getting hit and sneak through down the corridor; at the end you’ll find a barred off area with 11 Bonus Books arranged in a Question Mark. Unfortunately, you’ll have to find the remaining 41 Bonus Books one at a time as there’s no way to pass through. Smash the vase instead and you’ll collect the Bonus Book.
[expand image]
BONUS BOOK 59
![]()
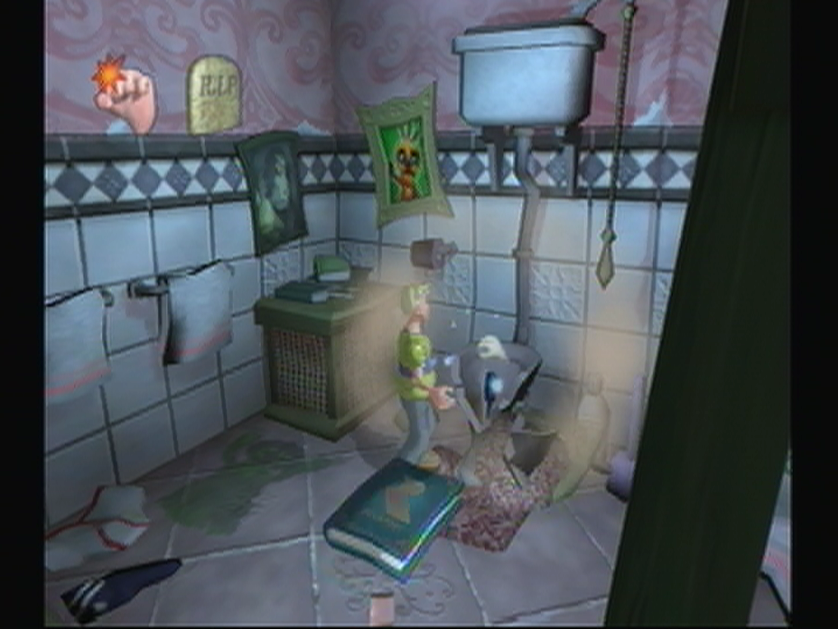
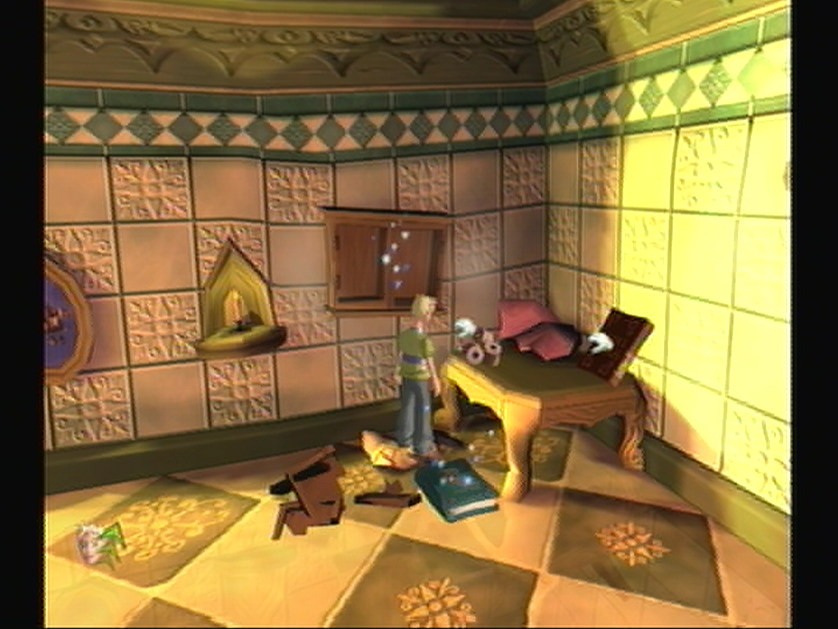
CHAPTER 3: SCENE 7: BATHROOM
This next Bonus Book is easy enough to get so long as you keep moving. As you start off in the Bathroom you’ll manage to see the alluring open door ahead between two stalls, you’ll need to approach the doorway, but avoid getting too close and begin the challenge, instead wander to the right after you pass the mirror and you’ll find a quaint little toilet against the wall. You’ll need to act fast as the Haunted Coats are likely on your tail, so when you’re ready give the toilet lid a great punch – it’s only rock hard porcelain – and you’ll uncover the Bonus Book inside the bowl. Wash your hands after you’ve finished playing.
[expand image]
BONUS BOOK 60
![]()
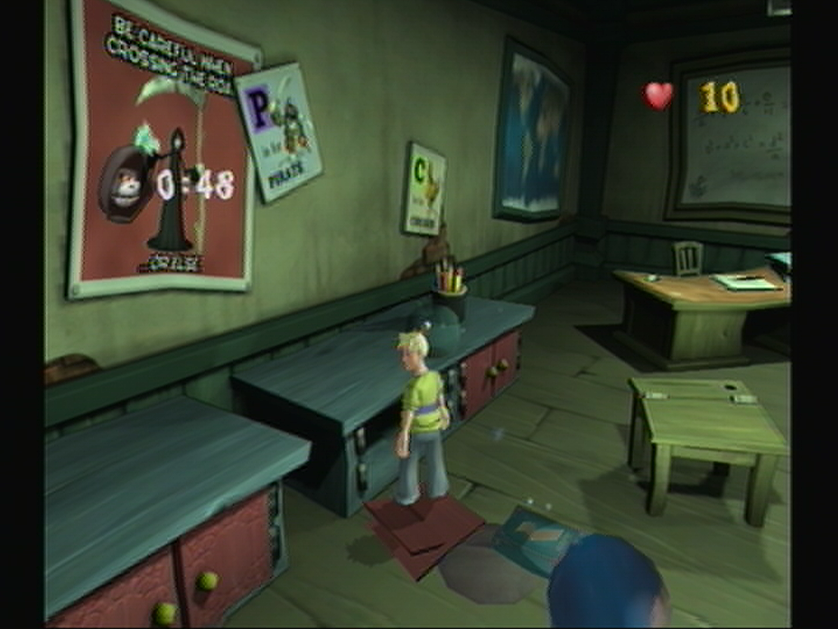
CHAPTER 3: SCENE 8: SCHOOLROOM
The search for the 60th Bonus Book is made much more challenging with the inability of breaking any of the Schoolrooms objects as specified by the challenge rules. Unfortunately for the purposes of this Bonus Book, these rules were meant to be broken! As you start out you’ll spot a few short cabinets to your left below a poster of the Grim Reaper (how appropriate). Atop the cabinets are an assortment of school themed items; a fishbowl, – housing Roysten of Banjo-Kazooie – a cup full of pencils and a Globe to name a few. Approach the Globe and knock it off its axis and you’ll reveal the Bonus Book as it rolls off.
[expand image]
BONUS BOOK 61
![]()
CHAPTER 3: SCENE 9: INFIRMARY
In order to collect the Bonus Book in the Infirmary you’re going to need access to the second area of the ward, which means you’ll have to avoid the Medusa ahead and have a chat with Fiddlesworth to begin the challenge. From where you start in front of Fiddlesworth you’ll need to carry on toward the second area where you’ll spot an empty cabinet and a bed to your right. In between them you’ll discover a hidden corridor with an upturned bed inside among the other items thrown askew; if you follow the corridor to its end you’ll end up finding the Bonus Book next to a barred door just around the corner.
[expand image]
BONUS BOOK 62
![]()
CHAPTER 3: SCENE 10: DUNFIDDLIN COTTAGE GARDEN
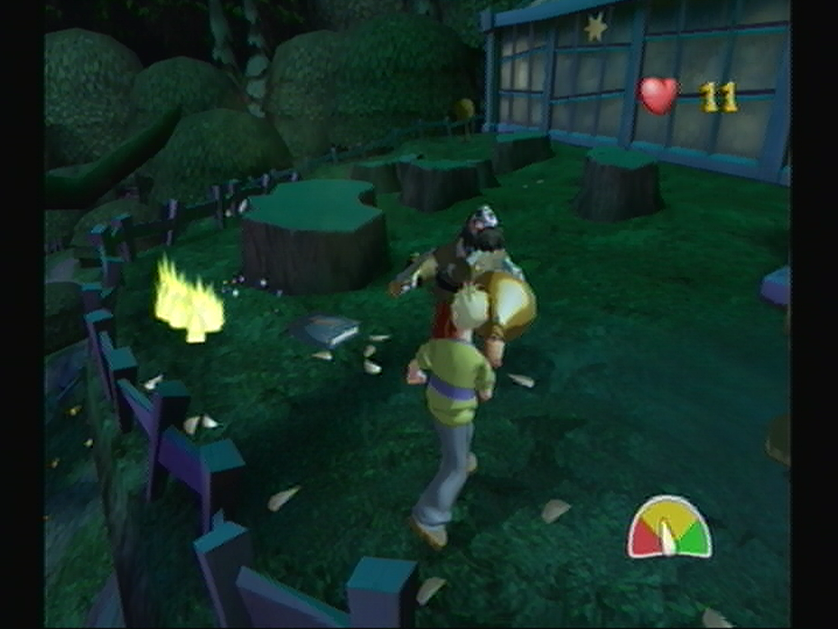
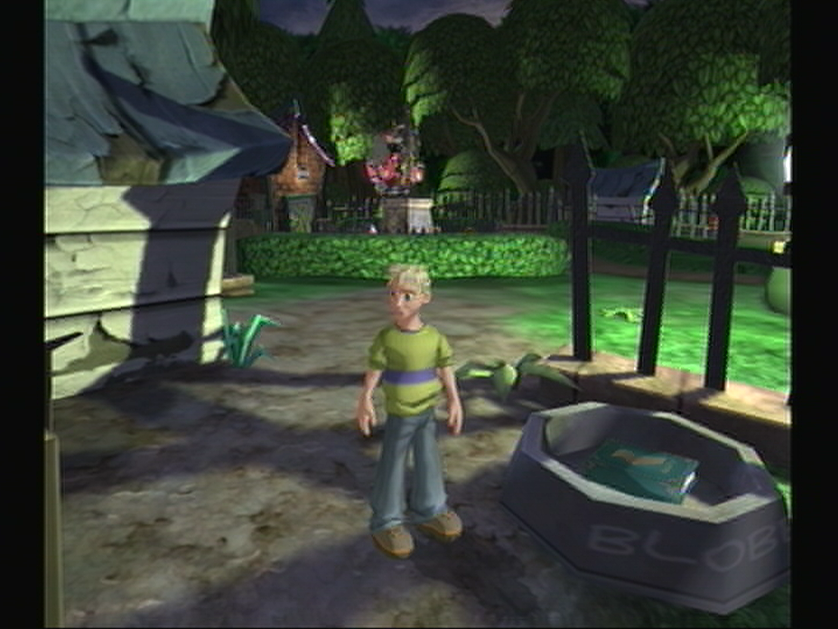
You won’t find the Bonus Book hidden amongst the scenery around the Cottage Garden as you’ll need to find Fiddlesworth before you’ll have the necessary weaponry to continue. Unfortunately you’ll only find Fiddlesworth just before you reach the Greenhouse at the end, so you’ll have to steer clear of the Ghoulies as you venture up the path. Once you speak with Fiddlesworth you’ll receive the Garlic Gun ‘Ol’ Edna’ which works wonders against the female Vampire Ghoulies whom you would have met in this clear cut area. Once you defeat one of the Vampires with Ol’ Edna you’ll acquire the Bonus Book.
[expand image]
BONUS BOOK 63
![]()
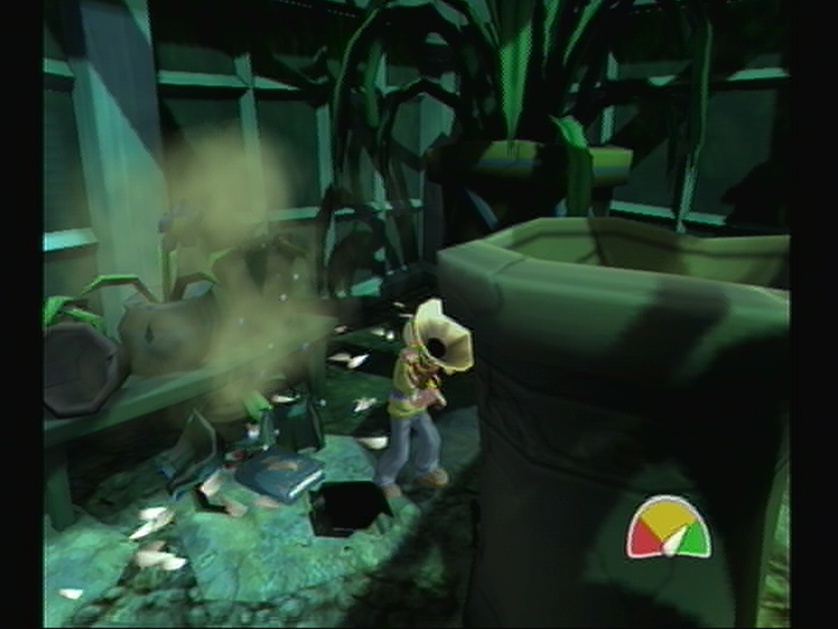
CHAPTER 3: SCENE 11: GREENHOUSE
Navigating around the Greenhouse can be a little tricky as the entire setup is much like a maze, with the plant life acting as sturdy walls to guide you through to the exit. Luckily finding the Bonus Book is quite simple, perhaps even more so than locating the exit. As you start off make your way forward to begin the challenge and then hang a left to round the corner. Once you’ve done that you’ll have to carry on ahead down the path where you can see the Challenge Door, then swing right so that you’ve entered an area with a Vampire Chicken and a barrel. The Bonus Book will sit in between three Pumpkins in this area.
[expand image]
BONUS BOOK 64
![]()
CHAPTER 3: SCENE 12: POTTING ROOM
While Crivens is quick to point out the location of the Rhyme needed to access Baron Von Ghouls’ Quarters, you’re probably more interested in finding the Bonus Book. To the Butlers’ credit however he does show you the location of the Bonus Book as the camera focuses on the rhyme, as the pottery directly to the right of the desired collectible contains the ghoulish tome. You’ll want to make sure you avoid starting the challenge by picking up the piece of rhyme in question, so be sure to go around the pot to the right. From here just smack the table with the pottery on top to find the Bonus Book inside.
[expand image]
BONUS BOOK 65
![]()
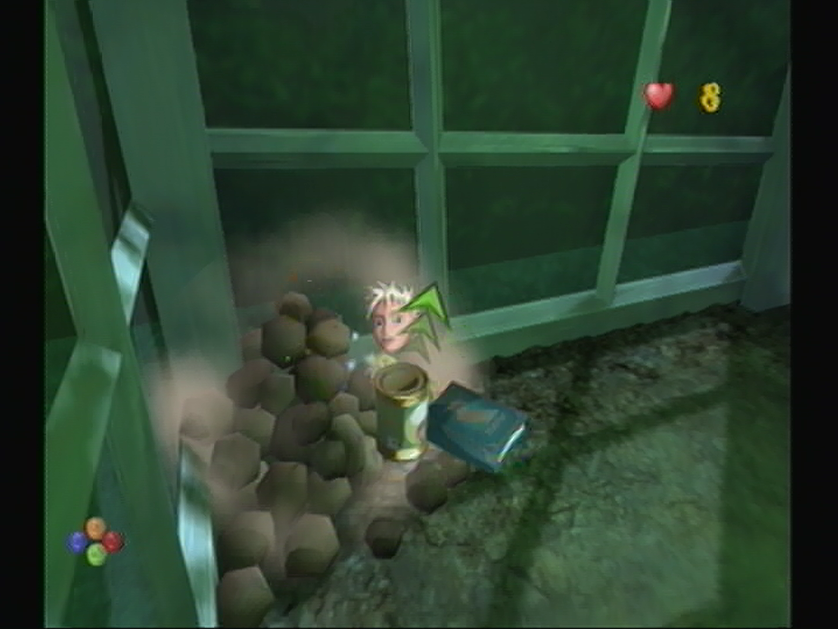
CHAPTER 3: SCENE 13: GREENHOUSE
Back in the Greenhouse you’ll find the pathway to this Bonus Book a little bit more complicated than our first venture. From where you start off you’ll have to round the vegetable stalks and pass by two Ninja Imps, and spot a Shocker Blocker where our three Bonus Book pumpkins were before. Continue toward the open area where the Health tins are bouncing about and stay close to the edge as you make your way toward a pile of rocks in the center of the greenhouse across from the entrance. Once you arrive in the corner, give the pile a kick and you’ll find the Bonus Book along with a Turbo Cooper Soup Tin.
[expand image]
BONUS BOOK 66
![]()
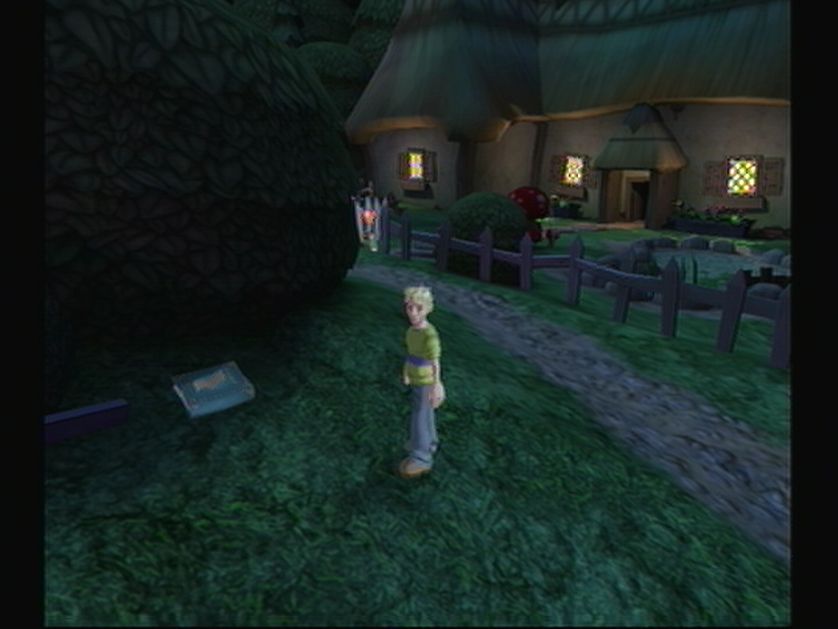
CHAPTER 3: SCENE 14: DUNFIDDLIN COTTAGE GARDEN
The return trip to Dunfiddlin Cottage Garden would normally see you entering Dunfiddlin Cottage belonging to Fiddlesworth at the end of the path, but for the purposes of this Bonus Book we’ll need to decline the invitation. From the Greenhouse you’ll need to work your way down toward Dunfiddlin Cabin, wrapping around the massive tree and avoiding all confrontation with the Ghoulies in the process. When you arrive at the Dunfiddlin Cottage gate avoid entering the yard and instead take a right when you spot the large bush on the path; you’ll find the Bonus Book tucked out of view next to a plank of wood.
[expand image]
BONUS BOOK 67
![]()
CHAPTER 3: SCENE 15: DUNFIDDLIN COTTAGE
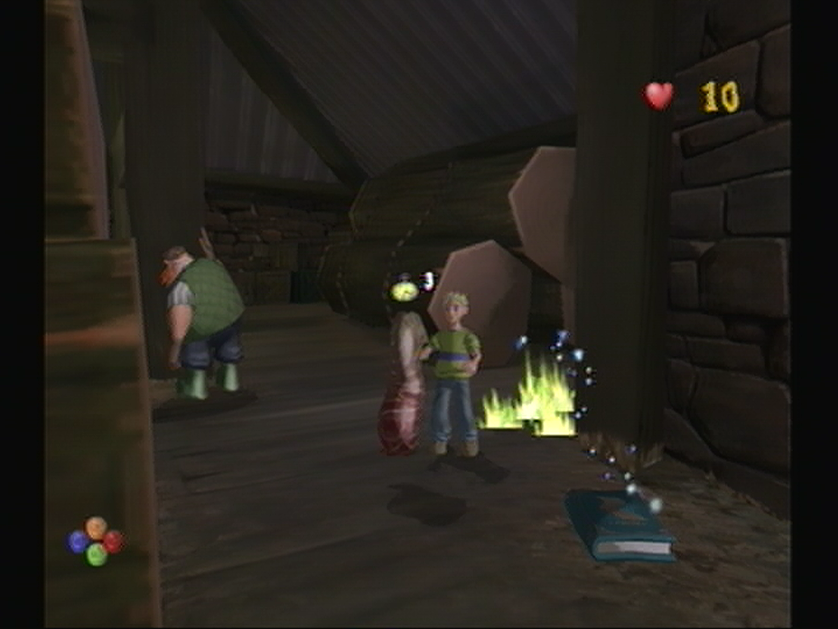
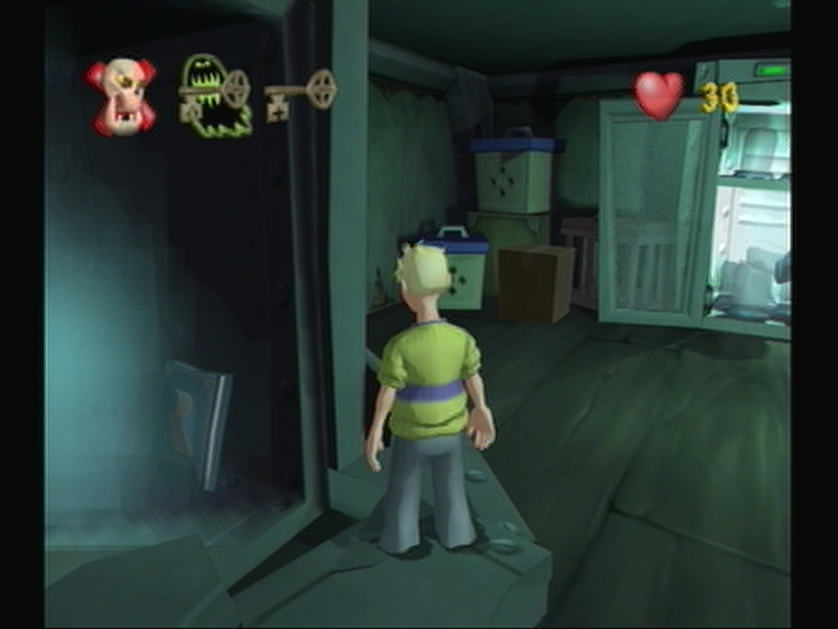
As you enter Dunfiddlin Cottage you’ll be treated to Cooper’s handy nervous glances once more, take note of the large metal freezer to your left; while you won’t be able to break it, remember its location for later. From here you’ll have to go about finding the Warlock and defeating him, which will begin the second challenge when you approach the now open Challenge door. Once you do so the door will become locked filling the room with flying Imps and, more importantly, releasing the Zombies from the Freezer in the Kitchen. Travel back to the now unlocked Freezer and you’ll find the Bonus Book waiting inside.
[expand image]
BONUS BOOK 68

![]()
CHAPTER 3: SCENE 16: WORKSHOP
You’ll find the Workshop without its harassing Skeleton cook when we last entered this area 32 Scenes ago, not that the Bonus Book will prove to be a challenge anyways. From where you stand you should manage to see a large furnace in the center of the room with an iron pipe leading to the kiln to the right, which you can see fully if you wander over toward the right side of the room. Once you’ve found the strong metal door give it a taste of your roundhouse kick and you’ll expose a large baked pot inside, break that and you’ll find the Bonus Book. Luckily this didn’t turn into a Nesting Doll puzzle…
[expand image]
BONUS BOOK 69

![]()
CHAPTER 3: SCENE 17: FARMYARD
While this area can be an absolute pain when you’re trying to sneak past the trio of Jessie N’ Clydes, this Bonus Book is one of the easiest to obtain in the game and you won’t even have to risk your life by traipsing past the broken wall to Jessie N’ Clyde territory. If you manipulate the camera and focus on the right hand side of the screen you should manage to spot a small stone wheel resting on the perimeter wall. Send the stone wheel crumbling with your fists of lead and you’ll manage to uncover the Bonus Book that was hidden inside, along with two explosive Worms that shoot out after it.
[expand image]
BONUS BOOK 70
![]()
CHAPTER 3: SCENE 18: FOUNDRY
You’ll want to avoid breaking any unnecessary objects looking for the Bonus Book in this room, as doing so will unleash the Ghouly hiding inside. Given that you can’t defeat any of them without summoning the Reaper you’ll want to be incredibly precise with what you objects you take out. In this case you’ll want to enter the main area of the Foundry and travel toward the large furnace in the corner until the Rare barrel comes into view. Just to the left of the Rare barrel you’ll spot a table with a set of tongs and a fireplace bellow on top. Break the fireplace bellow and you’ll find the Bonus Book that was hidden inside.
[expand image]
BONUS BOOK 71
![]()
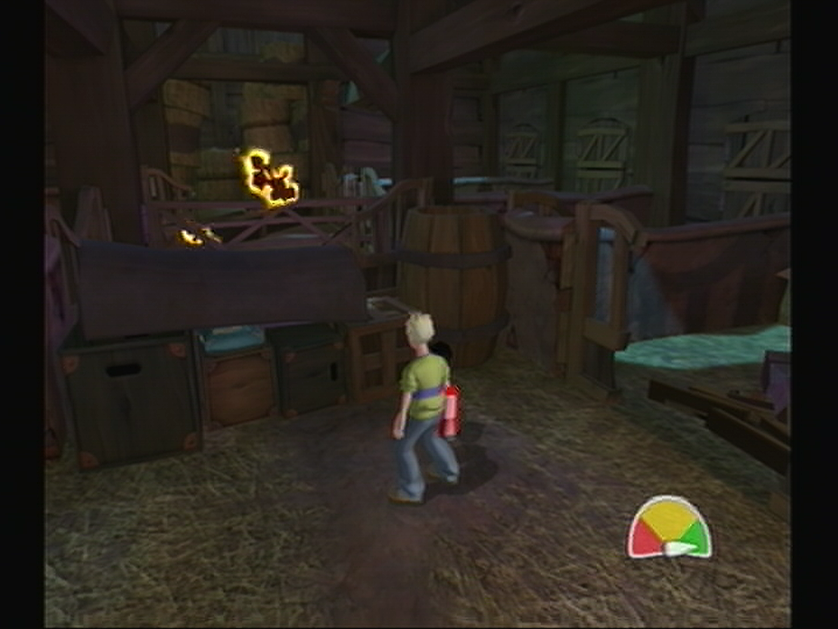
CHAPTER 3: SCENE 19: STABLES
While the Stables cover a vast area the Bonus Book is hidden rather close to home. As you start off you’ll need to head toward Mr. Ribs and acquire the fire extinguisher from him, once you’ve done that follow the constructed path and break down the first two stable walls here. Once you’ve done that you’ll enter a stable with a single bale of hay inside, break the gate to this stable and you’ll find yourself out in the open lane that goes through all the stables. To your right you should manage to spot a few crates and an upturned feeding trough blocking the path; where the Bonus Book is found underneath.
[expand image]
BONUS BOOK 72
![]()
CHAPTER 3: SCENE 20: FOUNDRY
Unlike the last time we ventured through the Foundry, the area has since become filled with Mummy Ghoulies who are fortunately much too apathetic to care about your presence in the room. Once Mr. Ribs has taken the fire extinguisher back you’ll simply have to work your way toward the entrance of the Foundry, but avoid getting close to the door or you’ll start the challenge. Instead, you should spot a large pile of coal with a Rare bag in the corner, if you look just a little to the left you should spot a large barrel with a Rare emblem on it. Bust open the barrel and you’ll find the Bonus Book and a Cursed Mummy inside.
[expand image]
BONUS BOOK 73
![]()
CHAPTER 3: SCENE 21: FARMYARD
You’ll have to tread lightly on the Farmyard as there are many Super Shock hands buried underneath the soil waiting to raise up and grab you. Work your way to the busted horse cart to the left and destroy the barrel at the rear, inside you’ll find a Shocker Blocker. From here, work your way down the path of unfavorable soups until you come to the wooden grinder we destroyed to obtain Bonus Book 33 and instead you’ll find a One-Hit Wonder inside. Make your way back up the path and you’ll find a Jessie N’ Clyde sleeping inside a fenced off area – break through the fence and defeat it to earn the Bonus Book.
[expand image]
BONUS BOOK 74
![]()
CHAPTER 3: SCENE 22: WOODSHED
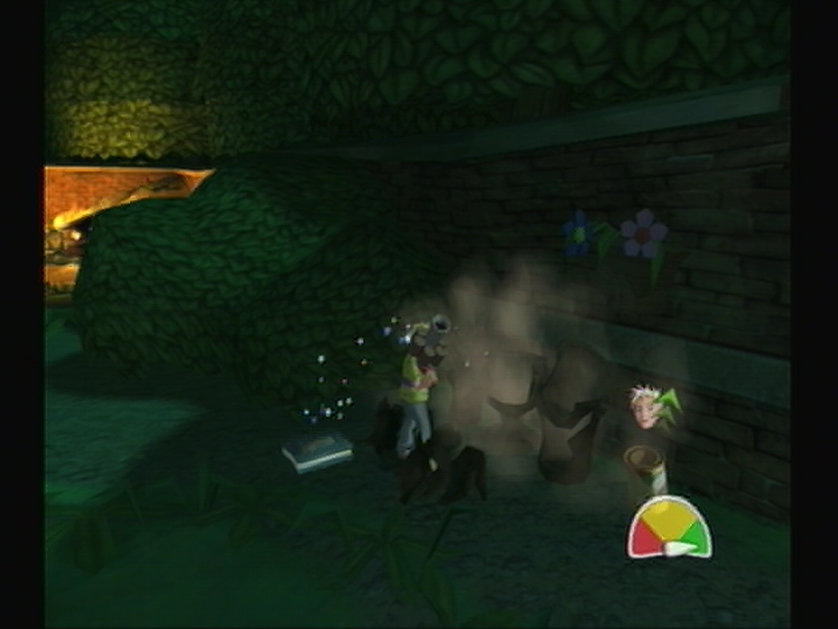
Venture into the Woodshed and you’ll have your work cut out for you in terms of finding the Bonus Book. This time you’ll be tasked with working your way through several patrolling Medusas to find Fiddlesworth at the end. While you might find it quicker to avoid the Medusa’s all together, the very last one you spot before coming to Fiddlesworth is the one that holds the Bonus Book. The easiest way to dispatch of all Medusas in general is to pick up a blunt object – like a stump or crate – and use it to knock the Medusa over, then before they can regain their composure wander over to fill them in and you’ll have the book.
[expand image]
BONUS BOOK 75
![]()
CHAPTER 3: SCENE 23: GARBAGE YARD
Wandering back to the Garbage Yard you’ll need to return Ol’ Edna to Fiddlesworth and then get a move on! You won’t be able to attack the Haunted Chairs that litter the Garbage Yard without summoning the Reaper, so from where you stand you’ll have to run to your right and pass the U-Dump Dumpster to give yourself enough time before the challenge starts. Once it does, continue around the corner that leads up toward the Challenge Door and you’ll spot a dumpster at the end of the path just before it turns up the ramp. Smash open the lid of the dumpster and you’ll uncover the Bonus Book hidden inside.
[expand image]
BONUS BOOK 76
![]()
CHAPTER 3: SCENE 24: FFFFREEZER
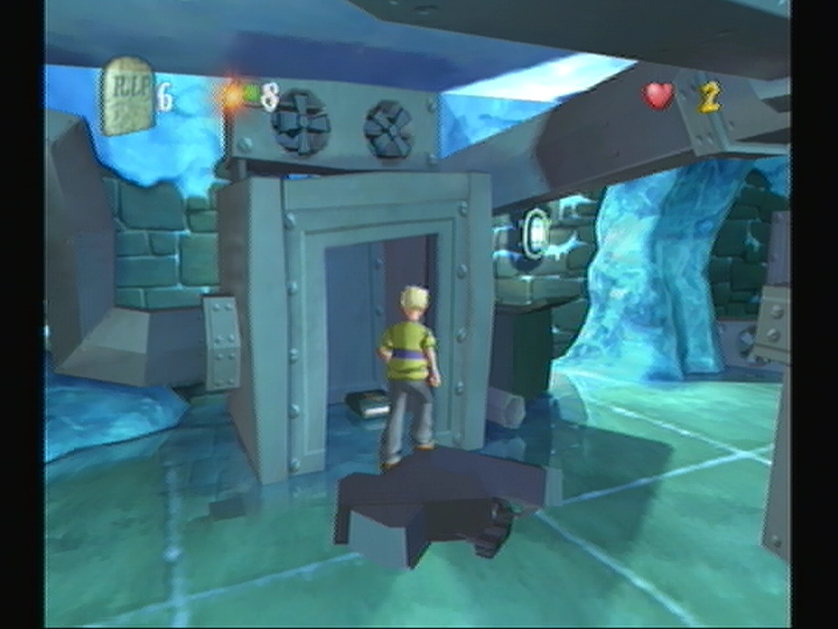
Unfortunately our latest excursion to the Freezer won’t share much similarity to Bonus Book 30 where we were able to slide right in and grab the book without intervention from the Ghoulies, though if you’re quick on your toes as you are sure footed you’ll manage to snag the Bonus Book with little issue. As you start off, work your way to the right side of the wall where you’ll spot two freezer doors, we want to get to the second of the two. Passing the first will start the challenge so be swift and break down the door to the second freezer. Inside you’ll find a friendly Mummy and the Bonus Book.
[expand image]
BONUS BOOK 77
![]()
CHAPTER 2: SCENE 25: KITCHEN
While there aren’t any challenges about in the Kitchen, there are a ton of Ghoulies from feisty Fire Imps to patrolling Medusas, so watch your step! From where you start off you’ll need to follow the wall to your left around the bend where you’ll pass a few loafs of bread being prepared on the counter and discover the staircase leading down to where you first entered the Kitchen to obtain Bonus Book 13 after coming through the Cellar. Descend both sets of stairs here and as you turn the corner you’ll end up spotting the Bonus Book propped up against the wall near the Thorned Challenge Door.
[expand image]
BONUS BOOK 78
![]()
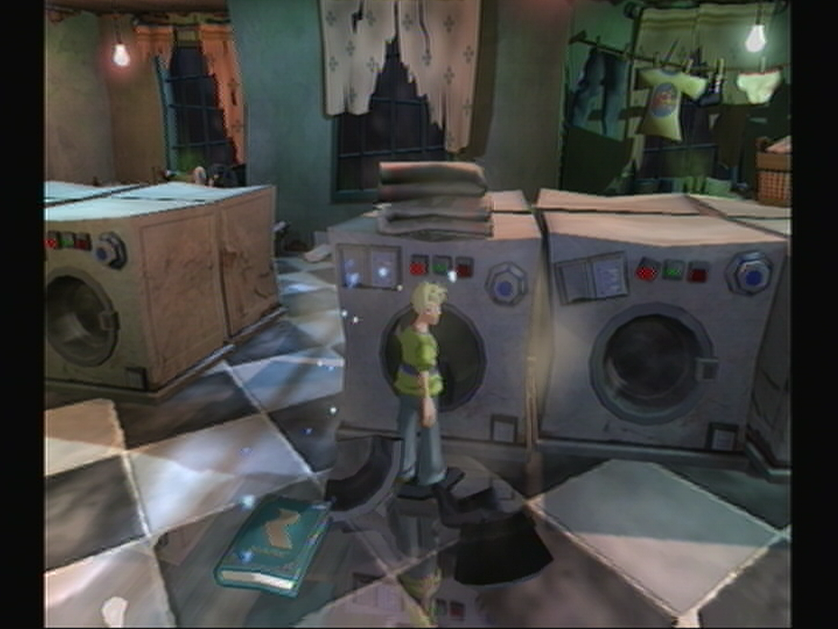
CHAPTER 3: SCENE 26: LAUNDRY
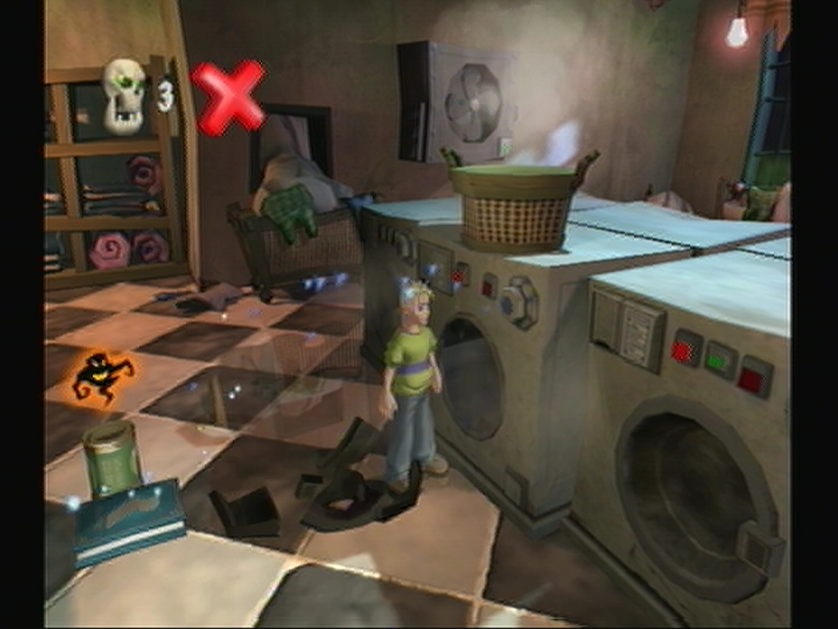
Looking for the Bonus Book on a whim in the Laundry Room can be fairly risky, as the Warlock could potentially be hiding within any object you choose to smash. Luckily, the Warlocks presence means the room is otherwise Ghouly free, so you’re free to explore without compromise. As you start off, ascend the large steps in front to find yourself in the Laundry Room. From here turn to the right and you should manage to spot a row of washing machines grouped into sets of threes. Find the washing machine with two folded towels on top of it and smash the door in, you’ll find the Bonus Book inside.
[expand image]
BONUS BOOK 79
![]()
CHAPTER 3: SCENE 27: SERVANTS DORMITORY
Housing arguably one of the most challenging Bonus Books in the game, the Servants Dormitory will certainly test your patience and skill as you’re tasked with navigating your way through a massive chamber patrolled by Jessie N’ Clydes and an assortment of other Ghoulies. If you’d prefer to flight rather than fight, there is an Invisibility Soup Tin found in the garbage bin just to the right, so if you’re able to smash it ahead you should manage to use it and sneak right by the first few floors. Get to the end and you’ll find a Haunted Door blocking the exit, if you manage to defeat it you’ll receive the Bonus Book in turn.
[expand image]
BONUS BOOK 80
![]()
CHAPTER 3: SCENE 28: SERVANTS BATHROOM
The Bonus Book in the Servant’s Bathroom will only make itself available to you after you’ve managed to complete the first challenge. What does this challenge entail? Avoid the Reaper for an entire minute in the bathrooms cramped quarters! Fortunately you’ll be allotted 20 seconds before the Reaper shows to make a strategy, so break down some stall doors for their helpful Soups. Once the challenge is complete a Cursed Mummy will make a showy entrance by bursting out of the furnace in this room, with the Bonus Book trailing shortly after him. Get to it before the Reaper gets to you.
[expand image]
BONUS BOOK 81
![]()
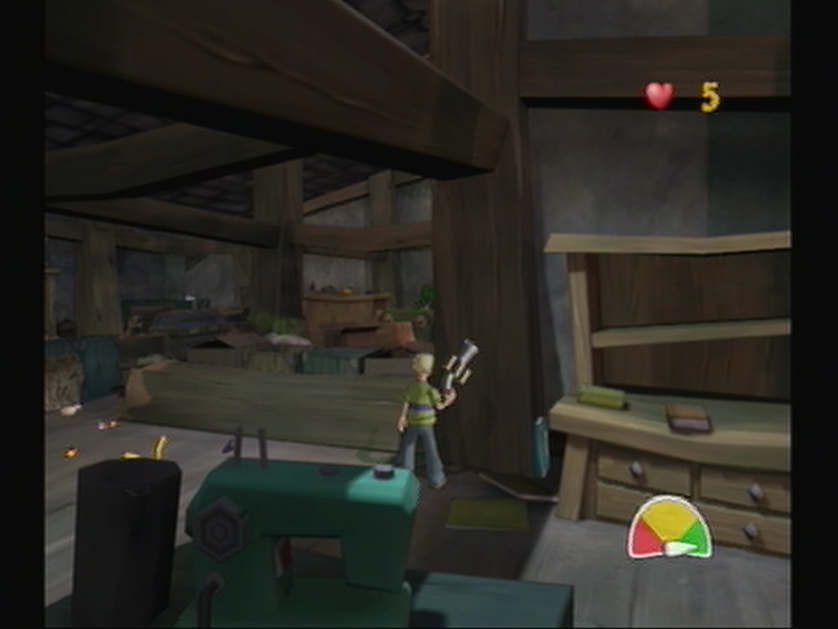
CHAPTER 3: SCENE 29: ATTIC
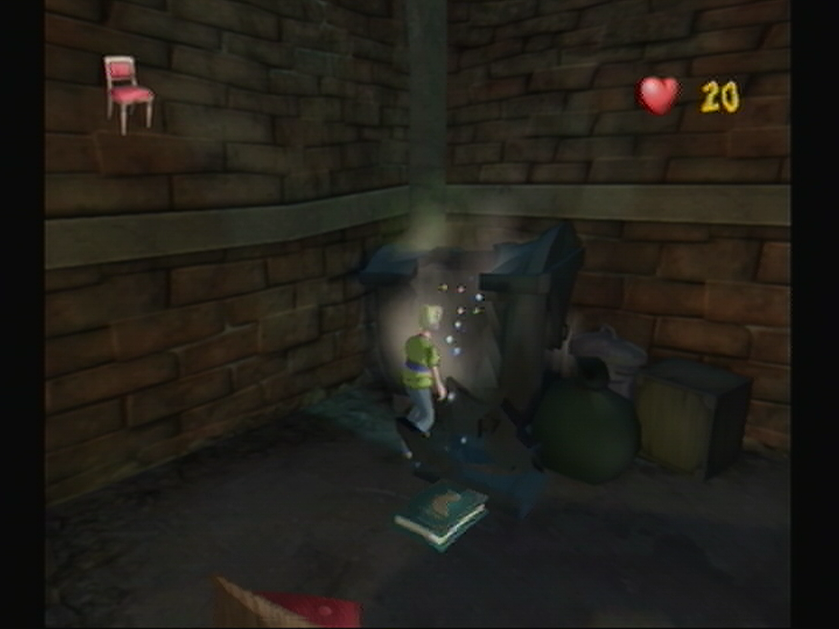
You’ll have hardly shaken the Reaper from your tail when you arrive in the Attic, as you’ll be given 45 seconds to make your escape before the Reaper is summoned once more. Make your way through the obstacles in your path with a little help from your Soda Pop Gun until you come up to a large purple treasure chest you’ll need to destroy to access the next area. Once you’ve destroyed it you should manage to spot a Sewing Machine in the center of the room ahead. If you look to the left of this machine you should spot the Bonus Book wedged in between the wall beam and a wooden cabinet shelf next to it.
[expand image]
BONUS BOOK 82
![]()
CHAPTER 3: SCENE 30: GRAND HALLWAY
You’ll be a little worse for wear as you emerge in the Grand Hallway with only a single unit of health, and to make matters worse you’ll find a trio of Skeleton Ghoulies looking to bash your head in with the objects they tout over their skulls. Luckily you’ll still be armed with Ol’ Edna, so make quick work of the Skeletons and then examine the area around the open door you’re supposed to enter. If you look carefully you’ll manage to spot a single vase to the right of the door, lead your eyes up from there and you’ll spot a Bust Sculpture in an alcove above. Take aim and fire at the Statue and you’ll reveal the Bonus Book inside.
[expand image]
BONUS BOOK 83
![]()
CHAPTER 3: SCENE 31: EXPERIMENTS CHAMBER
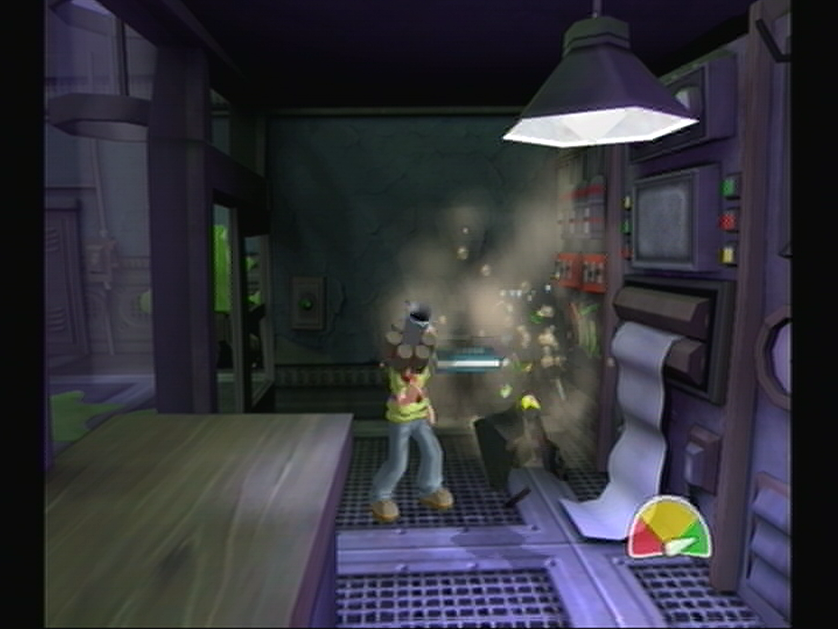
As you enter the Experiments Chamber you’ll likely take note of the deafeningly silent atmosphere; that’s because luckily the Experiments Chamber harbors a hiding Warlock, which means you shouldn’t run into any other Ghoulies afoot as you search for the Bonus Book. Work your way around the large table in the center of the room and you’ll spot a small area separated by a sheet of glass acting as the control room for the giant bloody laser. The second you pass through the entrance here you should spot a panel in front of you with a few red switches; give it a taste of Ol’ Edna and you’ll uncover the Bonus Book.
[expand image]
BONUS BOOK 84
![]()
CHAPTER 3: SCENE 32: KRACKPOTS LAB
After an extremely anticlimactic showdown that puts the plotting Dr. Krackpot in his underpants the twists are far from over as a trio of Jessie N’ Clydes are let loose in the laboratory. As you start off take note of where the Jessie N’ Clydes have begun their sleepwalking stampede and make an attempt to circle around the room – without getting mauled of course – to enter the room yourself. Once you’ve done that you should manage to spot a large refrigeration unit to the left the Jessie N Clydes were crammed inside of, if you get a better vantage point you’ll manage to spot the Bonus Book slanted against the interior.
[expand image]
BONUS BOOK 85
![]()
CHAPTER 3: SCENE 33: EXPERIMENTS CHAMBER
Unfortunately as you return to the Experiments Chamber with completed Rhyme in hand, it’s not quite as you left it when searching for Bonus Book 83 and has since been overrun by Skeleton Ghoulies armed to the teeth. You’ll find this Bonus Book inside the locker and the end of the table in the center which you’ll be able to see from the Control booth. If you’d like to wager an escape and try grabbing the Bonus Book from the locker before the Skeletons catch up then best of luck to you. You can also smash the control panel to the right in order to release friendly Ninja Imps to clear the area first.
[expand image]
BONUS BOOK 86
![]()
CHAPTER 3: SCENE 34: GRAND HALLWAY
While Crivens boldly tells you to beeline for the Barons’, it would be better to grab the Bonus Book first and save the chaotic confrontation for later. So long as you know where you’re going, this Bonus Book will prove to be quite simple to locate, though it is fiendishly hidden in its spot. From where you start off at the top of the stairs head right past the statue we previously knocked off for Bonus Book 82 and you’ll manage to see a large open door leading to a small area to your left when you reach the top of the stairs. Walk inside and then turn around and you’ll spot the Bonus Book hidden behind the door against the wall.
[expand image]
BONUS BOOK 87
![]()
CHAPTER 4: SCENE 1: THE BARON’S QUARTERS
While normally you would have to watch out for Ghoulies while exploring a room for a Bonus Book, this time you’ll only have to avoid the lashes of a middle aged man in his pajamas – improvement? Nonetheless, you’ll find the Bonus Book inside Baron Von Ghoul’s personal bathroom just to the left when you start up the battle. Walk through the curtains and you’ll come across a large bathtub surrounded by a few tables of commodities. Work your way around the tub to the left and you’ll spot a medicine cabinet in between a candle on the wall and a table in the corner. Smash it open and you’ll find the Bonus Book.
[expand image]
CHAPTER FIVE BONUS BOOKS
Notice: As previously stated, the easiest way to go about collecting the Bonus Books is to complete your campaign file first and then selecting the scene chapters for the Bonus Books you’ve missed. The rooms under Chapter 5: The Race are extremely time sensitive, and if you’re wasting time looking for Bonus Books you may not complete all the remaining thirteen rooms in time. If this occurs you will have to attempt Chapter 5 again until you’ve accessed all necessary rooms to find all 100 Bonus Books. To review, complete the Chapter as quickly as possible to find all thirteen rooms without looking for Bonus Books, then, when you’re finished utilize the Replay Scene option to find the Books without a time limit.
BONUS BOOK 88
![]()
CHAPTER 5: SCENE 1: GRAND HALLWAY
Starting from the Barons’ Quarters you’ll have to make your way over toward Mr. Ribs waiting on the right hand side of the Grand Hallway. As you emerge toward the hall you’ll spot a Turbo Cooper Super Soup Tin which you can utilize to get to Mr. Ribs a little bit more quickly. Make your way around the railing to the right and you’ll find Mr. Ribs waiting for you in front of the open door leading to the Bathroom, avoid stepping into the frame of the door and you’ll spot a large vase next to it. Smash the vase and you’ll expose the Bonus Book along with an unfavorable Soup Tin, avoid the latter and grab the Bonus Book.
[expand image]
BONUS BOOK 89
![]()
CHAPTER 5: SCENE 2: BATHROOM
After freeing the first of Baron Von Ghouls prisoners in the bathroom the large sudden burst of flatulence from the Bathroom stall should be enough to tell you that you’re not alone. After the Hunchback has revealed himself from around the stall you’ll be locked inside the room and forced to fight the freak. From where you start off inside the sauna room turn to the left and smash the large pane of glass to gain access to the bathroom. Take note of the large cabinet that Hunchy is standing in front of and work your way around the tub and smash said cabinet; inside you’ll find the Bonus Book.
[expand image]
BONUS BOOK 90
![]()
CHAPTER 5: SCENE 3: CONSERVATORY
While the timed nature of the following rooms robs us of Coopers nervous perspective that helped us locate Bonus Books before, the Conservatory camera will aid us as soon as Cooper walks through the door. As you enter the room and the words ‘Conservatory’ fade from view you should manage to spot an old garden bench directly across from Cooper blocked by a container of toys. As you start off you should manage to see the bench to the left along with a potted plant directly beside it. Walk past the container of toys to the bench and smash the pot to its left; you’ll find the Bonus Book inside.
[expand image]
BONUS BOOK 91
![]()
CHAPTER 5: SCENE 4: DUNFIDDLIN COTTAGE
Once you’ve found your way into Dunfiddlin Cottage you’ll need to find your way up the stairs to the loft to Mr. Ribs. While the bonehead is concerned with the boy trapped inside Fiddlesworths chest, we should focus on uncovering the Bonus Book which is admittedly made more challenging with the current rule against breaking anything in Dunfiddlin Cottage. Luckily we’ll grab the Bonus Book, which happens to be inside the large cabinet at the foot of Fiddlesworths bed, before the Reaper can ascend the steps toward us. Smash the cabinet, grab the Bonus Book and exit through the menu!
[expand image]
BONUS BOOK 92
![]()
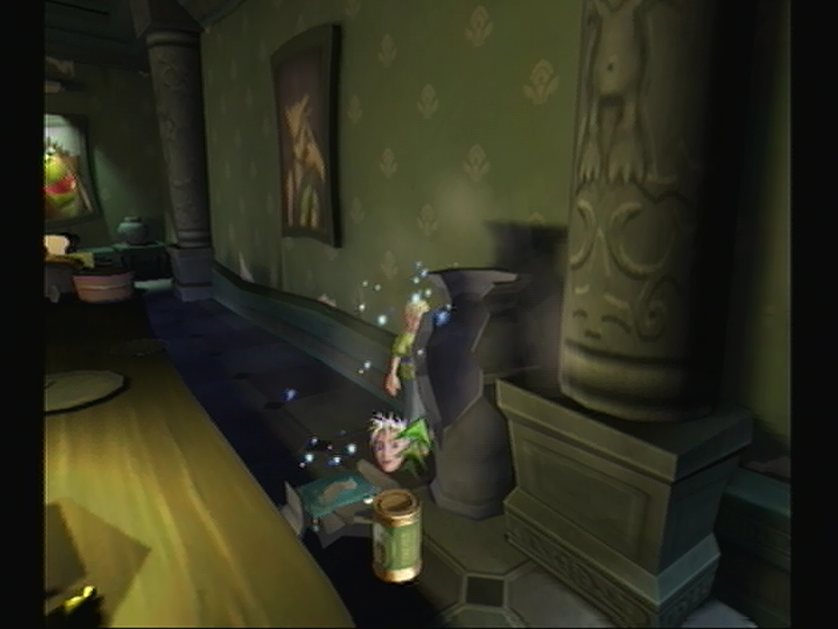
CHAPTER 1: SCENE 5: DINING ROOM
No longer overun by an army of unruly Zombie Pirates, the Dining Room will be much more tolerable when it comes to searching for the illusive Bonus Book, so long as you don’t approach Mr. Ribs to begin the challenge of course. From where you stand at the open door work your way to the right to avoid starting the challenge and weave through the tables until you arrive at the large table where the Pirate Captain was sitting during the events of Bonus Book 25. If you work your way around to the rear of the table you’ll spot a large vase next to a pillar; smash the vase open and you’ll find the Bonus Book hidden inside.
[expand image]
BONUS BOOK 93
![]()
CHAPTER 5: SCENE 6: PANTRY
You’ll have to tread carefully in the Pantry as there are several Super Shock Hands ready to hoist you into the air should you trespass over their territory. The best course of action to avoid tedium is to utilize the Shocker Blocker and Turbo Cooper Soup Tins found in the drawers of the low counter to your right. Once you’ve acquired the Tins, make your way to past Mr. Ribs and toward a Thorned Challenge Door in the next room to the left of the freezer. You’ll manage to spot a shelving unit next to the Thorned Challenge door in this area; give it a solid whack and you’ll find the Bonus Book hidden inside.
[expand image]
BONUS BOOK 94
![]()
CHAPTER 5: SCENE 7: RELIC STORE
Once again you’ll need to avoid catching up to Mr. Ribs, otherwise you’ll start up a challenge which hinders your search for the Bonus Book. Instead, as you start off you should manage to spot a Thorned Challenge door on the right side of the room, nearly obscured by a swinging light bulb directly behind you. Make your way over to the Thorned Challenge Door by passing through passage of crates and you’ll manage to spot two Sarcophagus’ to the right. Across from the second Sarcophagus you’ll find a third just left of the Thorned Challenge Door; hidden inside you’ll find the Bonus Book.
[expand image]
BONUS BOOK 95
![]()
CHAPTER 5: SCENE 8: LAUNDRY
You’ll have no choice but to approach Mr. Ribs in the Laundry Room as you’ll be unable to pass without bumping shoulders with him. While this will begin a challenge, you’ll have to expose the assailant Ghoulies by destroying the objects in the room they happen to be hiding inside, much like you’d go about finding a Warlock. From here walk toward the first section of washing machines to your right and should manage to spot a round empty basket atop the washing machine in the center; send your legs into a spin cycle with a solid kick to the washing machine door and you’ll find the Bonus Book hidden inside.
[expand image]
BONUS BOOK 96
![]()
CHAPTER 5: SCENE 9: WALLED GARDEN
To start things off on the right foot in the Walled Garden you’ll be faced in the wrong direction to find the Bonus Book, so take the time to manipulate the camera a bit to the right and you should spot a large window where you’ll need to travel toward. Once you’ve done that you’ll need to head toward the patio where we found Bonus Book 44 and then travel along the outer wall that forms the perimeter of the Garden. As you’re about the reach the corner across from the patio you’ll spot a Turbo Cooper Tin next to a collection of small pots. Wander over and smash the pots to reveal the hidden Bonus Book inside.
[expand image]
BONUS BOOK 97
![]()
CHAPTER 5: SCENE 10: CINEMA
As we near the end of our Bonus Book collection it’s becoming evident that the difficulty of the later Books doesn’t quite hold its weight, especially with the following Bonus Book in the Cinema. As you start off you’ll find Mr. Ribs gleefully waiting in the projection room to free the next prisoner, and much like the room previous you’ll be given the courtesy of facing the wrong direction to lead you astray. Turn to the left completely and you’ll end up spotting the large bookshelf with a small table next to it housing a small vase. Smash the vase and you’ll find the Bonus Book that was hidden inside.
[expand image]
BONUS BOOK 98

![]()
CHAPTER 5: SCENE 11: LOWER CORRIDORS
You’ll be in store for a rather rigorous runabout in the Lower Corridors as you search for the last Bonus Book which is found at the very end of the lengthy hall. Start things off with a solid sprint and you’ll manage to weave around the standard Ghoulies such as the group of Haunted Chairs and Portraits, so long as you keep moving they shouldn’t catch up. Once you’ve found your way to a Telephone atop a table in the final stretch you’ll be in store for a Super Scary Shock; escape the radius and you’ll spot a large vase between the open door and a Thorned Challenge Door. Break open the vase and you’ll find the Bonus Book inside.
[expand image]
BONUS BOOK 99
![]()
CHAPTER 5: SCENE 12: GRAND HALLWAY
Nearly there yet, just need to sneak past several patrolling Medusas all within close proximity of the Bonus Book, no pressure or anything. If you move around the stairs to the other bookshelf parallel to the one you stand in front of right now you’ll spot a blue vase in the corner of the uncompleted hallway that offers up an Invisibility Soup Tin inside. Render yourself invisible and travel toward Mr. Ribs taking care not to get too close and you should spot a portrait of Ghoulhaven Hall to the left with a vase on a table directly underneath it. Smash open the vase and you’ll find the 99th Bonus Book inside.
[expand image]
BONUS BOOK 100
![]()
CHAPTER 5: SCENE 13: FRONT GATE
You won’t find any Ghoulies to hinder your progress at the Front Gate, as long as you don’t bump into Mr. Ribs near the doghouse to the left you’ll keep it that way. From where you stand you’ll need to head around the small shrubs to your right that surround the statue of Baron Von Ghoul and you should manage to spot a second doghouse that parallels the one Mr. Ribs stands at across the yard. Venture towards it and turn to your left as you reach the doghouse door and you’ll spot a dogs dish hidden behind a wrought-iron fence. Clamber into the dogs bowl and you’ll manage to fetch the last Bonus Book of the game!
[expand image]
Now that you’ve managed to collect all 100 hidden Bonus Books in Grabbed by the Ghoulies you’ll have unlocked all 20 of the Bonus Challenges in the Features Menu. From here you’ll be able to complete each timed Bonus challenge for a ranking of bronze, silver or gold completion with a chance at the illusive Platinum ranking if you beat the challenge throughly enough. For each Platinum Medal you’ll earn a page of your own Bonus Book to be displayed in the Gallery, which showcases a ton of insider development images for the game!