Chapter 3-5: Method to the Madness


Navigation:
Chapter 1: The Rescue
Chapter 2: The Restoration
Chapter 3: The Riddle
-3-1: Fetching up the First Verse
-3-2: Second Stanza in the Stables
-3-3: Well Versed in Backtracking
-3-4: Don’t Fear the Reaper
-3-5: Method to the Madness
-3-6: Requisite for a Reckoning
Chapter 4: The Reckoning
Chapter 5: The Race
THE DERANGED DOCTOR WILL SEE YOU NOW…
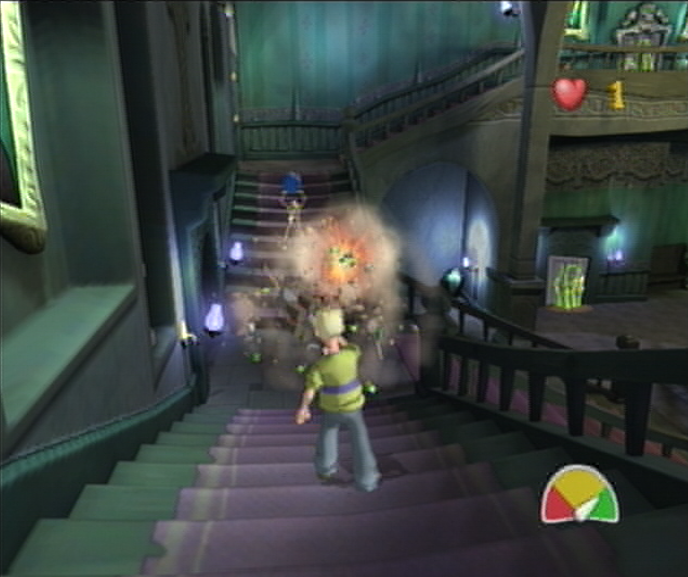
![]() With the events in the Attic behind us, we can get back on track to collecting the final part of the rhyme, which if you can recall, Crivens said was behind held inside Dr. Krackpots’ Ghouly-making Laboratory. Luckily our latest brush in with the Grim Reaper has seen us to the Grand Hallway where the Lab is a stones throw away, though the journey is hindered somewhat by the trio of Skeletons that have made an impromptu entrance on the opposite end of the Hall. From where you start off, descend the first set of steps and then stand where it levels off in front of the barred door. You’ll need to pick off the Skeletons with your Soda Pop gun from afar, they’ll go down easily enough with a single hit, but given your current health the same rules apply to you as well. It can be a little difficult to aim downward here, so keep your finger on the trigger until you send the Skeletons into pieces. Once you’ve managed to defeat the trio, we’ll carry on into the central doorway to the left.
With the events in the Attic behind us, we can get back on track to collecting the final part of the rhyme, which if you can recall, Crivens said was behind held inside Dr. Krackpots’ Ghouly-making Laboratory. Luckily our latest brush in with the Grim Reaper has seen us to the Grand Hallway where the Lab is a stones throw away, though the journey is hindered somewhat by the trio of Skeletons that have made an impromptu entrance on the opposite end of the Hall. From where you start off, descend the first set of steps and then stand where it levels off in front of the barred door. You’ll need to pick off the Skeletons with your Soda Pop gun from afar, they’ll go down easily enough with a single hit, but given your current health the same rules apply to you as well. It can be a little difficult to aim downward here, so keep your finger on the trigger until you send the Skeletons into pieces. Once you’ve managed to defeat the trio, we’ll carry on into the central doorway to the left.
EXPERIMENTS CHAMBER
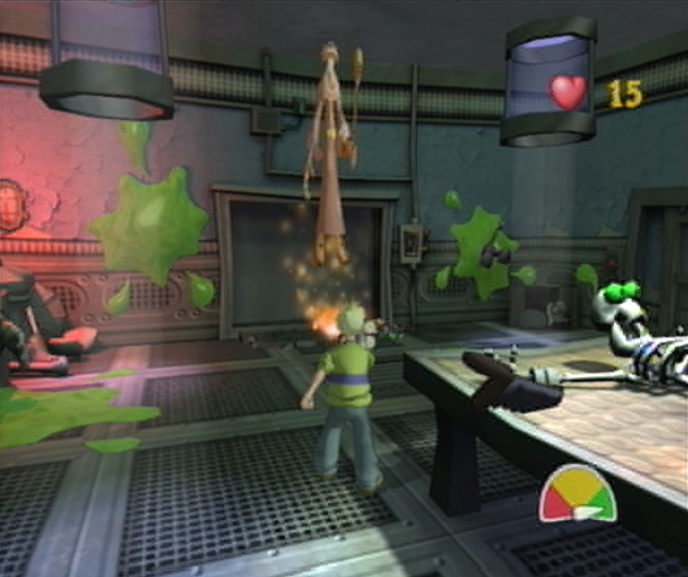
![]() The Experiments Chamber is host to yet another hidden Warlock, who has taken to hiding in the large section of lockers on the opposite side of the room. Fire a well placed shot over to the lockers and you’ll expose your Warlock. Since you’ll only be allotted a few seconds to defeat the Warlock, there’s a little trick you can exploit to be quick on the draw. There are only three places that the Warlock can appear; one being inside the windowed control room, the second being just outside the window next to a medical trolley, and finally from where you started from in front of the door to the Grand Hallway. Pay close attention to the scene that plays when the Challenge presents itself and you’ll see that the angle focuses on the inside of the control booth and the medical trolley. If the Warlock isn’t in either of these areas, it means he’s standing at the Grand Hallway door. Once you’ve regained control, spin around to the Warlocks position and take him out with two quick shots.
The Experiments Chamber is host to yet another hidden Warlock, who has taken to hiding in the large section of lockers on the opposite side of the room. Fire a well placed shot over to the lockers and you’ll expose your Warlock. Since you’ll only be allotted a few seconds to defeat the Warlock, there’s a little trick you can exploit to be quick on the draw. There are only three places that the Warlock can appear; one being inside the windowed control room, the second being just outside the window next to a medical trolley, and finally from where you started from in front of the door to the Grand Hallway. Pay close attention to the scene that plays when the Challenge presents itself and you’ll see that the angle focuses on the inside of the control booth and the medical trolley. If the Warlock isn’t in either of these areas, it means he’s standing at the Grand Hallway door. Once you’ve regained control, spin around to the Warlocks position and take him out with two quick shots.
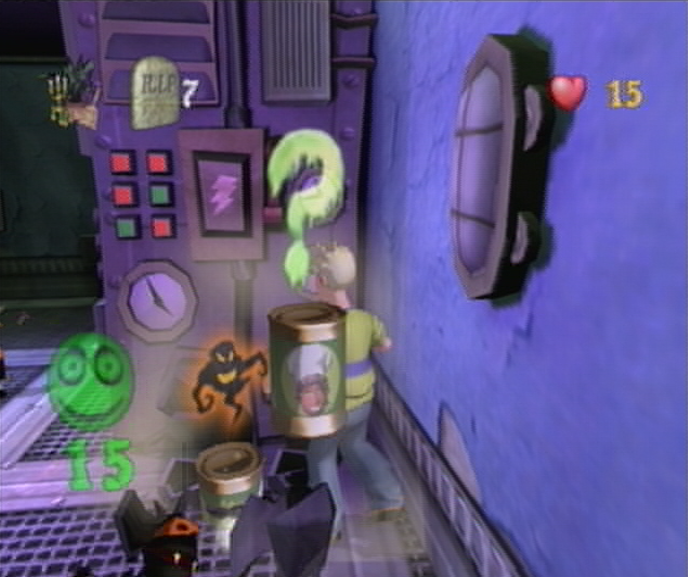
![]() After you’ve managed to defeat the Warlock, the Challenge Door will unlock inside the control booth as Babs Buffbrass shambles through the frame. Make your way through the entrance of the control booth and then approach Babs to get a stern talking-to. “That’s quite enough mess yer’ve made in ‘ere!“, The housekeeper trills as she takes in the damage before settling on your Soda Pop gun. “I don’t care what that Mr. Crivens says no more, I’m takin’ that thing back! Gimme it!”. Without a weapon we’ll have to carry on through the Challenge Door ahead, to which the door will slam in defiance, tasking us with a second more difficult challenge. Rather than defeating eight needless Ghoulies however, you’ll find a quicker solution if you turn around towards an Unfavorable Soup Tin in front of the large machine. Work your way around the Tin and kick in the piping closest to the wall to reveal a hidden Challenge Solved! Soup Tin. Collect it and then escape through the open Challenge Door.
After you’ve managed to defeat the Warlock, the Challenge Door will unlock inside the control booth as Babs Buffbrass shambles through the frame. Make your way through the entrance of the control booth and then approach Babs to get a stern talking-to. “That’s quite enough mess yer’ve made in ‘ere!“, The housekeeper trills as she takes in the damage before settling on your Soda Pop gun. “I don’t care what that Mr. Crivens says no more, I’m takin’ that thing back! Gimme it!”. Without a weapon we’ll have to carry on through the Challenge Door ahead, to which the door will slam in defiance, tasking us with a second more difficult challenge. Rather than defeating eight needless Ghoulies however, you’ll find a quicker solution if you turn around towards an Unfavorable Soup Tin in front of the large machine. Work your way around the Tin and kick in the piping closest to the wall to reveal a hidden Challenge Solved! Soup Tin. Collect it and then escape through the open Challenge Door.
DR. KRACKPOTS’ CRACK SHOT BACKFIRES
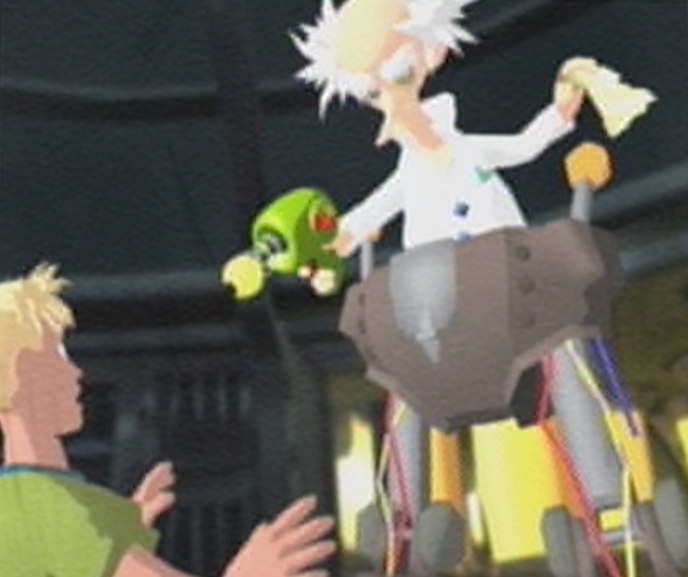
![]() Creeping around the large frothing test tubes, Cooper works his way into the dormant laboratory that supposedly houses the final piece of the sought-after rhyme. Before he’s gotten a chance to look around however, a large pair of robotic legs drop from the ceiling, catching Cooper by surprise. “Looking for this, are you little man?” Krackpot jeers as he holds the final piece of the Riddle above his head, “C’mon, take it then! I haven’t got all day!” As Krackpot waves the Riddle tauntingly out of reach, Cooper edges as close as possible before making a desperate jump, which fails to meet its mark as the poor lad drops to the floor below. As Cooper picks himself up, Krackpot quickly draws his Ghoulification Ray and takes aim, “This is all you’ll be getting from me!” the Doctor sneers as he cranks the Ghouly meter to full power, threatening to turn Cooper into an Ogre like Amber! In a last-ditch effort Cooper attempts to block the barrel with his finger as he braces for impact…
Creeping around the large frothing test tubes, Cooper works his way into the dormant laboratory that supposedly houses the final piece of the sought-after rhyme. Before he’s gotten a chance to look around however, a large pair of robotic legs drop from the ceiling, catching Cooper by surprise. “Looking for this, are you little man?” Krackpot jeers as he holds the final piece of the Riddle above his head, “C’mon, take it then! I haven’t got all day!” As Krackpot waves the Riddle tauntingly out of reach, Cooper edges as close as possible before making a desperate jump, which fails to meet its mark as the poor lad drops to the floor below. As Cooper picks himself up, Krackpot quickly draws his Ghoulification Ray and takes aim, “This is all you’ll be getting from me!” the Doctor sneers as he cranks the Ghouly meter to full power, threatening to turn Cooper into an Ogre like Amber! In a last-ditch effort Cooper attempts to block the barrel with his finger as he braces for impact…
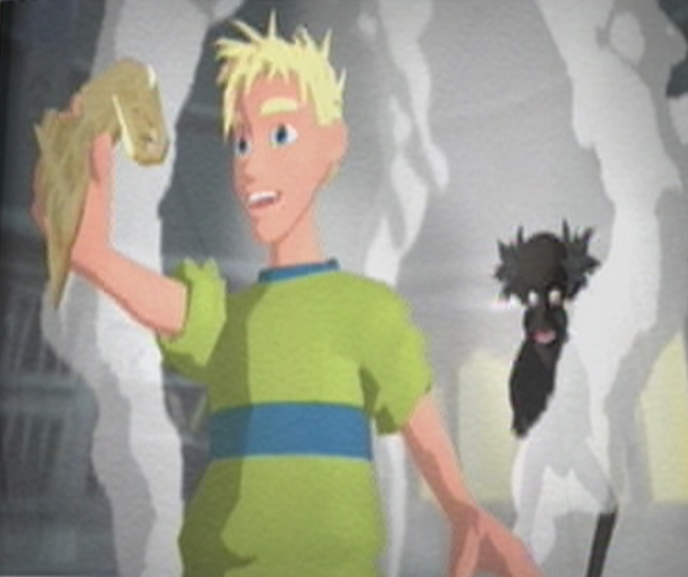
![]() As Krackpot squeezes the trigger to his Ghoulification Ray, Coopers finger effectively blocks the firing mechanism, and as a result the deafening explosion fills the laboratory with a brilliant white light. As the smoke settles it becomes clear that the damage wasn’t restricted to just the Ghoulification chamber, as a pantsless Dr. Krackpot has found himself amongst a pile of what used to be his robotic legs. “What the…!?“, Krackpot begins as he tries to take it all in, “That’s quite a design flaw! Er, back to the drawing board, methinks!!” As an unscathed Cooper stands dauntingly above the the frame of the charred Doctor, their vision settles on the final piece of the Riddle, which has remained miraculously unaffected by the explosion. “Here boy, take the paper! It’s the least of my worries! Just don’t tell anyone what happened!” Cooper snatches the page from Krackpots hand as the ashamed quack slinks off without his dignity. That’s it, the Riddle is complete once more!
As Krackpot squeezes the trigger to his Ghoulification Ray, Coopers finger effectively blocks the firing mechanism, and as a result the deafening explosion fills the laboratory with a brilliant white light. As the smoke settles it becomes clear that the damage wasn’t restricted to just the Ghoulification chamber, as a pantsless Dr. Krackpot has found himself amongst a pile of what used to be his robotic legs. “What the…!?“, Krackpot begins as he tries to take it all in, “That’s quite a design flaw! Er, back to the drawing board, methinks!!” As an unscathed Cooper stands dauntingly above the the frame of the charred Doctor, their vision settles on the final piece of the Riddle, which has remained miraculously unaffected by the explosion. “Here boy, take the paper! It’s the least of my worries! Just don’t tell anyone what happened!” Cooper snatches the page from Krackpots hand as the ashamed quack slinks off without his dignity. That’s it, the Riddle is complete once more!
KRACKPOT’S LAB
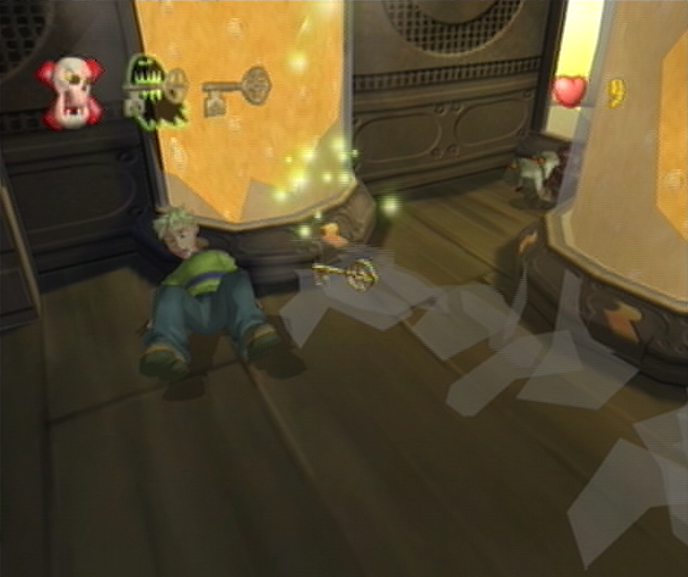
![]() Unfortunately we’re still left to contend with the challenge found in Krackpot’s Lab before making our escape, and it’s quite a difficult one at that. Three Jessie N’ Clydes will be roaming the floor, and so long as you don’t accidentally wake them up you shouldn’t have to deal with them at all. Adding onto the challenge, you’ll be tasked with finding two keys that are hidden in the room; one inside a Ghouly and the other inside one of the frothing tubes at in front of the Challenge Door. As you start off, spin around on the spot and you’ll spot the tubes directly behind you, you’ll have to crack open each tube individually; if you expose any Worms in the process you’ll have to deal with them before looking in another tube. Once you’ve managed to find the proper tube harboring the key we’ll carry out onto the floor and follow the caged wall to the right. Once you’ve reached the halfway point you’ll should spot an open iron door in front of a control panel on wheels.
Unfortunately we’re still left to contend with the challenge found in Krackpot’s Lab before making our escape, and it’s quite a difficult one at that. Three Jessie N’ Clydes will be roaming the floor, and so long as you don’t accidentally wake them up you shouldn’t have to deal with them at all. Adding onto the challenge, you’ll be tasked with finding two keys that are hidden in the room; one inside a Ghouly and the other inside one of the frothing tubes at in front of the Challenge Door. As you start off, spin around on the spot and you’ll spot the tubes directly behind you, you’ll have to crack open each tube individually; if you expose any Worms in the process you’ll have to deal with them before looking in another tube. Once you’ve managed to find the proper tube harboring the key we’ll carry out onto the floor and follow the caged wall to the right. Once you’ve reached the halfway point you’ll should spot an open iron door in front of a control panel on wheels.

![]() Inside the straw laden cage, you should manage to spot a large wooden crate directly across from a toilet. If you investigate behind this crate you’ll find a spot where the bars have been pried open, granting us access to a Traitor Fever! and Invulnerability! Soup Tin. Let’s scoop them up quickly and then work our way back out to the front of the cage. Now that you’re back in the main chamber, you should manage to spot number of small cages and a bookshelf next to the entrance of the bathroom. Kicking in the thinnest cage door closest to the bathroom will expose a Skeleton that will want to join the traitorous fray, cut him off at the pass and start chipping away at his energy as quickly as possible. As you might possibly be aware from the leftmost icon at the top of your screen, defeating any Skeletons is against the rules, but if you hope to escape Krackpot’s Lab we’ll require assistance from the Grim Reaper himself, who we’ve just spent the last few rooms trying to avoid.
Inside the straw laden cage, you should manage to spot a large wooden crate directly across from a toilet. If you investigate behind this crate you’ll find a spot where the bars have been pried open, granting us access to a Traitor Fever! and Invulnerability! Soup Tin. Let’s scoop them up quickly and then work our way back out to the front of the cage. Now that you’re back in the main chamber, you should manage to spot number of small cages and a bookshelf next to the entrance of the bathroom. Kicking in the thinnest cage door closest to the bathroom will expose a Skeleton that will want to join the traitorous fray, cut him off at the pass and start chipping away at his energy as quickly as possible. As you might possibly be aware from the leftmost icon at the top of your screen, defeating any Skeletons is against the rules, but if you hope to escape Krackpot’s Lab we’ll require assistance from the Grim Reaper himself, who we’ve just spent the last few rooms trying to avoid.
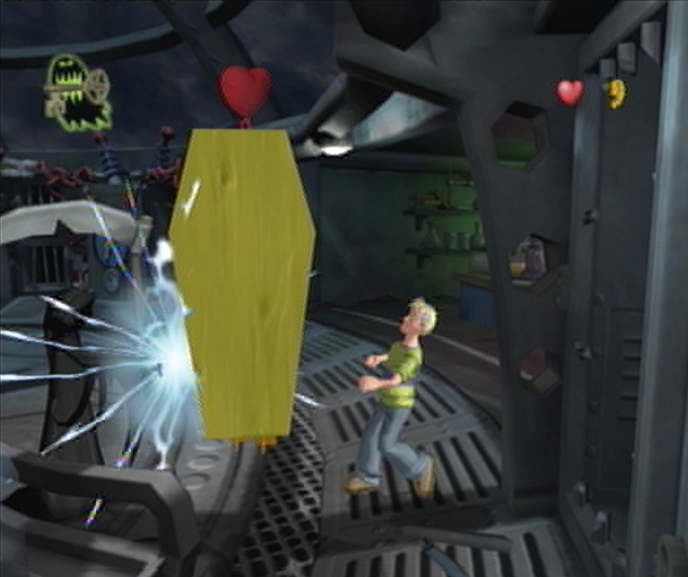
![]() After you’ve managed to defeat the Skeleton you’ll hear the tell-tale toll of the Reapers arrival. If you spin around on the spot from where you uncovered the Skeleton initially you’ll spot an area just across the room that houses a large table cluttered with scientific equipment. You’ll need to rush over to this spot and then break open another thin cage that can be found just to the right of this room, just around the corner from the Periodic Table of the Elements chart. Doing so will uncover the Vampire we’ll need to defeat for the Ghouly Key. Unfortunately without Ol’ Edna by our side, we have no way of getting through the Vampire’s coffin; that’s what the Reaper is for! If you can, try and keep the Vampire still by initiating an attack first and then hiding behind the coffin so that the Reaper raises his hand and touches petrified wood. Once the Vampire is defeated, avoid the Reaper and make your way to where we found the Worms to escape through the Challenge Door.
After you’ve managed to defeat the Skeleton you’ll hear the tell-tale toll of the Reapers arrival. If you spin around on the spot from where you uncovered the Skeleton initially you’ll spot an area just across the room that houses a large table cluttered with scientific equipment. You’ll need to rush over to this spot and then break open another thin cage that can be found just to the right of this room, just around the corner from the Periodic Table of the Elements chart. Doing so will uncover the Vampire we’ll need to defeat for the Ghouly Key. Unfortunately without Ol’ Edna by our side, we have no way of getting through the Vampire’s coffin; that’s what the Reaper is for! If you can, try and keep the Vampire still by initiating an attack first and then hiding behind the coffin so that the Reaper raises his hand and touches petrified wood. Once the Vampire is defeated, avoid the Reaper and make your way to where we found the Worms to escape through the Challenge Door.
EXPERIMENTS CHAMBER
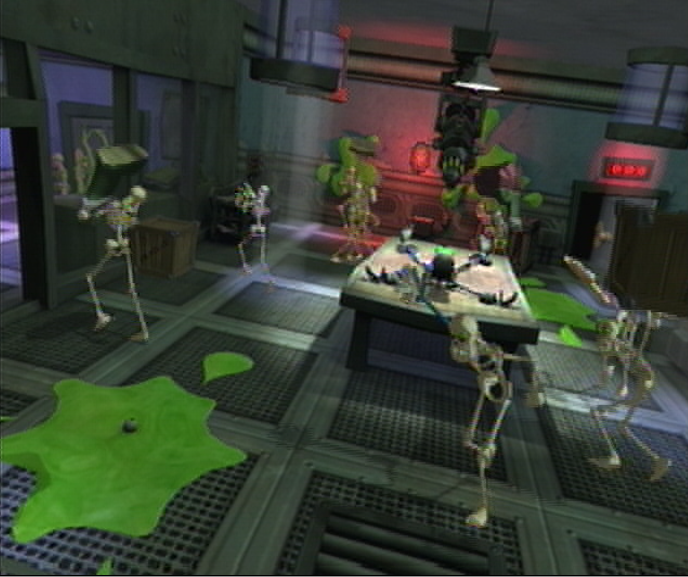
![]() Now that you’ve left the Laboratory behind, it’s time to get on track with reading the restored rhyme aloud and begin the reckoning with Baron Von Ghoul himself. Unfortunately, the Experiments Chamber has become overrun with a gangly gang of Skeletons, each wielding their own unique weapon for some revenge against Cooper. Since you’ve only started off in the Experiments Chamber with 10 health, it would be foolish to wander out on the floor unarmed to start fighting back or risking an escape, as doing so will jeopardize your Times Fainted standing, something you’ll want to avoid so near to the end of the game. Instead, you’ll have to stick back in the control room where you’ll view the action from afar, protected from a thick pane of glass. If you’d like, you can increase your energy by 5 if you wander to the rear of the machine closest to the Challenge Door and kick in the vent that housed our Challenge Solved! Soup Tin the last time we came through here.
Now that you’ve left the Laboratory behind, it’s time to get on track with reading the restored rhyme aloud and begin the reckoning with Baron Von Ghoul himself. Unfortunately, the Experiments Chamber has become overrun with a gangly gang of Skeletons, each wielding their own unique weapon for some revenge against Cooper. Since you’ve only started off in the Experiments Chamber with 10 health, it would be foolish to wander out on the floor unarmed to start fighting back or risking an escape, as doing so will jeopardize your Times Fainted standing, something you’ll want to avoid so near to the end of the game. Instead, you’ll have to stick back in the control room where you’ll view the action from afar, protected from a thick pane of glass. If you’d like, you can increase your energy by 5 if you wander to the rear of the machine closest to the Challenge Door and kick in the vent that housed our Challenge Solved! Soup Tin the last time we came through here.
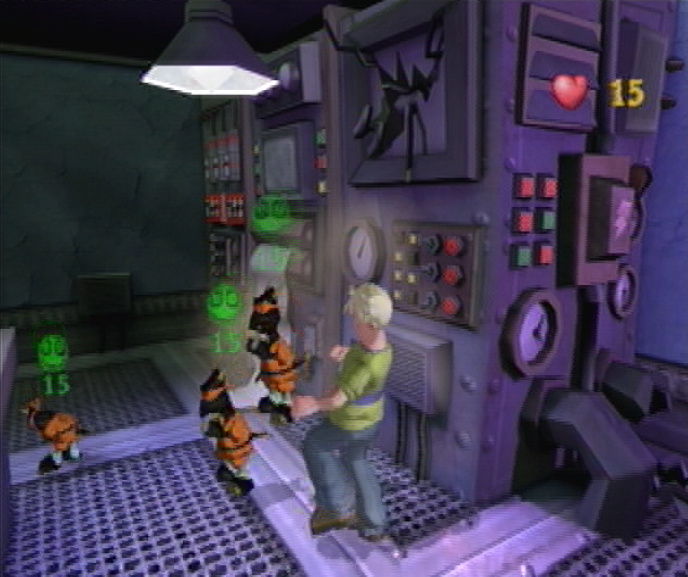
![]() While we’re in the habit of smashing in the Control Room machine, you’ll find the solution to the current problem at hand on the front panel. Without getting too close to the doorway, approach the corner of the machine and you should spot a broken television screen with a clock directly underneath it. Deliver a swift kick to the ventilation shaft just below this clock and you’ll unleash a trio of Traitorous Ninja Imps – just what we need to clear out the room! Once the Ninja Imps have run out, you’re free to watch from the Control Room as they take the room back. You’ll need to exhibit real patience for this room; if you run out too early you’ll be dealt with rather quickly, so just sit back, grab a stool in case you get some unwanted intruders from the doorway, and wait it out. Once the Ninja Imps have reduced the ranks to at least two Skeletons without any throwable weapons, you’ll want to keep the Imps on your side before they turn and run towards the exit.
While we’re in the habit of smashing in the Control Room machine, you’ll find the solution to the current problem at hand on the front panel. Without getting too close to the doorway, approach the corner of the machine and you should spot a broken television screen with a clock directly underneath it. Deliver a swift kick to the ventilation shaft just below this clock and you’ll unleash a trio of Traitorous Ninja Imps – just what we need to clear out the room! Once the Ninja Imps have run out, you’re free to watch from the Control Room as they take the room back. You’ll need to exhibit real patience for this room; if you run out too early you’ll be dealt with rather quickly, so just sit back, grab a stool in case you get some unwanted intruders from the doorway, and wait it out. Once the Ninja Imps have reduced the ranks to at least two Skeletons without any throwable weapons, you’ll want to keep the Imps on your side before they turn and run towards the exit.