Chapter 3-4: Don’t Fear the Reaper


Navigation:
Chapter 1: The Rescue
Chapter 2: The Restoration
Chapter 3: The Riddle
-3-1: Fetching up the First Verse
-3-2: Second Stanza in the Stables
-3-3: Well Versed in Backtracking
-3-4: Don’t Fear the Reaper
-3-5: Method to the Madness
-3-6: Requisite for a Reckoning
Chapter 4: The Reckoning
Chapter 5: The Race
CHEATING DEATH AND AVOIDING A GRIM FATE
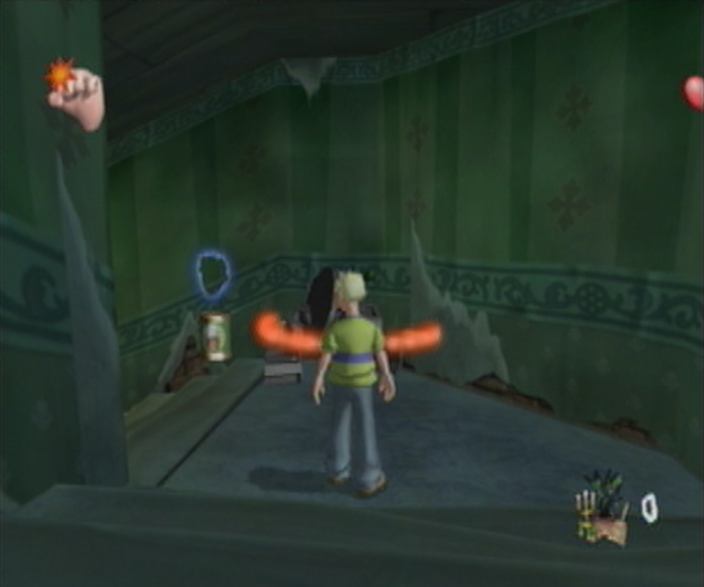
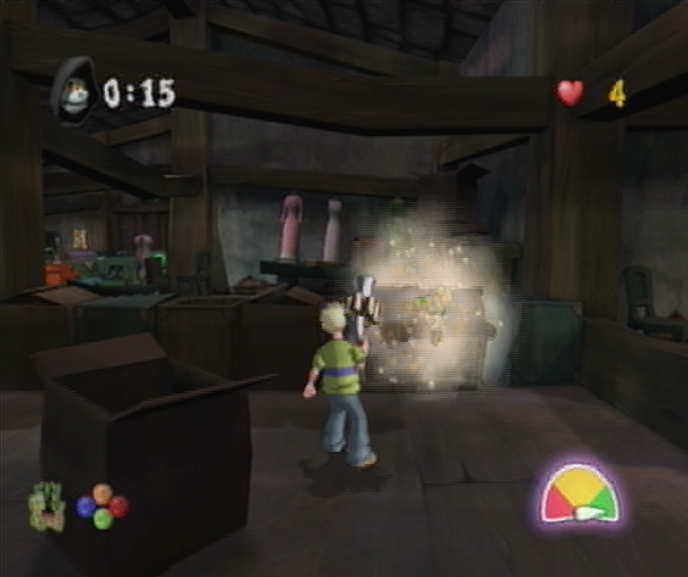
![]() Right, the following rooms can be particularity difficult in that you’ll be constantly evading the Grim Reaper, and the Laundry Room is no different. The challenge for this room will have you seeking out a Warlock and then defeating him without taking a single instance of damage, which can be quite tricky. From where you start off, ignore the hampers located at the bottom of the stairs in this area and instead ascend toward the main Laundry room, from here we’ll make our way to the rows of Washing Machines in the center. You’ll need all the help you can get here, and fortunately you’ll manage to find several Super Soups inside each Washing Machine, which can be coaxed out with a quick kick to their respective doors. We’ll leave the newly discovered Super Soups by the wayside and start breaking the hampers around the room in hopes of revealing the Warlock. If you stumble across any other Ghouly be sure to deal with them quickly before moving on to the next hamper.
Right, the following rooms can be particularity difficult in that you’ll be constantly evading the Grim Reaper, and the Laundry Room is no different. The challenge for this room will have you seeking out a Warlock and then defeating him without taking a single instance of damage, which can be quite tricky. From where you start off, ignore the hampers located at the bottom of the stairs in this area and instead ascend toward the main Laundry room, from here we’ll make our way to the rows of Washing Machines in the center. You’ll need all the help you can get here, and fortunately you’ll manage to find several Super Soups inside each Washing Machine, which can be coaxed out with a quick kick to their respective doors. We’ll leave the newly discovered Super Soups by the wayside and start breaking the hampers around the room in hopes of revealing the Warlock. If you stumble across any other Ghouly be sure to deal with them quickly before moving on to the next hamper.
![]() Once you’ve managed to expose the Warlock, make a beeline for the Turbo Cooper! and Miniature Cooper! Tins, all while keeping an eye out for any stray spells that pose a threat. Use your increased speed to rush the Warlock as soon as he’s appeared; you’ll really need to judge your distance properly, as giving the Warlock too much time to react will have you on the receiving end of a spell. Don’t hog the Warlock all to yourself either, it’s a good plan to send in your minions by picking up the Miniature Cooper! Tins where you won’t risk getting hit yourself. If you can manage to get a breath in during this insanity, head towards the long laundry hamper to the right of the Challenge door. Sink your foot into the side of the hamper and your efforts will be rewarded with a collection of bottles and toilet paper that spill out onto the ground ahead, which you can use to make quick work of the Warlock. Once that’s managed, carry on through the exit.
Once you’ve managed to expose the Warlock, make a beeline for the Turbo Cooper! and Miniature Cooper! Tins, all while keeping an eye out for any stray spells that pose a threat. Use your increased speed to rush the Warlock as soon as he’s appeared; you’ll really need to judge your distance properly, as giving the Warlock too much time to react will have you on the receiving end of a spell. Don’t hog the Warlock all to yourself either, it’s a good plan to send in your minions by picking up the Miniature Cooper! Tins where you won’t risk getting hit yourself. If you can manage to get a breath in during this insanity, head towards the long laundry hamper to the right of the Challenge door. Sink your foot into the side of the hamper and your efforts will be rewarded with a collection of bottles and toilet paper that spill out onto the ground ahead, which you can use to make quick work of the Warlock. Once that’s managed, carry on through the exit.
SERVANTS’ DORMITORIES
![]() The Servant’s Dormitories is arguably the most difficult room in all of Grabbed by the Ghoulies, and for good reason as well; the large spanning section of Ghoulhaven Hall features an abundance of Ghoulies including three separate Jessie N’ Clydes. If you run into the action blindly, it’s likely that you’ll send a running total of your Times Fainted as you’ll only be alloted 20 health, which the Jessie N’ Clydes can polish off in four throws. Instead, we’ll need to have stealthiness a prerogative – and what better way to slip through the cracks than grabbing an Invisibility! Tin straight off? If you focus your attention to your immediate right, you should notice a single trashcan inside an alcove. You’ll have to trust us that there’s an Invisibility Tin! inside, but for the time being you’ll have to hoist it over your shoulders and carry it through the Servants Dormitories until you’re ready to use it. You’ll come across your first obstacle ahead; a single Jessie N’ Clyde traipsing about the area.
The Servant’s Dormitories is arguably the most difficult room in all of Grabbed by the Ghoulies, and for good reason as well; the large spanning section of Ghoulhaven Hall features an abundance of Ghoulies including three separate Jessie N’ Clydes. If you run into the action blindly, it’s likely that you’ll send a running total of your Times Fainted as you’ll only be alloted 20 health, which the Jessie N’ Clydes can polish off in four throws. Instead, we’ll need to have stealthiness a prerogative – and what better way to slip through the cracks than grabbing an Invisibility! Tin straight off? If you focus your attention to your immediate right, you should notice a single trashcan inside an alcove. You’ll have to trust us that there’s an Invisibility Tin! inside, but for the time being you’ll have to hoist it over your shoulders and carry it through the Servants Dormitories until you’re ready to use it. You’ll come across your first obstacle ahead; a single Jessie N’ Clyde traipsing about the area.
![]() You’ll have to plan your route so that you manage to catch the Jessie N’ Clyde by surprise as you charge by, otherwise there’s a higher chance of being grabbed by this Ghouly. Try to plan it so that the Jessie N’ Clyde is far enough away that you’ll manage to escape the vicinity before it has time to react. So long as you manage to keep sprinting at full speed you’ll manage to pass it every time – don’t slow up for a second! Once you’ve managed that have to take a wide berth when you pass the closet in the tiny area ahead, and get nearest the red chest rather than the green to avoid startling Cooper. A Jessie N’ Clyde waits for us on the next floor, so we’ll ascend the stairs and do our best to avoid a confrontation; watch out for the Haunted Portrait around the table as you veer off to the right and then make your way past the tables and up the final set of stairs. Herein lies our last challenge, avoiding just one last Jessie N’ Clyde in these cramped quarters and then making our escape!
You’ll have to plan your route so that you manage to catch the Jessie N’ Clyde by surprise as you charge by, otherwise there’s a higher chance of being grabbed by this Ghouly. Try to plan it so that the Jessie N’ Clyde is far enough away that you’ll manage to escape the vicinity before it has time to react. So long as you manage to keep sprinting at full speed you’ll manage to pass it every time – don’t slow up for a second! Once you’ve managed that have to take a wide berth when you pass the closet in the tiny area ahead, and get nearest the red chest rather than the green to avoid startling Cooper. A Jessie N’ Clyde waits for us on the next floor, so we’ll ascend the stairs and do our best to avoid a confrontation; watch out for the Haunted Portrait around the table as you veer off to the right and then make your way past the tables and up the final set of stairs. Herein lies our last challenge, avoiding just one last Jessie N’ Clyde in these cramped quarters and then making our escape!
![]() The stairways leading up to their respective areas can work quite well as boundaries to keep the Jessie N Clydes at bay; if you carry on up the stairs as you’re pursued you’ll find it works similar to the trick we exploited back in the Farm Yard. Once you’re ready to explore further, wait until the next Jessie N Clyde is out of sight before venturing toward the bunk beds. If you snap your attention to the immediate left here you should spot a changing room panel that divides the room ahead, which is likely where your Jessie N Clyde will be found. Luckily we won’t have to pass through the center, as there’s a thin gap between the changing panel and the wall to the right which you can find by squeezing between the changing room panel and the triple bunk bed that scrapes the roof. Carry on to the right from here and then toss the trashcan against the wall up ahead. Without getting too close to the Challenge Door, pick up the Invisibility! Tin and then make your daring escape!
The stairways leading up to their respective areas can work quite well as boundaries to keep the Jessie N Clydes at bay; if you carry on up the stairs as you’re pursued you’ll find it works similar to the trick we exploited back in the Farm Yard. Once you’re ready to explore further, wait until the next Jessie N Clyde is out of sight before venturing toward the bunk beds. If you snap your attention to the immediate left here you should spot a changing room panel that divides the room ahead, which is likely where your Jessie N Clyde will be found. Luckily we won’t have to pass through the center, as there’s a thin gap between the changing panel and the wall to the right which you can find by squeezing between the changing room panel and the triple bunk bed that scrapes the roof. Carry on to the right from here and then toss the trashcan against the wall up ahead. Without getting too close to the Challenge Door, pick up the Invisibility! Tin and then make your daring escape!
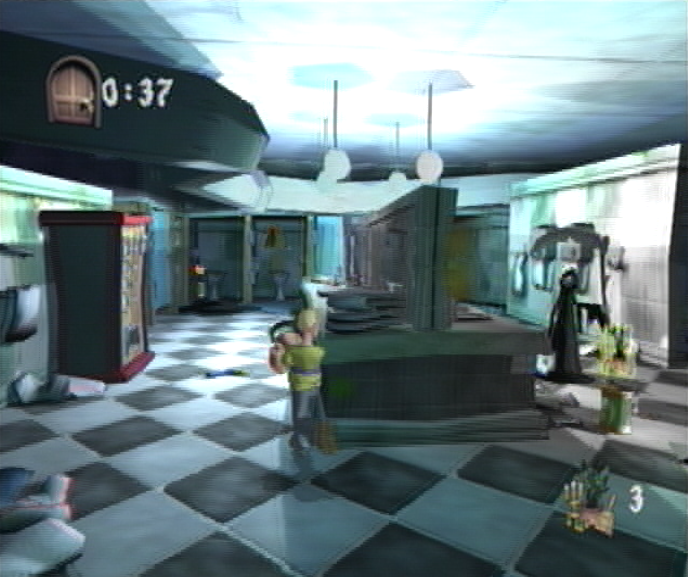
SERVANTS’ BATHROOM
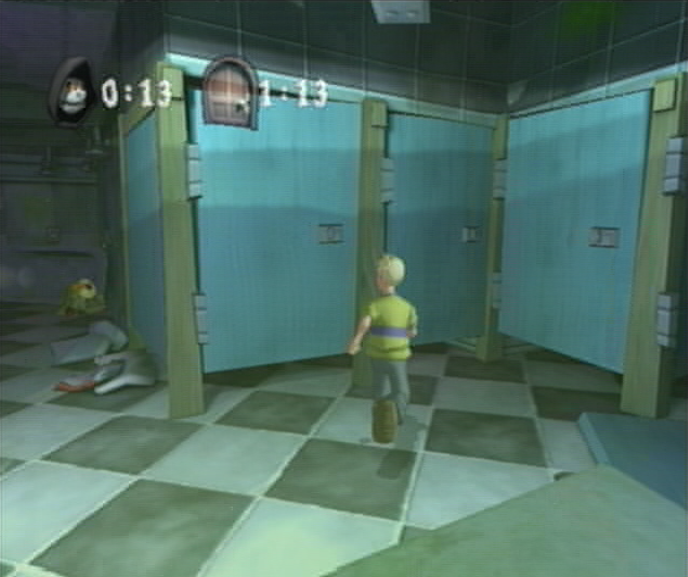
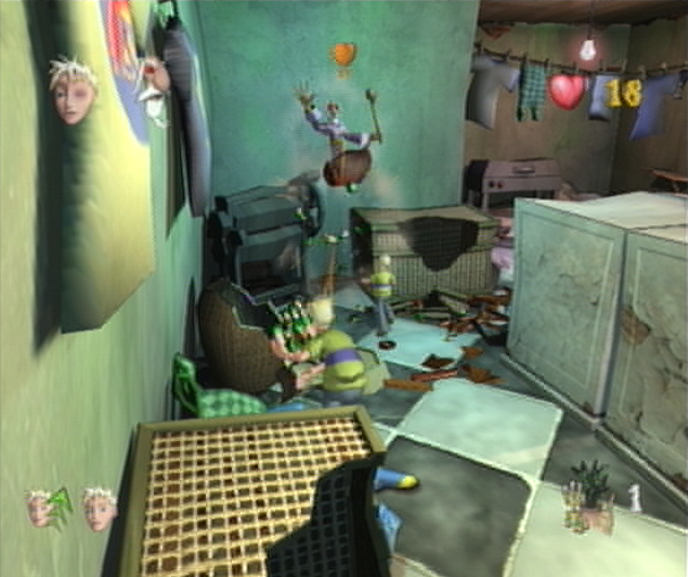
![]() I hope you’ve had a chance to catch your breath, as this next challenge might see Coopers’ last. The second you’ve walked into the Servants’ Bathroom you’ll have to wait out the clock for a minute and twenty seconds, while the Reaper will automatically show up in 20. For an entire minute you’ll be forced into avoiding the Reaper in these cramped quarters and hope that the challenges time runs out before Coopers does! We’ll have to work fast to make the most out of our time, so let’s start off like a flash past the Laundry trolley and toward the vending machine to the right where we’ll manage to locate a set of bathroom stall doors just after. Break open the second door to expose a spanning hallway that leads to the Challenge Door, and then venture in just a bit to trigger the Scary Shock event and then back up. Head over to the final stall on the far right and smash it open to reveal a Turbo Cooper! Soup Tin and snatch it up quick as your time should be nearly finished!
I hope you’ve had a chance to catch your breath, as this next challenge might see Coopers’ last. The second you’ve walked into the Servants’ Bathroom you’ll have to wait out the clock for a minute and twenty seconds, while the Reaper will automatically show up in 20. For an entire minute you’ll be forced into avoiding the Reaper in these cramped quarters and hope that the challenges time runs out before Coopers does! We’ll have to work fast to make the most out of our time, so let’s start off like a flash past the Laundry trolley and toward the vending machine to the right where we’ll manage to locate a set of bathroom stall doors just after. Break open the second door to expose a spanning hallway that leads to the Challenge Door, and then venture in just a bit to trigger the Scary Shock event and then back up. Head over to the final stall on the far right and smash it open to reveal a Turbo Cooper! Soup Tin and snatch it up quick as your time should be nearly finished!
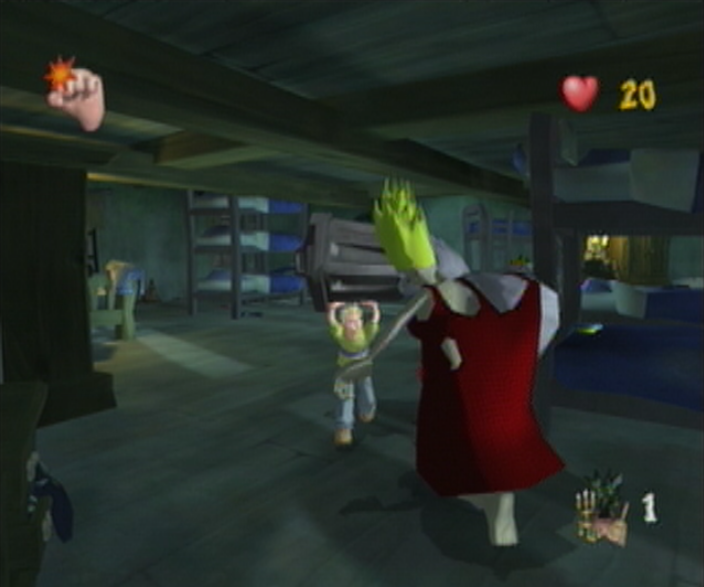
![]() With your last dwindling seconds, rush into the stall to the left with the door left ajar and grab one of the toilet paper roll piles off of the floor. For Cooper the bell tolls, signifying the appearance of the Grim Reaper who should manage to slide into view from where we started from. You’ll obviously want to avoid getting too close here, but take note of the Reapers gray aura that surrounds him; you’ll have to use this in order to keep track of him. The sink in the center will work wonders for giving Ol’ Grim the runaround which we’ll use to chip away at the minute of limbo. The Reaper can and will turn around while he’s chasing you around the sink, so take note which end his gray aura seems to be dwelling on; the worst scenario is rounding the corner blind and then bumping right into an extended finger. After you’ve lapped the sink a few times, you should manage to spot a large wardrobe from where we started which we’ll break open with a single roll of toilet paper.
With your last dwindling seconds, rush into the stall to the left with the door left ajar and grab one of the toilet paper roll piles off of the floor. For Cooper the bell tolls, signifying the appearance of the Grim Reaper who should manage to slide into view from where we started from. You’ll obviously want to avoid getting too close here, but take note of the Reapers gray aura that surrounds him; you’ll have to use this in order to keep track of him. The sink in the center will work wonders for giving Ol’ Grim the runaround which we’ll use to chip away at the minute of limbo. The Reaper can and will turn around while he’s chasing you around the sink, so take note which end his gray aura seems to be dwelling on; the worst scenario is rounding the corner blind and then bumping right into an extended finger. After you’ve lapped the sink a few times, you should manage to spot a large wardrobe from where we started which we’ll break open with a single roll of toilet paper.
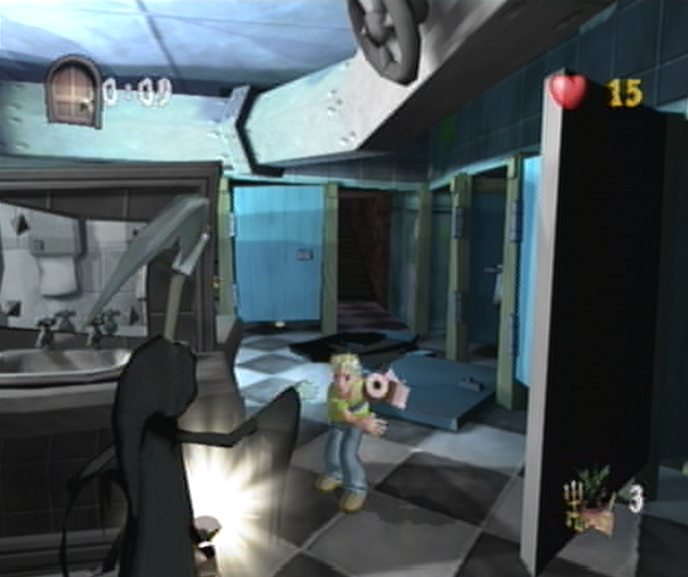
![]() We’ll leave our newly discovered Super Weapons! Tin by the wayside for the time being as we make our way back around the sink to waste a little bit more time off our clock. Once you’ve arrived back at the Super Weapons! Tin, pick it up quick-like and then start lobbing a few towards the Reaper. You don’t have to spam the entire pile; just manage to toss a single roll every few seconds to keep the Reaper in check while you try to make your way towards the Challenge Door stall. If you’ve kept up a steady stream of bog roll, the Super Weapons! Tin should see you to around 10 seconds or so, which is enough time to waste the rest of our Toilet Paper and venture into the second stall towards the challenge door. Once you’ve blocked yourself into the stall, there’s no turning back – it’s a good thing we dealt with that Scary Shock – so sprint up the stairs and you’ll find a Dizzy Reaper! Soup Tin for good measure. Send the Reaper spinning and rush through the door ahead.
We’ll leave our newly discovered Super Weapons! Tin by the wayside for the time being as we make our way back around the sink to waste a little bit more time off our clock. Once you’ve arrived back at the Super Weapons! Tin, pick it up quick-like and then start lobbing a few towards the Reaper. You don’t have to spam the entire pile; just manage to toss a single roll every few seconds to keep the Reaper in check while you try to make your way towards the Challenge Door stall. If you’ve kept up a steady stream of bog roll, the Super Weapons! Tin should see you to around 10 seconds or so, which is enough time to waste the rest of our Toilet Paper and venture into the second stall towards the challenge door. Once you’ve blocked yourself into the stall, there’s no turning back – it’s a good thing we dealt with that Scary Shock – so sprint up the stairs and you’ll find a Dizzy Reaper! Soup Tin for good measure. Send the Reaper spinning and rush through the door ahead.
ATTIC

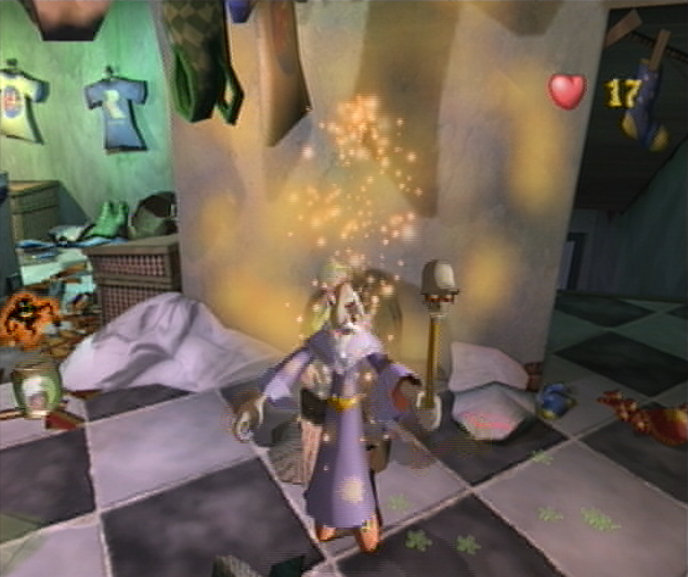
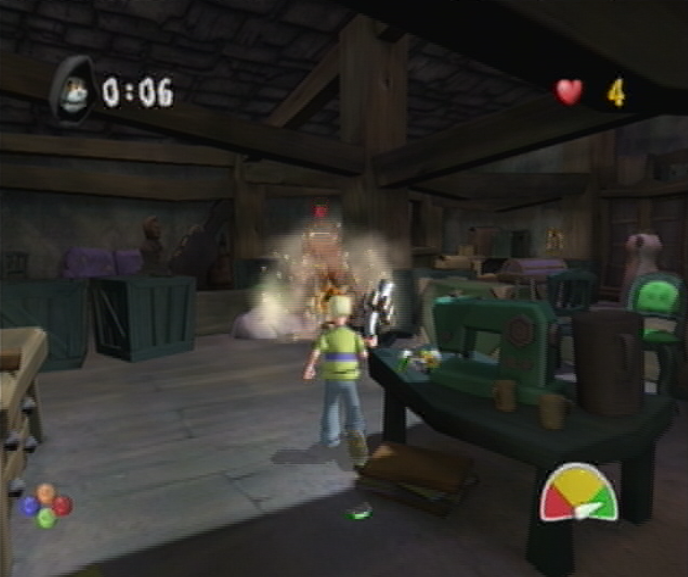
![]() To the top of the Hall and the climax of the Reaper challenges will see you to the Attic, where you’ll have to avoid an ever persistent Grim whilst finding an exit once more. From where you start off you’ll spot a wicker basket to your left, kick it open and you’ll expose a single Shocker Blocker! Soup Tin. Once you’ve managed to pick it up, ascend the steps ahead and you’ll find Babs Buffbrass with the Soda Pop Gun in hand. “That stuck-up old Mr. Crivens said I was to give yer this thing back.” Babs says gesturing towards the Soda Pop gun, “He seemed t’think yer’d need it.” Too right you are, Buffbrass! Once we’ve acquired our weapon once more we’ll carry on ahead where a Super Scary Shock will burst forth from the Washing Machine; let the Shocker Blocker take care of it and then use your Soda Pop Grenades to take out the Haunted Television Set ahead. If your shot misses the wicker basket next to the Television, crack it open and you’ll find a Super Weapons! Tin inside.
To the top of the Hall and the climax of the Reaper challenges will see you to the Attic, where you’ll have to avoid an ever persistent Grim whilst finding an exit once more. From where you start off you’ll spot a wicker basket to your left, kick it open and you’ll expose a single Shocker Blocker! Soup Tin. Once you’ve managed to pick it up, ascend the steps ahead and you’ll find Babs Buffbrass with the Soda Pop Gun in hand. “That stuck-up old Mr. Crivens said I was to give yer this thing back.” Babs says gesturing towards the Soda Pop gun, “He seemed t’think yer’d need it.” Too right you are, Buffbrass! Once we’ve acquired our weapon once more we’ll carry on ahead where a Super Scary Shock will burst forth from the Washing Machine; let the Shocker Blocker take care of it and then use your Soda Pop Grenades to take out the Haunted Television Set ahead. If your shot misses the wicker basket next to the Television, crack it open and you’ll find a Super Weapons! Tin inside.
![]() Continue through the broken ceiling beam to its end and then turn right and you’ll find a Haunted Chair blocking your path. A single shot from your Soda is all you’ll need to take out this Ghouly, and another to break open the blue crate harboring a Flying Imp inside. Now that we’ve cleared a path, we’ll make our way through to the next area where you’ll spot a light purple treasure chest. Break this treasure chest only and work your way through to the next area where you’ll find a Haunted Portrait waiting for you on the opposite side. Take care of it quickly with your Soda Pop gun and then carry on towards a sewing machine in the center of the room to find a Haunted Television Set ahead which we’ll take out in two shots. We’re nearly finished yet, and not a moment too soon, as the Reaper will likely be summoned at this point. It won’t take him very long to play catch up, though he can be kept at bay most effectively with a shot or two from your Soda Pop gun if things get tight.
Continue through the broken ceiling beam to its end and then turn right and you’ll find a Haunted Chair blocking your path. A single shot from your Soda is all you’ll need to take out this Ghouly, and another to break open the blue crate harboring a Flying Imp inside. Now that we’ve cleared a path, we’ll make our way through to the next area where you’ll spot a light purple treasure chest. Break this treasure chest only and work your way through to the next area where you’ll find a Haunted Portrait waiting for you on the opposite side. Take care of it quickly with your Soda Pop gun and then carry on towards a sewing machine in the center of the room to find a Haunted Television Set ahead which we’ll take out in two shots. We’re nearly finished yet, and not a moment too soon, as the Reaper will likely be summoned at this point. It won’t take him very long to play catch up, though he can be kept at bay most effectively with a shot or two from your Soda Pop gun if things get tight.
![]() Just ahead of the sewing machine you should manage to spot a pair of blue crates on the left hand side obstructing your path. Take them both out with your Soda Pop gun and then before you get too far ahead of yourself, turn to your immediate left as soon as you pass the two blue crates to take out the Haunted Chair. Carry on through this area and destroy the chest blocking your path to reveal another Flying Imp. Once you’ve managed defeat it, you’ll find yourself in the final stretch leading towards the Challenge Door. Before you step beyond the boundaries of this area, turn to the right and take out the final Haunted Television Set. While the Reaper is likely on your tail at this point, so it’s best to fire two shots towards the twin Grand Father Clocks up ahead to expose two Flying Imps before they have a chance to pop out and start leeching away at your minuscule bit of health. They’ll only require a single shot each, so you should manage it on the initial hit.
Just ahead of the sewing machine you should manage to spot a pair of blue crates on the left hand side obstructing your path. Take them both out with your Soda Pop gun and then before you get too far ahead of yourself, turn to your immediate left as soon as you pass the two blue crates to take out the Haunted Chair. Carry on through this area and destroy the chest blocking your path to reveal another Flying Imp. Once you’ve managed defeat it, you’ll find yourself in the final stretch leading towards the Challenge Door. Before you step beyond the boundaries of this area, turn to the right and take out the final Haunted Television Set. While the Reaper is likely on your tail at this point, so it’s best to fire two shots towards the twin Grand Father Clocks up ahead to expose two Flying Imps before they have a chance to pop out and start leeching away at your minuscule bit of health. They’ll only require a single shot each, so you should manage it on the initial hit.
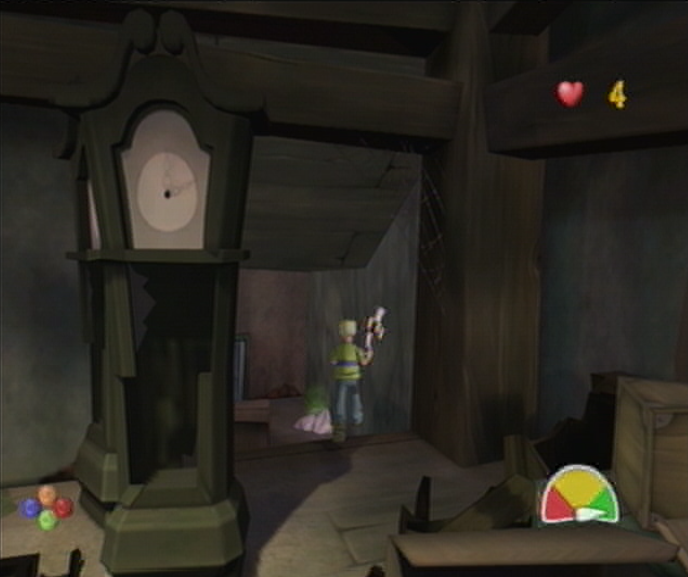
![]() Once you’ve managed to take care of both Flying Imps with your Soda Pop gun, it’s time to stray away from the path and find our deceptive exit! While the Attic continues to trail off to the right, you’ll find that following the route presented will take you in a massive circle once you’ve been lead back through to the sewing machine. Rather than wasting our time and letting the Reaper have a decent shot at following our destructive wake, let’s investigate the area behind the two grandfather clocks. Once you’ve gotten yourself in the correct vantage point you should manage to spot a final hallway leading to the Challenge Door, which has been hidden craftily out of view. From here, descend the set of stairs and then deal with the Haunted Portrait to the left with your Soda Pop gun. Once you’ve managed that, make a beeline towards the Challenge Door where a final Super Scary Shock sequence waits for us. Luckily our Shocker Blocker! Tin will take care of the button mashing for us.
Once you’ve managed to take care of both Flying Imps with your Soda Pop gun, it’s time to stray away from the path and find our deceptive exit! While the Attic continues to trail off to the right, you’ll find that following the route presented will take you in a massive circle once you’ve been lead back through to the sewing machine. Rather than wasting our time and letting the Reaper have a decent shot at following our destructive wake, let’s investigate the area behind the two grandfather clocks. Once you’ve gotten yourself in the correct vantage point you should manage to spot a final hallway leading to the Challenge Door, which has been hidden craftily out of view. From here, descend the set of stairs and then deal with the Haunted Portrait to the left with your Soda Pop gun. Once you’ve managed that, make a beeline towards the Challenge Door where a final Super Scary Shock sequence waits for us. Luckily our Shocker Blocker! Tin will take care of the button mashing for us.