Chapter 3-1: Fetching up the First Verse


Navigation:
Chapter 1: The Rescue
Chapter 2: The Restoration
Chapter 3: The Riddle
-3-1: Fetching up the First Verse
-3-2: Second Stanza in the Stables
-3-3: Well Versed in Backtracking
-3-4: Don’t Fear the Reaper
-3-5: Method to the Madness
-3-6: Requisite for a Reckoning
Chapter 4: The Reckoning
Chapter 5: The Race
CLEANING UP AFTER THE GHOULIES
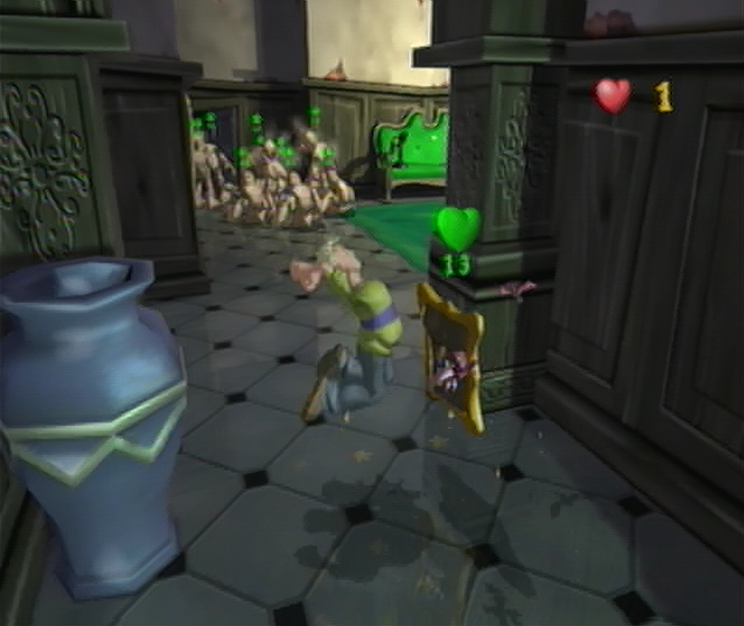
![]() The Upper Corridors will pit you against a rather sinister challenge: you’ll have to squeeze past a crowd of tight knit traitorous Ghoulies without getting hit, and given your current single unit of health this is much easier said than done. Before you can even begin to work out a strategy for that particular challenge however, you’ll have to survive through the narrow hall which harbors a duo of Haunted Portraits. From where you begin, turn to your immediate right and you’ll manage to spot a Portrait hanging on the wall. Use it against the first Haunted Portrait up ahead to your left to take it out in just two hits, saving the final swing to catch the next Haunted Portrait to the right of the vase by surprise before working it with your fists. Once you’ve done that, smash open the vase to find three Miniature Cooper! Soup Tins and then send them out to clear a path through the Mummies at the end of the Hall where you should manage to sneak by to the Challenge Door.
The Upper Corridors will pit you against a rather sinister challenge: you’ll have to squeeze past a crowd of tight knit traitorous Ghoulies without getting hit, and given your current single unit of health this is much easier said than done. Before you can even begin to work out a strategy for that particular challenge however, you’ll have to survive through the narrow hall which harbors a duo of Haunted Portraits. From where you begin, turn to your immediate right and you’ll manage to spot a Portrait hanging on the wall. Use it against the first Haunted Portrait up ahead to your left to take it out in just two hits, saving the final swing to catch the next Haunted Portrait to the right of the vase by surprise before working it with your fists. Once you’ve done that, smash open the vase to find three Miniature Cooper! Soup Tins and then send them out to clear a path through the Mummies at the end of the Hall where you should manage to sneak by to the Challenge Door.
BATHROOM
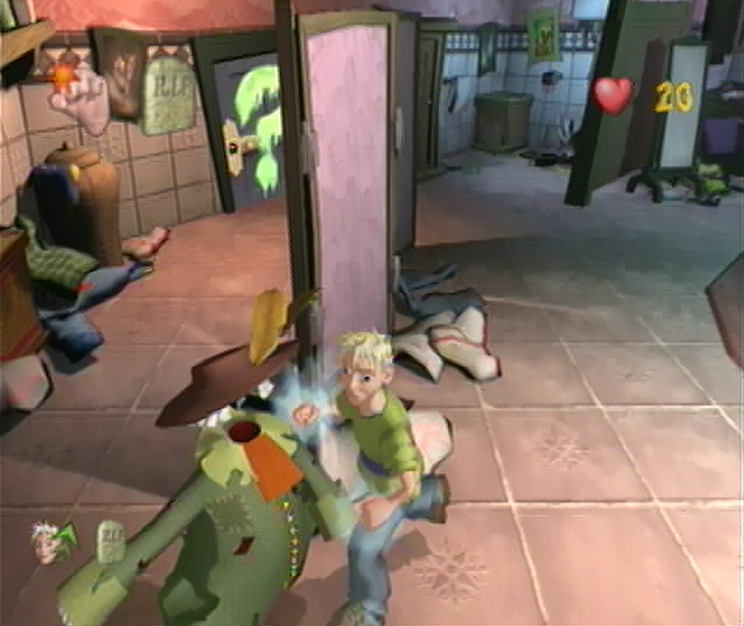
![]() The most important thing to avoid in the Bathroom is getting too close to the Challenge Door and starting the challenge too early, otherwise you’ll be given a bit of time to explore the room which we’ll use to pick off the Haunted Coats found in a heap around the room. From where you start off, turn around and break open the laundry hamper to find a One-Hit Wonder! and Turbo Cooper! Soup Tin inside. Pick up the Super Soups and then work your way past the laundry cart to the right where you’ll find and defeat the first Haunted Coat. Making sure to avoid getting too close to the challenge door, work your way to the toilet found to the right on the opposite side of the changing panels. Once you’ve done that, avoid crossing directly in front of the challenge door and instead work your way toward the bathtub in the center of the room, then go around the changing panel to the left to find the next Haunted Coat hidden behind the middle changing panel.
The most important thing to avoid in the Bathroom is getting too close to the Challenge Door and starting the challenge too early, otherwise you’ll be given a bit of time to explore the room which we’ll use to pick off the Haunted Coats found in a heap around the room. From where you start off, turn around and break open the laundry hamper to find a One-Hit Wonder! and Turbo Cooper! Soup Tin inside. Pick up the Super Soups and then work your way past the laundry cart to the right where you’ll find and defeat the first Haunted Coat. Making sure to avoid getting too close to the challenge door, work your way to the toilet found to the right on the opposite side of the changing panels. Once you’ve done that, avoid crossing directly in front of the challenge door and instead work your way toward the bathtub in the center of the room, then go around the changing panel to the left to find the next Haunted Coat hidden behind the middle changing panel.
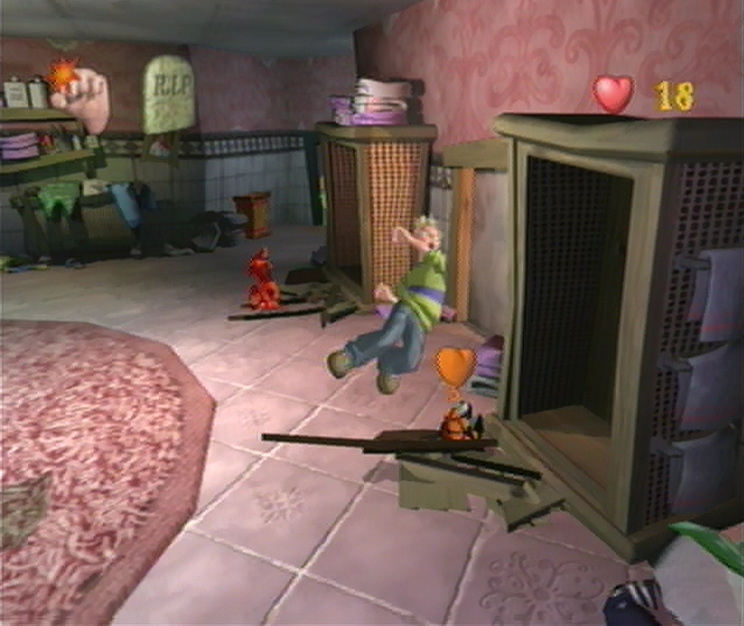
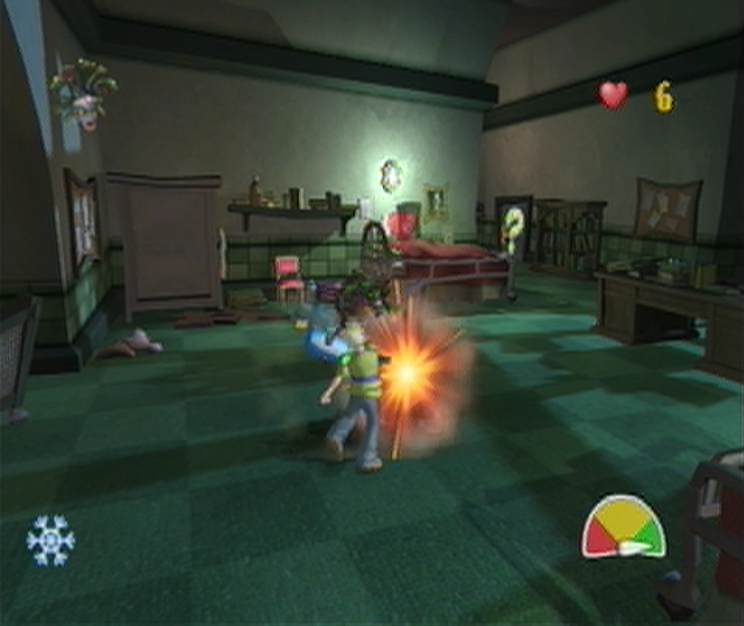
![]() Once you’ve taken care of the third Haunted Coat, work your way back to the bathtub once more and you’ll manage to spot the fourth coat wedged in between the shower and a wardrobe to the right. Take care of this Haunted Coat quickly, and then proceed to the shower for our final confrontation. Your power-ups will begin to wane here, so take out the final Haunted Coat quickly; the challenge for the Bathroom will start after you’ve done so. Once you’ve regained control, work your way back into the center of the room to deal with the Ninja Imps who are just starting their meditation. If you defeat these Imps now, you’ll take them out with just three hits, which can’t be done after they’ve grown. During this phase a few Skeletons will also join in, so be sure to watch out for the light bulb over their heads, as this indicates that they’ll start to grab commodities to fashion as weapons! Prevent them from acting on this thought with a few well timed blows and you’ll manage to sort them out.
Once you’ve taken care of the third Haunted Coat, work your way back to the bathtub once more and you’ll manage to spot the fourth coat wedged in between the shower and a wardrobe to the right. Take care of this Haunted Coat quickly, and then proceed to the shower for our final confrontation. Your power-ups will begin to wane here, so take out the final Haunted Coat quickly; the challenge for the Bathroom will start after you’ve done so. Once you’ve regained control, work your way back into the center of the room to deal with the Ninja Imps who are just starting their meditation. If you defeat these Imps now, you’ll take them out with just three hits, which can’t be done after they’ve grown. During this phase a few Skeletons will also join in, so be sure to watch out for the light bulb over their heads, as this indicates that they’ll start to grab commodities to fashion as weapons! Prevent them from acting on this thought with a few well timed blows and you’ll manage to sort them out.
![]() If you find yourself overwhelmed, or you’ve taken a few beatings and your stamina is starting to linger, there are a few sure fire ways of turning things around. If your energy is getting too low, you can find a number of Energy Boost! Tins on the inside the closets dotting the perimeter once the Ninja Imps have burst forth from them. If you’re looking to get control over the Ghoulies you’ll find a trip towards the laundry hamper to the left of the Challenge Door will provide you with a Miniature Cooper! and Traitor Fever! Tin. Once you’ve managed to clear the room of all its inhabitants, the Challenge Door will unlock and a single Medusa will wander out, effectively guarding your only exit. From here, carry on back to where we took out our first Haunted Coat and you’ll manage to spot a standing mirror in front of the changing panels which harbors a Shocker Blocker! Tin inside. Once you’ve shattered the glass, pick up the Tin and use it to sneak past the Medusa.
If you find yourself overwhelmed, or you’ve taken a few beatings and your stamina is starting to linger, there are a few sure fire ways of turning things around. If your energy is getting too low, you can find a number of Energy Boost! Tins on the inside the closets dotting the perimeter once the Ninja Imps have burst forth from them. If you’re looking to get control over the Ghoulies you’ll find a trip towards the laundry hamper to the left of the Challenge Door will provide you with a Miniature Cooper! and Traitor Fever! Tin. Once you’ve managed to clear the room of all its inhabitants, the Challenge Door will unlock and a single Medusa will wander out, effectively guarding your only exit. From here, carry on back to where we took out our first Haunted Coat and you’ll manage to spot a standing mirror in front of the changing panels which harbors a Shocker Blocker! Tin inside. Once you’ve shattered the glass, pick up the Tin and use it to sneak past the Medusa.
SCHOOLROOM
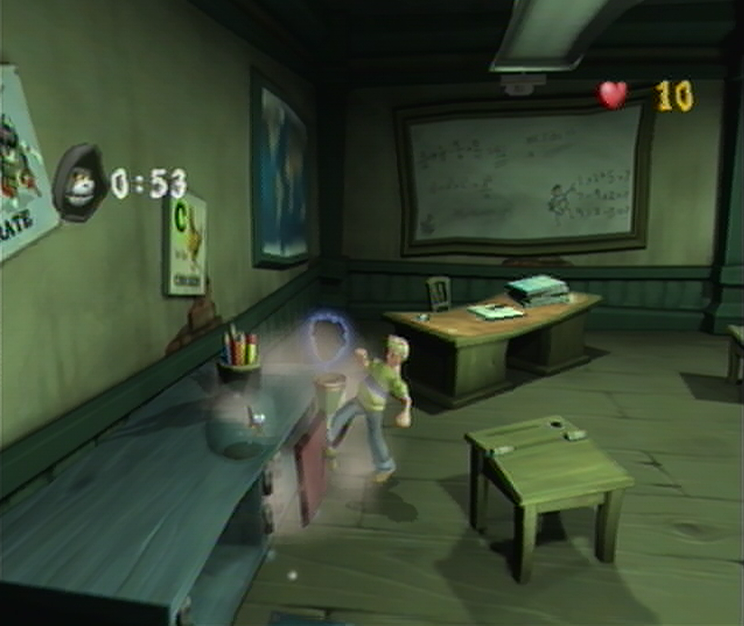
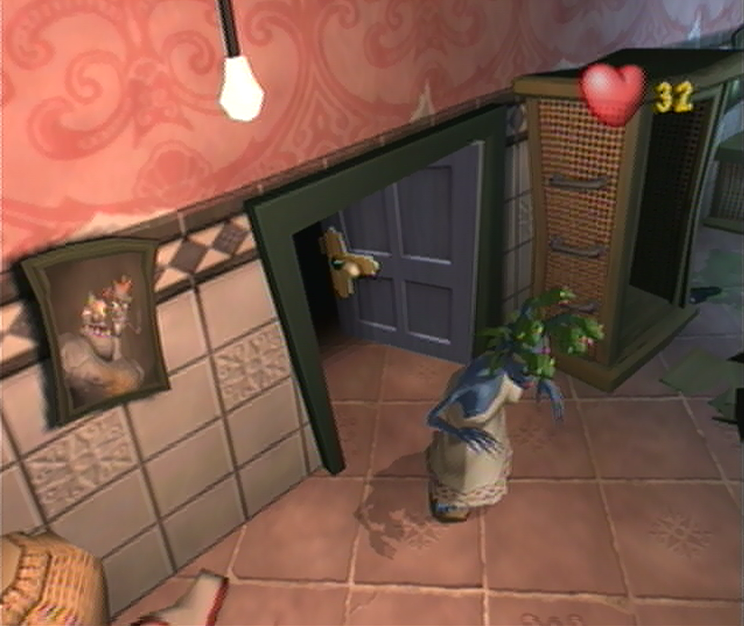
![]() Things aren’t shaping up too well for Cooper as he wanders into the Schoolroom, receiving a pathetic inkling of health that won’t see him past a single Medusa conflict and adhering to a strict time limit from the Reaper simply spells disaster. However, if you go about the proper strategy you’ll manage to skip class without any confrontation. From where you start off, venture on ahead and you’ll spot a small classroom area. If you look to your left you’ll manage to spot a small green shelving unit next to the wall with red doors harboring a globe and a fishbowl atop. Ignore the rules about keeping the place pristine and smash open the red drawer closest to the teachers desk; doing so will expose an Invisibility Tin. Since you’ve broken the rules, the Reaper will be summoned, but he can’t catch what he can’t see! Make your way past the first two Medusas through the bookish corridors, then work your way past the bulletin board to the exit and sneak by the watchful Reaper!
Things aren’t shaping up too well for Cooper as he wanders into the Schoolroom, receiving a pathetic inkling of health that won’t see him past a single Medusa conflict and adhering to a strict time limit from the Reaper simply spells disaster. However, if you go about the proper strategy you’ll manage to skip class without any confrontation. From where you start off, venture on ahead and you’ll spot a small classroom area. If you look to your left you’ll manage to spot a small green shelving unit next to the wall with red doors harboring a globe and a fishbowl atop. Ignore the rules about keeping the place pristine and smash open the red drawer closest to the teachers desk; doing so will expose an Invisibility Tin. Since you’ve broken the rules, the Reaper will be summoned, but he can’t catch what he can’t see! Make your way past the first two Medusas through the bookish corridors, then work your way past the bulletin board to the exit and sneak by the watchful Reaper!
INFIRMARY

![]() Luckily the Infirmary is the final room we’ll have to clear before granting ourselves a breath of fresh air in the Cottage Garden, stick around though, this will certainly massage your Ghoulies Defeated Score! Right, from where you start off you’ll manage to spot a trolley in the center of the room with a pile of bottles ontop. Grab these decanters first as to avoid destroying them too early and then start tossing them toward the Medusa in this area; you should manage to drain all her health with all 6 bottles without issue. With that out the way, return to the trolley and plant your foot in the center of it, doing so will expose a Freeze Ghoulies! Tin that we’ll leave alone for now. Now that everything is set up, it’s time to knock them down by speaking with Fiddlesworth in the middle of the ward here so that he’ll supply us with Little Willy’s Water Pistol once more. The second you’ve finished the challenge will begin, pitting you against all the Zombies you can handle in a single minute!
Luckily the Infirmary is the final room we’ll have to clear before granting ourselves a breath of fresh air in the Cottage Garden, stick around though, this will certainly massage your Ghoulies Defeated Score! Right, from where you start off you’ll manage to spot a trolley in the center of the room with a pile of bottles ontop. Grab these decanters first as to avoid destroying them too early and then start tossing them toward the Medusa in this area; you should manage to drain all her health with all 6 bottles without issue. With that out the way, return to the trolley and plant your foot in the center of it, doing so will expose a Freeze Ghoulies! Tin that we’ll leave alone for now. Now that everything is set up, it’s time to knock them down by speaking with Fiddlesworth in the middle of the ward here so that he’ll supply us with Little Willy’s Water Pistol once more. The second you’ve finished the challenge will begin, pitting you against all the Zombies you can handle in a single minute!
![]() Rather than rushing out to meet the undead, it’s wise to stay in the first area where you began and let the Zombies come to you. Be quick on the trigger when dealing with multiple Ghoulies; if you find yourself running low on water just hit the leftmost locker door behind the trolley in order to find a Super Weapons! Soup Tin inside. Once the time limit manages to finish and you’ve dealt with all of the Zombies, you’ll only have the Medusa in the next room to deal with to solve the challenge. To make matters easiest, let’s grab the Freeze Ghoulies! Soup Tin that we found on the Trolley and use the blunt of our Liquid Squirter to take our the Medusa with 3 swings. Once you’ve done that,just work your way toward the Challenge Door at the left side of the room and then use the squirter again to take out the duo of Frozen Haunted Chairs waiting for you. Now that you’ve managed to clear the room of all sickly Ghoulies, it’s time to leave the Infirmary and make our way to the Cottage Garden.
Rather than rushing out to meet the undead, it’s wise to stay in the first area where you began and let the Zombies come to you. Be quick on the trigger when dealing with multiple Ghoulies; if you find yourself running low on water just hit the leftmost locker door behind the trolley in order to find a Super Weapons! Soup Tin inside. Once the time limit manages to finish and you’ve dealt with all of the Zombies, you’ll only have the Medusa in the next room to deal with to solve the challenge. To make matters easiest, let’s grab the Freeze Ghoulies! Soup Tin that we found on the Trolley and use the blunt of our Liquid Squirter to take our the Medusa with 3 swings. Once you’ve done that,just work your way toward the Challenge Door at the left side of the room and then use the squirter again to take out the duo of Frozen Haunted Chairs waiting for you. Now that you’ve managed to clear the room of all sickly Ghoulies, it’s time to leave the Infirmary and make our way to the Cottage Garden.
DUNFIDDLIN COTTAGE GARDEN
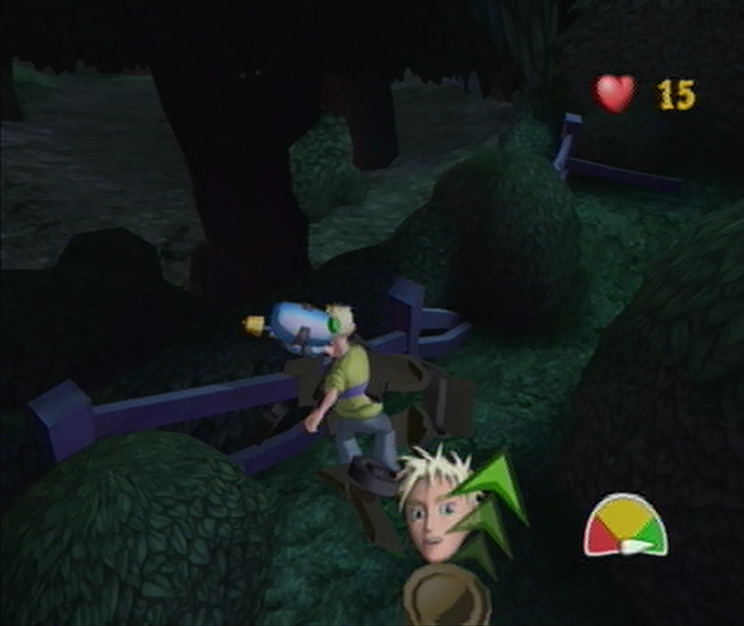
![]() Now that you’ve effectively treated the Zombies into increasing your Ghoulies Defeated score, it’s likely taken a toll on your patience, so we’ll ignore the Ghoulies here and instead attempt to dart through the Garden as quickly as possible to benefit our Time Taken score. From where you start off, let the duo of traitorous Zombies deal with eachother and venture off to the left where you’ll spot an upturned wheelbarrow behind a bush. Smash the wheelbarrow with your Water Pistol and you’ll find a Turbo Cooper! Soup Tin. Grab it and continue up the ascending Garden path ahead while ignoring any Ghouly that hops out of the bushes to hinder your progress. Once you’ve made it around the large Oak tree in the center you’ll spot a standing Coffin blocking the path as it begins to climb steadily. Do what you can to avoid getting too close to this new breed of Ghouly and approach Fiddlesworth at the foot of the Greenhouse and enter inside.
Now that you’ve effectively treated the Zombies into increasing your Ghoulies Defeated score, it’s likely taken a toll on your patience, so we’ll ignore the Ghoulies here and instead attempt to dart through the Garden as quickly as possible to benefit our Time Taken score. From where you start off, let the duo of traitorous Zombies deal with eachother and venture off to the left where you’ll spot an upturned wheelbarrow behind a bush. Smash the wheelbarrow with your Water Pistol and you’ll find a Turbo Cooper! Soup Tin. Grab it and continue up the ascending Garden path ahead while ignoring any Ghouly that hops out of the bushes to hinder your progress. Once you’ve made it around the large Oak tree in the center you’ll spot a standing Coffin blocking the path as it begins to climb steadily. Do what you can to avoid getting too close to this new breed of Ghouly and approach Fiddlesworth at the foot of the Greenhouse and enter inside.
GREENHOUSE
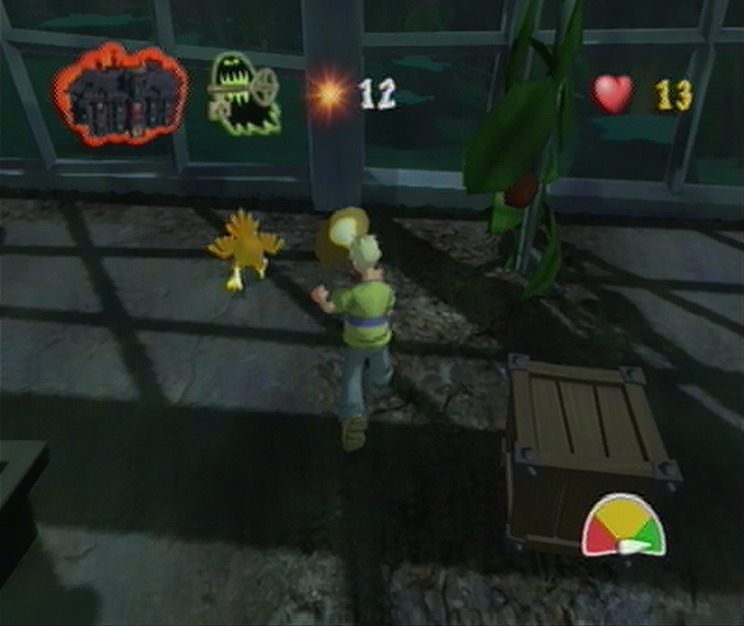
![]() Before you step into the center of the Greenhouse, turn around and you’ll spot a barrel in a corner next to the door; smash it open and you’ll uncover a Freeze Ghoulies! Tin – leave for the time being. Once you’re ready, walk into the main area and the challenge will begin, allowing you to spin around and pick up the tin before working your way through the frozen labyrinth. For the most efficient route, take an immediate left heading toward the challenge door and then take a right once you’ve managed to spot the first Vampire Chicken next to a crate. Carry on and you’ll find an open space with an alluring Energy Boost! Tin. Instead of picking it up, go around the perimeter to the left towards the corner. Once the maze permits, take another left and you’ll find yourself in front of the Challenge Door. Take one final left to spot a large crate in the labyrinth next to a glowing Vampire Chicken. Take out the Vampire Chicken using Ol’ Edna and then make a hasty escape before it’s too late!
Before you step into the center of the Greenhouse, turn around and you’ll spot a barrel in a corner next to the door; smash it open and you’ll uncover a Freeze Ghoulies! Tin – leave for the time being. Once you’re ready, walk into the main area and the challenge will begin, allowing you to spin around and pick up the tin before working your way through the frozen labyrinth. For the most efficient route, take an immediate left heading toward the challenge door and then take a right once you’ve managed to spot the first Vampire Chicken next to a crate. Carry on and you’ll find an open space with an alluring Energy Boost! Tin. Instead of picking it up, go around the perimeter to the left towards the corner. Once the maze permits, take another left and you’ll find yourself in front of the Challenge Door. Take one final left to spot a large crate in the labyrinth next to a glowing Vampire Chicken. Take out the Vampire Chicken using Ol’ Edna and then make a hasty escape before it’s too late!
POTTING ROOM
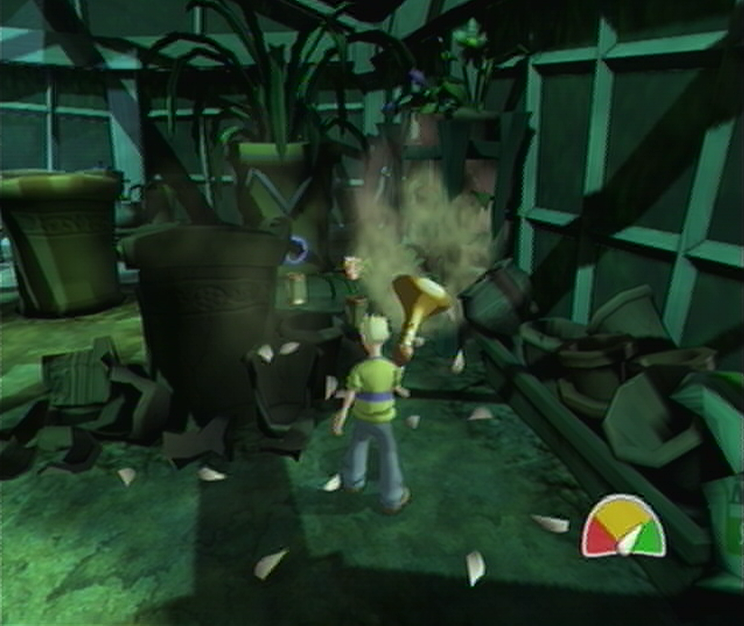
![]() The Potting Room is really going to test your mettle, and appropriately so as it houses the first piece of the illusive Baron Rhyme! Before you go running gingerly up to it however, let’s have a proper strategy in mind! As you start off, carry on forward until you’ve come across a shattered pot with a shelving unit just ahead on the right side of the room. Make quick work of it using Ol’ Edna and you’ll expose an Invisible Cooper! and Turbo Cooper! Soup Tins respectively, which we’ll leave by the wayside for the time being. Right, now we’ll just need to concern ourselves with walking blindly into an obvious trap by venturing forward and picking up the first piece of the Baron’s Rhyme between the two far tables. As soon as you’ve done that you’ll find yourself ambushed by a twin tag team of Vampires, Skeletons and Vampire Chickens from within the center of the room. Akin to the Sitting Room, this is largely a battle based on the “Next-one-different” scheme.
The Potting Room is really going to test your mettle, and appropriately so as it houses the first piece of the illusive Baron Rhyme! Before you go running gingerly up to it however, let’s have a proper strategy in mind! As you start off, carry on forward until you’ve come across a shattered pot with a shelving unit just ahead on the right side of the room. Make quick work of it using Ol’ Edna and you’ll expose an Invisible Cooper! and Turbo Cooper! Soup Tins respectively, which we’ll leave by the wayside for the time being. Right, now we’ll just need to concern ourselves with walking blindly into an obvious trap by venturing forward and picking up the first piece of the Baron’s Rhyme between the two far tables. As soon as you’ve done that you’ll find yourself ambushed by a twin tag team of Vampires, Skeletons and Vampire Chickens from within the center of the room. Akin to the Sitting Room, this is largely a battle based on the “Next-one-different” scheme.
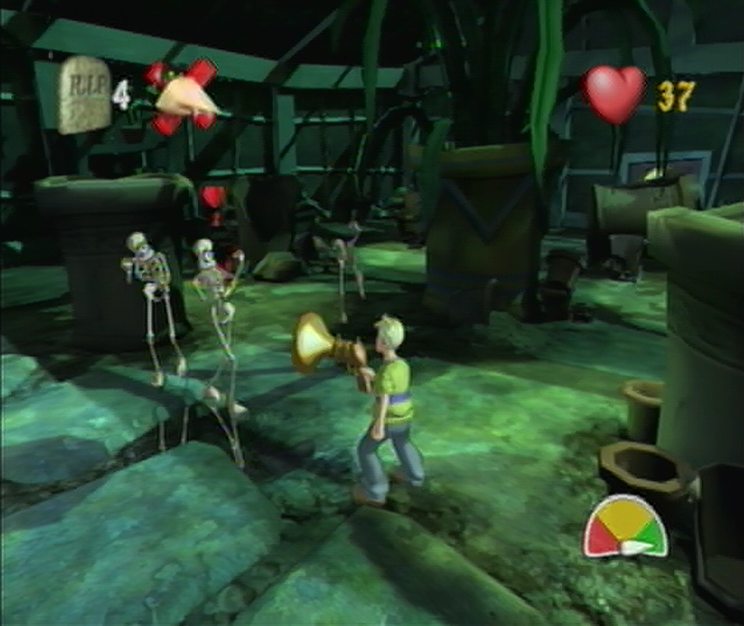
![]() Things aren’t quite evenly matched across the waves of Ghoulies either, as each breed will need special attention in order to ensure that you don’t accidentally knock off the same enemy twice. The Vampire Chickens will cause you the most trouble in this battle, as they only require one hit to defeat and you’ll find them getting in the way constantly. Skeletons are fairly easy to defeat as well, with four successful shots needed to take them out for good. The most difficult to defeat in this room is the newly found Vampire, as she’s got a sturdy Coffin door that she’ll use to defend herself with. You’ll have to approach her so that she opens her door – without getting hit, mind – and then land two successful shots of Garlic to take her down. Rush back to the Super Soups and grab only the Invisible Cooper! Tin. The order that you’ll need to follow is Vampire Chicken, Skeleton, Vampire, Vampire Chicken, Skeleton, and then Vampire to solve the challenge before you take out the remaining Skeleton twins.
Things aren’t quite evenly matched across the waves of Ghoulies either, as each breed will need special attention in order to ensure that you don’t accidentally knock off the same enemy twice. The Vampire Chickens will cause you the most trouble in this battle, as they only require one hit to defeat and you’ll find them getting in the way constantly. Skeletons are fairly easy to defeat as well, with four successful shots needed to take them out for good. The most difficult to defeat in this room is the newly found Vampire, as she’s got a sturdy Coffin door that she’ll use to defend herself with. You’ll have to approach her so that she opens her door – without getting hit, mind – and then land two successful shots of Garlic to take her down. Rush back to the Super Soups and grab only the Invisible Cooper! Tin. The order that you’ll need to follow is Vampire Chicken, Skeleton, Vampire, Vampire Chicken, Skeleton, and then Vampire to solve the challenge before you take out the remaining Skeleton twins.

![]() Before we turn in Ol’ Edna to Fiddlesworth, we’ll use her for one final task by smashing the pots just to the right of the Challenge Door to reveal a pair of Extra Time! Soup Tins. With that out of the way we’ll return to Fiddlesworth only to have the Baron send in a Hunchback from the ceiling. As soon as the battle begins we’ll have to grab both Extra Time! Soup Tins and make our way to the shelf to pick up the remaining Turbo Cooper! Tin. Once you’ve managed to bowl Hunchy over, it’s likely he’ll bend over and protect his face with both hands rather than defending with one. It won’t matter if you give him plenty of space in this state, instead just wail on him until he turns red and comes up swinging. Avoid getting in the way of his windmill maneuver and wait until he’s spun himself dizzy before laying it on thick. If you can’t manage to take out the Hunchback before the Reaper shows, just lead the him over to Hunchy and then make a quick escape when he’s managed his touch of death!
Before we turn in Ol’ Edna to Fiddlesworth, we’ll use her for one final task by smashing the pots just to the right of the Challenge Door to reveal a pair of Extra Time! Soup Tins. With that out of the way we’ll return to Fiddlesworth only to have the Baron send in a Hunchback from the ceiling. As soon as the battle begins we’ll have to grab both Extra Time! Soup Tins and make our way to the shelf to pick up the remaining Turbo Cooper! Tin. Once you’ve managed to bowl Hunchy over, it’s likely he’ll bend over and protect his face with both hands rather than defending with one. It won’t matter if you give him plenty of space in this state, instead just wail on him until he turns red and comes up swinging. Avoid getting in the way of his windmill maneuver and wait until he’s spun himself dizzy before laying it on thick. If you can’t manage to take out the Hunchback before the Reaper shows, just lead the him over to Hunchy and then make a quick escape when he’s managed his touch of death!