Chapter 2-4: Sugar, Spice and Dungweed


Navigation:
Chapter 1: The Rescue
Chapter 2: The Restoration
-2-1: Ingress with Ingredients
-2-2: Eggs for cracking, Ghoulies for smacking
-2-3: Someone has a Bone to pick with you…
-2-4: Sugar, Spice and Dungweed
-2-5: A Curious Concoction
-2-6: Too many cooks spoil the broth
Chapter 3: The Riddle
Chapter 4: The Reckoning
Chapter 5: The Race
MAKING A MAD DASH IN A QUICK PINCH
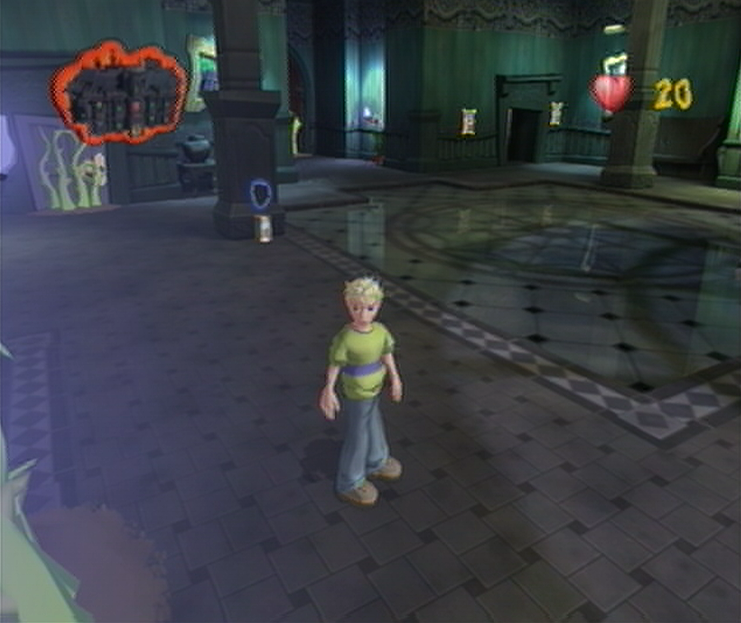
![]() While our run thus far has had us taking care of Ghoulies left, right and center to benefit our ever growing Ghoulies Defeated score, we’ve been rather ignorant of our Time Taken score. Luckily, the start of the Dungweed quest will give us ample opportunity to skip some unnecessary confrontations that would otherwise take upwards of around ten minutes or so to solve and progress onward. Let’s start straight off in the Grand Hallway by locating the Invisibility! Soup Tin just in front of the nearest pillar and then using the guise to traverse toward the open Challenge Door completely undetected. Through normal means the two Haunted Portraits would pop off of the wall to give you a hard time, but with your current form they should be completely ignorant of your presence. Use this to your advantage by passing in between the two right through the doorway to the next room. Insultingly simple, but there’s still more invisible antics yet to come as we continue onward.
While our run thus far has had us taking care of Ghoulies left, right and center to benefit our ever growing Ghoulies Defeated score, we’ve been rather ignorant of our Time Taken score. Luckily, the start of the Dungweed quest will give us ample opportunity to skip some unnecessary confrontations that would otherwise take upwards of around ten minutes or so to solve and progress onward. Let’s start straight off in the Grand Hallway by locating the Invisibility! Soup Tin just in front of the nearest pillar and then using the guise to traverse toward the open Challenge Door completely undetected. Through normal means the two Haunted Portraits would pop off of the wall to give you a hard time, but with your current form they should be completely ignorant of your presence. Use this to your advantage by passing in between the two right through the doorway to the next room. Insultingly simple, but there’s still more invisible antics yet to come as we continue onward.
CLOAK ROOM
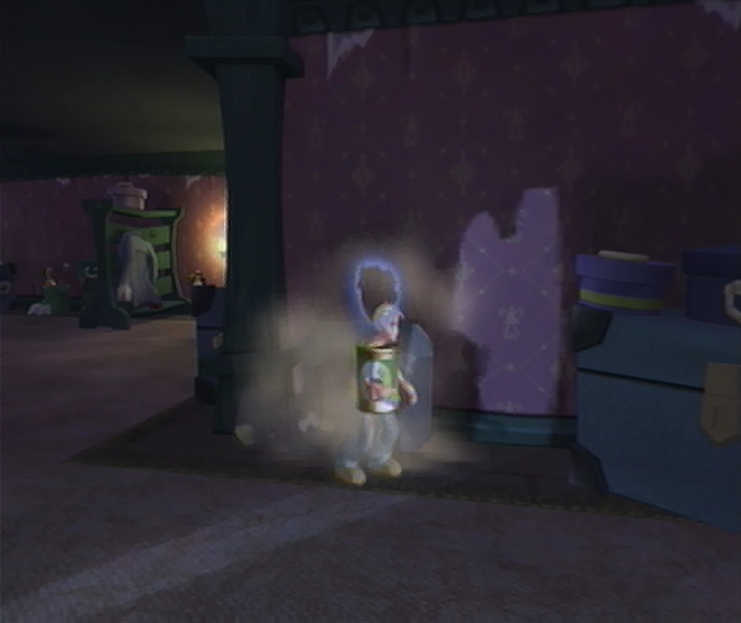
![]() You’ll need to be exceedingly cautious in the Cloak Room, as one false step could have you starting the challenge unwillingly. As you step into the room you should manage to spot two clothing trunks to your left, one is blue and the other is green; you’ll need to follow the wall that these trunks rest against until you’ve rounded the corner. From there you should spot a single rotund suitcase with two stickers leaning up against the wall as you round the bend. Give the suitcase a swift kick and you’ll expose the Invisibility! Soup Tin inside. Snatch it up and use its stealthy abilities to carry on through to the Challenge Door on the opposite side of the room; you should manage to spot it as you look to your left while facing the suitcase. What would have hurtled you into a brawl with Haunted Coats, Portraits, Imps and ultimately the Grim Reaper should now only take a brisk walk where you’re free to pass right through the Challenge Door undetected. Sneaky stuff!
You’ll need to be exceedingly cautious in the Cloak Room, as one false step could have you starting the challenge unwillingly. As you step into the room you should manage to spot two clothing trunks to your left, one is blue and the other is green; you’ll need to follow the wall that these trunks rest against until you’ve rounded the corner. From there you should spot a single rotund suitcase with two stickers leaning up against the wall as you round the bend. Give the suitcase a swift kick and you’ll expose the Invisibility! Soup Tin inside. Snatch it up and use its stealthy abilities to carry on through to the Challenge Door on the opposite side of the room; you should manage to spot it as you look to your left while facing the suitcase. What would have hurtled you into a brawl with Haunted Coats, Portraits, Imps and ultimately the Grim Reaper should now only take a brisk walk where you’re free to pass right through the Challenge Door undetected. Sneaky stuff!
SITTING ROOM

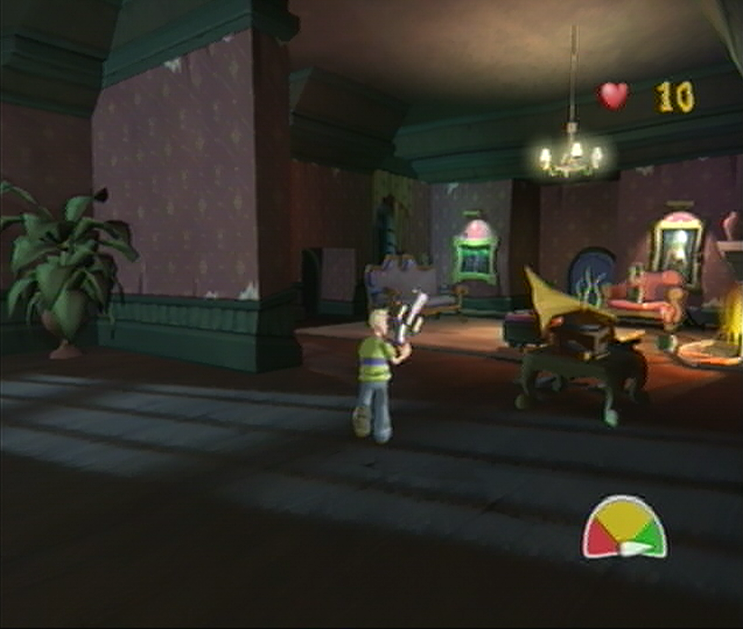
![]() If you’re hoping for another freebie in the Sitting Room you’ll be sadly mistaken, as the Invisibly Soup is nowhere to be seen. In this challenge you’ll need to pertain to the “Next One Different” set-up, in that you’re not allowed to defeat the same breed of Ghouly twice. As you start off the most irritating aspect of this challenge will come to fruition; the sluggish Zombies have much more health than the nimble Skeletons, and the bony bunch will constantly be within your line of fire as you try to take care of the Zombies. The first thing you should set out doing in this challenge is taking out the first Skeleton you see, it shouldn’t take very much to send him packing. Once you’ve done that avoid the other Skeleton at all costs, and instead approach the fireplace in the cramped Sitting Room quarters where you’ll spot a Haunted Chair just to the right. Take out the Haunted Chair as efficiently as possible and you’ll spot a Knock-Down Mania! Soup Tin atop the table closest to the fire.
If you’re hoping for another freebie in the Sitting Room you’ll be sadly mistaken, as the Invisibly Soup is nowhere to be seen. In this challenge you’ll need to pertain to the “Next One Different” set-up, in that you’re not allowed to defeat the same breed of Ghouly twice. As you start off the most irritating aspect of this challenge will come to fruition; the sluggish Zombies have much more health than the nimble Skeletons, and the bony bunch will constantly be within your line of fire as you try to take care of the Zombies. The first thing you should set out doing in this challenge is taking out the first Skeleton you see, it shouldn’t take very much to send him packing. Once you’ve done that avoid the other Skeleton at all costs, and instead approach the fireplace in the cramped Sitting Room quarters where you’ll spot a Haunted Chair just to the right. Take out the Haunted Chair as efficiently as possible and you’ll spot a Knock-Down Mania! Soup Tin atop the table closest to the fire.
![]() Pick it up and then work your way over to one of the Zombies. The only thing you’ll need to worry about here is the single remaining Skeleton running over to intervene, if you manage to keep your attacks squarely on the Zombie. With the added benefit of the Knock Down Mania! Super Soup you should find it a tad easier to defeat the Zombie since you won’t have to land any initial hits before slamming it across the room. After you’ve defeated the first Zombie, you’ll need to take out the Skeleton next. With the second Skeleton out of the way there’s nothing stopping you from chipping away at the final Zombie uninterrupted. While it’s likely that you’ve used up your Knock-Down Mania! Soup Tin by now, there are several objects around the room that you can use to take care of the Zombie a little quicker, which would have been a risky decision earlier in the challenge. Once you’ve managed to take out the final Zombie the Challenge Door will open.
Pick it up and then work your way over to one of the Zombies. The only thing you’ll need to worry about here is the single remaining Skeleton running over to intervene, if you manage to keep your attacks squarely on the Zombie. With the added benefit of the Knock Down Mania! Super Soup you should find it a tad easier to defeat the Zombie since you won’t have to land any initial hits before slamming it across the room. After you’ve defeated the first Zombie, you’ll need to take out the Skeleton next. With the second Skeleton out of the way there’s nothing stopping you from chipping away at the final Zombie uninterrupted. While it’s likely that you’ve used up your Knock-Down Mania! Soup Tin by now, there are several objects around the room that you can use to take care of the Zombie a little quicker, which would have been a risky decision earlier in the challenge. Once you’ve managed to take out the final Zombie the Challenge Door will open.
CLAMORED BY THE COMPULSIVE CLEANING WOMAN
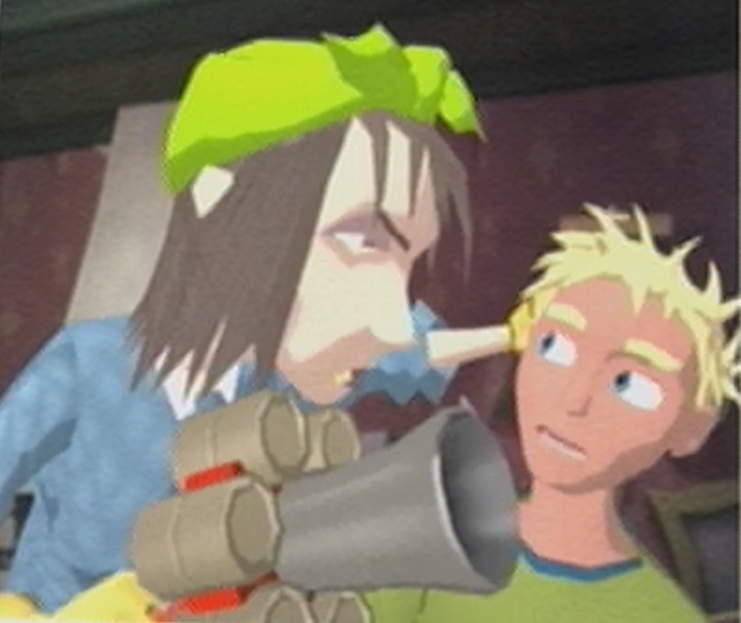
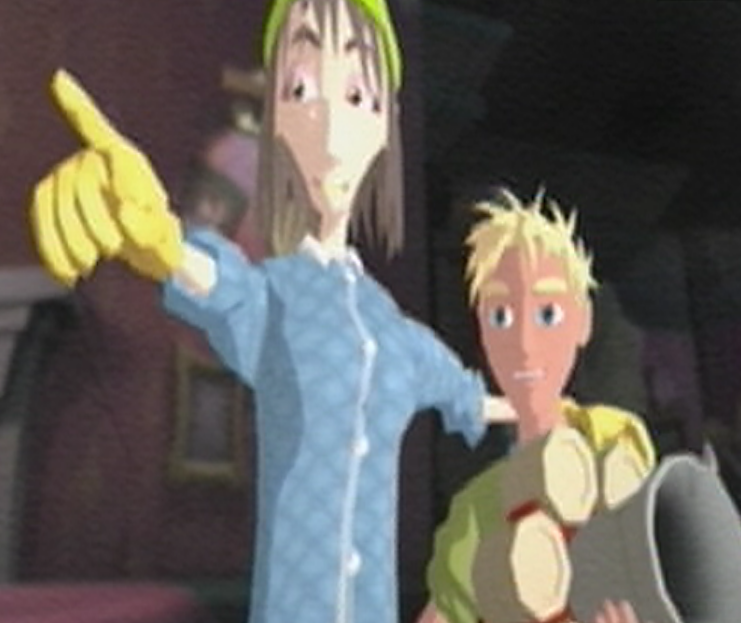
![]() As Cooper emerges into the Music Room he tries his best to keep quiet to avoid alerting any Ghoulies who might be near. Peering around the room cautiously, Cooper manages to spot something interesting on the floor; it looks like some sort of blunderbuss thats had its barrel decorated with soda pop cans. As Cooper reaches down to pick up the weapon however, a gloved hand reaches out and snatches it away! Before Cooper has the chance to react, he’s lifted to his feet painfully by his ear. Brought up to full height Cooper manages to see his captor; a sneering woman with yellowed teeth. “Oi! Are you the disrespectful young so-and-so that’s bin usin’ this thing ta make a sticky mess all over me clean floors?” The cleaning woman inquires as Cooper shakes his head in confusion “Oh… right then. Must’ve bin someone else. Sorry about that. But now you’re ‘ere, yer may as well take it with yer an’ throw it in the trash.” The cleaning woman says as she hands the gun over to Cooper.
As Cooper emerges into the Music Room he tries his best to keep quiet to avoid alerting any Ghoulies who might be near. Peering around the room cautiously, Cooper manages to spot something interesting on the floor; it looks like some sort of blunderbuss thats had its barrel decorated with soda pop cans. As Cooper reaches down to pick up the weapon however, a gloved hand reaches out and snatches it away! Before Cooper has the chance to react, he’s lifted to his feet painfully by his ear. Brought up to full height Cooper manages to see his captor; a sneering woman with yellowed teeth. “Oi! Are you the disrespectful young so-and-so that’s bin usin’ this thing ta make a sticky mess all over me clean floors?” The cleaning woman inquires as Cooper shakes his head in confusion “Oh… right then. Must’ve bin someone else. Sorry about that. But now you’re ‘ere, yer may as well take it with yer an’ throw it in the trash.” The cleaning woman says as she hands the gun over to Cooper.
![]() “Disgustin’ thing, that.“, the Cleaning Woman nods toward the blunderbass as Cooper studies it with great interest. “Someone’s bin a-tinkerin’ with it ta make it fire soda pop cans! A right mess they make when they explode, let me tell yer!” Cooper spins the barrel around before asking about the Walled Garden. “What’s that, the Walled Garden yer say? Why, it’s just through here, innit?” the Cleaning Woman says as she points a helpful finger across the room. “Barbara Buffbrass is me name, by the way. Me friends call me Babs. You c’n call me Ms. Buffbrass. Cooper smiles up thankfully at Ms. Buffbrass before giving a nod to the opposite side of the room. Glancing down to his newly found Fizzy Grenade Soda Pop Gun, Cooper spins the revolving chamber once more before patiently waiting for Babs to leave the room. She isn’t going to like the aftermath of what will happen to her newly polished floors once he’s gotten through a thick wave of steadily approaching Ghoulies…
“Disgustin’ thing, that.“, the Cleaning Woman nods toward the blunderbass as Cooper studies it with great interest. “Someone’s bin a-tinkerin’ with it ta make it fire soda pop cans! A right mess they make when they explode, let me tell yer!” Cooper spins the barrel around before asking about the Walled Garden. “What’s that, the Walled Garden yer say? Why, it’s just through here, innit?” the Cleaning Woman says as she points a helpful finger across the room. “Barbara Buffbrass is me name, by the way. Me friends call me Babs. You c’n call me Ms. Buffbrass. Cooper smiles up thankfully at Ms. Buffbrass before giving a nod to the opposite side of the room. Glancing down to his newly found Fizzy Grenade Soda Pop Gun, Cooper spins the revolving chamber once more before patiently waiting for Babs to leave the room. She isn’t going to like the aftermath of what will happen to her newly polished floors once he’s gotten through a thick wave of steadily approaching Ghoulies…
MUSIC ROOM
![]() You’ll find that controlling the Soda Pop Gun is quite similar to Ol’ Edna. Holding the Right Thumbstick will designate where you’d like to fire a soda pop can, whereas tapping it will instead allow you to swing it heartily when you’ve run out of ammo. Instead of darting for the door on the opposite of the Music Room straight off, let’s instead crack open the large guitar case on the floor directly ahead to unleash a Skeleton inside. You’ll only need a single shot to take him out and two subsequent hits to take out the Zombie that follows after. Once you’re finished with that, approach the second area of this room and you’ll spot a single Health Super Soup in front of the fireplace. Snatch it up quickly and then head toward the door where you’ll enter a Super Scary Shock Sequence. Thanks to the Health Soup if you fail this challenge you’ll have a single unit of health to make it through the door to the Walled Garden, which is preferable to using up one of your Times Fainted instead.
You’ll find that controlling the Soda Pop Gun is quite similar to Ol’ Edna. Holding the Right Thumbstick will designate where you’d like to fire a soda pop can, whereas tapping it will instead allow you to swing it heartily when you’ve run out of ammo. Instead of darting for the door on the opposite of the Music Room straight off, let’s instead crack open the large guitar case on the floor directly ahead to unleash a Skeleton inside. You’ll only need a single shot to take him out and two subsequent hits to take out the Zombie that follows after. Once you’re finished with that, approach the second area of this room and you’ll spot a single Health Super Soup in front of the fireplace. Snatch it up quickly and then head toward the door where you’ll enter a Super Scary Shock Sequence. Thanks to the Health Soup if you fail this challenge you’ll have a single unit of health to make it through the door to the Walled Garden, which is preferable to using up one of your Times Fainted instead.
WALLED GARDEN
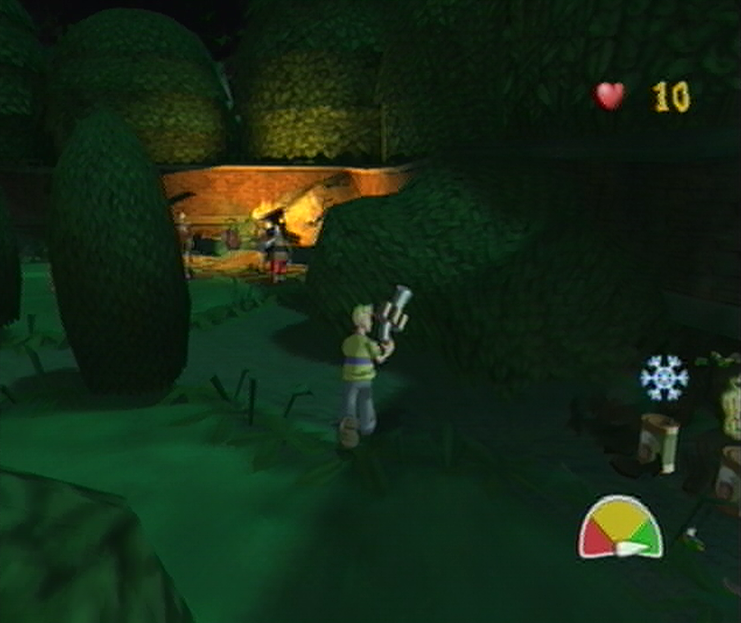
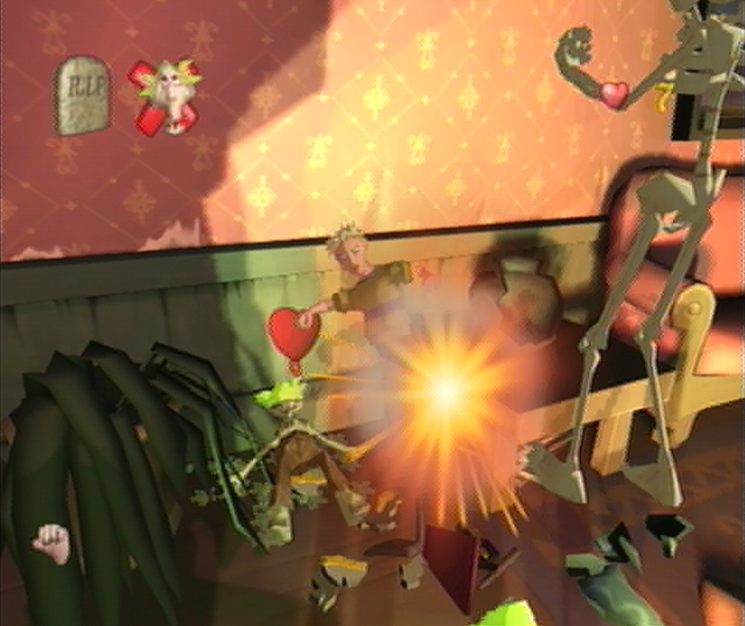
![]() Initially you’ll only be allotted a meager 5 Health as you step into the Walled Garden, so make sure that you take out the Flying Imp overhead with your Soda Pop gun before turning around on the spot to locate a 5 Health Tin inside one of the flower pots. Now that your health has been increased to a more manageable 10, you’ll need to work your way around the fountain in the center and avoid collecting the Dungweed just yet. If you’ve passed by completely undetected you’ll spot a great crack that goes down the perimeter wall next to an upturned bench as you approach it. While it’s quite difficult to see through the shadows, you should spot a collection of descending flower pots just to the left of this crack. Breaking all three open with your Soda Pop Gun will reveal a Super Weapons! Soup Tin as well as a Freeze Ghoulies! Soup Tin. Now that we’re finished with that we’ll sneak up on the Zombie Pirate by the Dungweed to the left and use one of our Fizzy Grenades to knock him over.
Initially you’ll only be allotted a meager 5 Health as you step into the Walled Garden, so make sure that you take out the Flying Imp overhead with your Soda Pop gun before turning around on the spot to locate a 5 Health Tin inside one of the flower pots. Now that your health has been increased to a more manageable 10, you’ll need to work your way around the fountain in the center and avoid collecting the Dungweed just yet. If you’ve passed by completely undetected you’ll spot a great crack that goes down the perimeter wall next to an upturned bench as you approach it. While it’s quite difficult to see through the shadows, you should spot a collection of descending flower pots just to the left of this crack. Breaking all three open with your Soda Pop Gun will reveal a Super Weapons! Soup Tin as well as a Freeze Ghoulies! Soup Tin. Now that we’re finished with that we’ll sneak up on the Zombie Pirate by the Dungweed to the left and use one of our Fizzy Grenades to knock him over.
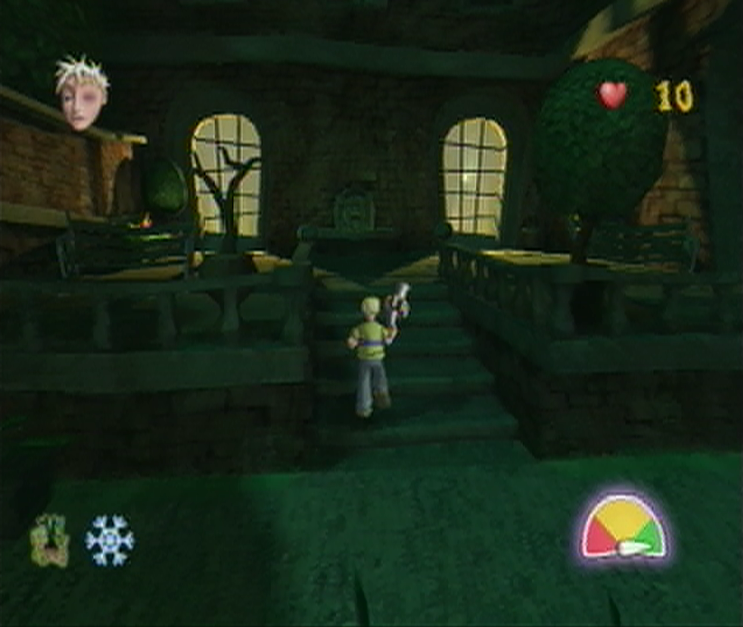
![]() In response to sticking up to their slave driver, the trio of Skeletons will turn on their master and become traitorous. While the Skeletons naturally make good friends, they make even better entries to our Ghoulies Defeated score, so before they’ve gotten a chance to properly revolt, take out all three and then move on to the Zombie Pirate afterwards. Once the coast is clear, retrieve the Dungweed from its spot in the Garden and you’ll start the challenge. You’ll need to head back immediately toward the Super Soups you’ve uncovered and grab the Freeze Ghoulies! Tin. From here it’s just a simple task of running up to the Challenge Door found on the stone porch directly across from the pots. You’ll only have a limited time before the Freeze Ghoulies! Tin wears off so make the most of it and you should reach the Challenge Door without issue. Once you arrive, use a Fizzy Grenade to take out the single frozen Ninja Imp at the doorway and then carry through to the Study.
In response to sticking up to their slave driver, the trio of Skeletons will turn on their master and become traitorous. While the Skeletons naturally make good friends, they make even better entries to our Ghoulies Defeated score, so before they’ve gotten a chance to properly revolt, take out all three and then move on to the Zombie Pirate afterwards. Once the coast is clear, retrieve the Dungweed from its spot in the Garden and you’ll start the challenge. You’ll need to head back immediately toward the Super Soups you’ve uncovered and grab the Freeze Ghoulies! Tin. From here it’s just a simple task of running up to the Challenge Door found on the stone porch directly across from the pots. You’ll only have a limited time before the Freeze Ghoulies! Tin wears off so make the most of it and you should reach the Challenge Door without issue. Once you arrive, use a Fizzy Grenade to take out the single frozen Ninja Imp at the doorway and then carry through to the Study.