Chapter 2-3: Someone with a bone to pick with you…


Navigation:
Chapter 1: The Rescue
Chapter 2: The Restoration
-2-1: Ingress with Ingredients
-2-2: Eggs for cracking, Ghoulies for smacking
-2-3: Someone has a Bone to pick with you…
-2-4: Sugar, Spice and Dungweed
-2-5: A Curious Concoction
-2-6: Too many cooks spoil the broth
Chapter 3: The Riddle
Chapter 4: The Reckoning
Chapter 5: The Race
AN EGG IN THE HAND IS WATCHED BY BONES IN THE BUSH
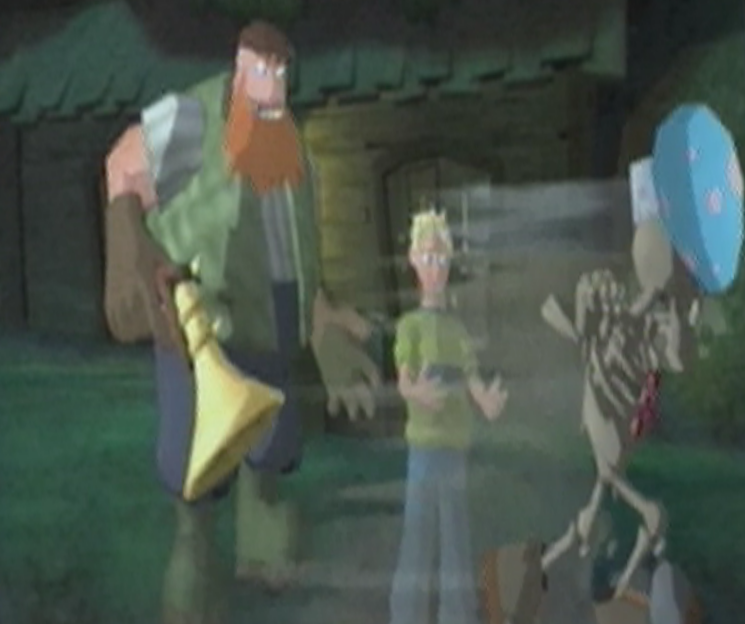
![]() From his hidden vantage point in the bush, the short Skeleton brushes a bit of greenery out of the way to get a better look. While the rustling goes unheard, the same can not be said for the Skeletons audible and agitated ‘Tsk’ as he raises a questioning arm into the air. Fiddlesworth manages to turn and see the source of the sound just as the nimble Skeleton bounds over the fence and makes a beeline toward Cooper! No sooner had the dubious duo taken in the ridiculous scene before them had the Skeleton swiped the Giant Egg right from Coopers hands, much to the surprise of a startled Fiddlesworth! “Pick my plums!” the groundskeeper shouts aghast as he points toward the direction of the Skeleton, “That be a strange occurence an’ no mistake! You’d best be after ‘im quick an’ get back that big egg o’ yers!” And just as many scenes previous Cooper is once again to fend for himself as he chases the eggcentric Skeleton around the yard in hopes to steal his Giant Egg once again…
From his hidden vantage point in the bush, the short Skeleton brushes a bit of greenery out of the way to get a better look. While the rustling goes unheard, the same can not be said for the Skeletons audible and agitated ‘Tsk’ as he raises a questioning arm into the air. Fiddlesworth manages to turn and see the source of the sound just as the nimble Skeleton bounds over the fence and makes a beeline toward Cooper! No sooner had the dubious duo taken in the ridiculous scene before them had the Skeleton swiped the Giant Egg right from Coopers hands, much to the surprise of a startled Fiddlesworth! “Pick my plums!” the groundskeeper shouts aghast as he points toward the direction of the Skeleton, “That be a strange occurence an’ no mistake! You’d best be after ‘im quick an’ get back that big egg o’ yers!” And just as many scenes previous Cooper is once again to fend for himself as he chases the eggcentric Skeleton around the yard in hopes to steal his Giant Egg once again…
FARM YARD
![]() Luckily the Farmyard itself doesn’t pose a challenge that you’ll have to beat before you can go chasing after the heels of the swindling Skeleton, but getting there is going to be half the battle. There isn’t much ground to cover, and you’ll find yourself completing the trek rather easily, but your meager amount of health provided in the Farmyard could run you into a spot of trouble all the same. While you’ll naturally want to hit the ground running, be sure to avoid getting too close to the well in the center of the yard which harbors a collection of four Ninja Imps just waiting to pounce out. You can turn this outcome in your favor by collecting the Traitor Fever! Soup Tin just to the left of the well; this will keep the Ninja Imps busy practicing their lethal martial arts on each other, allowing you to slip by completely unscathed. Keep an eye out for the second ambush that will keep themselves busy as you approach the crumbly wall near the egg touting Skeleton.
Luckily the Farmyard itself doesn’t pose a challenge that you’ll have to beat before you can go chasing after the heels of the swindling Skeleton, but getting there is going to be half the battle. There isn’t much ground to cover, and you’ll find yourself completing the trek rather easily, but your meager amount of health provided in the Farmyard could run you into a spot of trouble all the same. While you’ll naturally want to hit the ground running, be sure to avoid getting too close to the well in the center of the yard which harbors a collection of four Ninja Imps just waiting to pounce out. You can turn this outcome in your favor by collecting the Traitor Fever! Soup Tin just to the left of the well; this will keep the Ninja Imps busy practicing their lethal martial arts on each other, allowing you to slip by completely unscathed. Keep an eye out for the second ambush that will keep themselves busy as you approach the crumbly wall near the egg touting Skeleton.
WORKSHOP
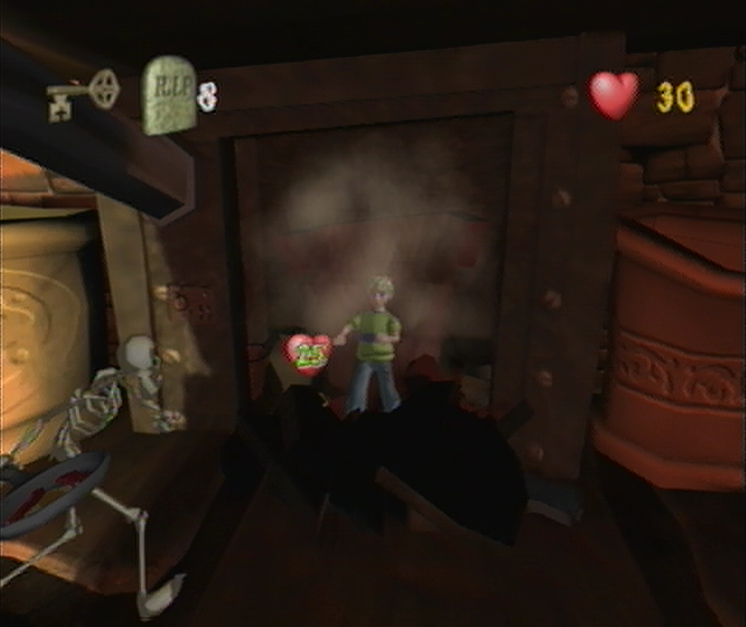
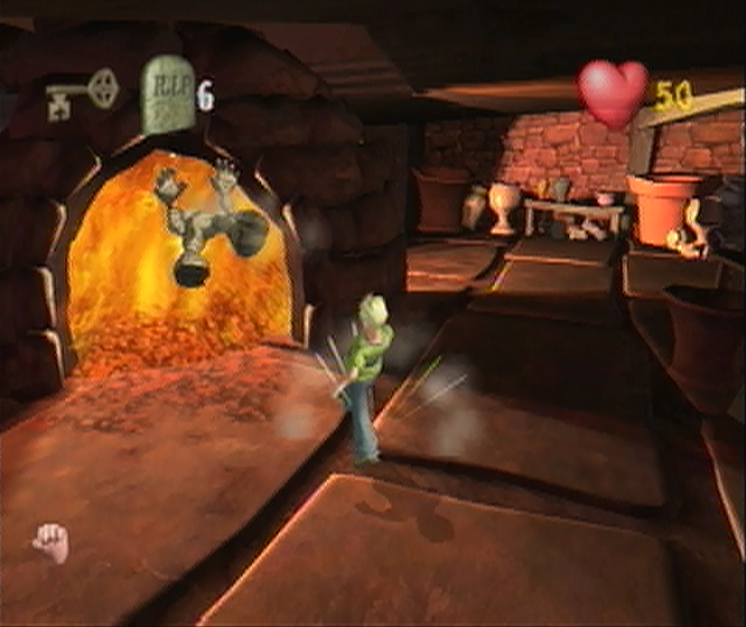
![]() When you enter the Workshop for the first time you’ll swear you were seeing double! In front of the central fireplace crouches a Skeleton roasting an egg, luckily it isn’t yours, but on the other hand this gives the real Skeleton ample time to exit the room and leave you a hefty challenge, brilliant! In this case you’ll have to beat a total of eight Ghoulies in the Workshop and locate the Key that’s been hidden in some rare pottery. You’ll want to avoid the Skeleton wielding the Frying Pan here, and use this time before the waves of Ghoulies start swamping into the room to look for the Kiln Room around the perimeter. Once you’ve managed to locate the Kiln Room, as evidenced by the large iron door, give yourself plenty of space from the Skeleton and smash yourself an opening. After you’ve scooped up the 25 Health Soup Tin off the floor you’re free to go to work on the Skeleton which shouldn’t be too difficult. Once you’ve done that, the real fun begins.
When you enter the Workshop for the first time you’ll swear you were seeing double! In front of the central fireplace crouches a Skeleton roasting an egg, luckily it isn’t yours, but on the other hand this gives the real Skeleton ample time to exit the room and leave you a hefty challenge, brilliant! In this case you’ll have to beat a total of eight Ghoulies in the Workshop and locate the Key that’s been hidden in some rare pottery. You’ll want to avoid the Skeleton wielding the Frying Pan here, and use this time before the waves of Ghoulies start swamping into the room to look for the Kiln Room around the perimeter. Once you’ve managed to locate the Kiln Room, as evidenced by the large iron door, give yourself plenty of space from the Skeleton and smash yourself an opening. After you’ve scooped up the 25 Health Soup Tin off the floor you’re free to go to work on the Skeleton which shouldn’t be too difficult. Once you’ve done that, the real fun begins.
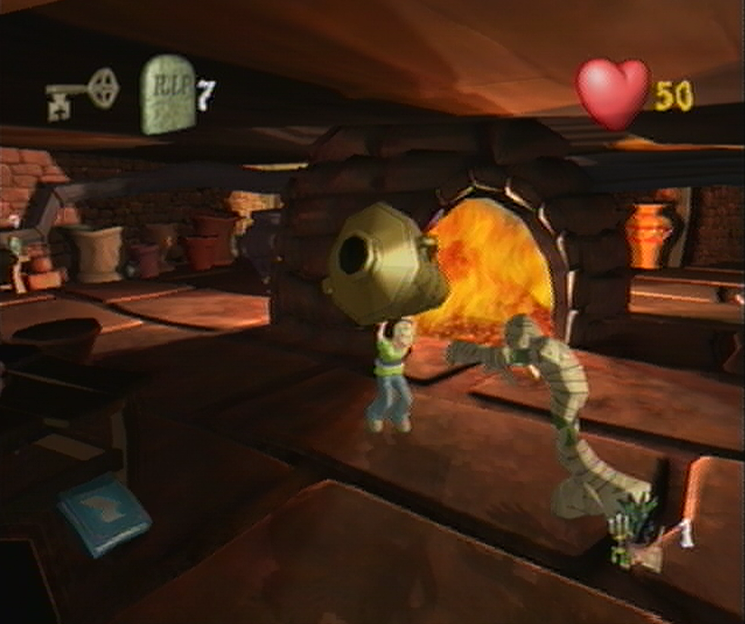
![]() Once the Skeleton has been panhandled, you’ll find that a Mummy has burst forth from one of the pots nearest one of the locked Challenge Doors. Since you’re without a torch in the Workshop you’ll have to do a little improvisation with your surroundings by kicking the Mummies into the large oven in the center of the room. Before we tackle our first Mummy, let’s avoid a potential problem and add to our Ghouly counter as well. Take note from where the first Mummy came from in the Workshop and you’ll spot a large bronze vase in the corner that you can pick up once you’ve gotten close enough. After you’ve hoisted it above your head, launch it into the fireplace and you’ll notice your Ghouly counter on the top right hand side of the screen will decrease by a single point; turns out that your vase also harbored a Cursed Mummy inside that would have popped out later on. By utilizing this strategy you’ll benefit your score and save time otherwise spent kicking him in as well.
Once the Skeleton has been panhandled, you’ll find that a Mummy has burst forth from one of the pots nearest one of the locked Challenge Doors. Since you’re without a torch in the Workshop you’ll have to do a little improvisation with your surroundings by kicking the Mummies into the large oven in the center of the room. Before we tackle our first Mummy, let’s avoid a potential problem and add to our Ghouly counter as well. Take note from where the first Mummy came from in the Workshop and you’ll spot a large bronze vase in the corner that you can pick up once you’ve gotten close enough. After you’ve hoisted it above your head, launch it into the fireplace and you’ll notice your Ghouly counter on the top right hand side of the screen will decrease by a single point; turns out that your vase also harbored a Cursed Mummy inside that would have popped out later on. By utilizing this strategy you’ll benefit your score and save time otherwise spent kicking him in as well.
![]() Right, it’s time to turn around and deal with the Mummy that’s been pursuing you around the Workshop. Move in close in order to get in some quick hits that direct him toward the fireplace in the center of the room. After a few successful combos you’ll notice that he’s gotten rather dizzy; it’s time for the finisher. Line up your shot and deliver one final blow to send him into the flames, if you’ve missed there’s still time to adjust your new angle and kick him into the fireplace before he gets to his feet. It’s a good idea to go around the edges of the Workplace to look for the Knockdown Mania! Soup Tin found atop one of the benches; this will allow you to deliver one of the ‘finishing blows’ without the tedium of sending the Mummy into a dizzy spell first. After you’ve defeated your fifth Ghouly the ante is upped considerably as two Mummies will come to fight you at the same time, which can be rather difficult when you’re trying to align a precise shot into the fireplace.
Right, it’s time to turn around and deal with the Mummy that’s been pursuing you around the Workshop. Move in close in order to get in some quick hits that direct him toward the fireplace in the center of the room. After a few successful combos you’ll notice that he’s gotten rather dizzy; it’s time for the finisher. Line up your shot and deliver one final blow to send him into the flames, if you’ve missed there’s still time to adjust your new angle and kick him into the fireplace before he gets to his feet. It’s a good idea to go around the edges of the Workplace to look for the Knockdown Mania! Soup Tin found atop one of the benches; this will allow you to deliver one of the ‘finishing blows’ without the tedium of sending the Mummy into a dizzy spell first. After you’ve defeated your fifth Ghouly the ante is upped considerably as two Mummies will come to fight you at the same time, which can be rather difficult when you’re trying to align a precise shot into the fireplace.
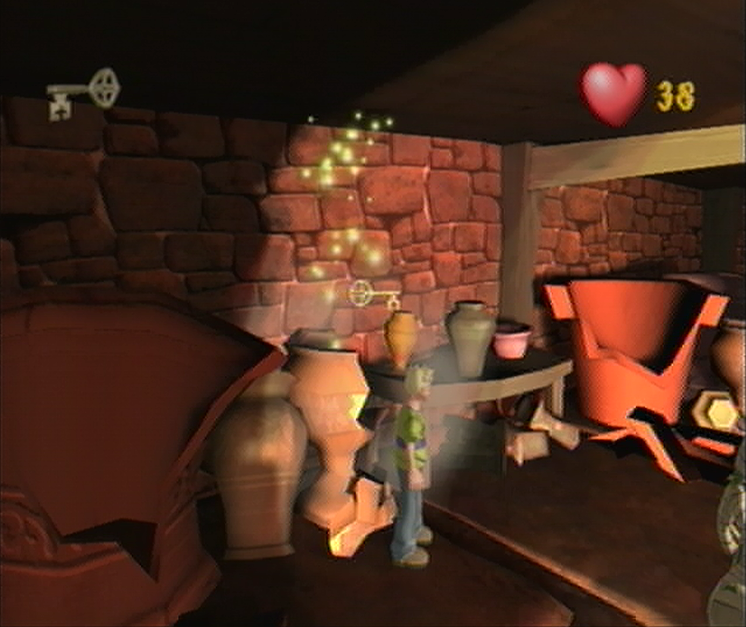
![]() If you’ve been hit by one of the Mummies over the head you’ll go lose 3 Health Points and enter a stunned mode. From here you’re vulnerable for the Mummy to club you with his large staf, an attack that takes away 6 whole points once it connects with Cooper, so you’ll want to avoid that at all costs or your health will be drained in no time flat. The best maneuver is to rotate the right thumbstick to regain composure and then flee the area of attack. This also works if you get a little wrapped up in bandages yourself, and if that’s the case a staf smash is sure to follow! Try your best to multi-task with the duo of Mummies by stunning one and dealing with another alternately. Once you manage to get your counter to 0, check round the room for any remaining Mummies and slam them into the fire to increase your Ghoulies Defeated score. Your last task is to find the Hidden Key inside one of the Rare ceramic works around the Workshop, smash them all open and you’ll find the key allowing you to progress.
If you’ve been hit by one of the Mummies over the head you’ll go lose 3 Health Points and enter a stunned mode. From here you’re vulnerable for the Mummy to club you with his large staf, an attack that takes away 6 whole points once it connects with Cooper, so you’ll want to avoid that at all costs or your health will be drained in no time flat. The best maneuver is to rotate the right thumbstick to regain composure and then flee the area of attack. This also works if you get a little wrapped up in bandages yourself, and if that’s the case a staf smash is sure to follow! Try your best to multi-task with the duo of Mummies by stunning one and dealing with another alternately. Once you manage to get your counter to 0, check round the room for any remaining Mummies and slam them into the fire to increase your Ghoulies Defeated score. Your last task is to find the Hidden Key inside one of the Rare ceramic works around the Workshop, smash them all open and you’ll find the key allowing you to progress.
LOWER CORRIDORS
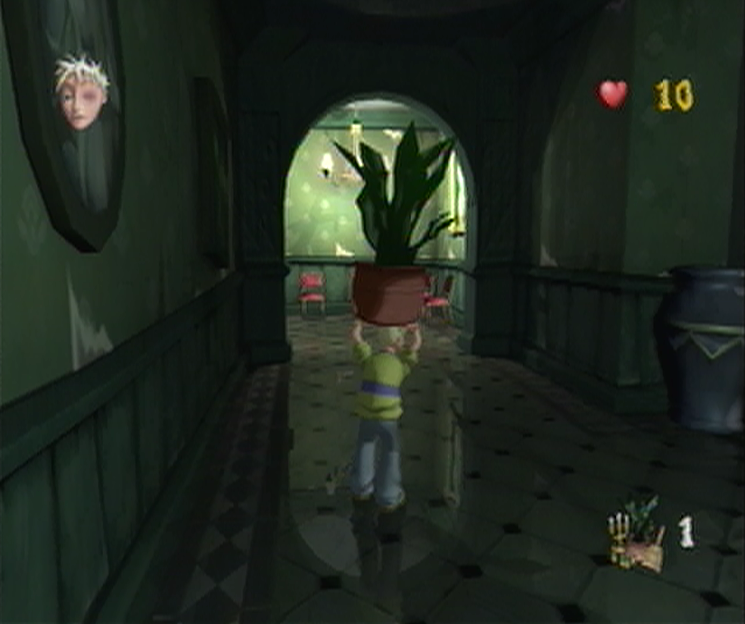
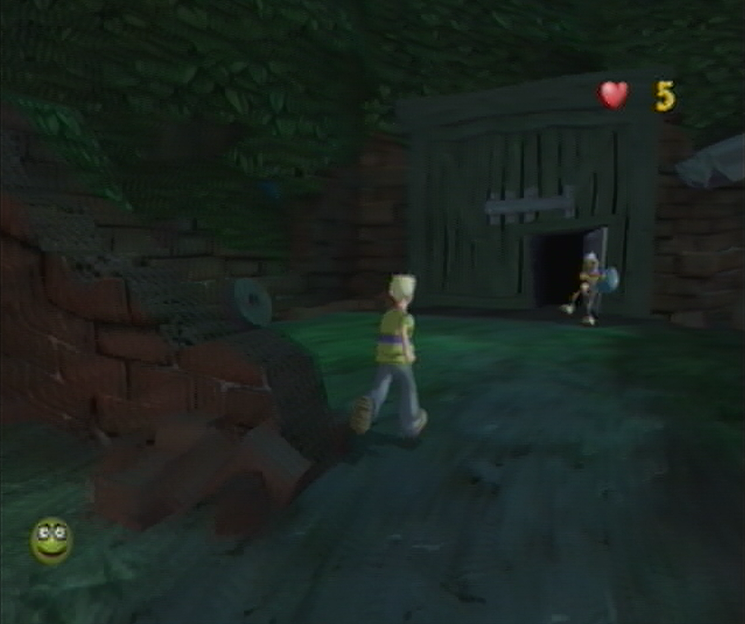
![]() Now that we’ve found our way back inside Ghoulhaven Hall we’ll be thrown into a new challenge straight away; get through the Lower Corridors without succumbing to any damage whatsoever. While this challenge comes off as difficult at first, there’s one crucial move that sends it all unraveling. As you start off, ignore the chairs ahead and instead turn to your left to find a single potted plant in the corner. Pick up the plant and pitch it toward the second chair from the left in the corner ahead. If you’ve done this correctly you’ll manage to defeat all four Haunted Chairs, which clears out all of the Ghoulies found in this room. Once you’ve done that continue down the corridor and you’ll find a 5 Health Point Soup Tin just around the corner, which prepares you for the challenge ahead. Drink up and head for the exit where you’ll unwillingly enter a Super Scary Shock event. Survive the sequence – or fail thanks to the Soup – and carry on through the exit once you’ve been returned to the ground.
Now that we’ve found our way back inside Ghoulhaven Hall we’ll be thrown into a new challenge straight away; get through the Lower Corridors without succumbing to any damage whatsoever. While this challenge comes off as difficult at first, there’s one crucial move that sends it all unraveling. As you start off, ignore the chairs ahead and instead turn to your left to find a single potted plant in the corner. Pick up the plant and pitch it toward the second chair from the left in the corner ahead. If you’ve done this correctly you’ll manage to defeat all four Haunted Chairs, which clears out all of the Ghoulies found in this room. Once you’ve done that continue down the corridor and you’ll find a 5 Health Point Soup Tin just around the corner, which prepares you for the challenge ahead. Drink up and head for the exit where you’ll unwillingly enter a Super Scary Shock event. Survive the sequence – or fail thanks to the Soup – and carry on through the exit once you’ve been returned to the ground.
PANTRY
![]() Akin to the room previous, the Pantry also features a rather lofty challenge that can easily be worked around if you execute the correct strategy. As you start off you’ll need to make your way to the center of the room where you’ll see a discarded piece of clothing on the ground. Once you’ve walked far enough the Egg-bearing Skeleton will run through the open door as it slams behind him, this will also introduce you to the Haunted Coat as the once inanimate coat springs to life. Dealing with this load of laundry is actually quite simple; just lay it on thick without giving it a chance to deck you with its spinning sleeves. Right, this bit is crucial – until instructed, do not continue down the corridor toward the Challenge Door or this entire plan will be for naught. If the Haunted Coat ventures off between the shelves, stay back and you’ll lure him toward the center of the room after he’s finished. Defeat the Haunted Coat and the Challenge Door will open – don’t fall for this deception!
Akin to the room previous, the Pantry also features a rather lofty challenge that can easily be worked around if you execute the correct strategy. As you start off you’ll need to make your way to the center of the room where you’ll see a discarded piece of clothing on the ground. Once you’ve walked far enough the Egg-bearing Skeleton will run through the open door as it slams behind him, this will also introduce you to the Haunted Coat as the once inanimate coat springs to life. Dealing with this load of laundry is actually quite simple; just lay it on thick without giving it a chance to deck you with its spinning sleeves. Right, this bit is crucial – until instructed, do not continue down the corridor toward the Challenge Door or this entire plan will be for naught. If the Haunted Coat ventures off between the shelves, stay back and you’ll lure him toward the center of the room after he’s finished. Defeat the Haunted Coat and the Challenge Door will open – don’t fall for this deception!
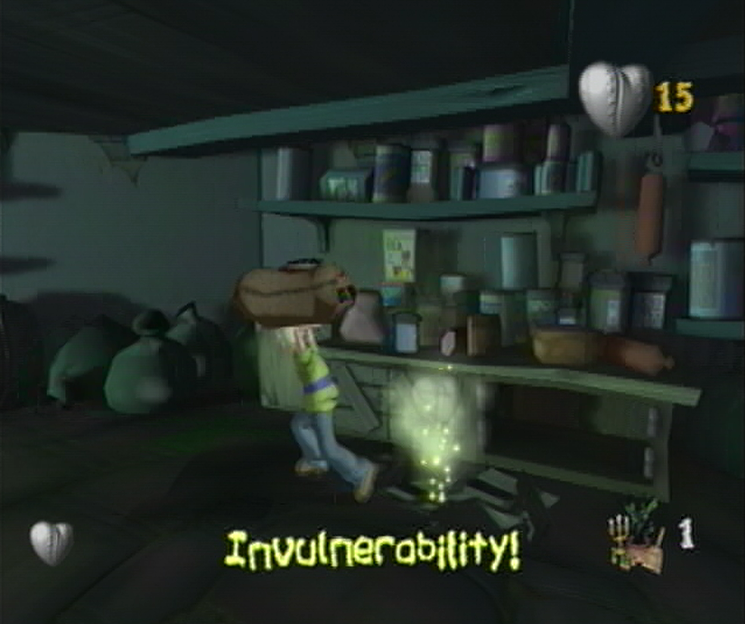
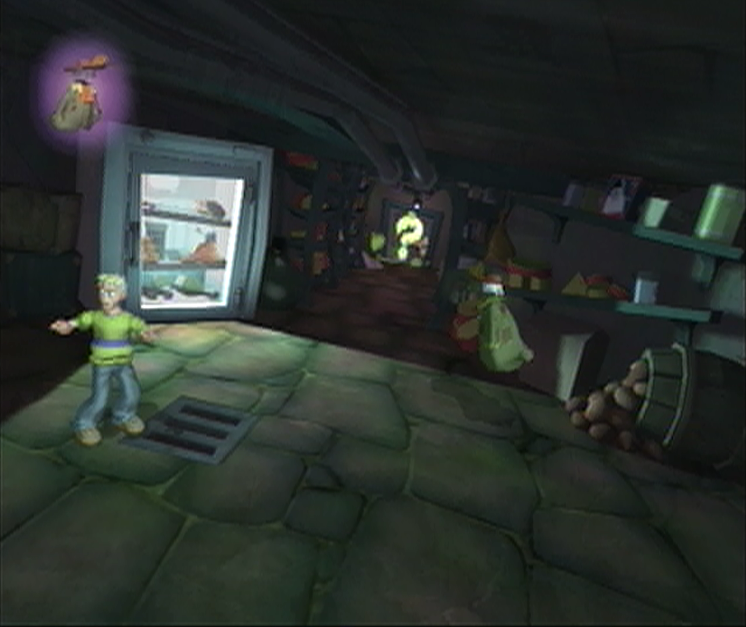
![]() Once the Haunted Coat has returned to a lump on the floor, the dusty fabric will dissolve, revealing some Imps who are perfectly ripe for a good kick. Do what you can to take out the Imps in a timely fashion, just remember that the same rules apply as before; avoid venturing down the Corridor at all costs. Once you manage to take out the Imps you should notice a short cabinet with four doors underneath a row of shelves. Walk up to this cabinet and kick out the farthest door to the right, doing so will reveal the last Imp as well as an Invulnerability! Soup Tin. Defeat the Imp but avoid collecting this Super Soup just yet. Once the room has been cleared out from its Imp infestation we’ll be ready for the next step; working our way back to the area that we started off in behind the Freezer. From here, you should manage to see a large bag of flour to the left, tucked behind a pile of potatoes. Pick it up and collect the Invulnerability! Soup Tin back in the main room.
Once the Haunted Coat has returned to a lump on the floor, the dusty fabric will dissolve, revealing some Imps who are perfectly ripe for a good kick. Do what you can to take out the Imps in a timely fashion, just remember that the same rules apply as before; avoid venturing down the Corridor at all costs. Once you manage to take out the Imps you should notice a short cabinet with four doors underneath a row of shelves. Walk up to this cabinet and kick out the farthest door to the right, doing so will reveal the last Imp as well as an Invulnerability! Soup Tin. Defeat the Imp but avoid collecting this Super Soup just yet. Once the room has been cleared out from its Imp infestation we’ll be ready for the next step; working our way back to the area that we started off in behind the Freezer. From here, you should manage to see a large bag of flour to the left, tucked behind a pile of potatoes. Pick it up and collect the Invulnerability! Soup Tin back in the main room.
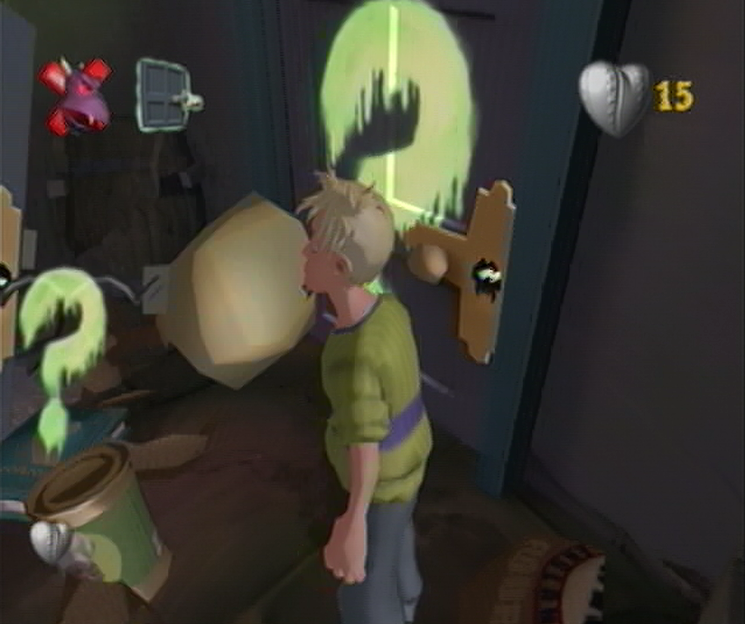
![]() You’ll need to start down the corridor that features the open Challenge Door at the end, but you must not go past the first shelving unit or you’ll trigger the event too early. Instead, position yourself midway when you arrive at the shelving unit and then toss your bag of flour directly at the center of the Challenge Door. If you’ve done this correctly, the Door will reveal itself to be of the Haunted variety, but not before an ill-placed barrel to the left of it explodes, leaving a Challenge Complete! Soup Tin in its wake. With the Imps out of the picture we won’t accidentally defeat them as we make our way toward the door, and thanks to the Invulnerability! Soup Tin we’ll be able to sneak right past the Haunted Door. Once you’ve managed to squeeze by the Doors’ frame, or sent it into submission, you’ll spot the Challenge Complete! Soup Tin on the ground just in front of the real Challenge Door. Scoop it up as quickly as possible and then carry on through to the Kitchen.
You’ll need to start down the corridor that features the open Challenge Door at the end, but you must not go past the first shelving unit or you’ll trigger the event too early. Instead, position yourself midway when you arrive at the shelving unit and then toss your bag of flour directly at the center of the Challenge Door. If you’ve done this correctly, the Door will reveal itself to be of the Haunted variety, but not before an ill-placed barrel to the left of it explodes, leaving a Challenge Complete! Soup Tin in its wake. With the Imps out of the picture we won’t accidentally defeat them as we make our way toward the door, and thanks to the Invulnerability! Soup Tin we’ll be able to sneak right past the Haunted Door. Once you’ve managed to squeeze by the Doors’ frame, or sent it into submission, you’ll spot the Challenge Complete! Soup Tin on the ground just in front of the real Challenge Door. Scoop it up as quickly as possible and then carry on through to the Kitchen.
KITCHEN

![]() Well, it was a bit of a round about way of doing things, but here we are back in the Kitchen with our second ingredient; now to just pry it from Bone Boys’ hands and we’ll be set! As you start off you’ll find the Skeleton at Ma Soupswils’ Cauldron in the center of the room, without anywhere left to run you’ll only need to approach him for a chase to ensue! You shouldn’t have much trouble dishing out the damage on this sprinting Skeleton, as he starts off at a nice pace that you can easily catch up to and plan out your route well in advance. However, the more hits you land, the faster he moves, so the best course of action is to use the items around the room in order to attack him from afar. The best course of action is to ignore chasing him at all and instead head over to a garbage pile near the Christmas Pudding atop the table. On the pile closest to the fireplace you’ll find a collection of Hamburgers which you can pick up and toss freely in his direction which leads to a very quick confrontation.
Well, it was a bit of a round about way of doing things, but here we are back in the Kitchen with our second ingredient; now to just pry it from Bone Boys’ hands and we’ll be set! As you start off you’ll find the Skeleton at Ma Soupswils’ Cauldron in the center of the room, without anywhere left to run you’ll only need to approach him for a chase to ensue! You shouldn’t have much trouble dishing out the damage on this sprinting Skeleton, as he starts off at a nice pace that you can easily catch up to and plan out your route well in advance. However, the more hits you land, the faster he moves, so the best course of action is to use the items around the room in order to attack him from afar. The best course of action is to ignore chasing him at all and instead head over to a garbage pile near the Christmas Pudding atop the table. On the pile closest to the fireplace you’ll find a collection of Hamburgers which you can pick up and toss freely in his direction which leads to a very quick confrontation.
NOW YOU’VE WOUND UP WITH EGG ON YOUR FACE
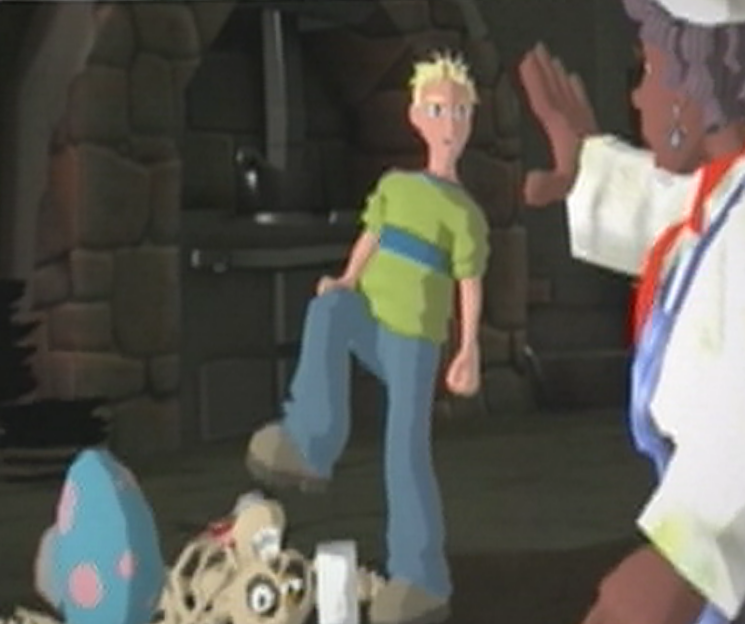
![]() After receiving a startling blow to his polished skull, the Skeleton nearly drops the egg on the floor, but its shell is able to withstand much more abuse – perhaps even more than he can. Cooper stands daunting over top, exasperated and bent on revenge, he raises his shoe into the air preparing himself to come down hard, when suddenly – Ma Soupswill flies into the room, waving her arms trying to get Coopers’ attention. “Oh Lordy! Don’t hurt poor Mister Ribs!” the Cook pleads aloud, “Mr. Ribs is me trusty assistant! I asked ‘im t’help yer by fetchin’ that pretty egg!” Mr. Ribs sighs a breath of relief before wiping a bony hand across his sweaty brow. As the realization washes over Coopers face he smiles coyly and reaches out a hand to help Mr. Ribs to his feet. Well, isn’t this just a tad embarrassing… “Phew! Mr. Ribs okay, no broken bones!” the Skeleton offers seeing Coopers apologetic face. “Look, me get tasty egg for Cookie and strange boy, hee hee!” Mr. Ribs gently removes the egg off the floor.
After receiving a startling blow to his polished skull, the Skeleton nearly drops the egg on the floor, but its shell is able to withstand much more abuse – perhaps even more than he can. Cooper stands daunting over top, exasperated and bent on revenge, he raises his shoe into the air preparing himself to come down hard, when suddenly – Ma Soupswill flies into the room, waving her arms trying to get Coopers’ attention. “Oh Lordy! Don’t hurt poor Mister Ribs!” the Cook pleads aloud, “Mr. Ribs is me trusty assistant! I asked ‘im t’help yer by fetchin’ that pretty egg!” Mr. Ribs sighs a breath of relief before wiping a bony hand across his sweaty brow. As the realization washes over Coopers face he smiles coyly and reaches out a hand to help Mr. Ribs to his feet. Well, isn’t this just a tad embarrassing… “Phew! Mr. Ribs okay, no broken bones!” the Skeleton offers seeing Coopers apologetic face. “Look, me get tasty egg for Cookie and strange boy, hee hee!” Mr. Ribs gently removes the egg off the floor.
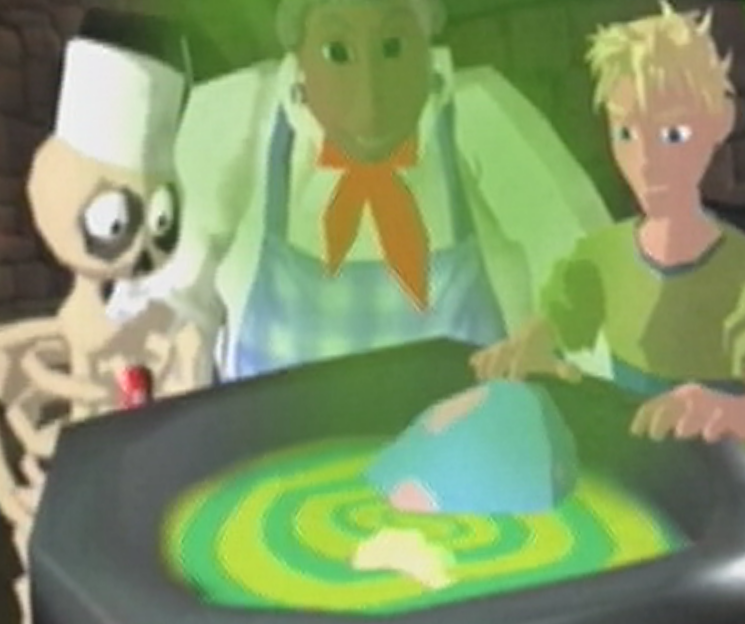
![]() Using both hands, Cooper and Mr. Ribs handle the Egg with extreme care, it would be a shame for it to crack here after coming so far. As Cooper hands off the Giant Egg to Ma Soupswill she throws it behind her shoulder with one hand directly into the frothing Cauldron, nice one! The trio stare into the mix as the Glow Worms and Giant Egg float to the surface and circle around eachother. “Excellent! remarks Ma, “Just a sprig o’ Dungweed left for our potion now! I do believe I’ve seen some potent Dungweed growin’ in the Walled Garden. Head on out through the Grand Hallway to start with!” Right, now that we’ve procured the cure from the first two ingredients, we’re on the last leg of our trip to locate the final ingredient that will see Amber restored to her less-disgusting self! How far we’ve come indeed. Once you’re ready to get moving we’ll continue on ahead to the Grand Hallway where we can be assured that the Ghoulies are sure to intervene during the trek…
Using both hands, Cooper and Mr. Ribs handle the Egg with extreme care, it would be a shame for it to crack here after coming so far. As Cooper hands off the Giant Egg to Ma Soupswill she throws it behind her shoulder with one hand directly into the frothing Cauldron, nice one! The trio stare into the mix as the Glow Worms and Giant Egg float to the surface and circle around eachother. “Excellent! remarks Ma, “Just a sprig o’ Dungweed left for our potion now! I do believe I’ve seen some potent Dungweed growin’ in the Walled Garden. Head on out through the Grand Hallway to start with!” Right, now that we’ve procured the cure from the first two ingredients, we’re on the last leg of our trip to locate the final ingredient that will see Amber restored to her less-disgusting self! How far we’ve come indeed. Once you’re ready to get moving we’ll continue on ahead to the Grand Hallway where we can be assured that the Ghoulies are sure to intervene during the trek…