Chapter 2: The Restoration


Navigation:
Chapter 1: The Rescue
Chapter 2: The Restoration
-2-1: Ingress with Ingredients
-2-2: Eggs for cracking, Ghoulies for smacking
-2-3: Someone has a Bone to pick with you…
-2-4: Sugar, Spice and Dungweed
-2-5: A Curious Concoction
-2-6: Too many cooks spoil the broth
Chapter 3: The Riddle
Chapter 4: The Reckoning
Chapter 5: The Race
RUNNING OUT A RECIPE FOR DISASTER
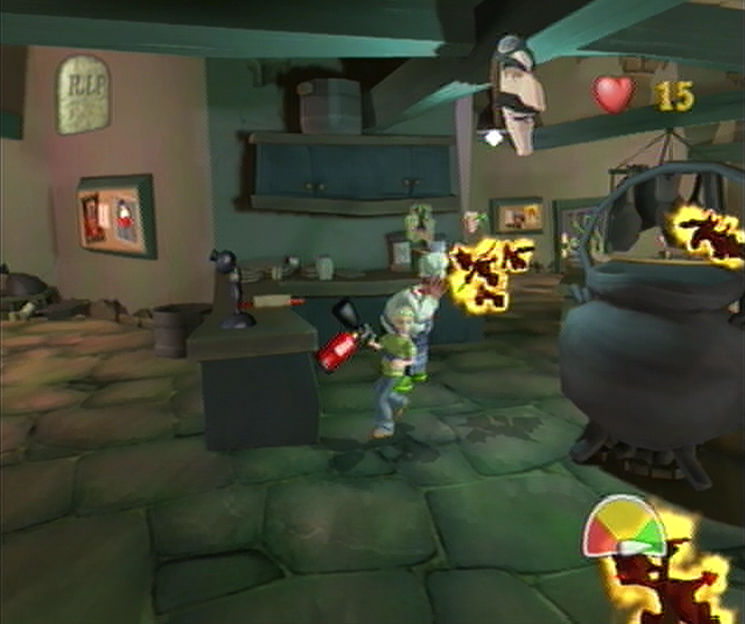
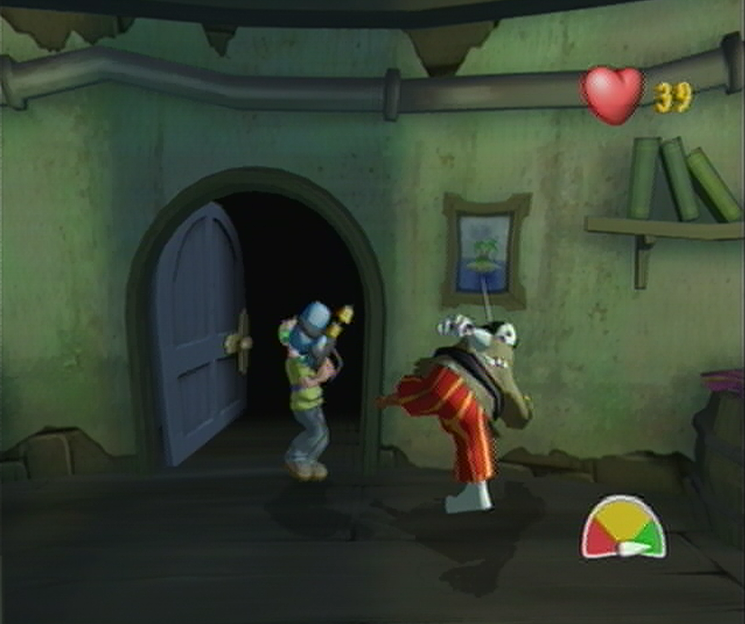
![]() As you ascend the large staircase to the Kitchen you’ll find nearly a dozen Fire Imps soaring around the place causing havoc; if you speak to Ma Soupswill cowering ahead she’ll supply you with a single Fire Extinguisher that you can use independently with the right control stick. Use the extinguisher to clear off the first few Imps before making your way over to the counter behind Ma Soupswill where you’ll manage to find a Turbo Cooper! and Super Weapons! Soup Tin; Grab them both and you’ll be able to clear out the room a lot quicker. Once the Kitchen has been saved the Challenge Door behind the counter will open allowing a Skeleton to enter, Ma Soupswill will tell you that you’ll need to obtain three far flung ingredients to concoct a special potion; the first ingredient being Glow-Worms found powering the Lighthouse. When you’re ready to go, make sure to avoid the Skeleton and travel around the back of the counter where you found the Super Soups to locate the exit.
As you ascend the large staircase to the Kitchen you’ll find nearly a dozen Fire Imps soaring around the place causing havoc; if you speak to Ma Soupswill cowering ahead she’ll supply you with a single Fire Extinguisher that you can use independently with the right control stick. Use the extinguisher to clear off the first few Imps before making your way over to the counter behind Ma Soupswill where you’ll manage to find a Turbo Cooper! and Super Weapons! Soup Tin; Grab them both and you’ll be able to clear out the room a lot quicker. Once the Kitchen has been saved the Challenge Door behind the counter will open allowing a Skeleton to enter, Ma Soupswill will tell you that you’ll need to obtain three far flung ingredients to concoct a special potion; the first ingredient being Glow-Worms found powering the Lighthouse. When you’re ready to go, make sure to avoid the Skeleton and travel around the back of the counter where you found the Super Soups to locate the exit.
SCULLERY
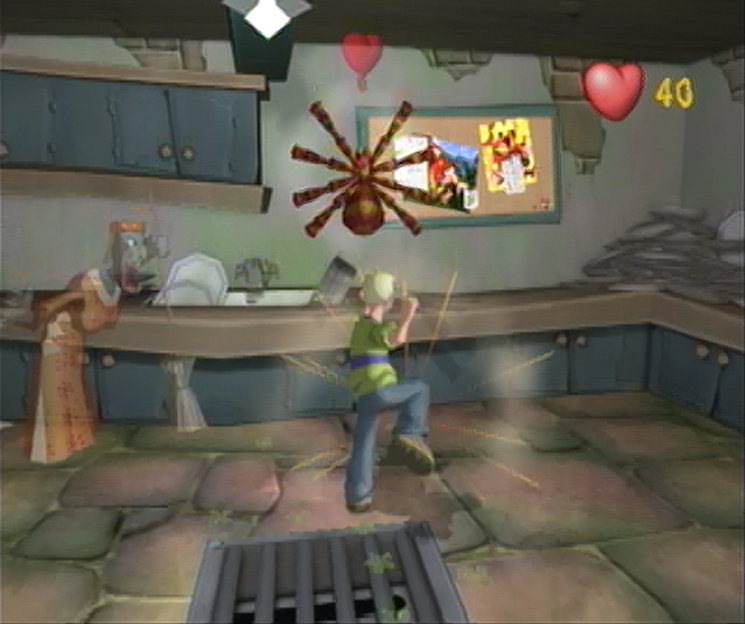
![]() Once you’ve found your way into the Scullery you’ll manage to spot a single Spider clinging to the bulletin board above the sink ahead. Normally we’d avoid this Ghouly outright, but since we’ll find ourselves in a time sensitive situation soon, it’s in our best interest to take it out so we can avoid unnecessary hindrance if we step through its web. Once you’ve coaxed the Spider to fall off the wall it will only take two hits to send it off for good, once you’ve done that, just travel toward the thin corridor with shelves along either side. Follow the shelves to its end and you’ll find an open Challenge Door waiting for you on the opposite side of the room. Attempt to travel through the doorway and you’ll meet the Zombie Ghouly unceremoniously as it breaks wind while stumbling through the exit. With a Zombie in the room the Challenge begins; you’ll have 25 seconds to defeat the Zombie, if you’re unable to do so within that time frame then you’ll get to meet the Grim Reaper.
Once you’ve found your way into the Scullery you’ll manage to spot a single Spider clinging to the bulletin board above the sink ahead. Normally we’d avoid this Ghouly outright, but since we’ll find ourselves in a time sensitive situation soon, it’s in our best interest to take it out so we can avoid unnecessary hindrance if we step through its web. Once you’ve coaxed the Spider to fall off the wall it will only take two hits to send it off for good, once you’ve done that, just travel toward the thin corridor with shelves along either side. Follow the shelves to its end and you’ll find an open Challenge Door waiting for you on the opposite side of the room. Attempt to travel through the doorway and you’ll meet the Zombie Ghouly unceremoniously as it breaks wind while stumbling through the exit. With a Zombie in the room the Challenge begins; you’ll have 25 seconds to defeat the Zombie, if you’re unable to do so within that time frame then you’ll get to meet the Grim Reaper.
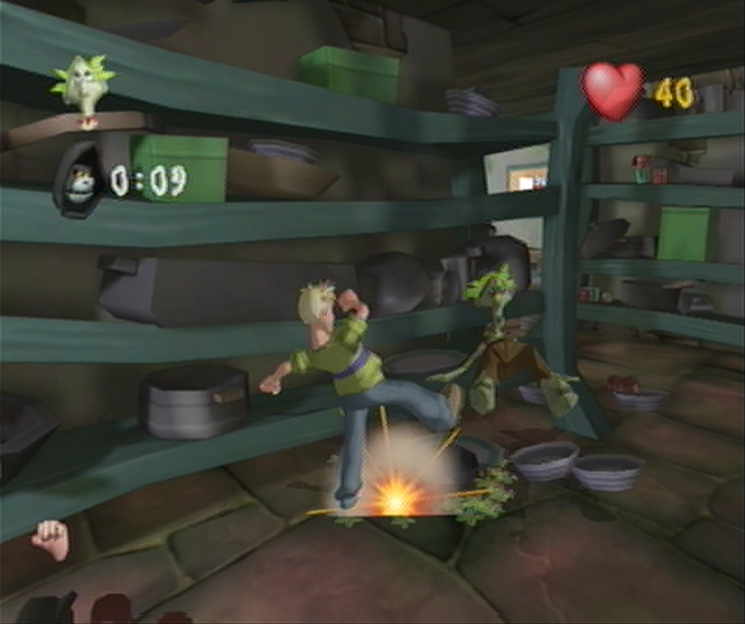
![]() A meeting with the Reaper is less than desired of course, as breaking of the Challenge rules does have its’ consequences. The Reaper will start off at the entrance of any room you cause him to appear in, wherein he’ll slowly approach your location with his finger outstretched. If you’re unable to escape the room or this touch of death before it comes in contact with Cooper, you’ll die instantly, meaning you’ll have to start the room over from the beginning, effectively restarting any challenges within in. Since we’ll want to naturally avoid this happening at all costs we’ll need to defeat the Zombie in a timely fashion. Start off by grabbing the Knockout Mania! Soup Tin found to the left of the Challenge Door and then pummel the Zombie into submission. Once you manage to knock him down keep on swinging; you’ll need to register 8 hits in total to take out this Undead annoyance. Once you’ve completed the Challenge just walk through the door the Zombie initially came through.
A meeting with the Reaper is less than desired of course, as breaking of the Challenge rules does have its’ consequences. The Reaper will start off at the entrance of any room you cause him to appear in, wherein he’ll slowly approach your location with his finger outstretched. If you’re unable to escape the room or this touch of death before it comes in contact with Cooper, you’ll die instantly, meaning you’ll have to start the room over from the beginning, effectively restarting any challenges within in. Since we’ll want to naturally avoid this happening at all costs we’ll need to defeat the Zombie in a timely fashion. Start off by grabbing the Knockout Mania! Soup Tin found to the left of the Challenge Door and then pummel the Zombie into submission. Once you manage to knock him down keep on swinging; you’ll need to register 8 hits in total to take out this Undead annoyance. Once you’ve completed the Challenge just walk through the door the Zombie initially came through.
LOWER CORRIDORS
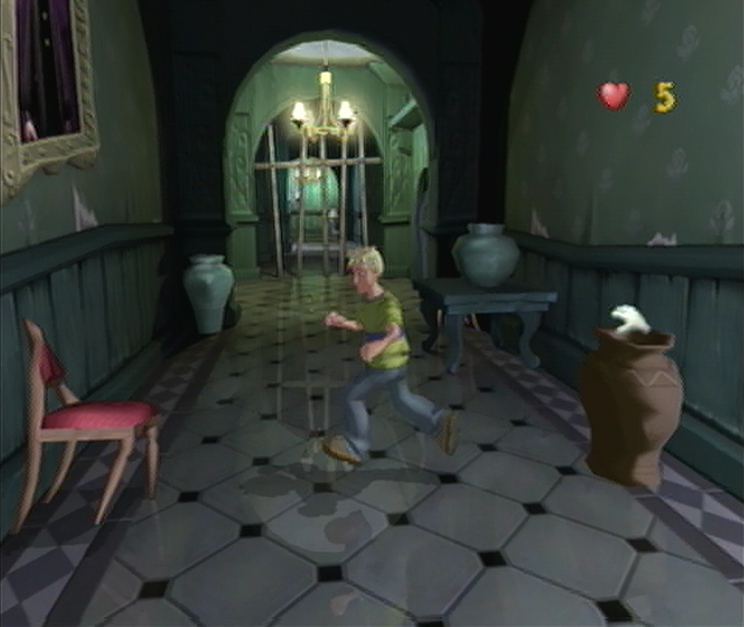
![]() In similar fashion to our last trek through the Lower Corridors we’ll have to be extra careful if we want to avoid an untimely demise, and the odds are definitely stacked against us with an extremely meager amount of health we’ve been offered up. Your main concern therefore is reaching the doorway on the other end of the hallway to the right. You’ll find two Haunted Chairs prepared to stop you from arriving at the doorway, but if you manage to keep a steady pace and avoid the chairs’ sweeping smacks altogether. You’ll be warranted a total of 3 hits from the Chairs to make your job a bit easier, and given the cramped quarters it should be easy enough to keep an eye on their current position from afar and react accordingly. Once you make it through to the end of the hall, travel through the doorway and you’ll manage to hear the thumping bass from the area beyond reverberating through the floor. Is there a Monster Mash in Ghoulhaven Hall?…
In similar fashion to our last trek through the Lower Corridors we’ll have to be extra careful if we want to avoid an untimely demise, and the odds are definitely stacked against us with an extremely meager amount of health we’ve been offered up. Your main concern therefore is reaching the doorway on the other end of the hallway to the right. You’ll find two Haunted Chairs prepared to stop you from arriving at the doorway, but if you manage to keep a steady pace and avoid the chairs’ sweeping smacks altogether. You’ll be warranted a total of 3 hits from the Chairs to make your job a bit easier, and given the cramped quarters it should be easy enough to keep an eye on their current position from afar and react accordingly. Once you make it through to the end of the hall, travel through the doorway and you’ll manage to hear the thumping bass from the area beyond reverberating through the floor. Is there a Monster Mash in Ghoulhaven Hall?…
EMBASSY BALLROOM
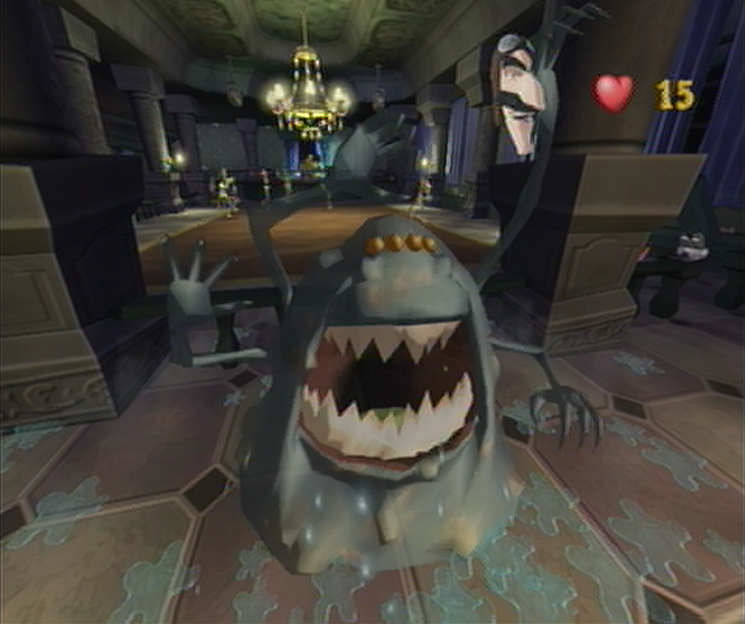
![]() Inside the Embassy Ballroom you’ll manage to answer that question, as the entire room is filled to the brim with Zoot suit Zombies, Sliding Skeletons and overseen by a Mummy DJ. Before you’ll have a chance to get into the club, you’ll have to get by the bouncer who can be found just above the entrance way ready to give you a Scary Shock. When you’re ready to bash some buttons venture on ahead past the curtain and you’ll trigger the Dropper to plop himself down as you solve the Scary Shock Sequence. Once you’ve finished the sequence without losing a bit of health we’ll be ready to tackle our next challenge; getting onto the dance floor. Currently you’ll notice that the floors rather full up with Ghoulies completely devoid of any sense of spatial awareness, if you were to venture on and come in contact with any of the dancing Ghoulies and throw off their groove, you’ll find that they change their tune and become hostile fairly quickly.
Inside the Embassy Ballroom you’ll manage to answer that question, as the entire room is filled to the brim with Zoot suit Zombies, Sliding Skeletons and overseen by a Mummy DJ. Before you’ll have a chance to get into the club, you’ll have to get by the bouncer who can be found just above the entrance way ready to give you a Scary Shock. When you’re ready to bash some buttons venture on ahead past the curtain and you’ll trigger the Dropper to plop himself down as you solve the Scary Shock Sequence. Once you’ve finished the sequence without losing a bit of health we’ll be ready to tackle our next challenge; getting onto the dance floor. Currently you’ll notice that the floors rather full up with Ghoulies completely devoid of any sense of spatial awareness, if you were to venture on and come in contact with any of the dancing Ghoulies and throw off their groove, you’ll find that they change their tune and become hostile fairly quickly.
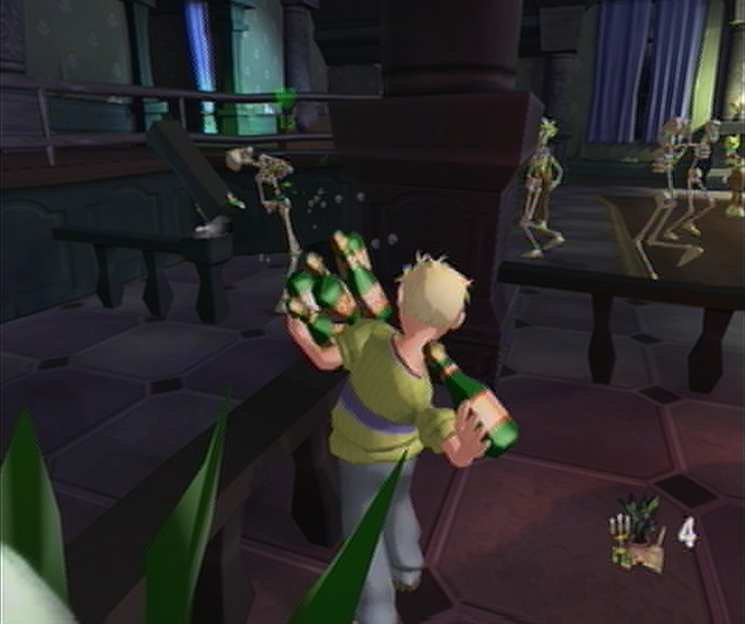
![]() To make matters worse you’ll be locked in the second you step onto the dance floor, so there’s no escaping when your dance partners want to have you for one more song. Luckily we’ll have ample time to prepare for the dance without venturing onto the floor. If you work your way to the left side of the room you’ll see that the perimeter extends to an area with a few tables and chairs set up on the outside. From here you’ll be able to grab the Health soup tins that will see you to the other side of the dance floor, but more importantly you’ll find a number of objects that you’ll be able to utilize against the dancers. The key target to hit is the Skeleton guarding the exit, found near the end of the farthest table closest to the Mummy DJ. Pick up the bottles here and use them to toss at the Skeleton; each time you come in contact with the bony bouncer you’ll take off 5 hitpoints for a total of 20 with 4 successful hits. If you run out of bottles there’s another pile waiting on the table.
To make matters worse you’ll be locked in the second you step onto the dance floor, so there’s no escaping when your dance partners want to have you for one more song. Luckily we’ll have ample time to prepare for the dance without venturing onto the floor. If you work your way to the left side of the room you’ll see that the perimeter extends to an area with a few tables and chairs set up on the outside. From here you’ll be able to grab the Health soup tins that will see you to the other side of the dance floor, but more importantly you’ll find a number of objects that you’ll be able to utilize against the dancers. The key target to hit is the Skeleton guarding the exit, found near the end of the farthest table closest to the Mummy DJ. Pick up the bottles here and use them to toss at the Skeleton; each time you come in contact with the bony bouncer you’ll take off 5 hitpoints for a total of 20 with 4 successful hits. If you run out of bottles there’s another pile waiting on the table.
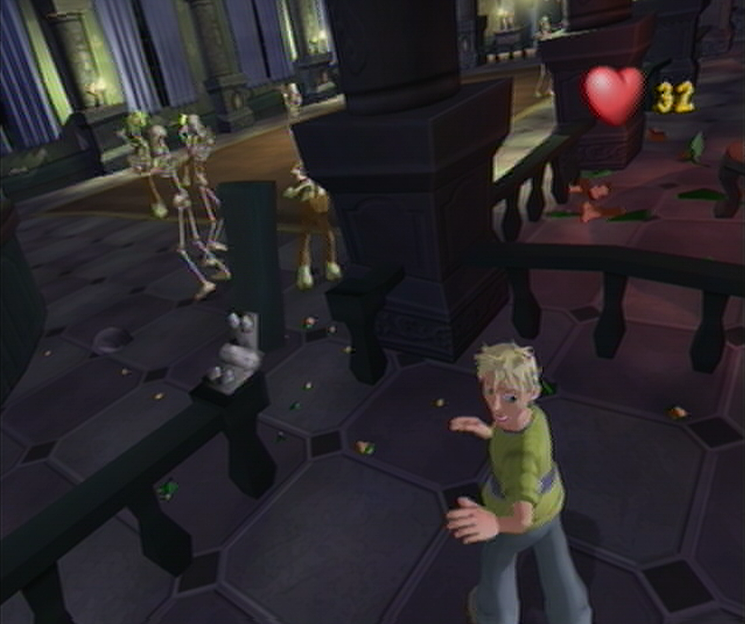
![]() Once you’ve managed to take him out though you’re free to use the Potted Plant in the corner here to try taking out the other dancers. Once you’re ready, work your way back around to where we met the Dropper and you’ll spot the entrance to the Dance Floor along with a large painting of Ghoulhaven Hall resting against the wall. Smash the painting and you’ll receive an extra 10 Health Points from the Super Soup to see you to the end, then walk through the entrance way to have the gate shut behind you. If you stick close to the wall and do your best to avoid the other dancers you should manage to make your way to the exit without any trouble at all. Once you’ve done so, walk through the exit and you’ll have conquered the Embassy Ballroom. Just one more challenge now: getting past the DJ. Climb the stairs to your right and then stick to the wall to locate the hallway that leads to the open challenge door. Follow it to its end without intervention from the DJ and you’re set!
Once you’ve managed to take him out though you’re free to use the Potted Plant in the corner here to try taking out the other dancers. Once you’re ready, work your way back around to where we met the Dropper and you’ll spot the entrance to the Dance Floor along with a large painting of Ghoulhaven Hall resting against the wall. Smash the painting and you’ll receive an extra 10 Health Points from the Super Soup to see you to the end, then walk through the entrance way to have the gate shut behind you. If you stick close to the wall and do your best to avoid the other dancers you should manage to make your way to the exit without any trouble at all. Once you’ve done so, walk through the exit and you’ll have conquered the Embassy Ballroom. Just one more challenge now: getting past the DJ. Climb the stairs to your right and then stick to the wall to locate the hallway that leads to the open challenge door. Follow it to its end without intervention from the DJ and you’re set!
CONSERVATORY
![]()
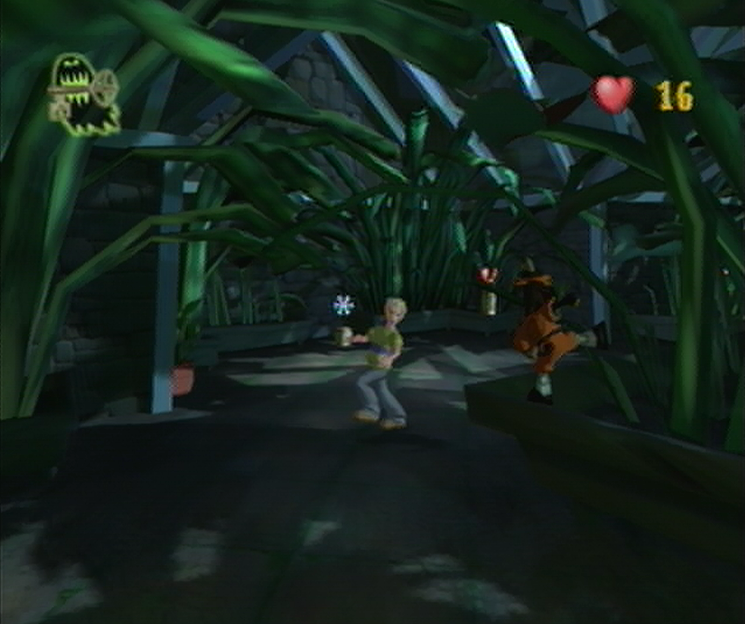
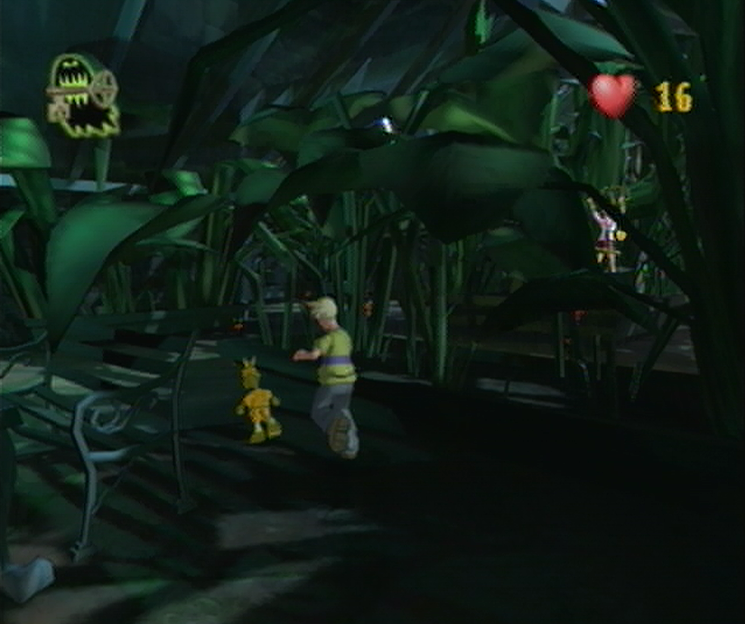
Now we’re making progress, and as a sure sign let’s get ready to meet our next breed of Ghouly! As you start off you should notice a patio table in this little enclosure; keep this location in mind, you’ll need to return here once the challenge begins. Once you’ve done that work your way out toward the main area to your left and you’ll meet the Ninja Imp! These little guys are nimble, so you’ll need to do your best to avoid getting swarmed, their main means of attack is a flying kick they execute in mid-air, you’ll have plenty of time to avoid it when it occurs however as they’ll freeze in the air before jetting forwards. Now that you’re on the floor you’ll need to work your way toward the exit which can be found straight through where the Ninja Imp starts from. Once there you should manage to spot the alluring challenge door, attempting to walk through it will allow a cascade of Ninja Imps to break through the glass ceiling and the challenge begins!
![]() This particular challenge requires you to locate the key inside one of the Ghoulies in the room, only exposing itself when that Ghouly is defeated. Given this scenario it can be very infuriating trying to pick through the Ninja Imps, but with some assistance you’ll manage to deal with this issue efficiently. Once the Ninja Imps have dropped from above, work your way back towards that patio table that you started off from, on your way you should manage to spot a Freeze Ghoulies Soup Tin – as evidenced by the snowflake hovering over the top – which allows you to freeze all the Ghoulies in the room for a limited time. Pick up the Soup Tin and then work your way back over to the patio table and you’ll find a Ninja Imp hiding behind it slowly flashing, meaning that its harboring the Ghouly key. Use your time to crank out some hits on the Ninja Imp and once the Tin wears off the challenge will complete. Avoid any interception as you make your way toward the exit and carry through.
This particular challenge requires you to locate the key inside one of the Ghoulies in the room, only exposing itself when that Ghouly is defeated. Given this scenario it can be very infuriating trying to pick through the Ninja Imps, but with some assistance you’ll manage to deal with this issue efficiently. Once the Ninja Imps have dropped from above, work your way back towards that patio table that you started off from, on your way you should manage to spot a Freeze Ghoulies Soup Tin – as evidenced by the snowflake hovering over the top – which allows you to freeze all the Ghoulies in the room for a limited time. Pick up the Soup Tin and then work your way back over to the patio table and you’ll find a Ninja Imp hiding behind it slowly flashing, meaning that its harboring the Ghouly key. Use your time to crank out some hits on the Ninja Imp and once the Tin wears off the challenge will complete. Avoid any interception as you make your way toward the exit and carry through.
PLAYING SECOND FIDDLE TO NONE

![]() Running across the hillside Cooper makes his way to the decrepit looking boathouse sitting on the shore of Ghoulhaven Hall. Inside he’ll manage to find the first ingredient needed to cure Amber of her affliction, if he can make it back out alive that is. Approaching the door Cooper reaches for the large brass knocker, only to have the door swing open unexpectedly as he does so. Peering into the darkness Cooper makes out a pair of beady eyes belonging to a towering figure on the other side. While running would certainly be the best option here, Coopers legs have other plans as they remain frozen in place as the daunting figure slowly makes its way to the light. Thankfully for Cooper the freaky figure doesn’t belong to one of the Ghoulies, but rather to a burly man with a wide smile. “Mow my meadow!” the bearded man exclaims, “You gave me a fright, young ‘un! I were busy adjustin’ my tackle in the Boathouse. I be ol’ Fiddlesworth, the groundskeeper!” Well, it’s nice to meet a friendly face at least…
Running across the hillside Cooper makes his way to the decrepit looking boathouse sitting on the shore of Ghoulhaven Hall. Inside he’ll manage to find the first ingredient needed to cure Amber of her affliction, if he can make it back out alive that is. Approaching the door Cooper reaches for the large brass knocker, only to have the door swing open unexpectedly as he does so. Peering into the darkness Cooper makes out a pair of beady eyes belonging to a towering figure on the other side. While running would certainly be the best option here, Coopers legs have other plans as they remain frozen in place as the daunting figure slowly makes its way to the light. Thankfully for Cooper the freaky figure doesn’t belong to one of the Ghoulies, but rather to a burly man with a wide smile. “Mow my meadow!” the bearded man exclaims, “You gave me a fright, young ‘un! I were busy adjustin’ my tackle in the Boathouse. I be ol’ Fiddlesworth, the groundskeeper!” Well, it’s nice to meet a friendly face at least…
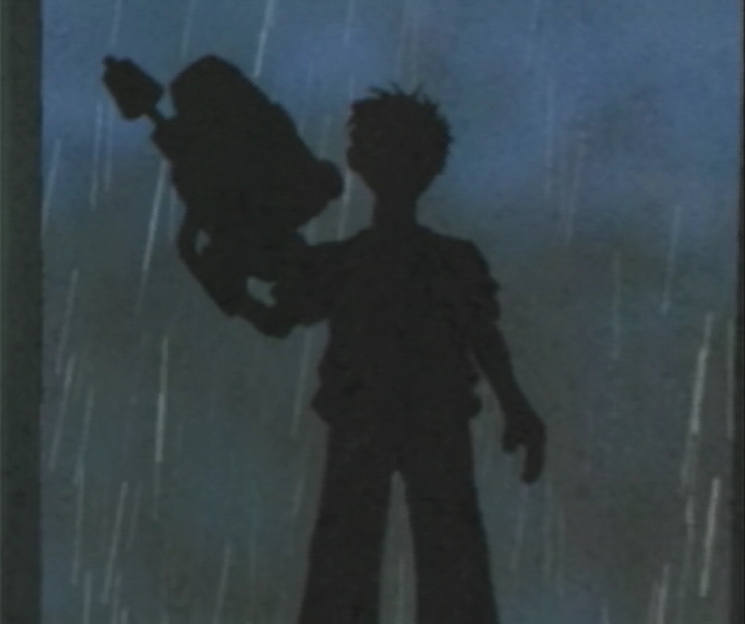
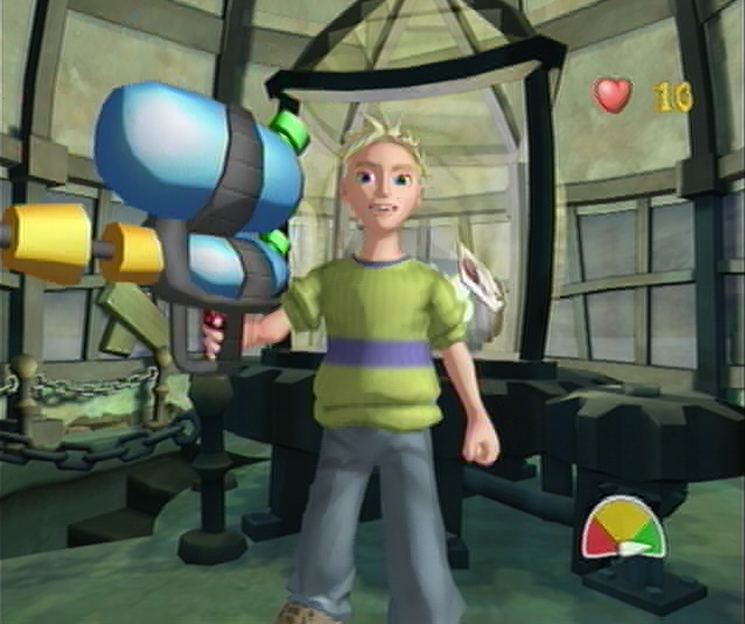
![]() “Where might you be headin’, lad?” Fiddlesworth says as he looks Cooper over. “Not through the Boathouse and out towards the ol’ Lighthouse, I ‘ope?” Before Cooper has a chance to reply Fiddlesworth draws a large water pistol from within the Boathouse and points it squarely at Coopers’ chest. “Best take this with yer. It be full o’ sacred water that them ‘orrors don’t like.” Fiddlesworth hands over the large water pistol as Cooper smiles up gratefully. While the water pistol wielding is a new field for Cooper, you’ll find it controls and preforms identical to the Fire Extinguisher previous; holding right thumbstick in the direction that you wish to attack will cause a stream of water to trail off from the pistol, whereas tapping the right thumbstick will have Cooper swing the pistol which can be especially effective if you’ve run out of water and need some crowd control. Remember to keep on eye on your supply; if you run the pistol dry it’ll take some time for it to refuel.
“Where might you be headin’, lad?” Fiddlesworth says as he looks Cooper over. “Not through the Boathouse and out towards the ol’ Lighthouse, I ‘ope?” Before Cooper has a chance to reply Fiddlesworth draws a large water pistol from within the Boathouse and points it squarely at Coopers’ chest. “Best take this with yer. It be full o’ sacred water that them ‘orrors don’t like.” Fiddlesworth hands over the large water pistol as Cooper smiles up gratefully. While the water pistol wielding is a new field for Cooper, you’ll find it controls and preforms identical to the Fire Extinguisher previous; holding right thumbstick in the direction that you wish to attack will cause a stream of water to trail off from the pistol, whereas tapping the right thumbstick will have Cooper swing the pistol which can be especially effective if you’ve run out of water and need some crowd control. Remember to keep on eye on your supply; if you run the pistol dry it’ll take some time for it to refuel.
BOATHOUSE
![]()
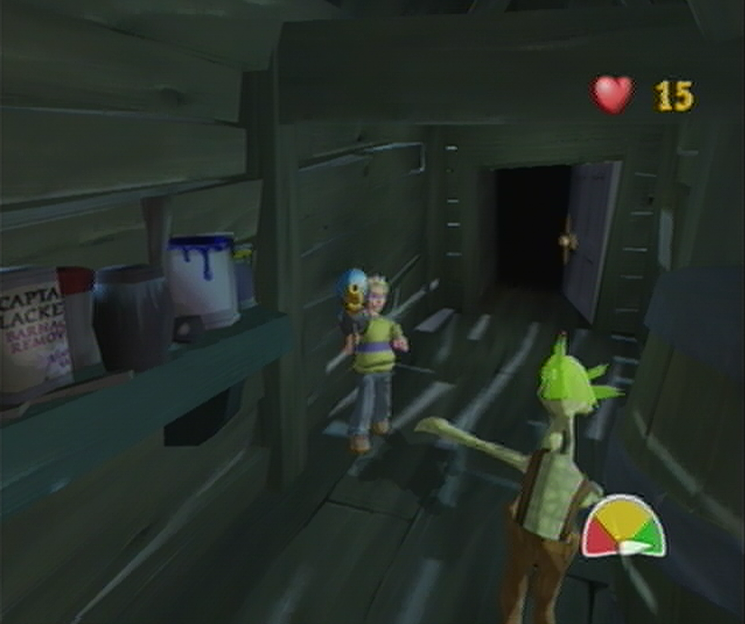
The Boathouse is great if you’ve got itchy trigger fingers, as there are two eligible Zombies inside that just beg for a dousing. Once you’ve managed to clear the Boathouse of both undead inhabitants, the chest in the center of the room will burst open, revealing another pair of Zombies, as well as a duo of Skeletons and Imps inside. You’ll want to make sure you deal with these Ghoulies as quickly as possible, as you’ll be given a strict time limit that you mustn’t let run out. Deal with the new duo of Zombies first with a strong stream from your Squirter, once you’ve done that it’s time to deal with the Skeletons and Imps, which unfortunately won’t go down quite so easily. Unlike the Zombies you’ve faced so far, you’ll find that the Water Squirter has no effect on the remaining enemies, so you’ll have to use its broadside to dish out the damage instead. Once you’ve managed to pummel them into the floor the challenge will finish and you’ll be granted entry into the next room.
LIGHTHOUSE STORE
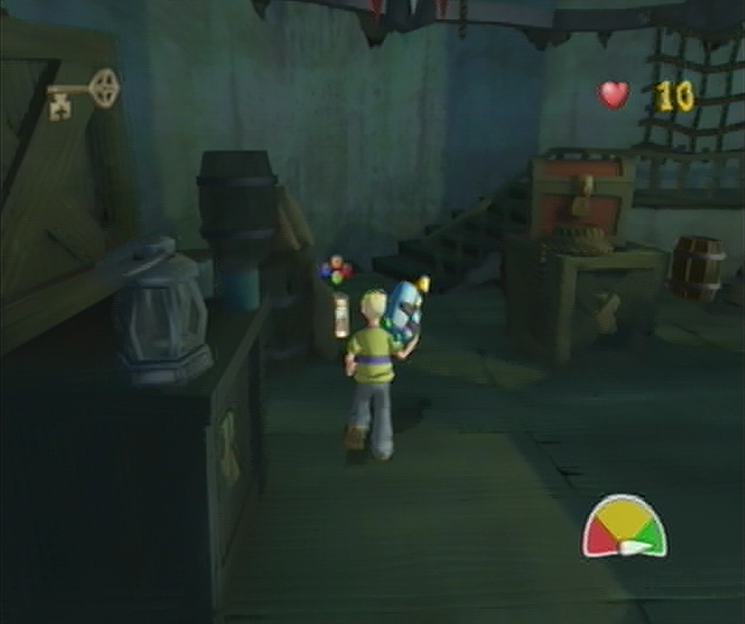
![]() As soon as you step into the Lighthouse Store you’ll get to meet a brand new Ghouly; the dreaded Medusa. Unlike the other Ghoulies, the Medusa won’t go chasing after you as soon as you’re put in the same room, instead it spends its time effectively patrolling a small area. The Medusa will use her vision as a green spotlight to keep watch directly ahead, if you step into this zone you’ll be forced to solve a Super Scary Shock sequence to escape unscathed. Luckily we won’t need to get too close to the Medusas to solve this rooms Challenge, which involves breaking the Rare Crates around the room to find the hidden Key to escape. Since you start out with a minimal amount of health it would be wise to locate the Shocker Blocker! Soup Tin in front of the staircase which will solve any Super Scary sequence automatically. Once you’ve found the key in the proper crate work your way up the stairs and then use your pistol to deal with the Zombie guarding the door. More water-based carnage!
As soon as you step into the Lighthouse Store you’ll get to meet a brand new Ghouly; the dreaded Medusa. Unlike the other Ghoulies, the Medusa won’t go chasing after you as soon as you’re put in the same room, instead it spends its time effectively patrolling a small area. The Medusa will use her vision as a green spotlight to keep watch directly ahead, if you step into this zone you’ll be forced to solve a Super Scary Shock sequence to escape unscathed. Luckily we won’t need to get too close to the Medusas to solve this rooms Challenge, which involves breaking the Rare Crates around the room to find the hidden Key to escape. Since you start out with a minimal amount of health it would be wise to locate the Shocker Blocker! Soup Tin in front of the staircase which will solve any Super Scary sequence automatically. Once you’ve found the key in the proper crate work your way up the stairs and then use your pistol to deal with the Zombie guarding the door. More water-based carnage!
LIGHTHOUSE LIVING QUARTERS
![]() You’ll manage to make quick work of this room thanks to a friendly feud. Not all Ghoulies get along with each other, which can benefit us greatly. If you manage to spot a Ghouly with a smiley face icon above their health it means they’ll do battle with any other Ghouly in the room before taking after you when the room becomes clear. These Traitorous Ghoulies will definitely help us later on when we need to rely on a distraction. Leave the Zombies to their own devices and pick up the 25 Health Soup Tin the proceed to the Haunted Television Set in front of the bathtub. Normally these Ghoulies can be a challenge, but the Water Pistol will deal with them beautifully. Once you’ve done that travel toward the open challenge door and you’ll meet another new entry to the Ghoulipedia; the Zombie Pirate! Luckily these undead seadogs can’t stand the water either, and a quick stream from your pistol will take care of this putrefied pirate so that you may travel through the Challenge Door.
You’ll manage to make quick work of this room thanks to a friendly feud. Not all Ghoulies get along with each other, which can benefit us greatly. If you manage to spot a Ghouly with a smiley face icon above their health it means they’ll do battle with any other Ghouly in the room before taking after you when the room becomes clear. These Traitorous Ghoulies will definitely help us later on when we need to rely on a distraction. Leave the Zombies to their own devices and pick up the 25 Health Soup Tin the proceed to the Haunted Television Set in front of the bathtub. Normally these Ghoulies can be a challenge, but the Water Pistol will deal with them beautifully. Once you’ve done that travel toward the open challenge door and you’ll meet another new entry to the Ghoulipedia; the Zombie Pirate! Luckily these undead seadogs can’t stand the water either, and a quick stream from your pistol will take care of this putrefied pirate so that you may travel through the Challenge Door.
LIGHTHOUSE LANTERN ROOM
![]() Now that we’ve reached the pinnacle of our perilous Lighthouse search, we’ll manage to locate the Glow-worms needed as the first ingredient of Ma Soupswill’s Un-Ghoulifying Potion for Amber. From here it’s just a short trek up the stairs and a quick tour around the Lighthouse Lantern until you manage to locate an upright jar of Glow-worms handily labeled with a picture of Ma Soupswill. Once you’ve snatched up the first ingredient you’ll be tasked with returning it to the cook, but not before the challenge door slams shut letting in a single measly Imp at the base of the stairs. While this Imp is impervious to the lethal liquids contained in the water squirter, it’s still vulnerable to a solid whack from the water squirter itself, so once you’ve caught up with the Imp a nice crack to the chops with the squirter will send him flying, defeating him in a single hit. Now that you’re finished with that little distraction you’re free to make your way through the challenge door below.
Now that we’ve reached the pinnacle of our perilous Lighthouse search, we’ll manage to locate the Glow-worms needed as the first ingredient of Ma Soupswill’s Un-Ghoulifying Potion for Amber. From here it’s just a short trek up the stairs and a quick tour around the Lighthouse Lantern until you manage to locate an upright jar of Glow-worms handily labeled with a picture of Ma Soupswill. Once you’ve snatched up the first ingredient you’ll be tasked with returning it to the cook, but not before the challenge door slams shut letting in a single measly Imp at the base of the stairs. While this Imp is impervious to the lethal liquids contained in the water squirter, it’s still vulnerable to a solid whack from the water squirter itself, so once you’ve caught up with the Imp a nice crack to the chops with the squirter will send him flying, defeating him in a single hit. Now that you’re finished with that little distraction you’re free to make your way through the challenge door below.